Setting up Google Single Sign-on in Level AI
Last updated: June 18, 2026
The Level AI - Google SSO enables members of your contact center to seamlessly log into your Level AI platform without having to create separate credentials. Also, your IT team can easily onboard new members into Level AI via Google SSO.
Configuration Steps
Part I: Setting up a Consent screen
You can either use an existing consent screen or create a new one that you would want to use for Level AI.
If you want to use an existing consent screen, you have to verify that:
User type is set as Internal. This is necessary to make sure that only the employees of your organization can log into Level AI.
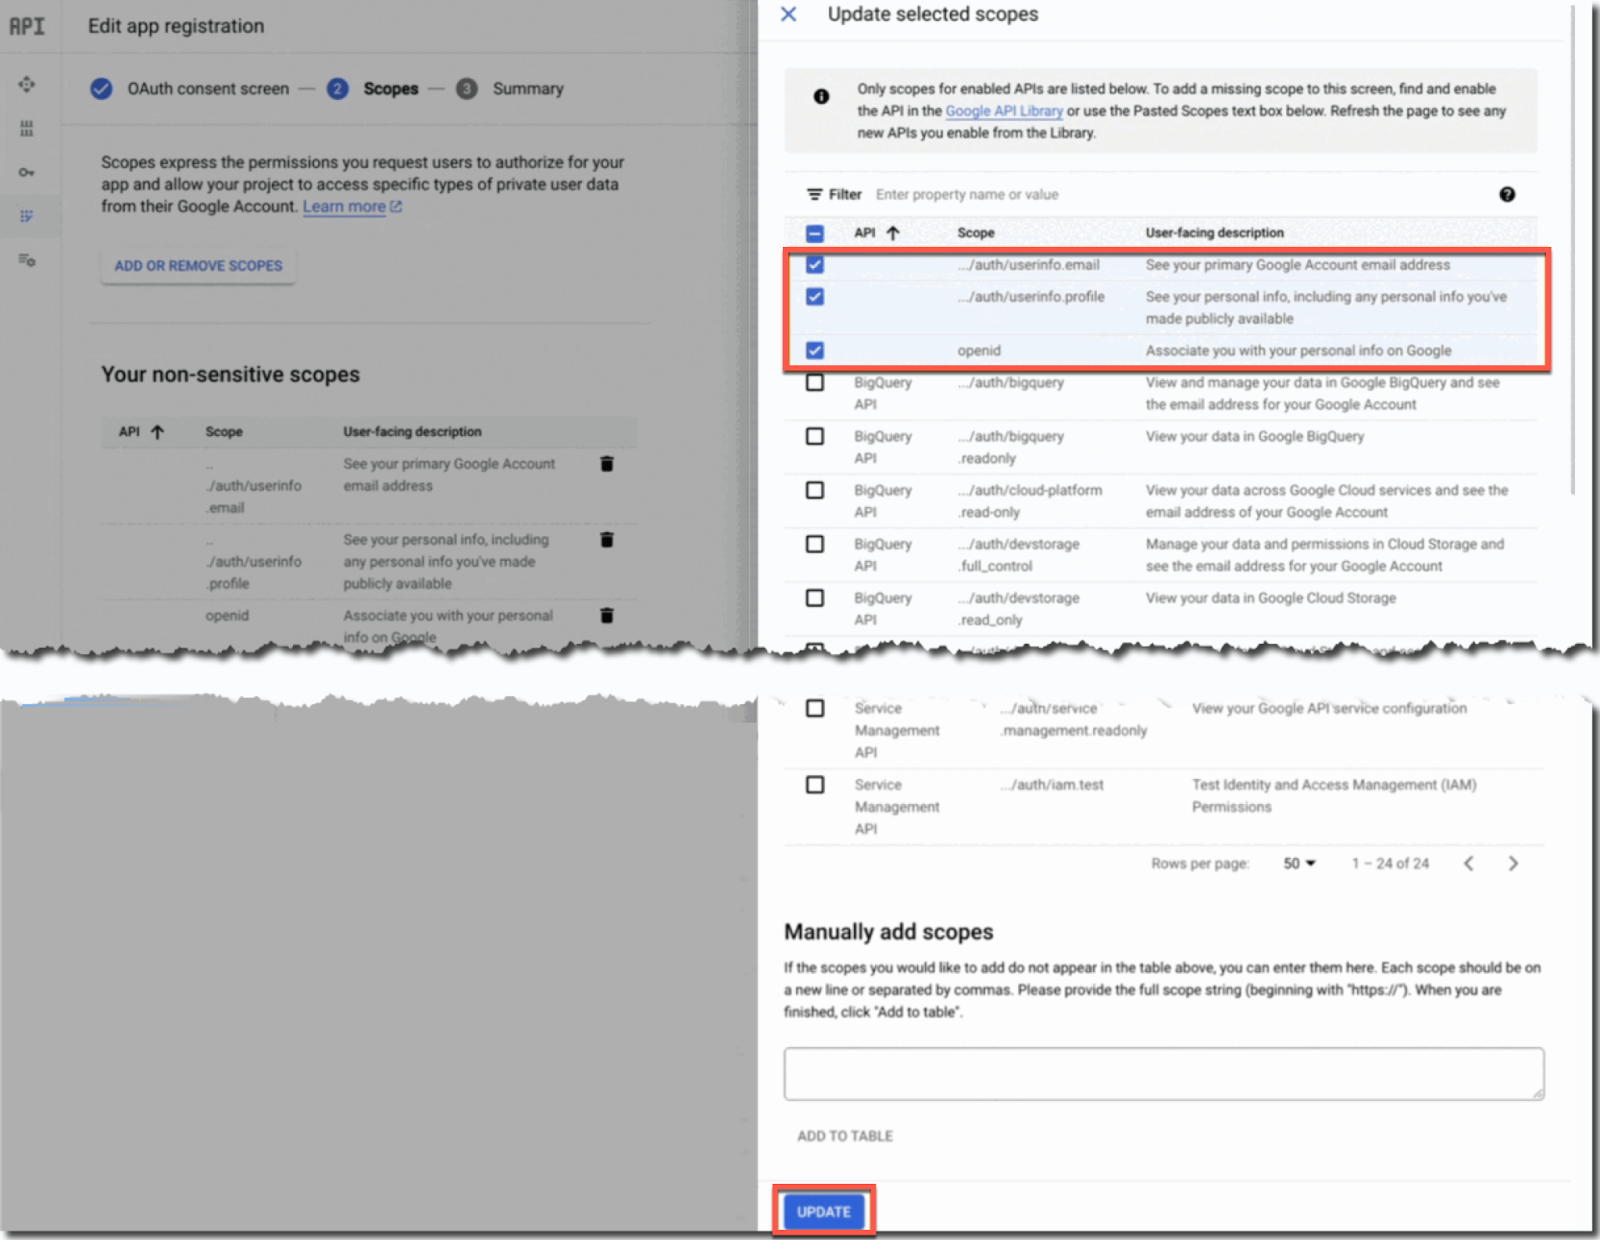
The consent screen has openID, /auth/userinfo.profile and /auth/userinfo.email scopes
INFO
If the existing consent screen has more scopes than those mentioned above, please consult your IT Security team whether you should use the existing project and consent screen or create a new one for Level AI.
If you want to create a new consent screen, you must, firstly, create a new project:
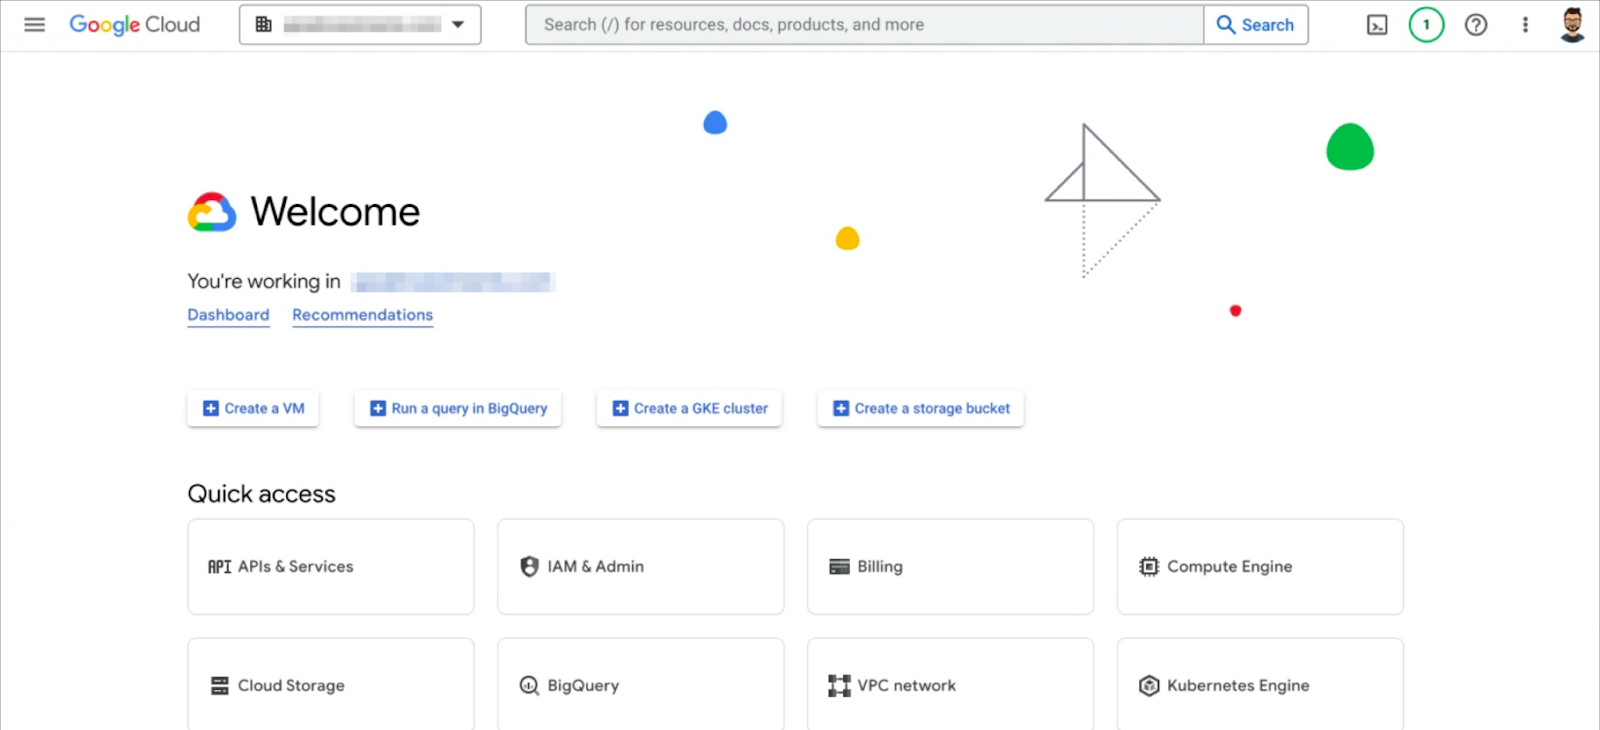
Log in to your Google admin workspace.
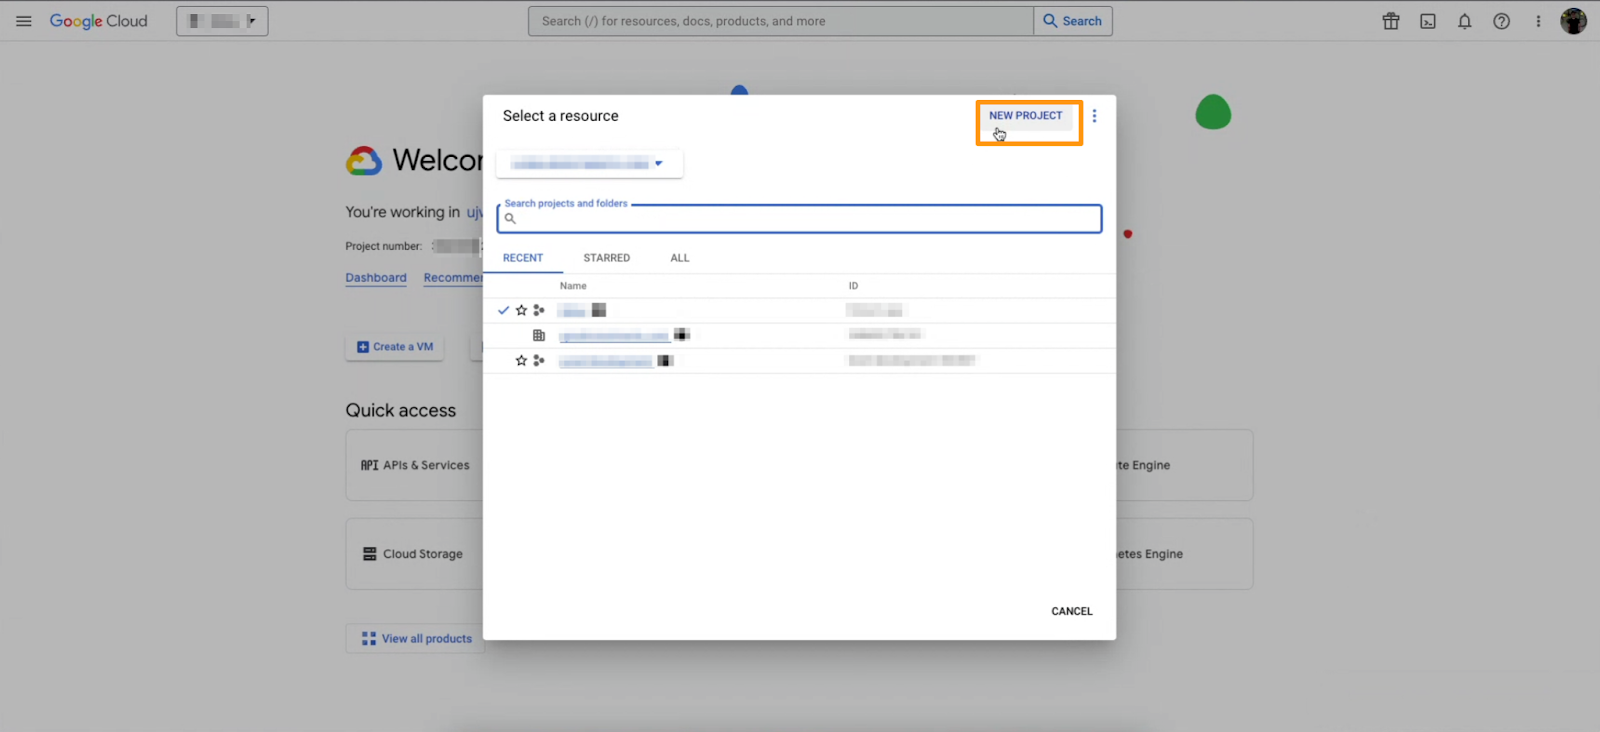
Click New Project.
Enter the Project name, Billing account, Organization and Location details as per your Google setup and click Create.
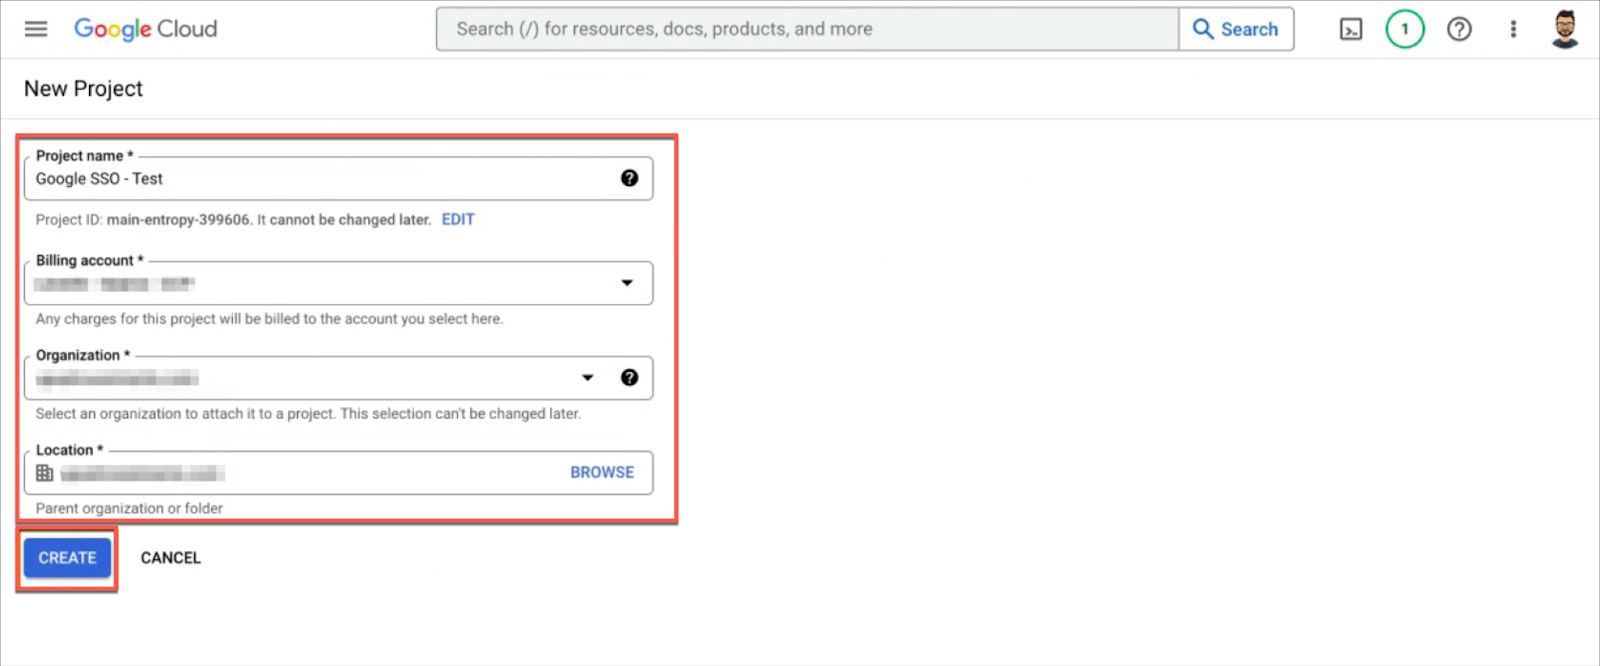
A new project will be created as illustrated below:
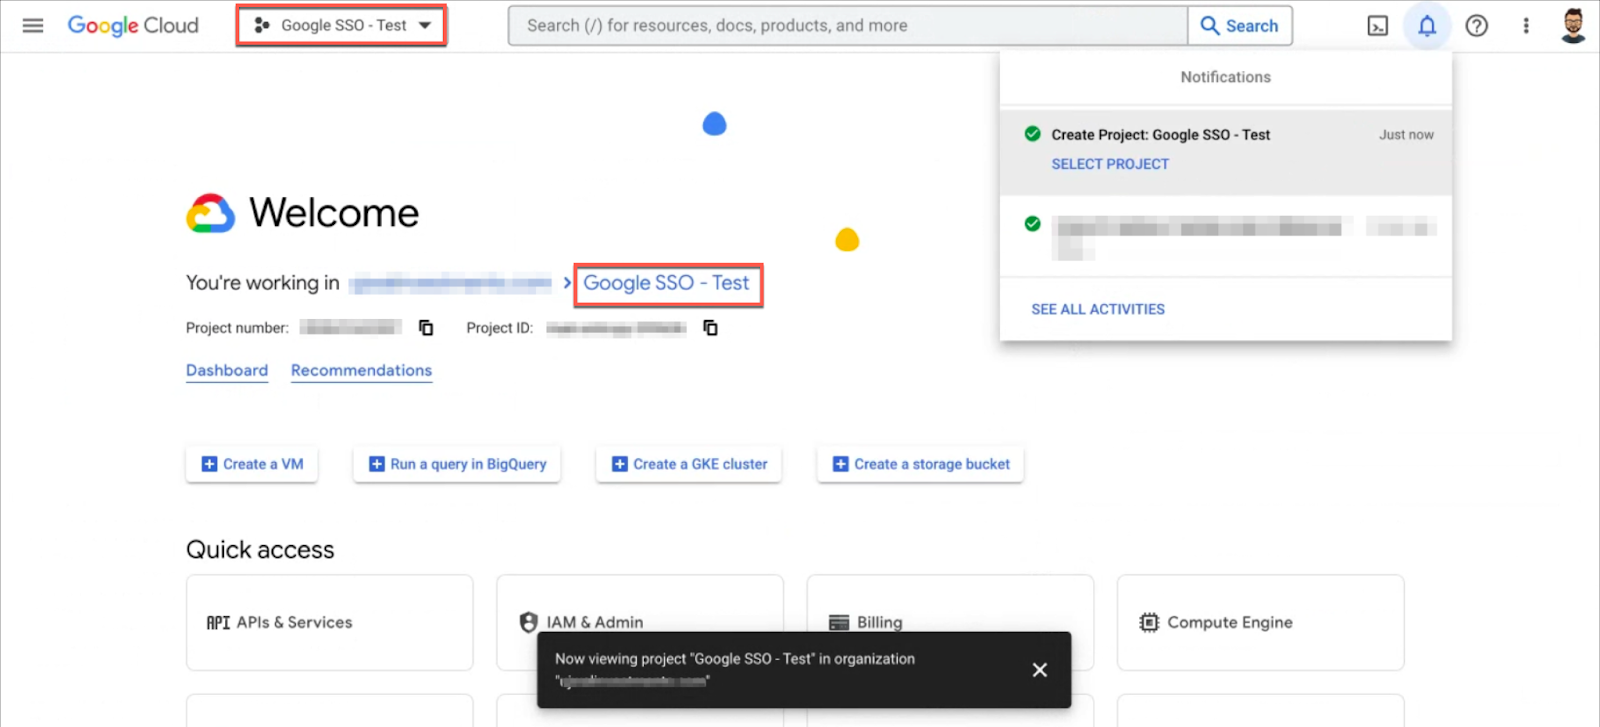
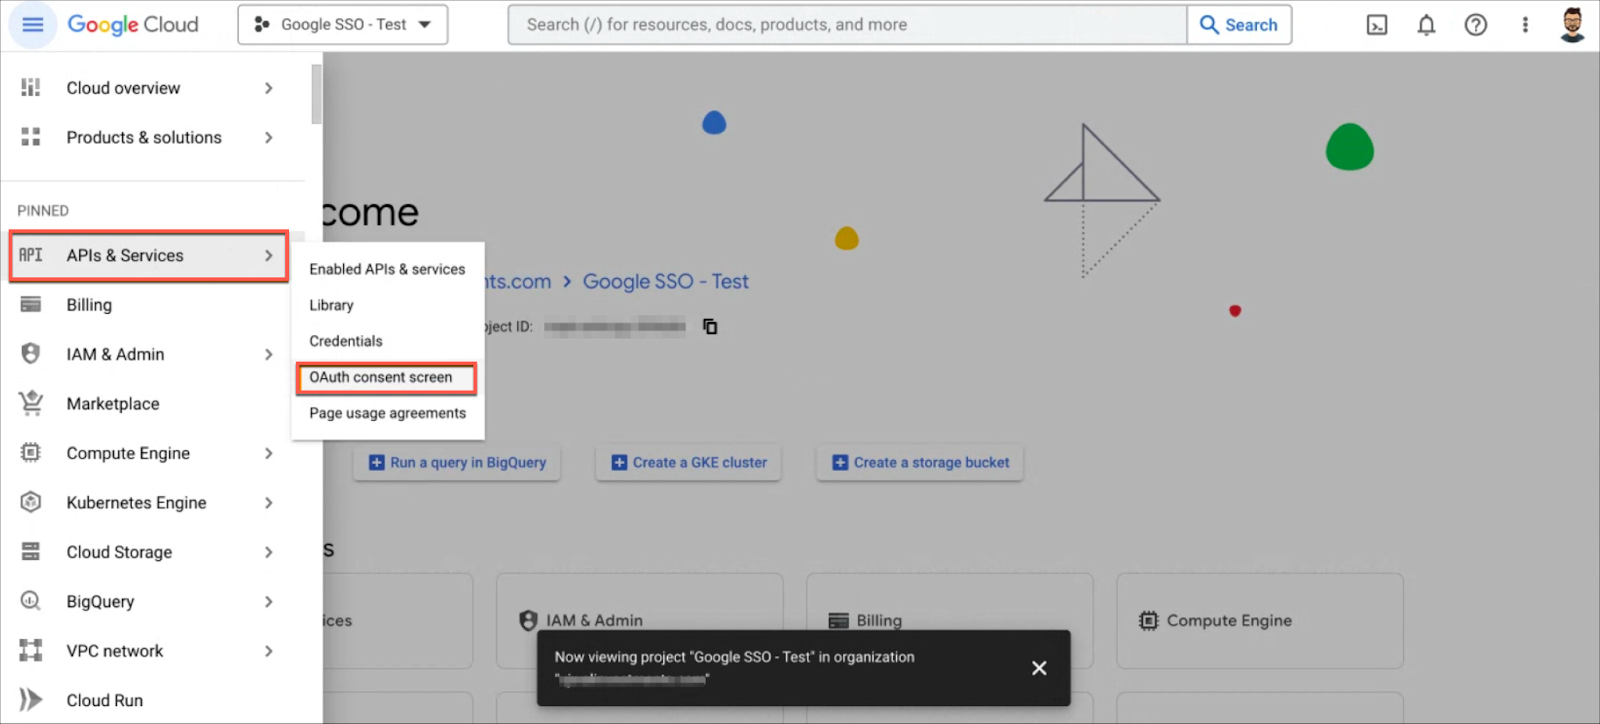
Navigate to API and Services > OAuth consent screen.
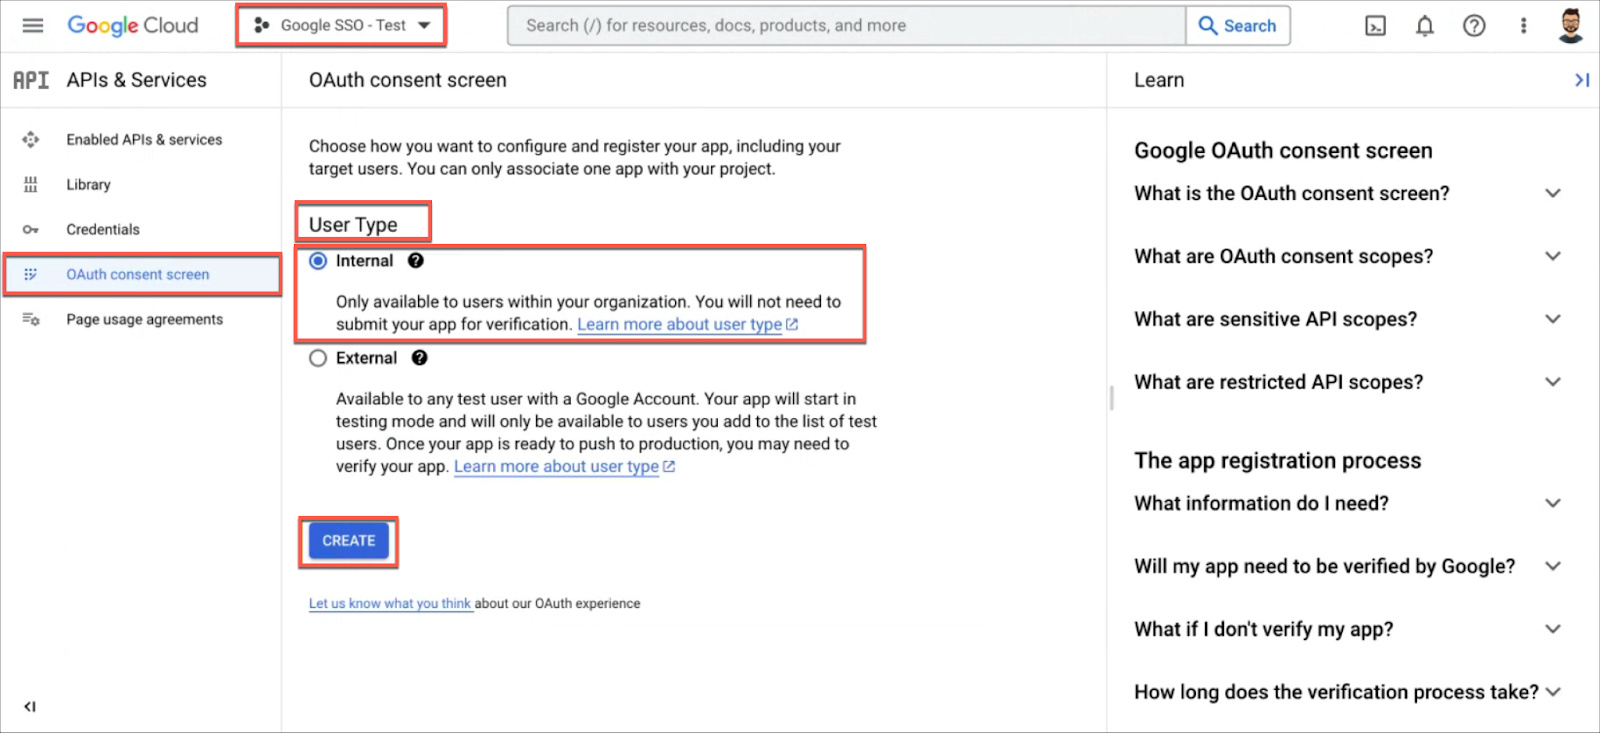
Under User Type, select Internal and click Create. This ensures that only the users in your organization can log in to your Level AI tenant via the Google SSO.
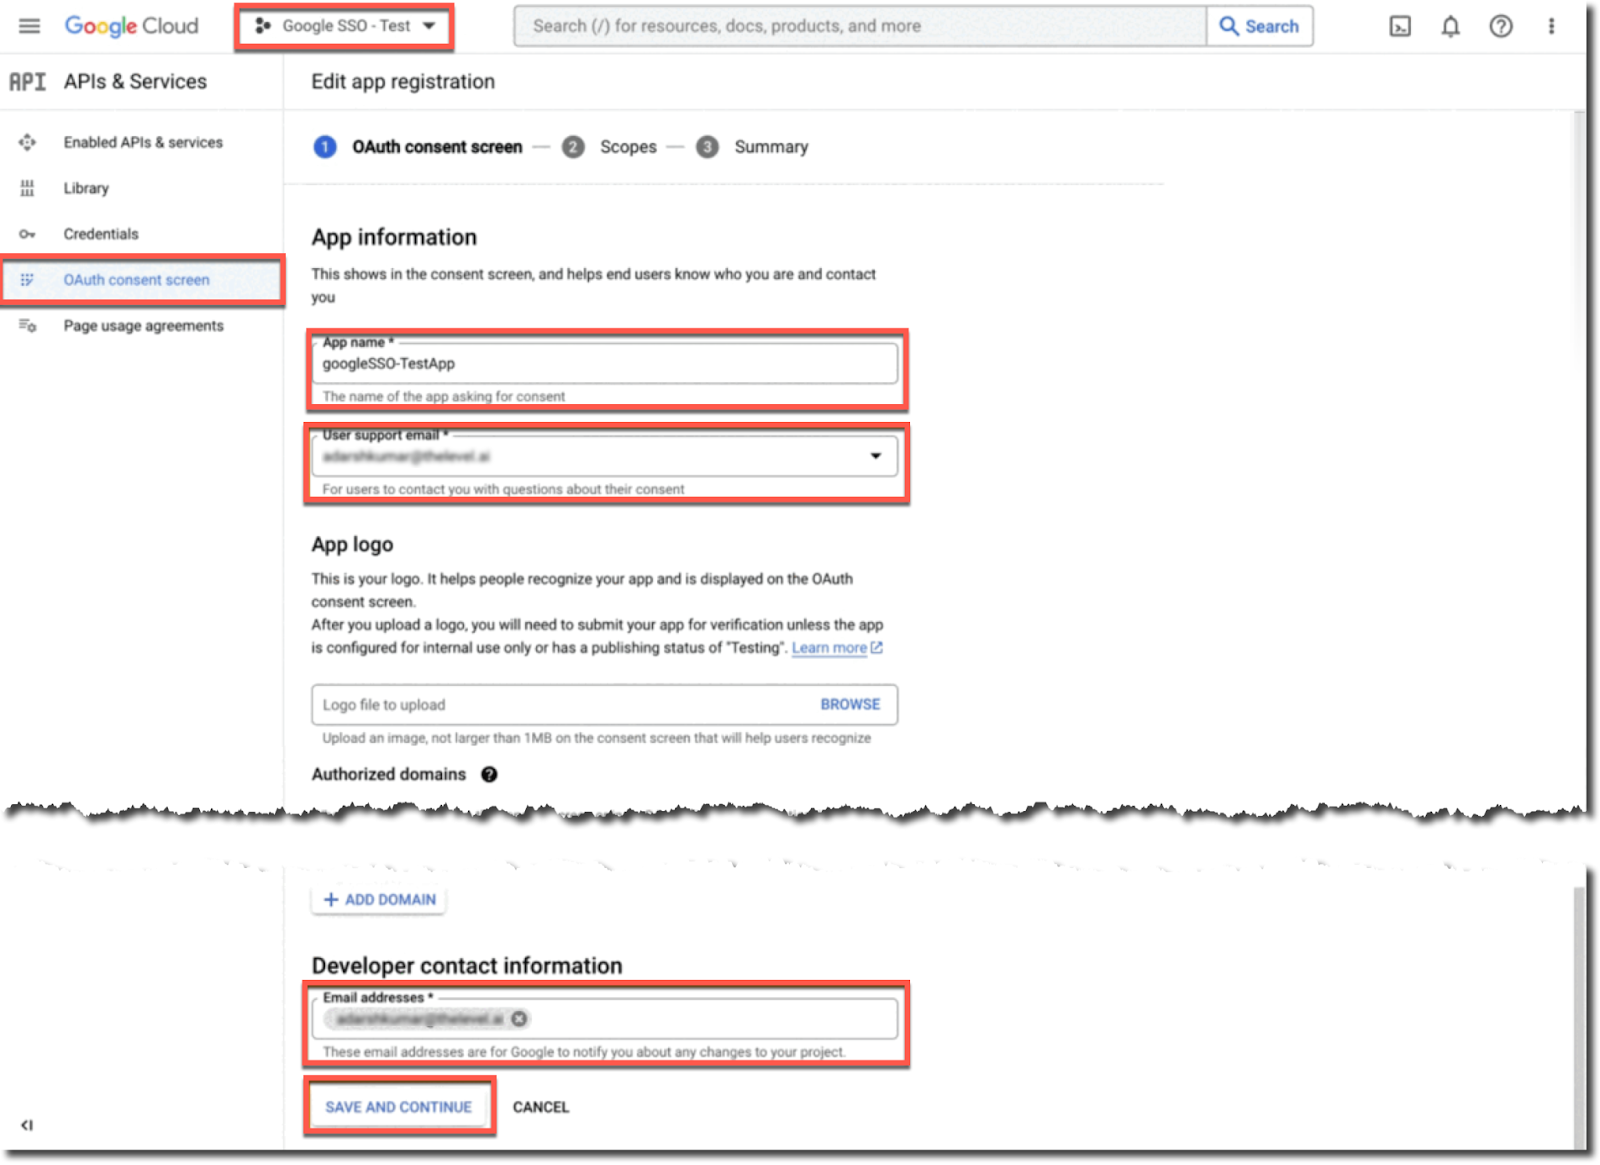
Once the consent screen is created, enter the mandatory information such as App name, Support email and Developer contact information. Click Save and Continue.
Click the Add or Remove Scopes button.
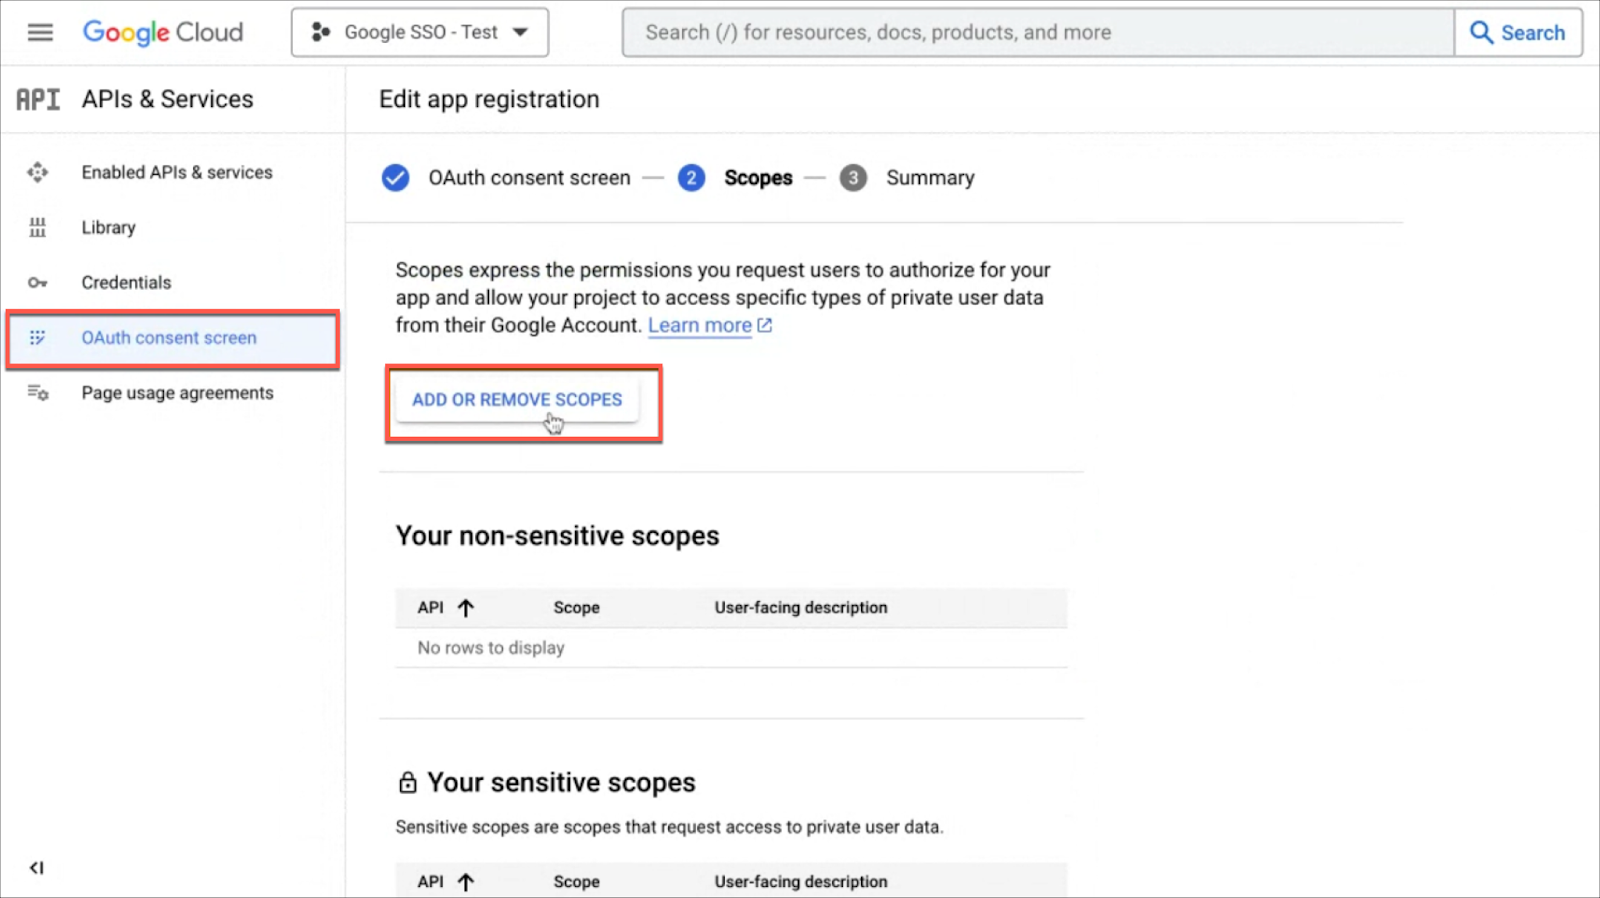
Select openID, /auth/userinfo.profile and /auth/userinfo.email scopes and click Update.
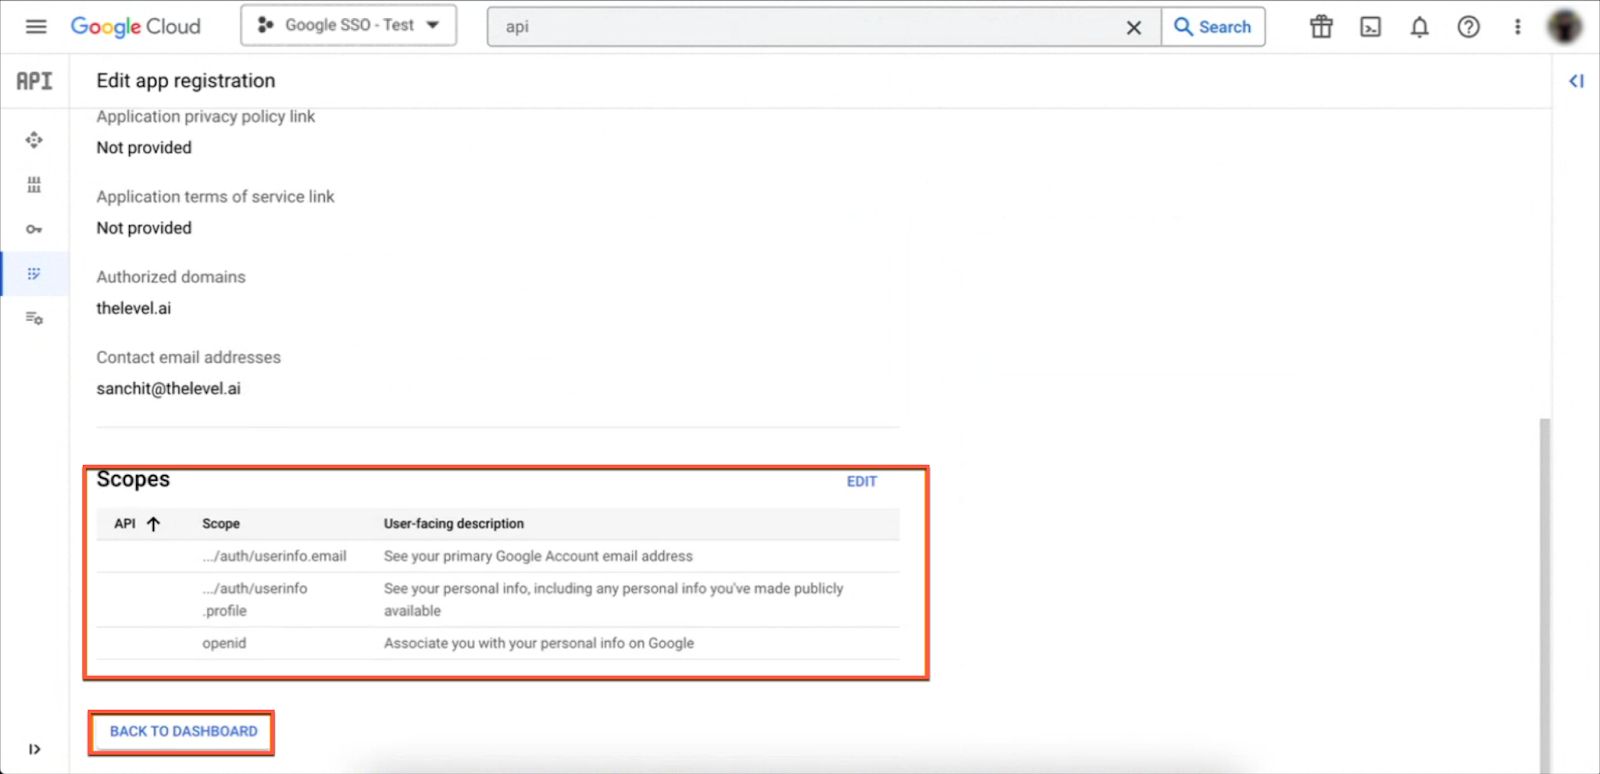
Verify that you have entered all the right details and scopes for your consent screen.
Part II: Configuring OAuth credentials
In addition to the above information that you have entered in the consent screen, you will need to set up the OAuth credentials for the screen so that Level AI can authenticate it:
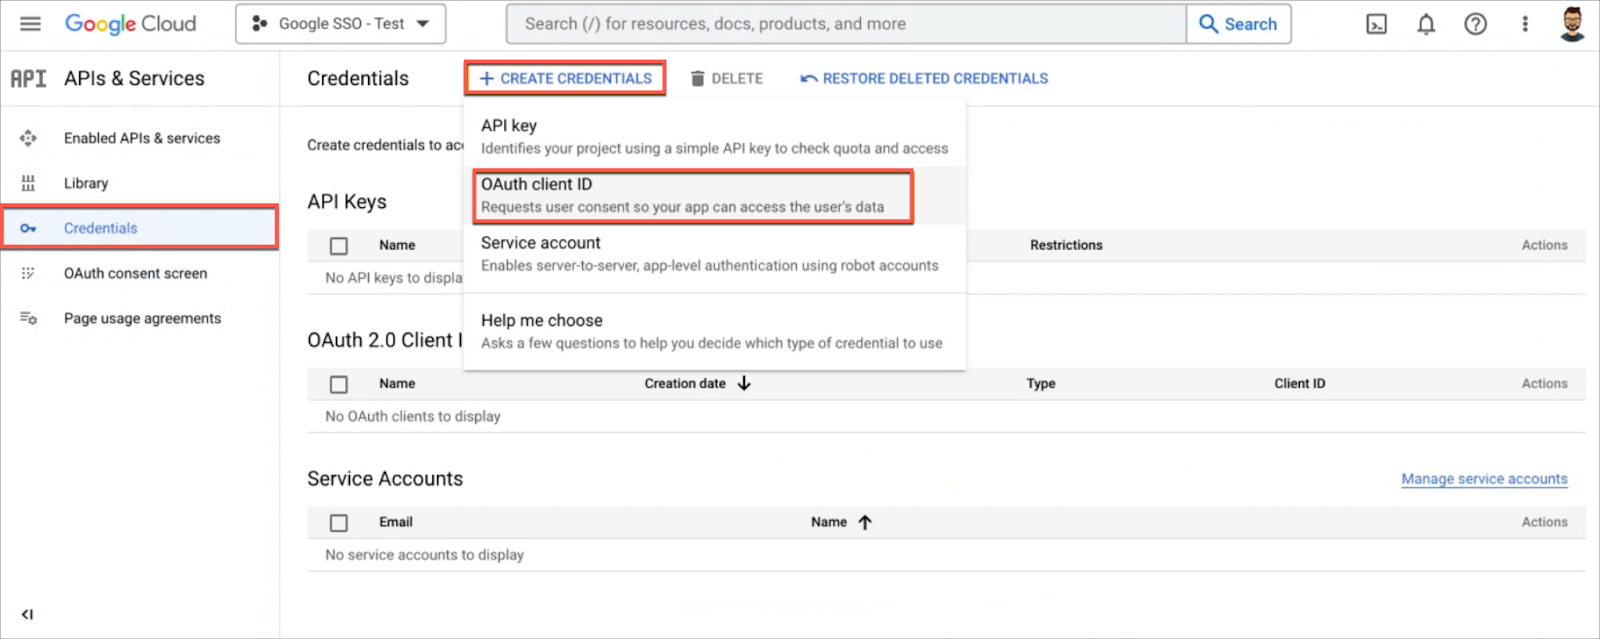
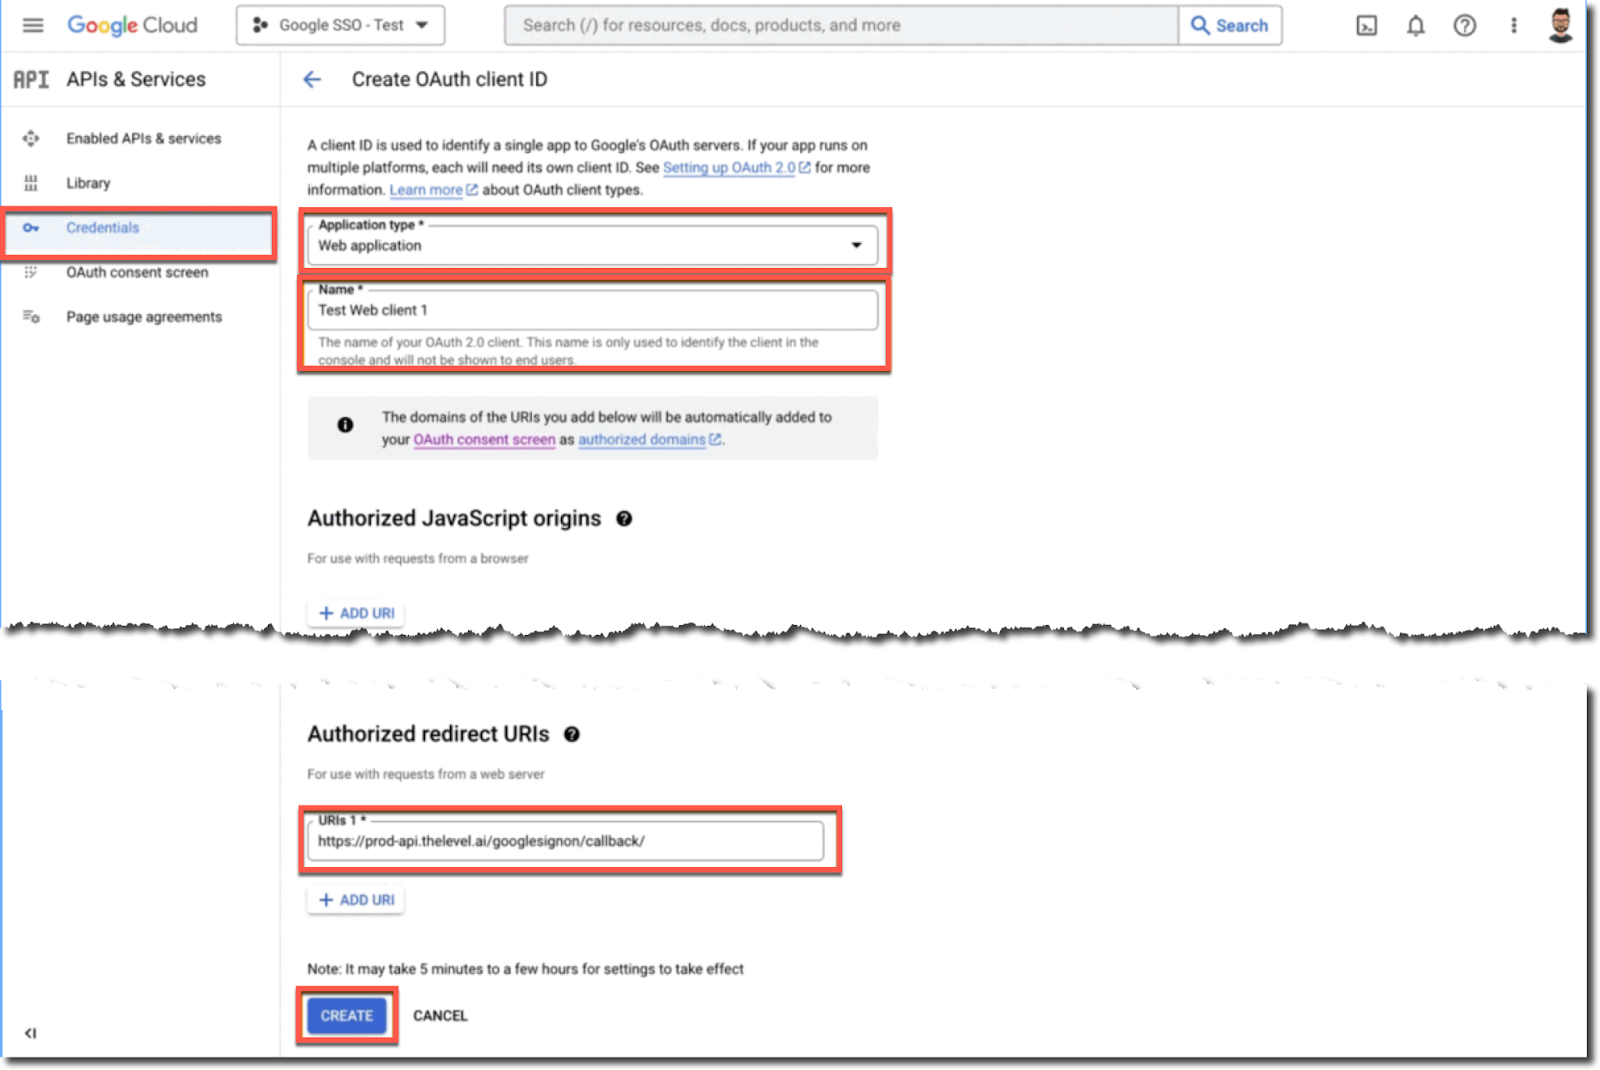
Click Credentials on the menu in the left panel.
Click Create Credentials and select OAuth Client ID from the dropdown.
Enter the Web Application type, Name of the Application and the Redirect URI as
https://prod-api.thelevel.ai/googlesignon/callback/ and click Create.
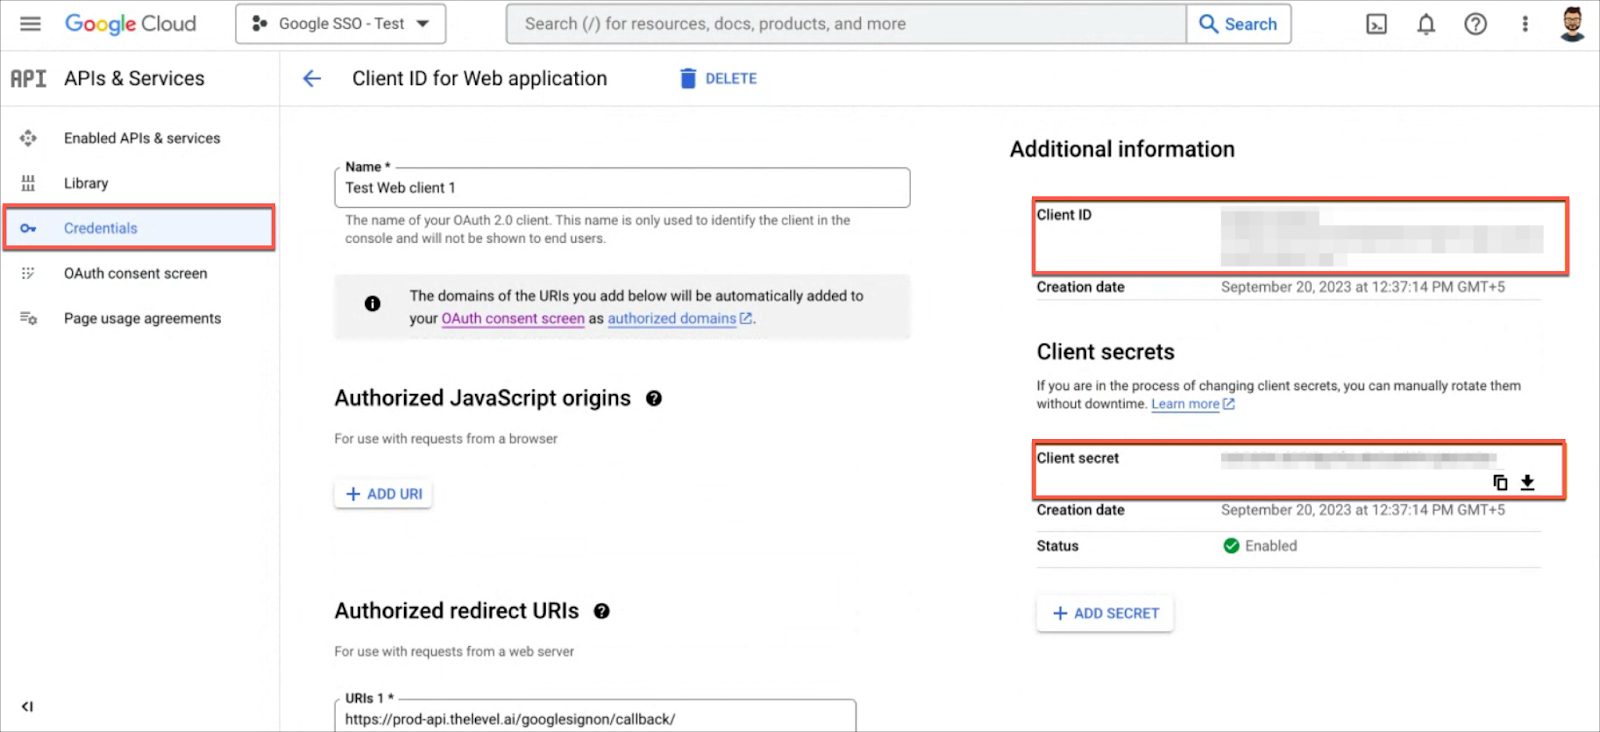
The Client ID and Client secret key values will be generated. This is the final step indicating that your project and consent screen for Level AI has been successfully created.
TIP
Copy and paste the Client ID and Client secret key values since you will need it for the upcoming steps.
Part III: Setting up your Google SSO in Level AI
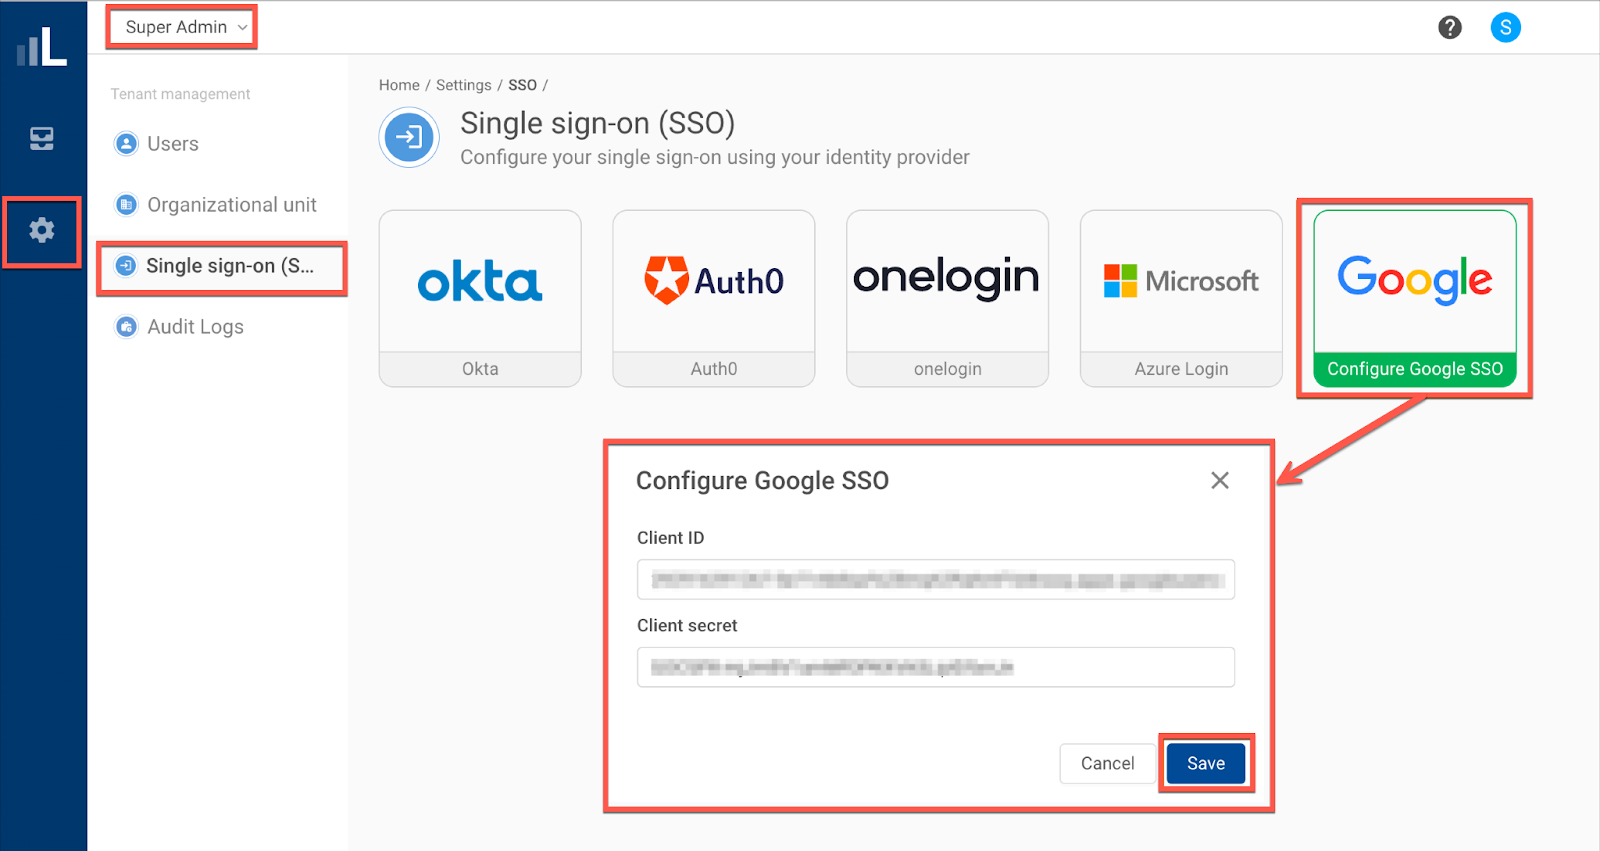
Log in to your Level AI tenant as a Super Admin.
In the left sidebar, click Settings and navigate to Single Sign-on (SSO).
Enter the Client ID and Client secret key that you generated from the earlier steps. Click Save. This will integrate your Google SSO with your Level AI tenant.
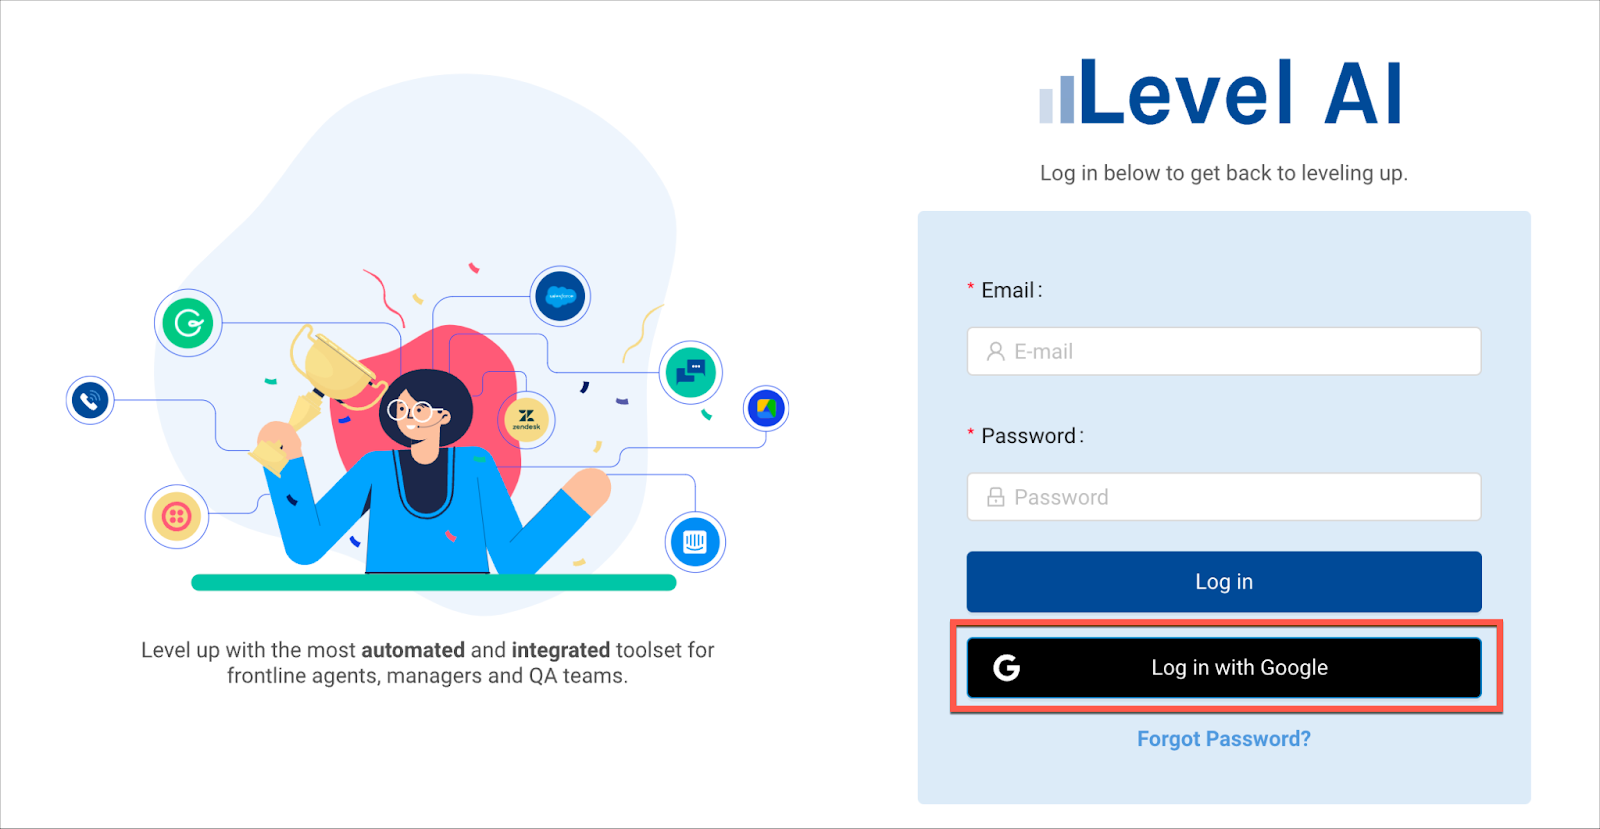
The users in your organization can easily log into Level AI by clicking the Login via Google button.