Setting up Microsoft Azure AD Single Sign-on (SSO) in Level AI
Last updated: September 29, 2026
Overview
Configure Microsoft Azure Active Directory (Azure AD) Single Sign-On (SSO) on your Level AI account to simplify your team's login process. Once enabled, users sign in with their existing Azure AD credentials, removing the need to manage separate Level AI credentials for each user.
How are users authenticated
Users are authenticated through a Service Provider (SP)-initiated SSO flow:
The user starts a login attempt on the Level AI platform.
Level AI redirects the user to the Azure login page for authentication.
Azure checks whether a session already exists and retrieves the logged-in user, if any.
Azure generates a SAML response and grants the user access to the Level AI platform.
Before you begin
Ensure you have the required permissions on your Azure AD account to register a new application.
Ensure you have Super Admin privileges on your Level AI account to configure SSO.
Ensure your intended users already exist in Azure Active Directory.
Steps to configure SSO
Configuring SSO involves three steps: registering the Level AI application in Azure AD, granting it the required API permissions, and configuring Azure SSO on your Level AI account.
Step 1: Register Level AI Application
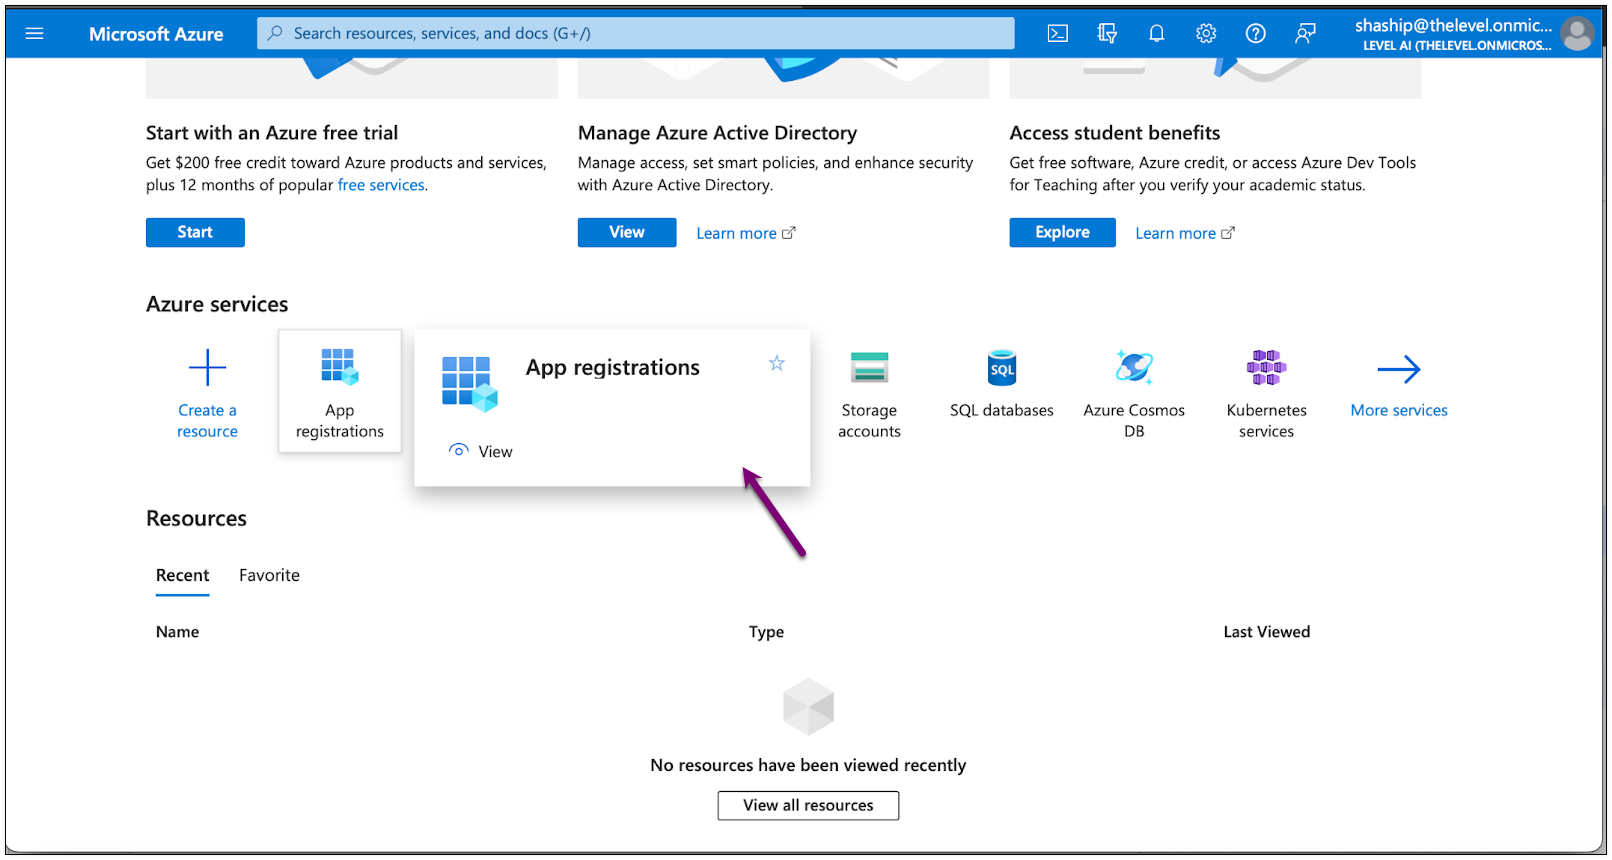
a. Log in to your Azure account and select App registrations from the menu.
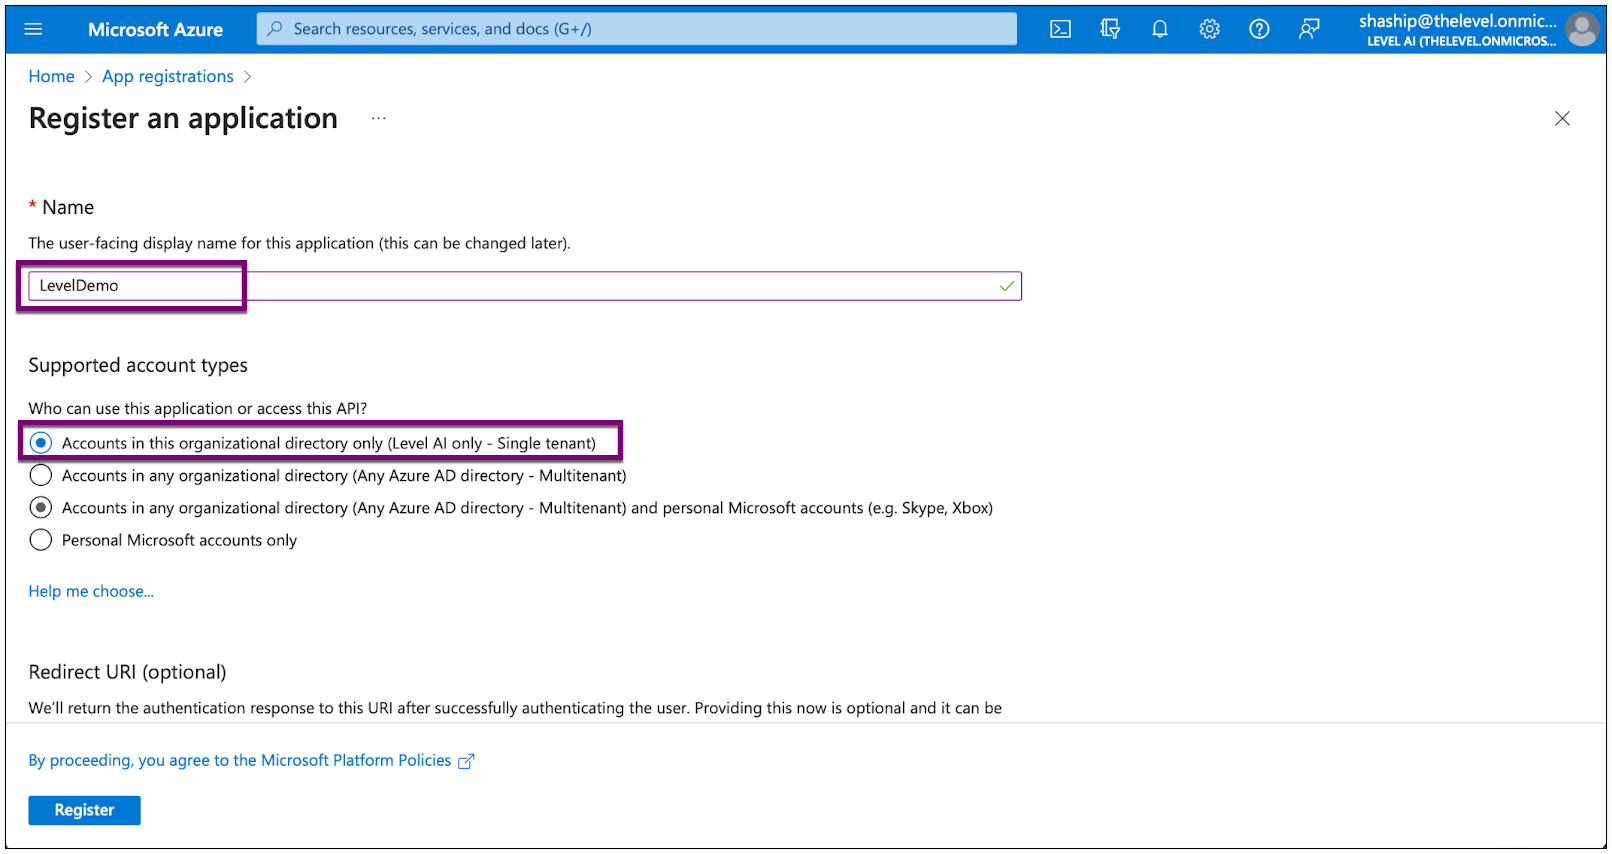
b. Enter a suitable Name (for example; Level AI), then select Single tenant under Supported account types.
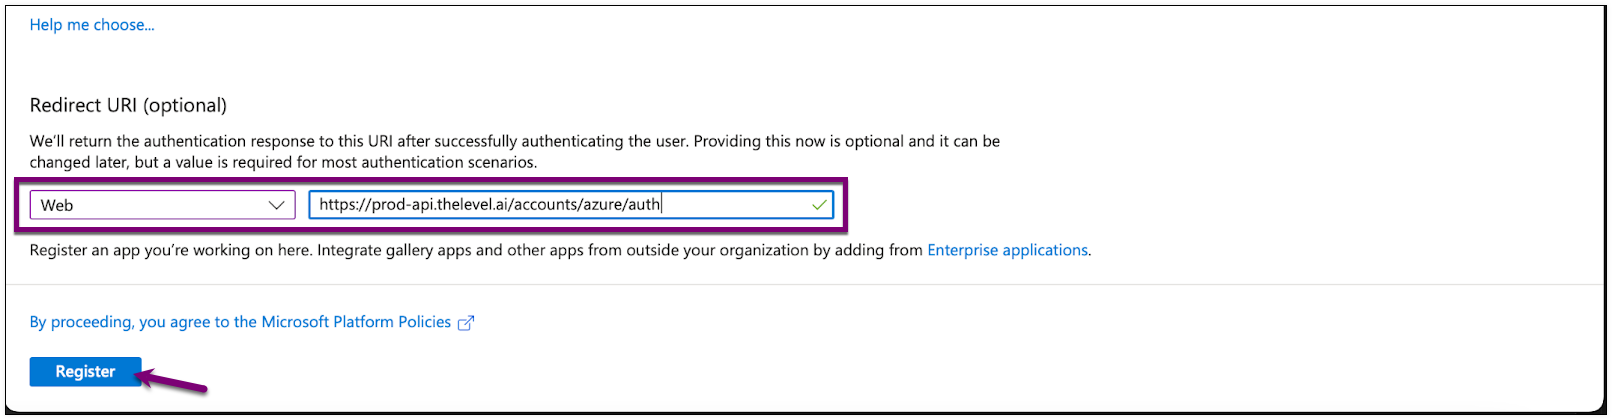
c. Enter the below Redirect URL, then click Register.
i. Type: Web
ii. URL: https://prod-api.thelevel.ai/accounts/azure/auth
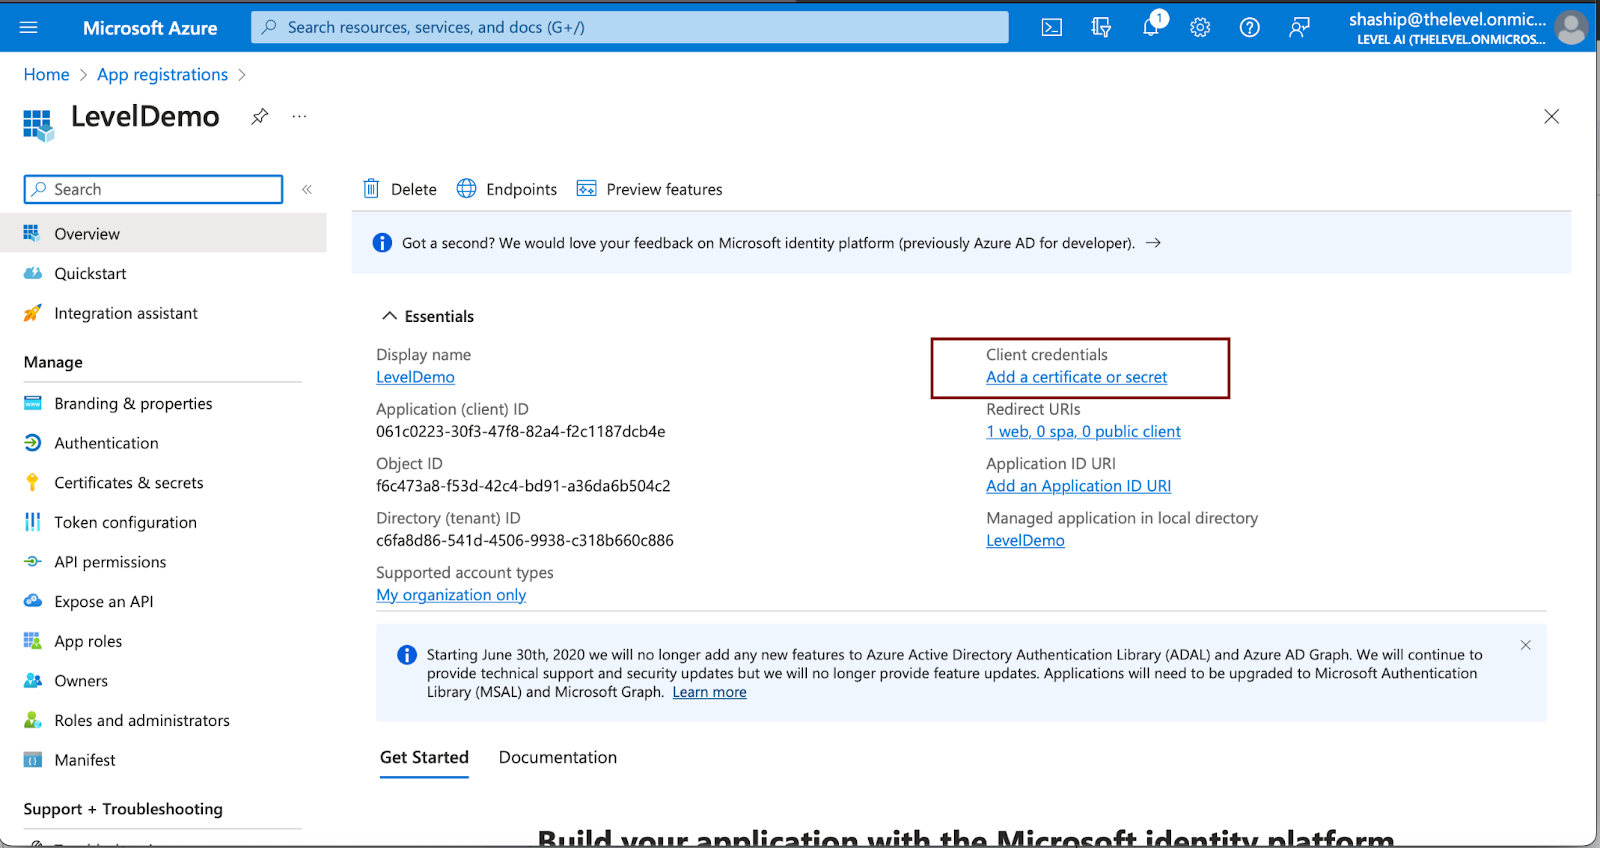
d. Open the application you just registered and select Certificates & secrets.
e. Navigate to the Client secrets tab, then click + New client secret.
f. Add a suitable description, select an expiry for the client secret, then select Add. Azure generates a new client secret.
NOTE
The client secret expires automatically on the timeline you select, and SSO stops working when it does. Generate a new secret before it expires and update it on your Level AI account.
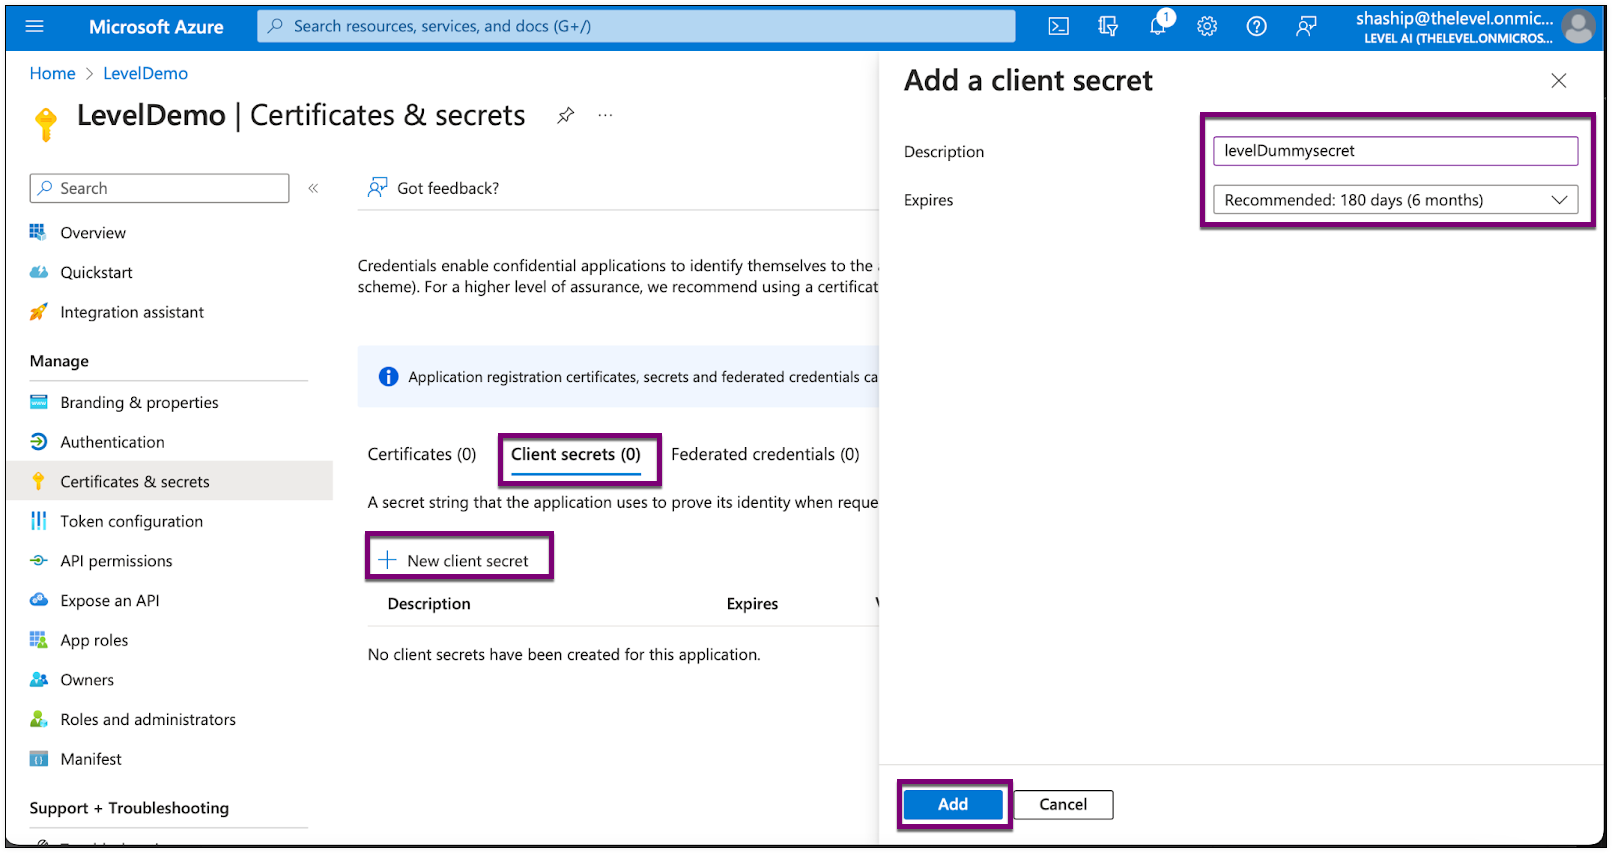
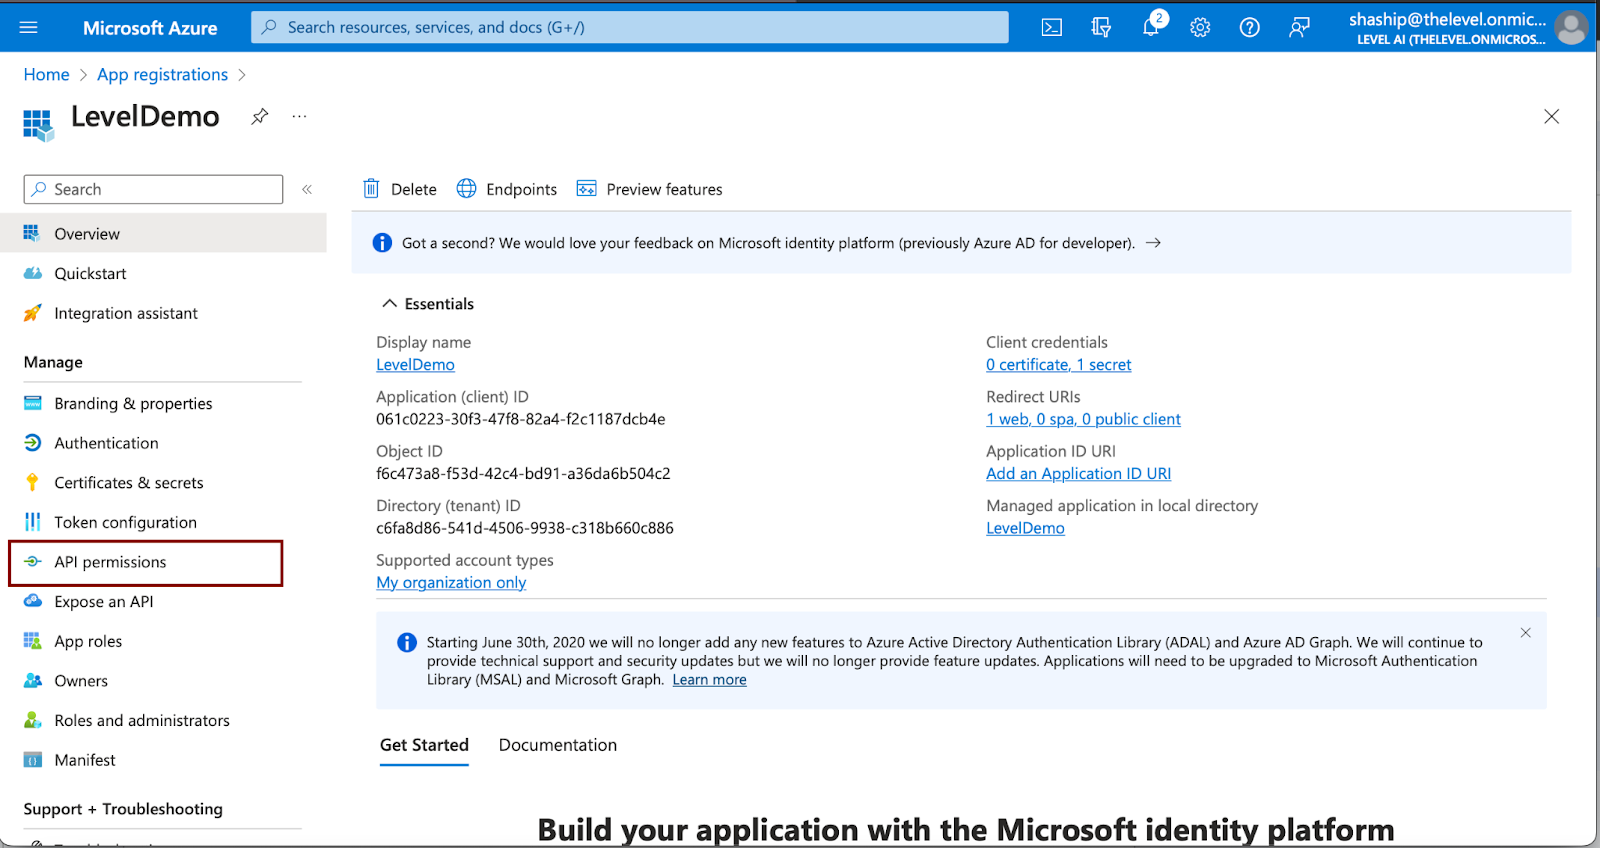
g. Copy the Application ID, Tenant ID, and the Client Secret value, and store them somewhere secure as you will need these during Step 3.
NOTE
Copy the client secret value before closing the window. Once closed, you can't retrieve it again — you'll need to generate a new one.
Step 2: Grant API permissions to the Level AI application
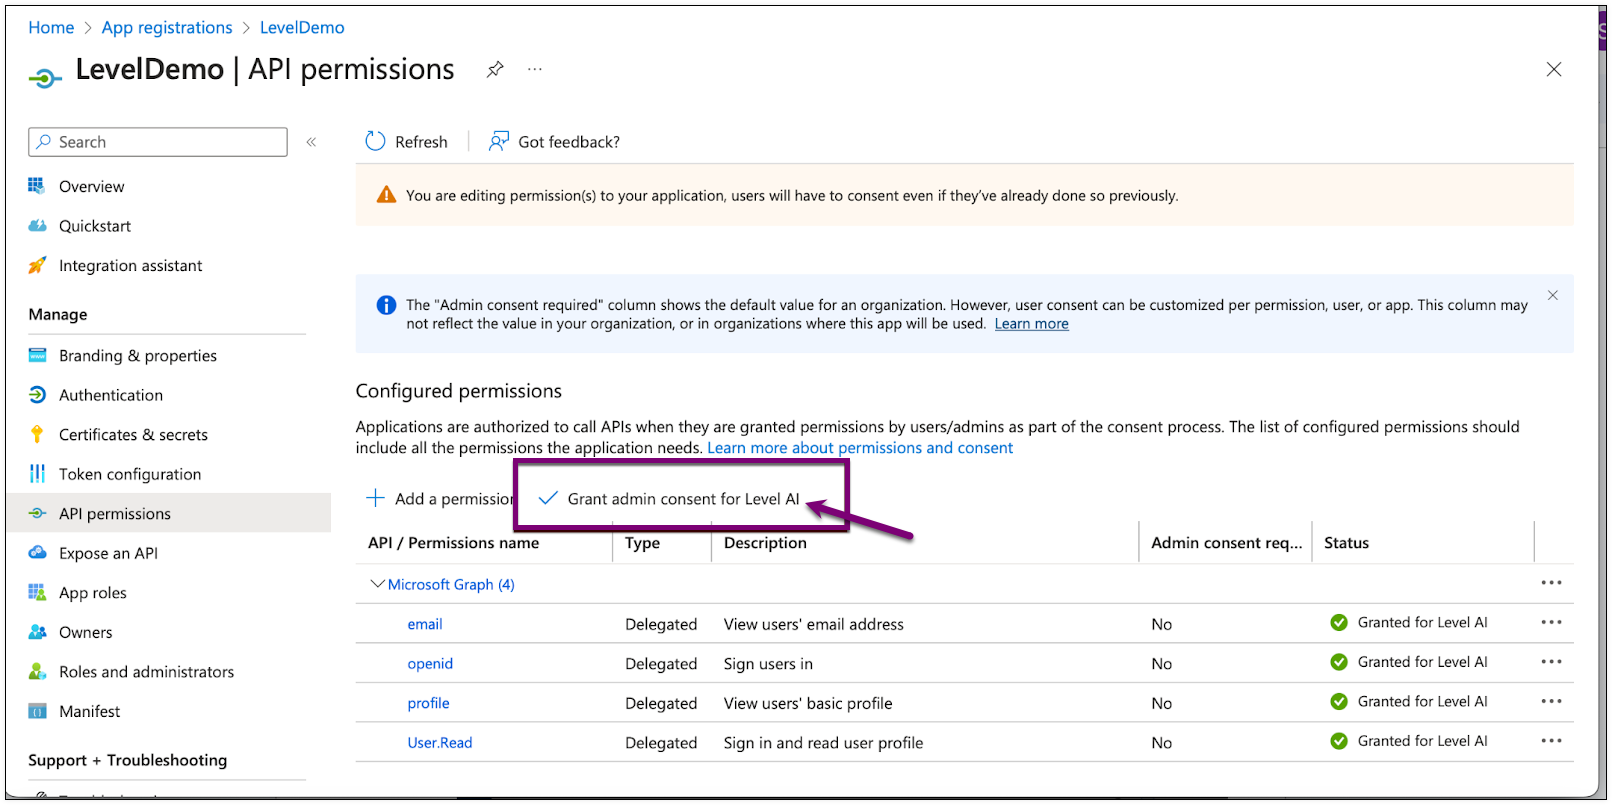
a. Open the Level AI application you created in the Step 1(c), then navigate to API permissions on the left-side navigation bar.
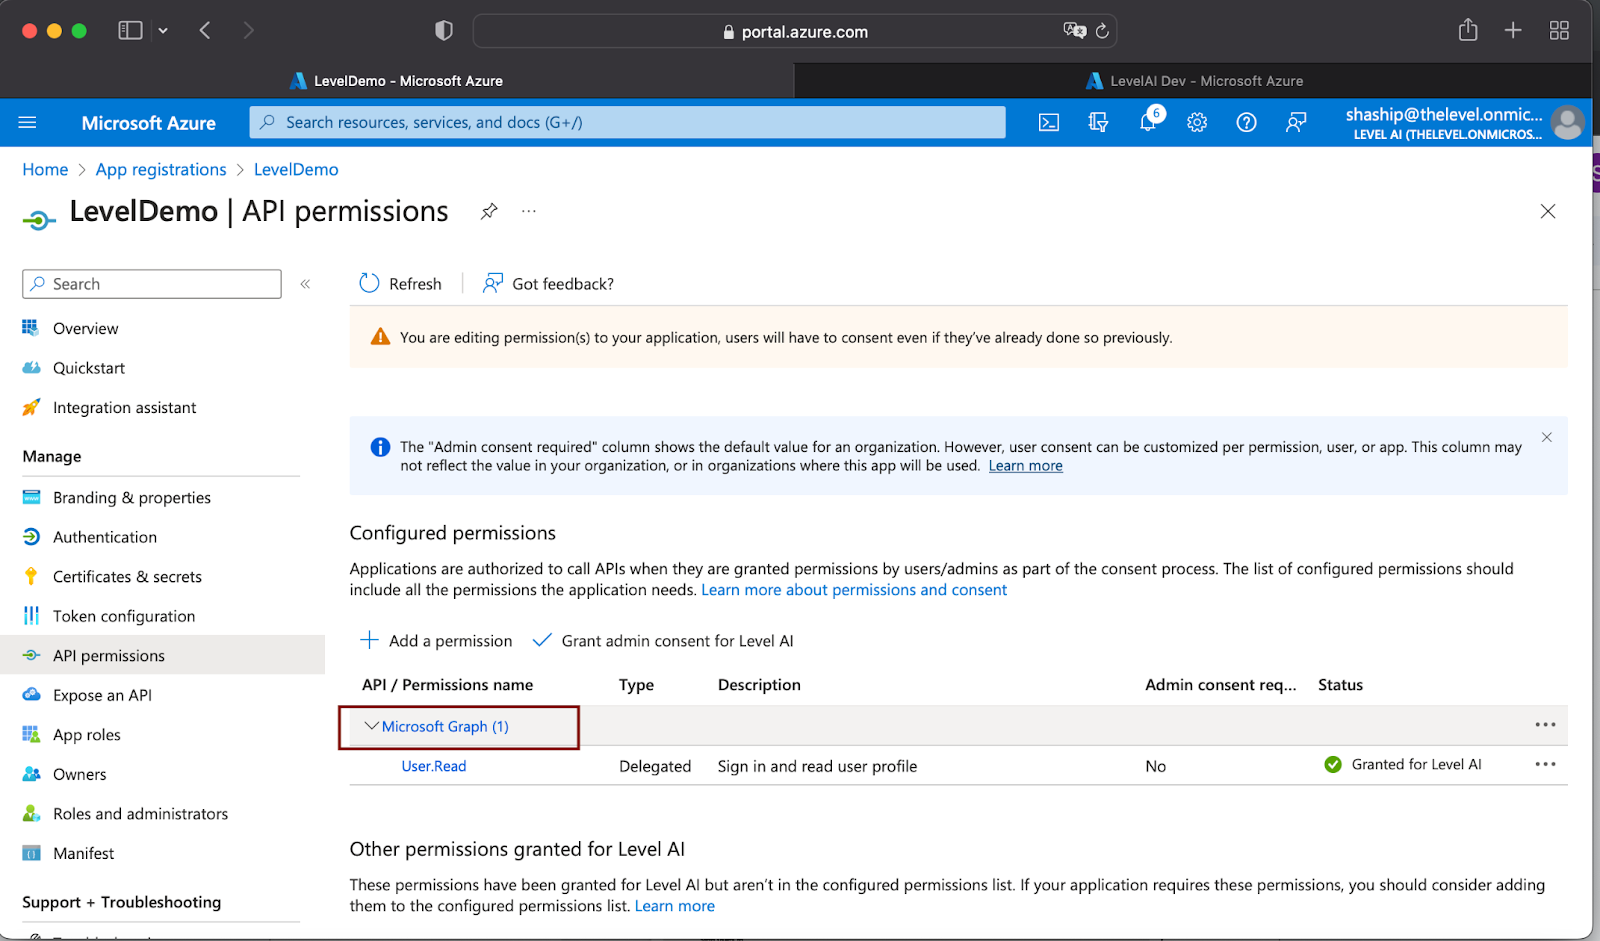
b. Extend the Microsoft Graph dropdown.
c. Ensure the following permissions are added, then click Update Permissions.
emailopenidprofile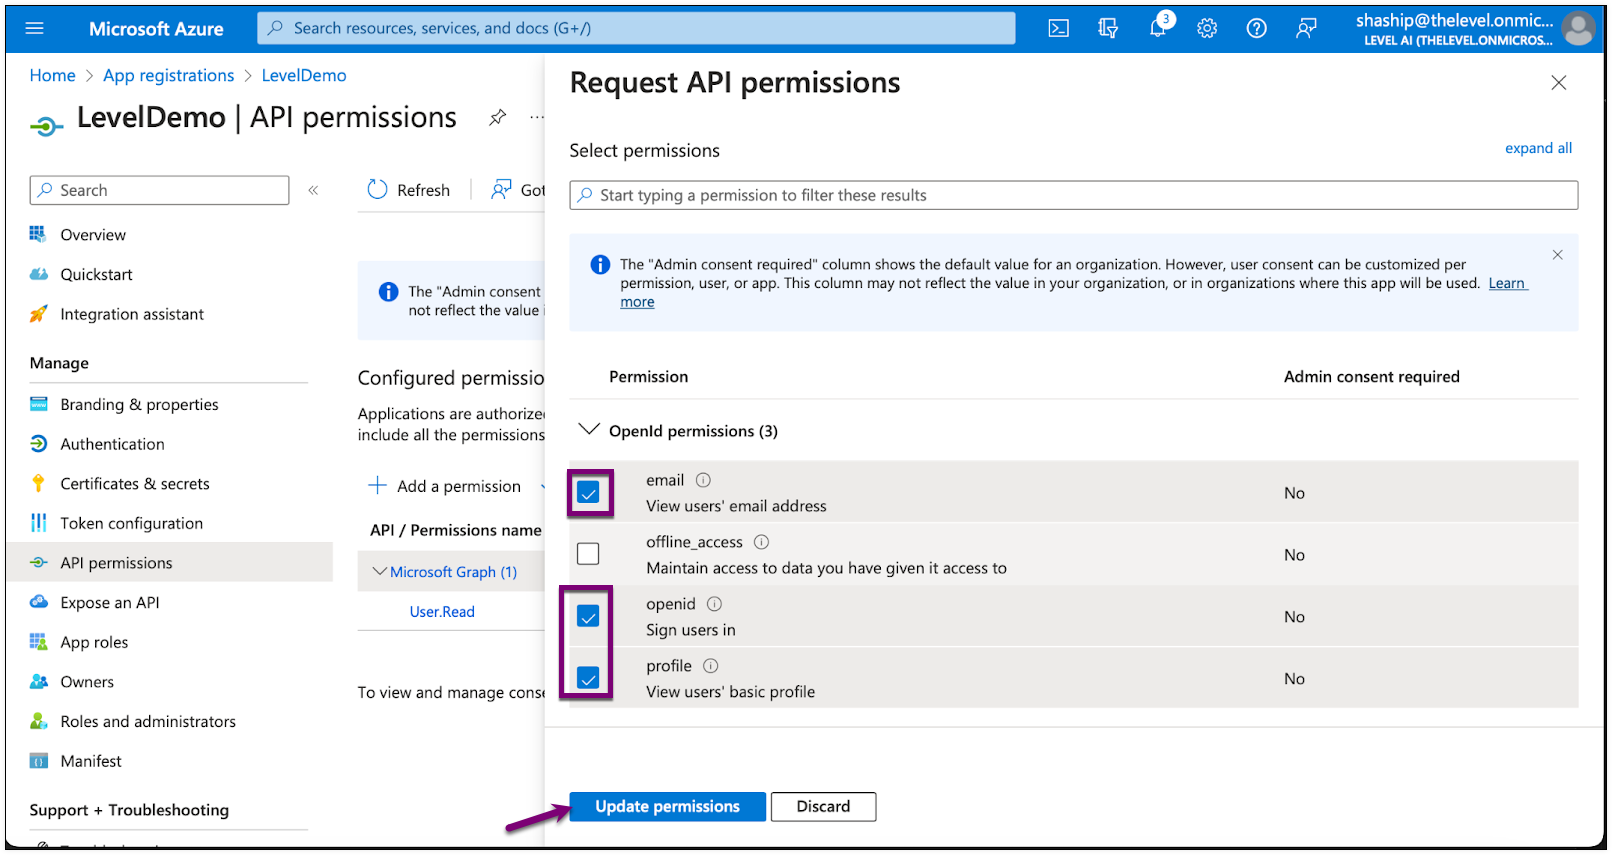
d. Click on Grant Admin consent for...
Step 3: Configure Azure SSO on Level AI account
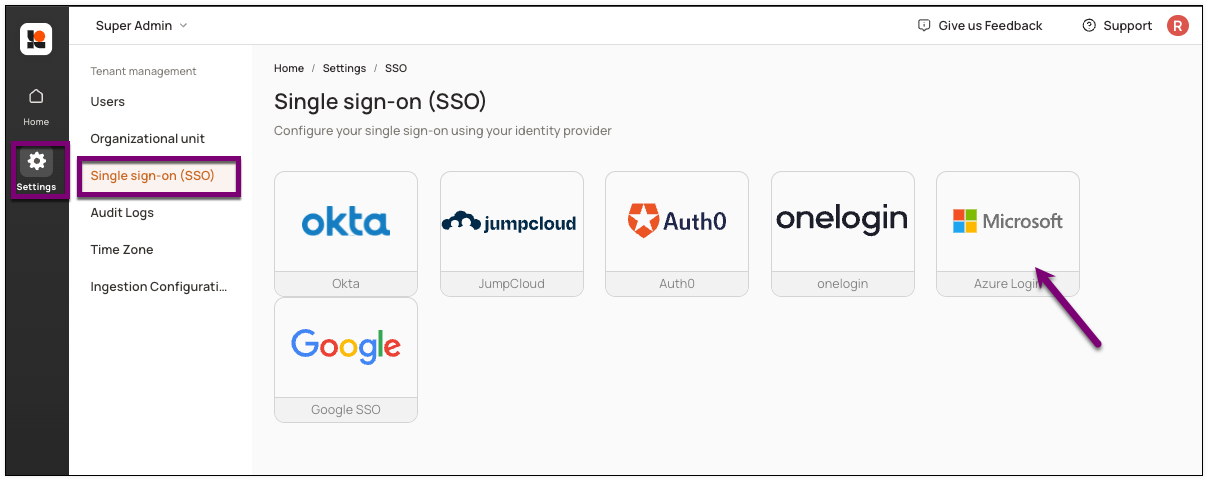
a. Log into your Level AI account as Super Admin and navigate to Settings > SSO and select Microsoft.
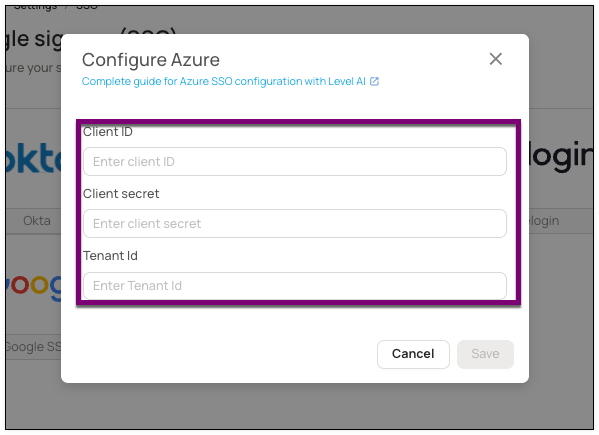
b. Enter the values you copied in Step 1(g) into the matching fields:
Azure AD | Level AI |
|---|---|
Application (client) ID | Client ID |
Client Secret value | Client Secret |
Directory (tenant) ID | Tenant ID |
d. Click Save.
e. Test the configuration by signing in with Azure AD SSO on your Level AI account's login page.
Important Points to note
Level AI verifies users against Azure AD by email address. If a user's email isn't present in Azure AD, they can't log in to Level AI through SSO.
Users with existing Level AI credentials can still log in using those credentials, bypassing SSO.