Setting up Okta SSO in Level AI
Last updated: June 18, 2026
The Level AI - Okta SSO enables members of your contact center to seamlessly log into your Level AI platform without having to create separate credentials. Also, your IT team can easily onboard new members into Level AI via SSO.
WARNING
This setup might fail without parameter values that are customized for your organization. Please use the Okta Administrator Dashboard to add an application and view the values that are specific for your organization.
Supported Features
The Okta/Level AI SAML integration currently supports the following features:
SP-initiated SSO
JIT (Just In Time) Provisioning
For more information on the listed features, visit the Okta Glossary.
Configuration Steps
In Level AI
Sign in to your Level AI instance as a Super Admin.
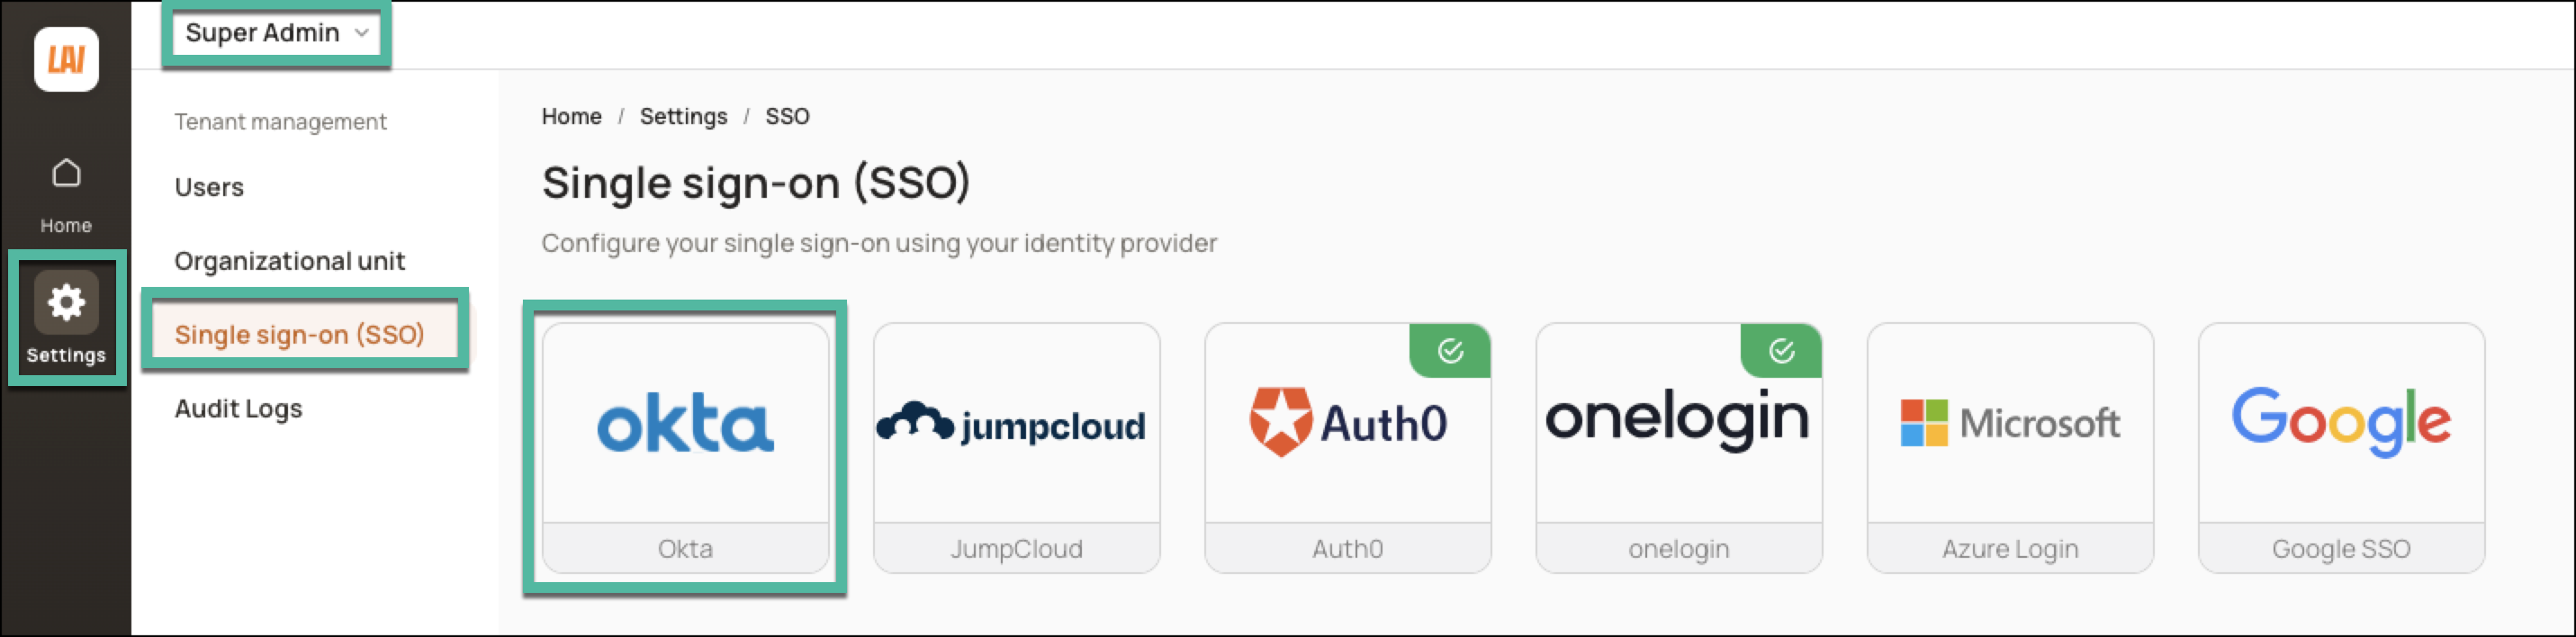
Navigate to Settings > Single sign-on (SSO) and click Okta.
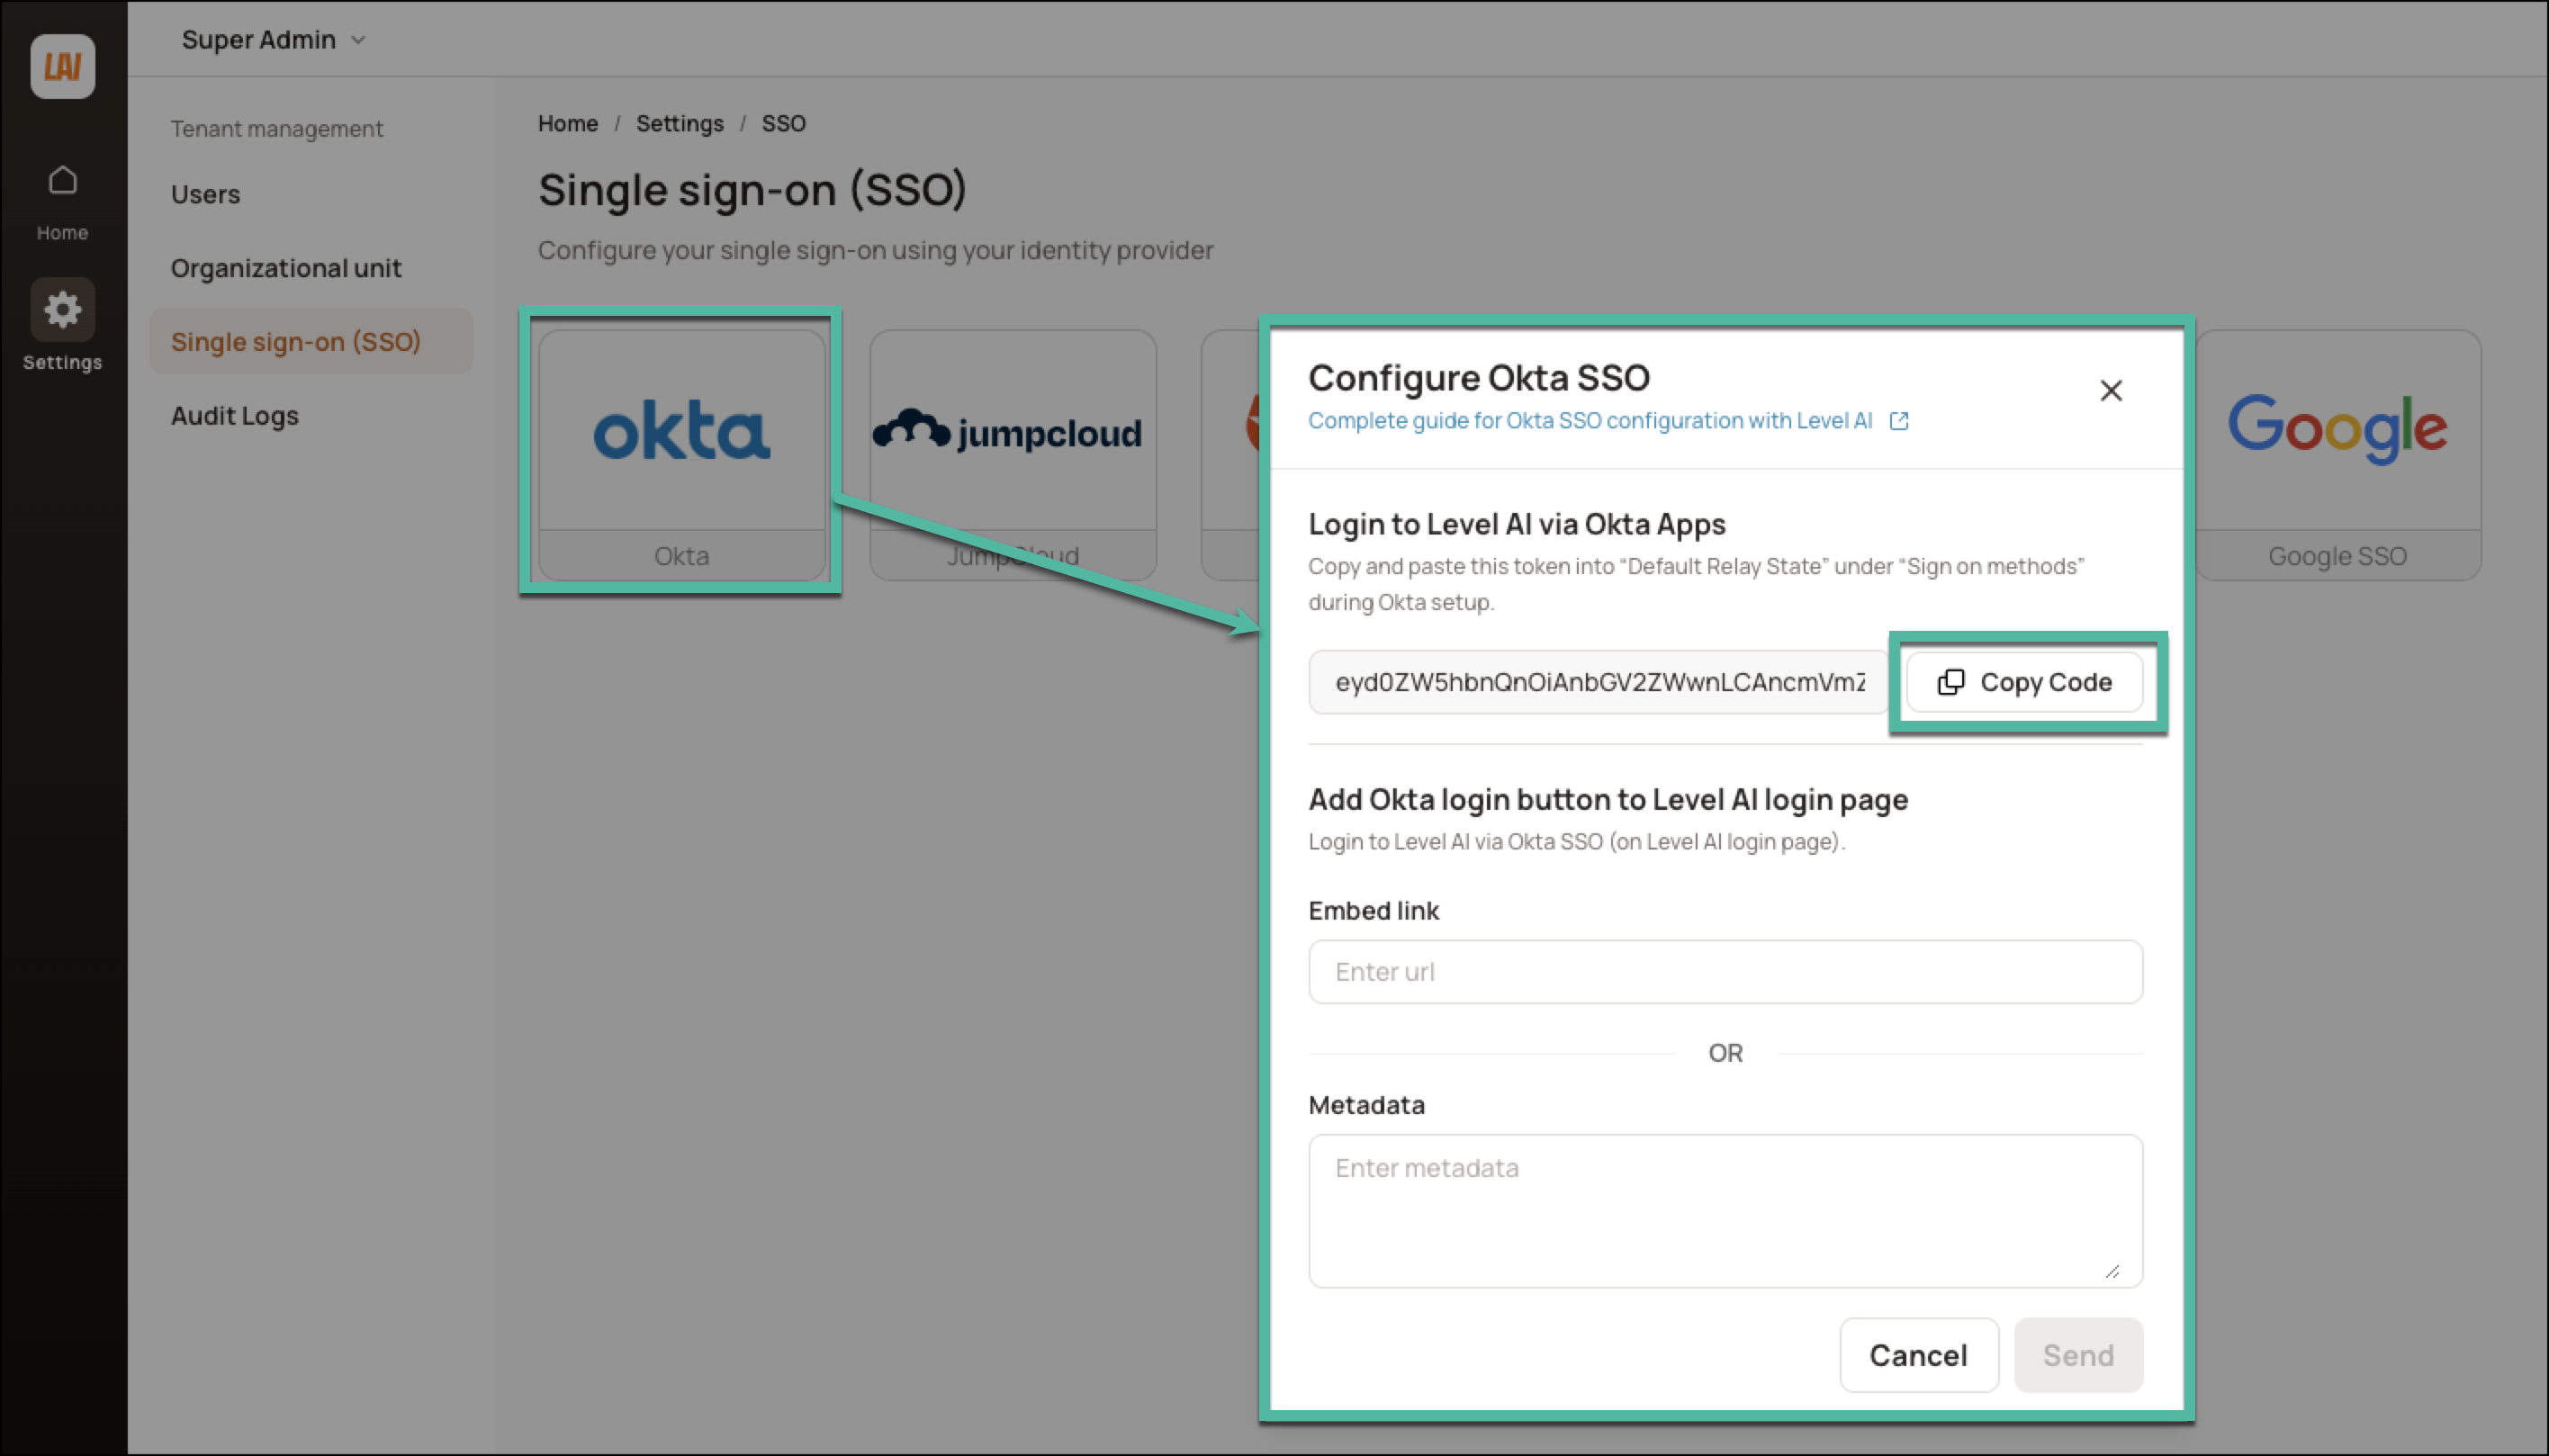
In the window that appears, a Default Relay State code is generated. Click Copy Code to be able to use this value in the subsequent steps.
In Okta
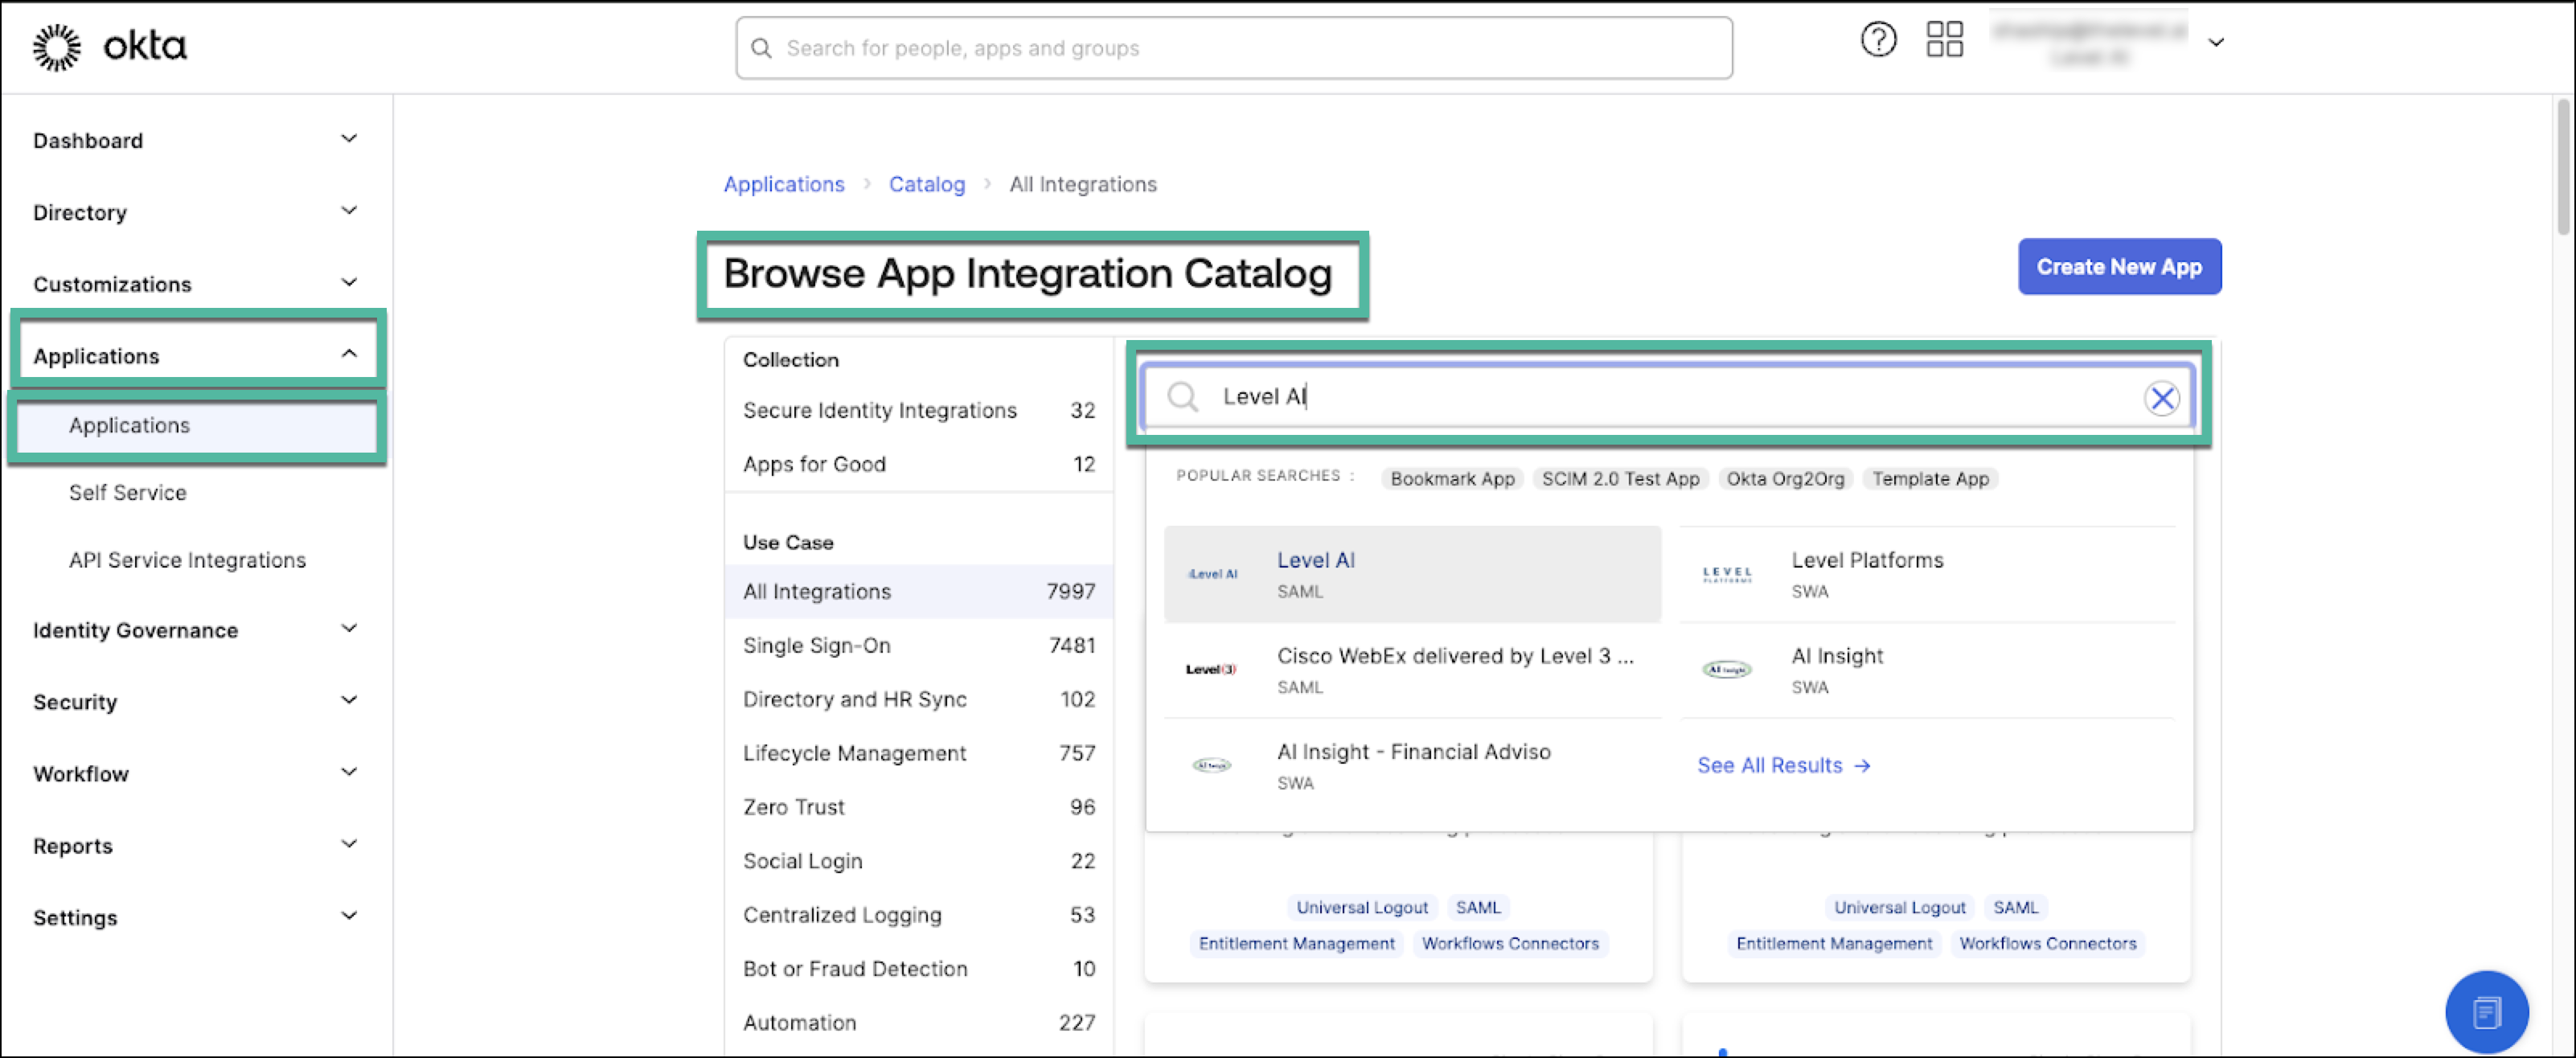
Navigate to Applications > Browse App Catalog.
Search for Level AI and select it.
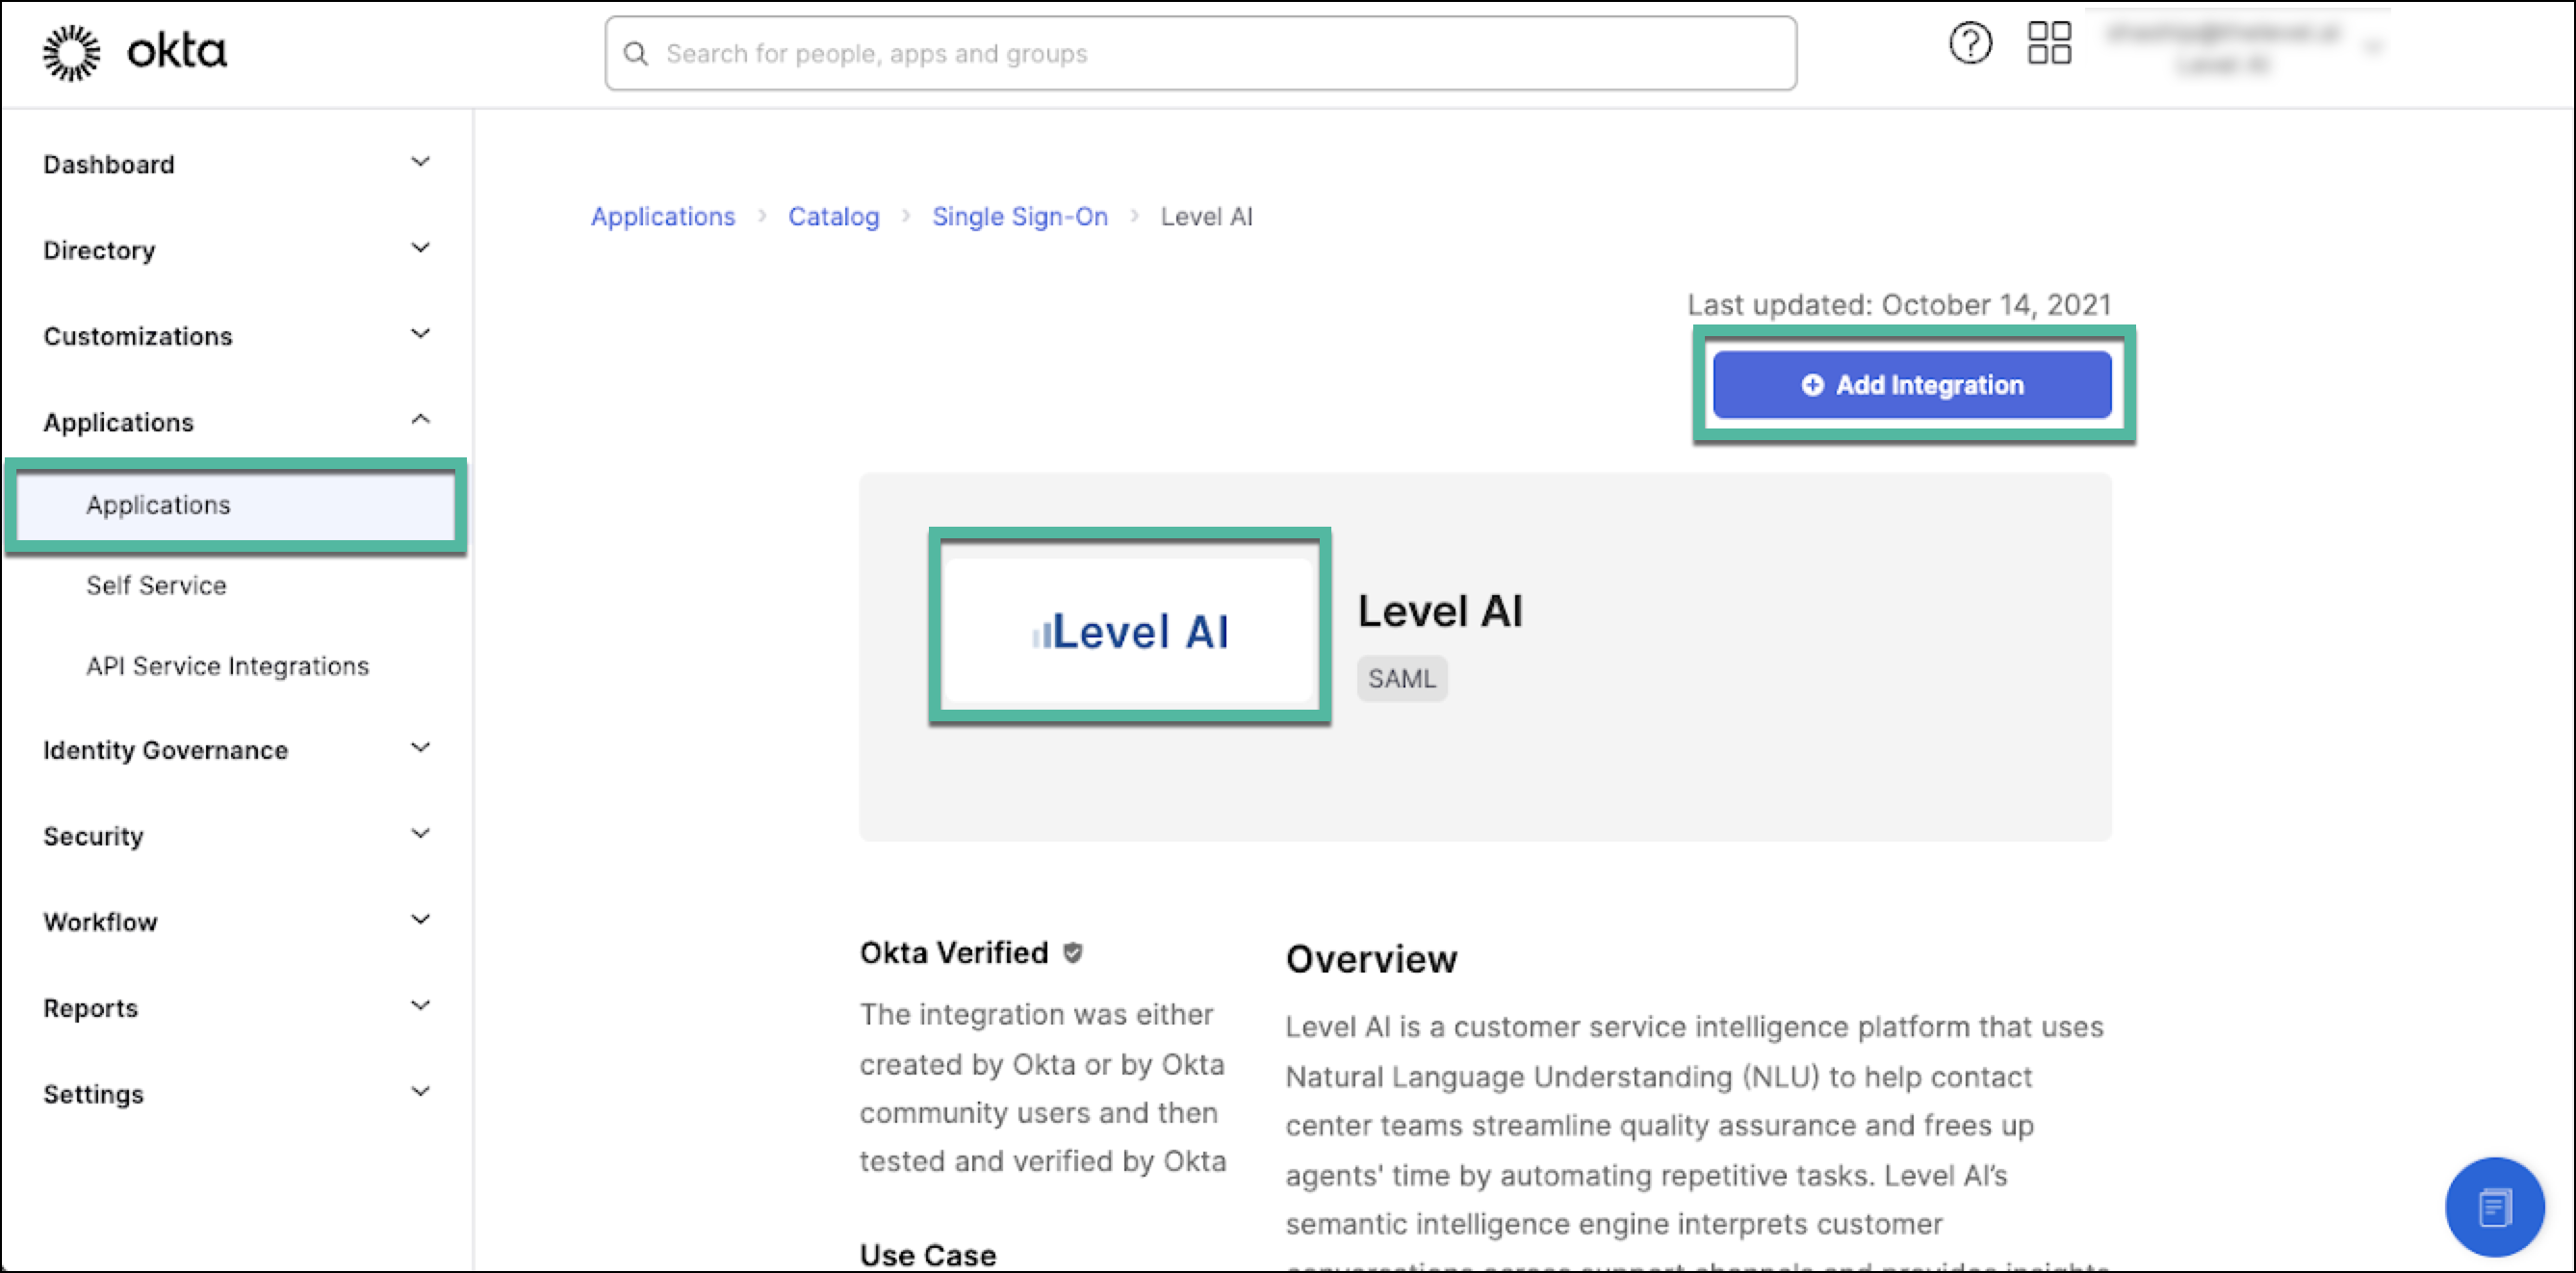
Click Add Integration and Complete the required general information fields.
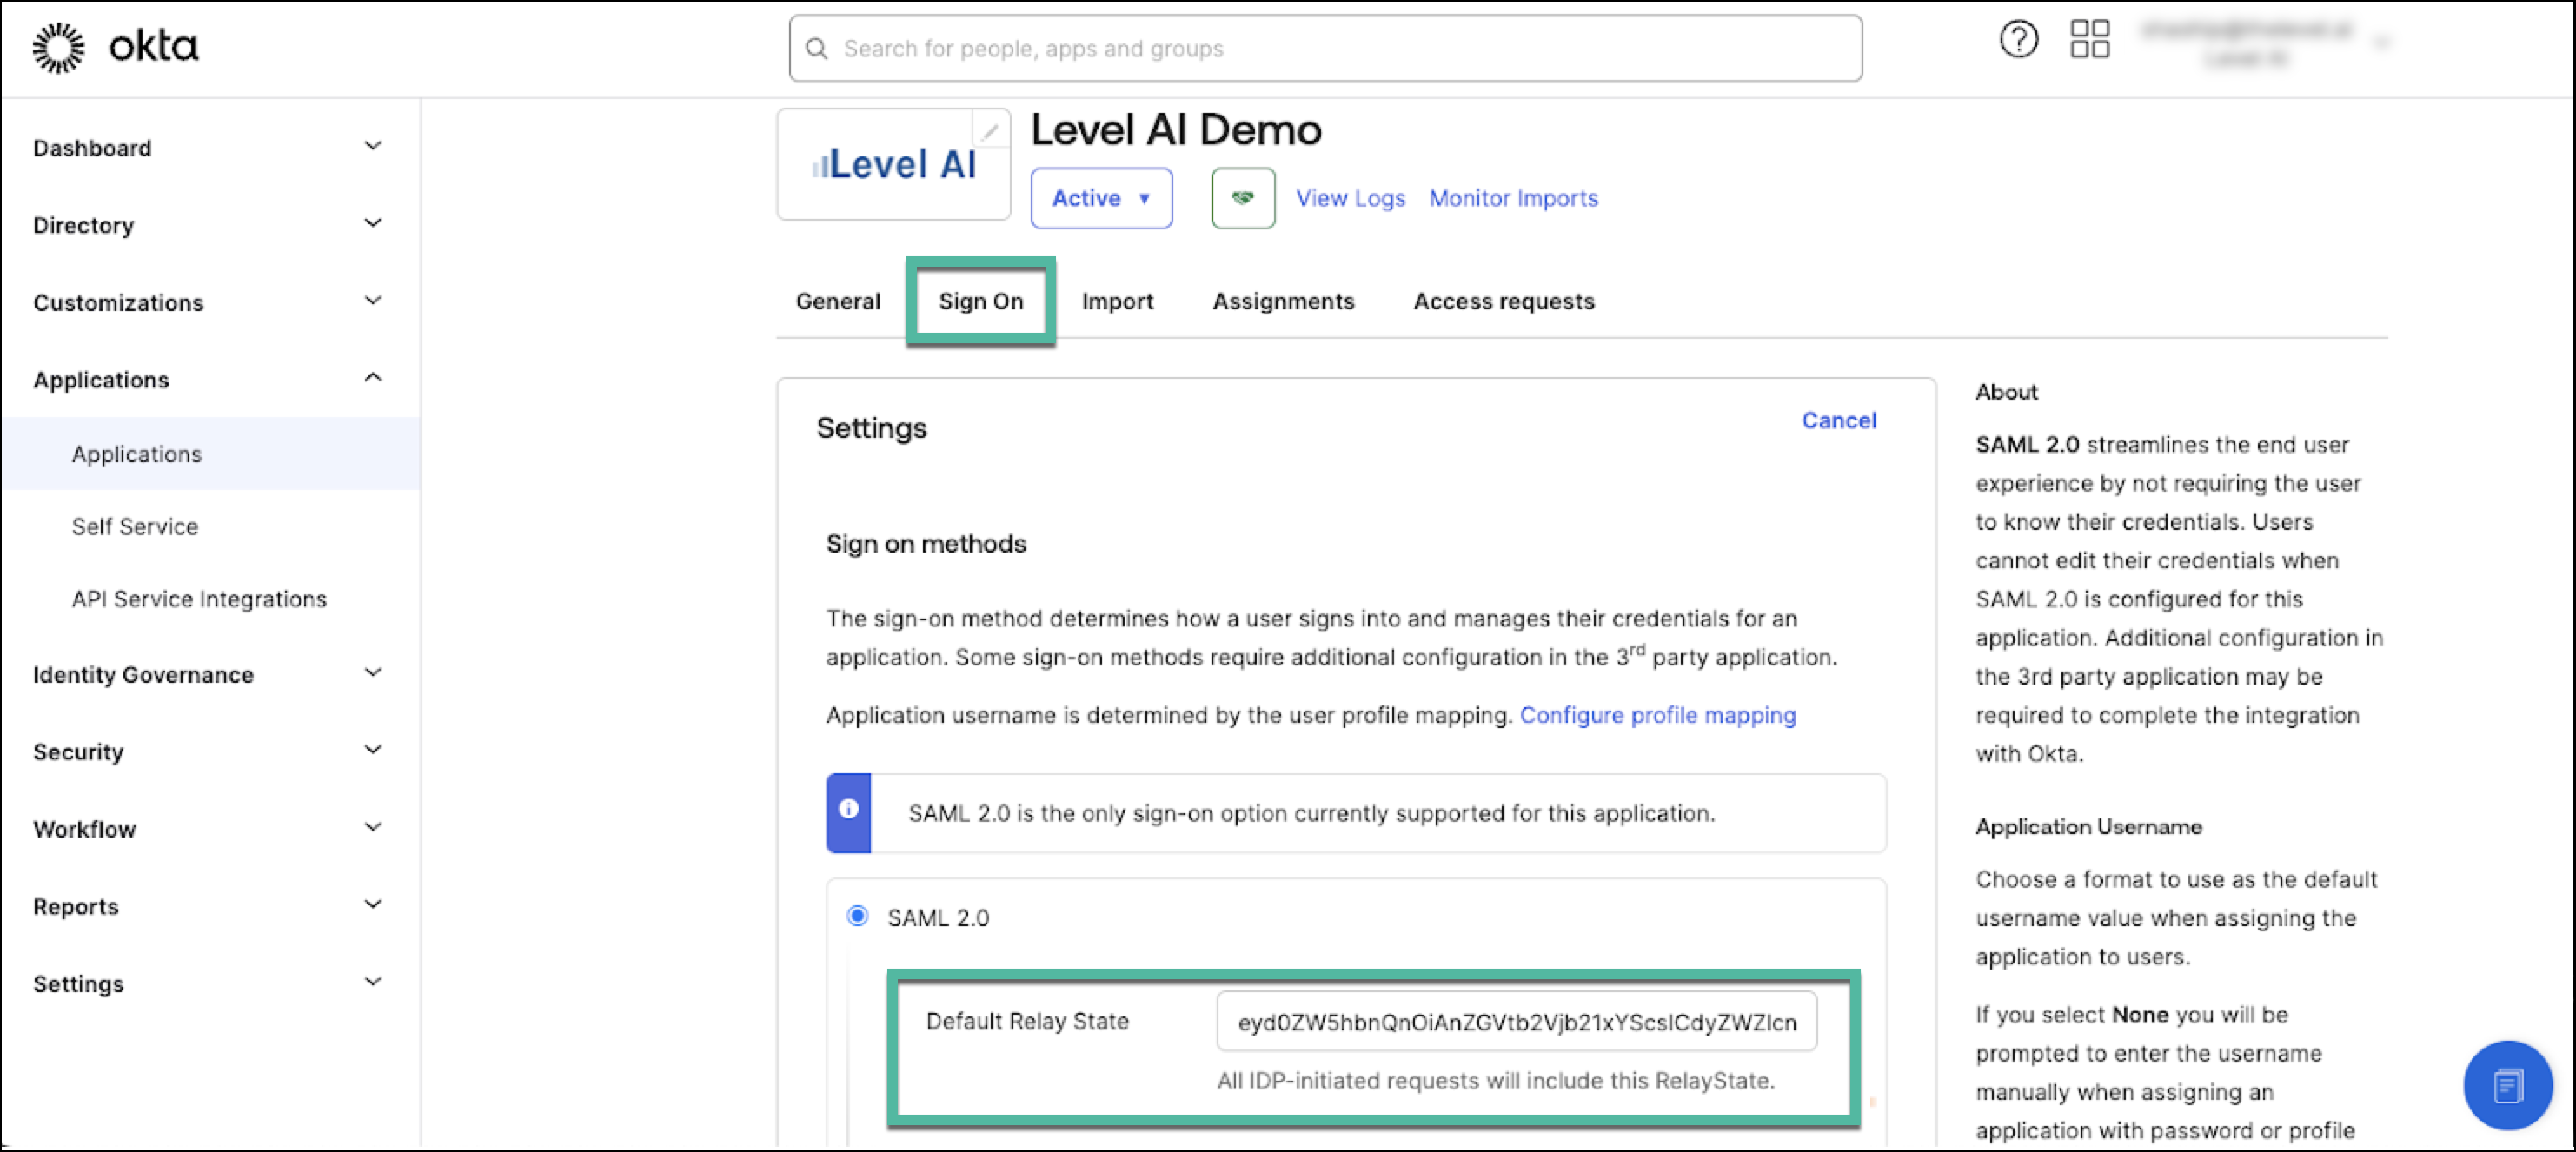
In the Sign On tab, paste the previously-copied Default Relay State code.
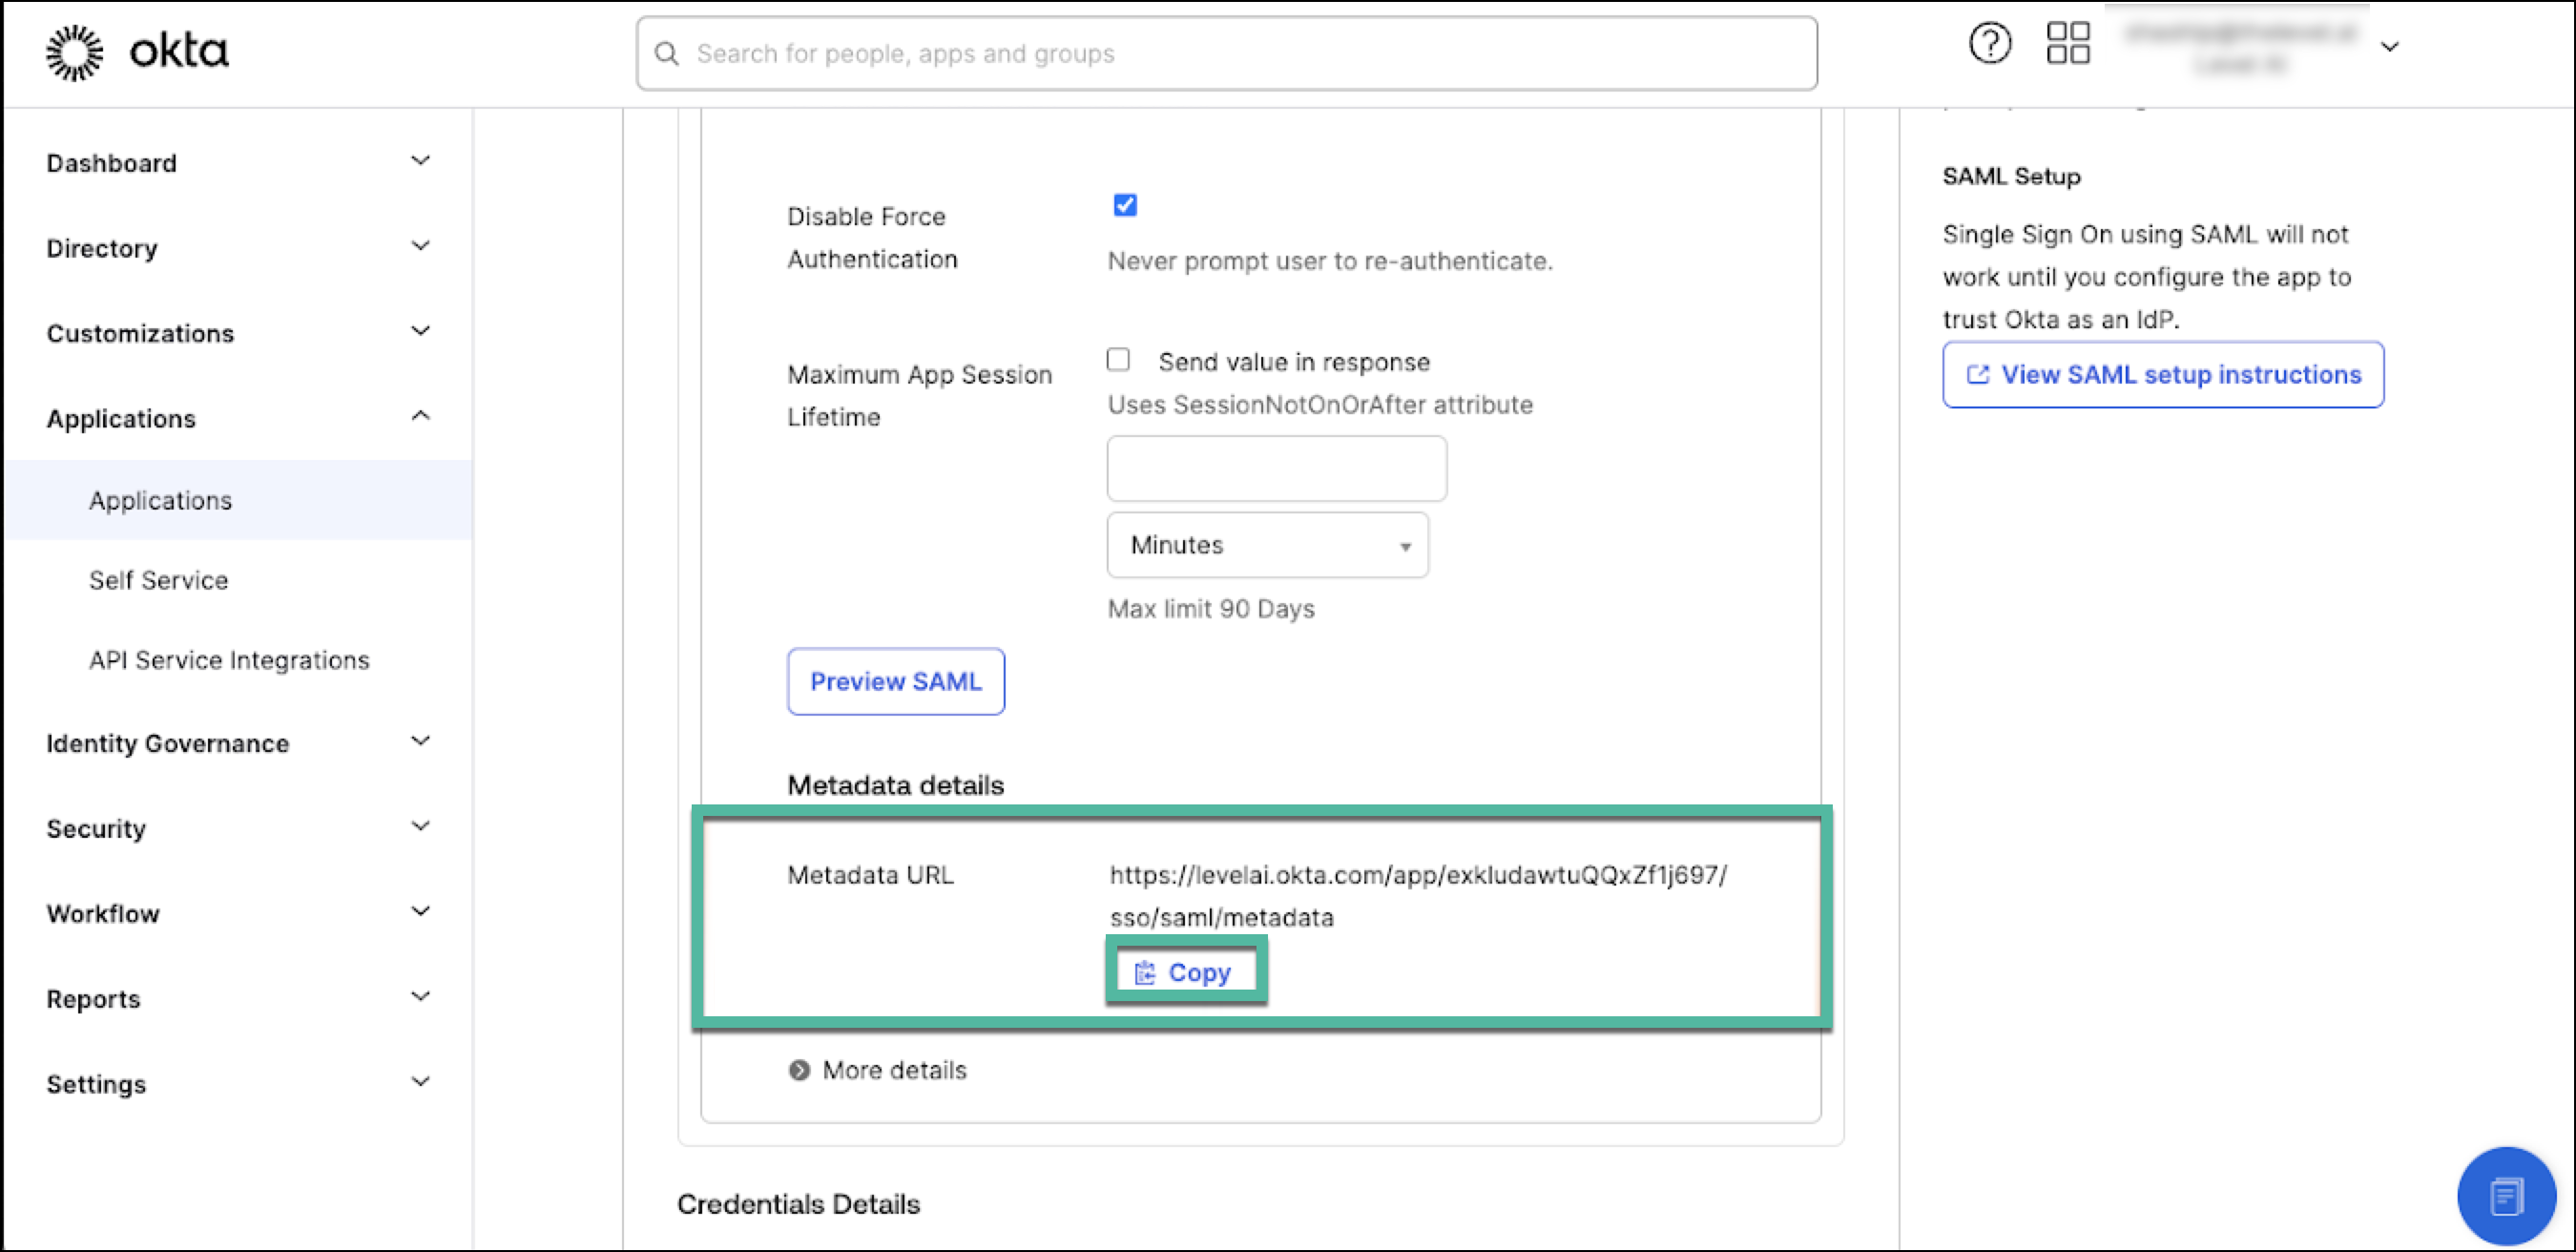
Copy the SAML Metadata URL.
Return to Level AI for SSO Setup Completion
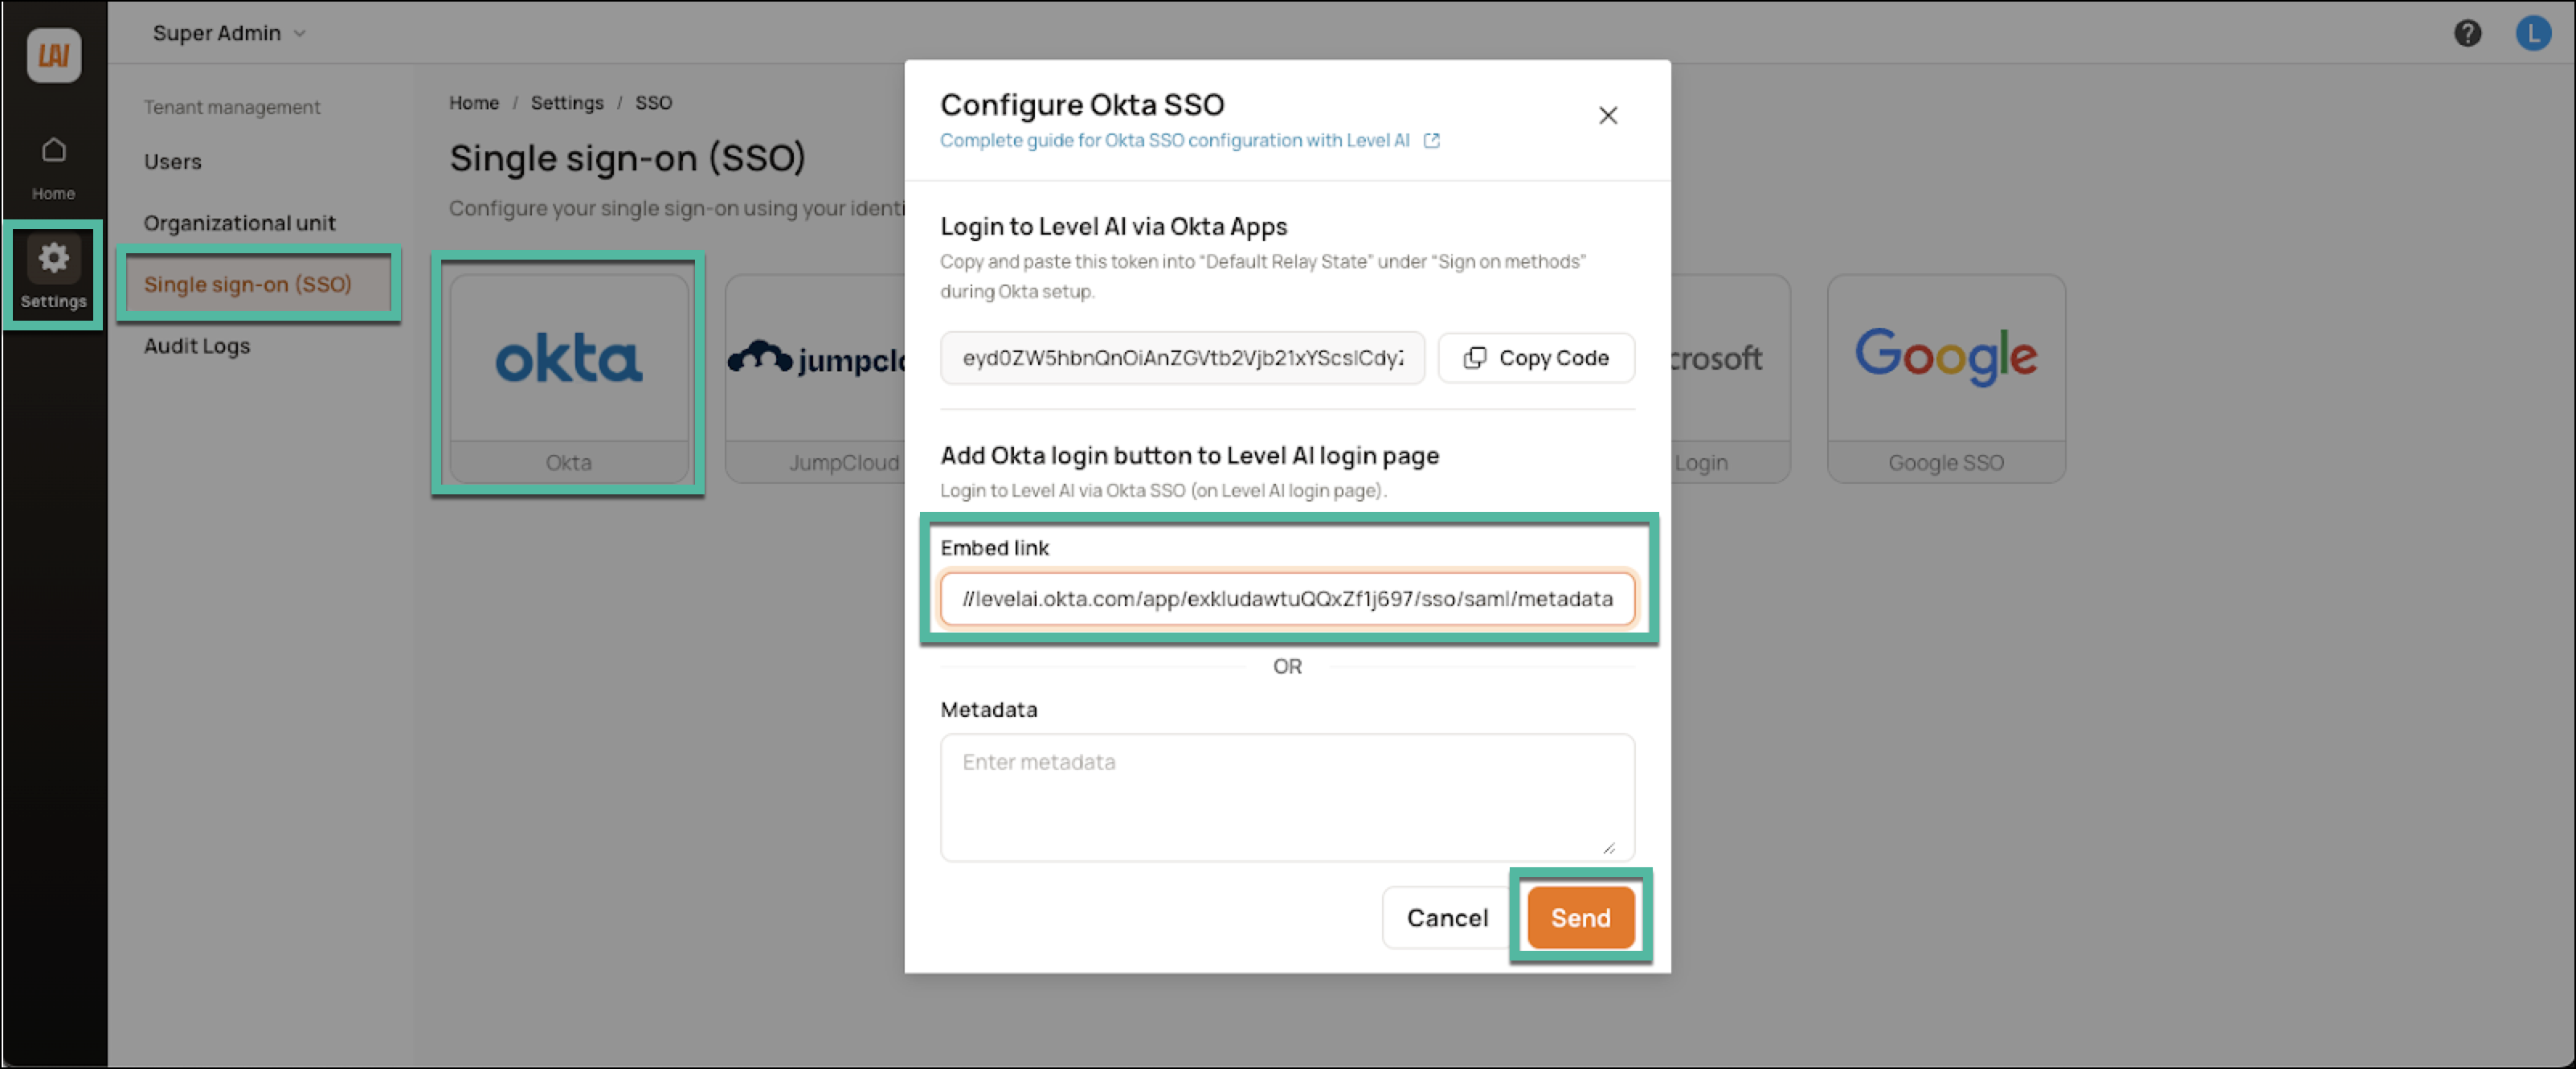
Navigate to Settings > Single Sign on (SSO) > Okta.
Paste the Okta Metadata URL into the Embed link URL field.
Click Send.
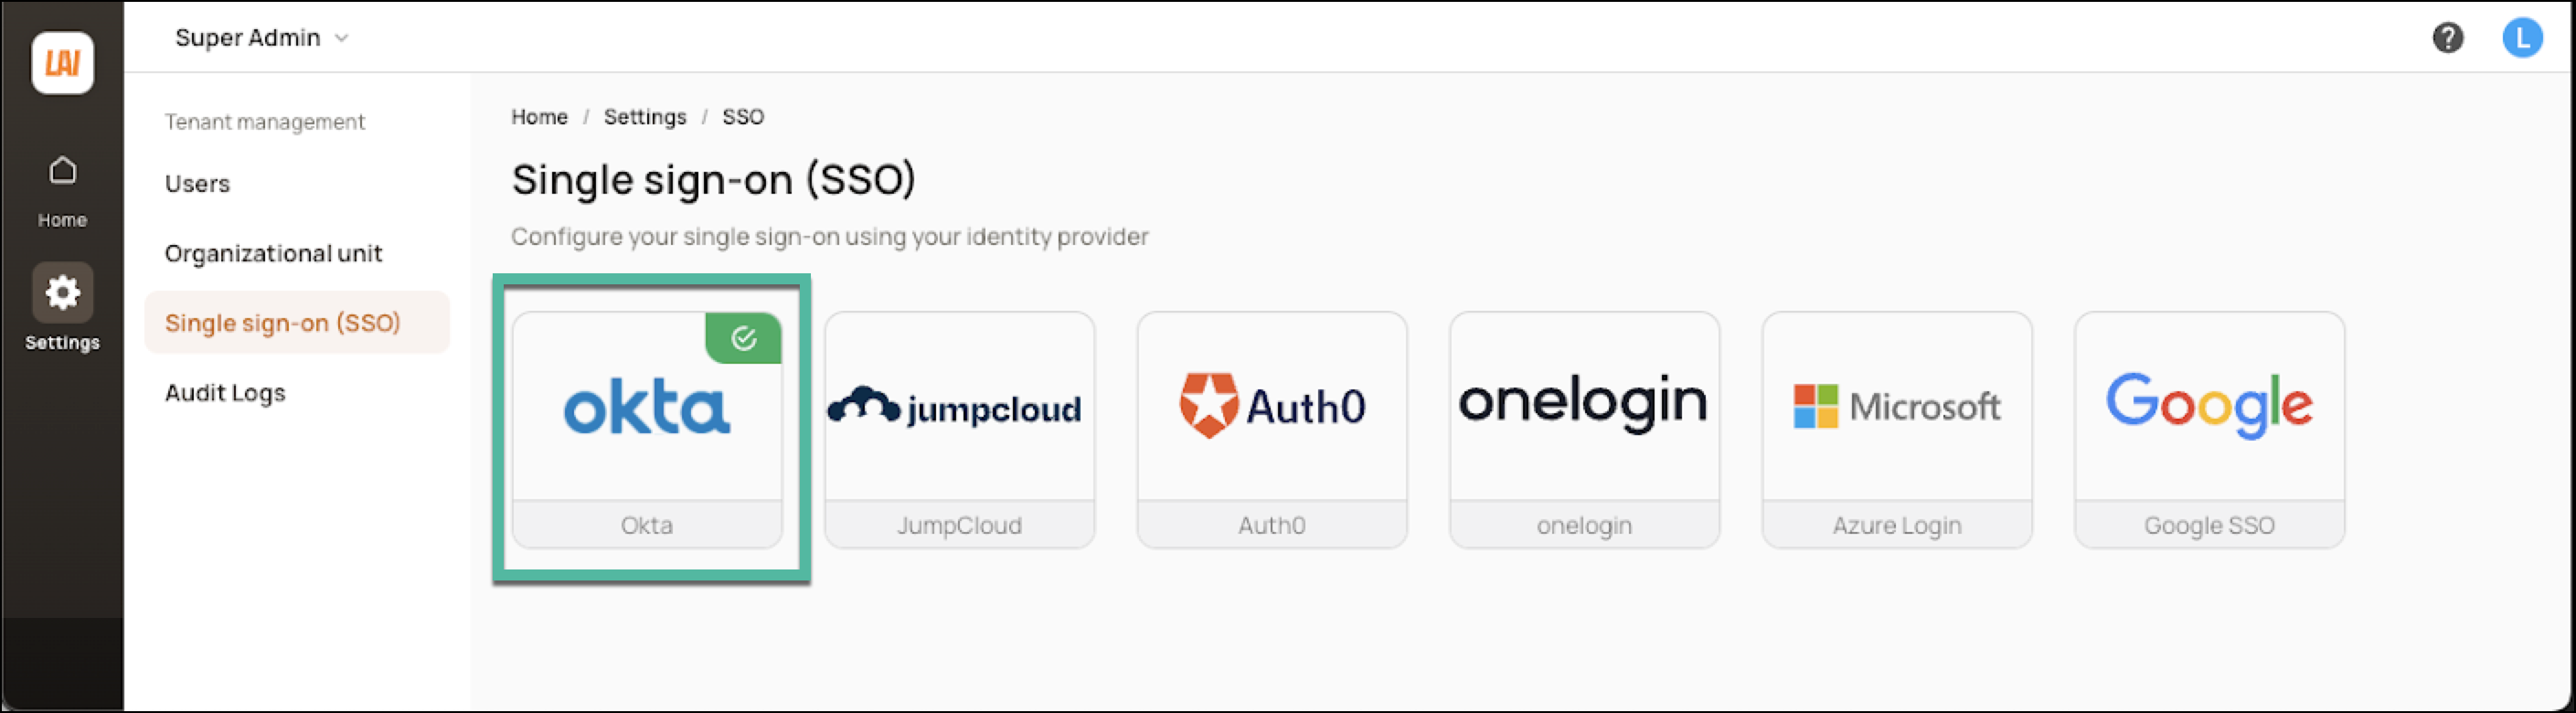
On verification, you'll see a success message.
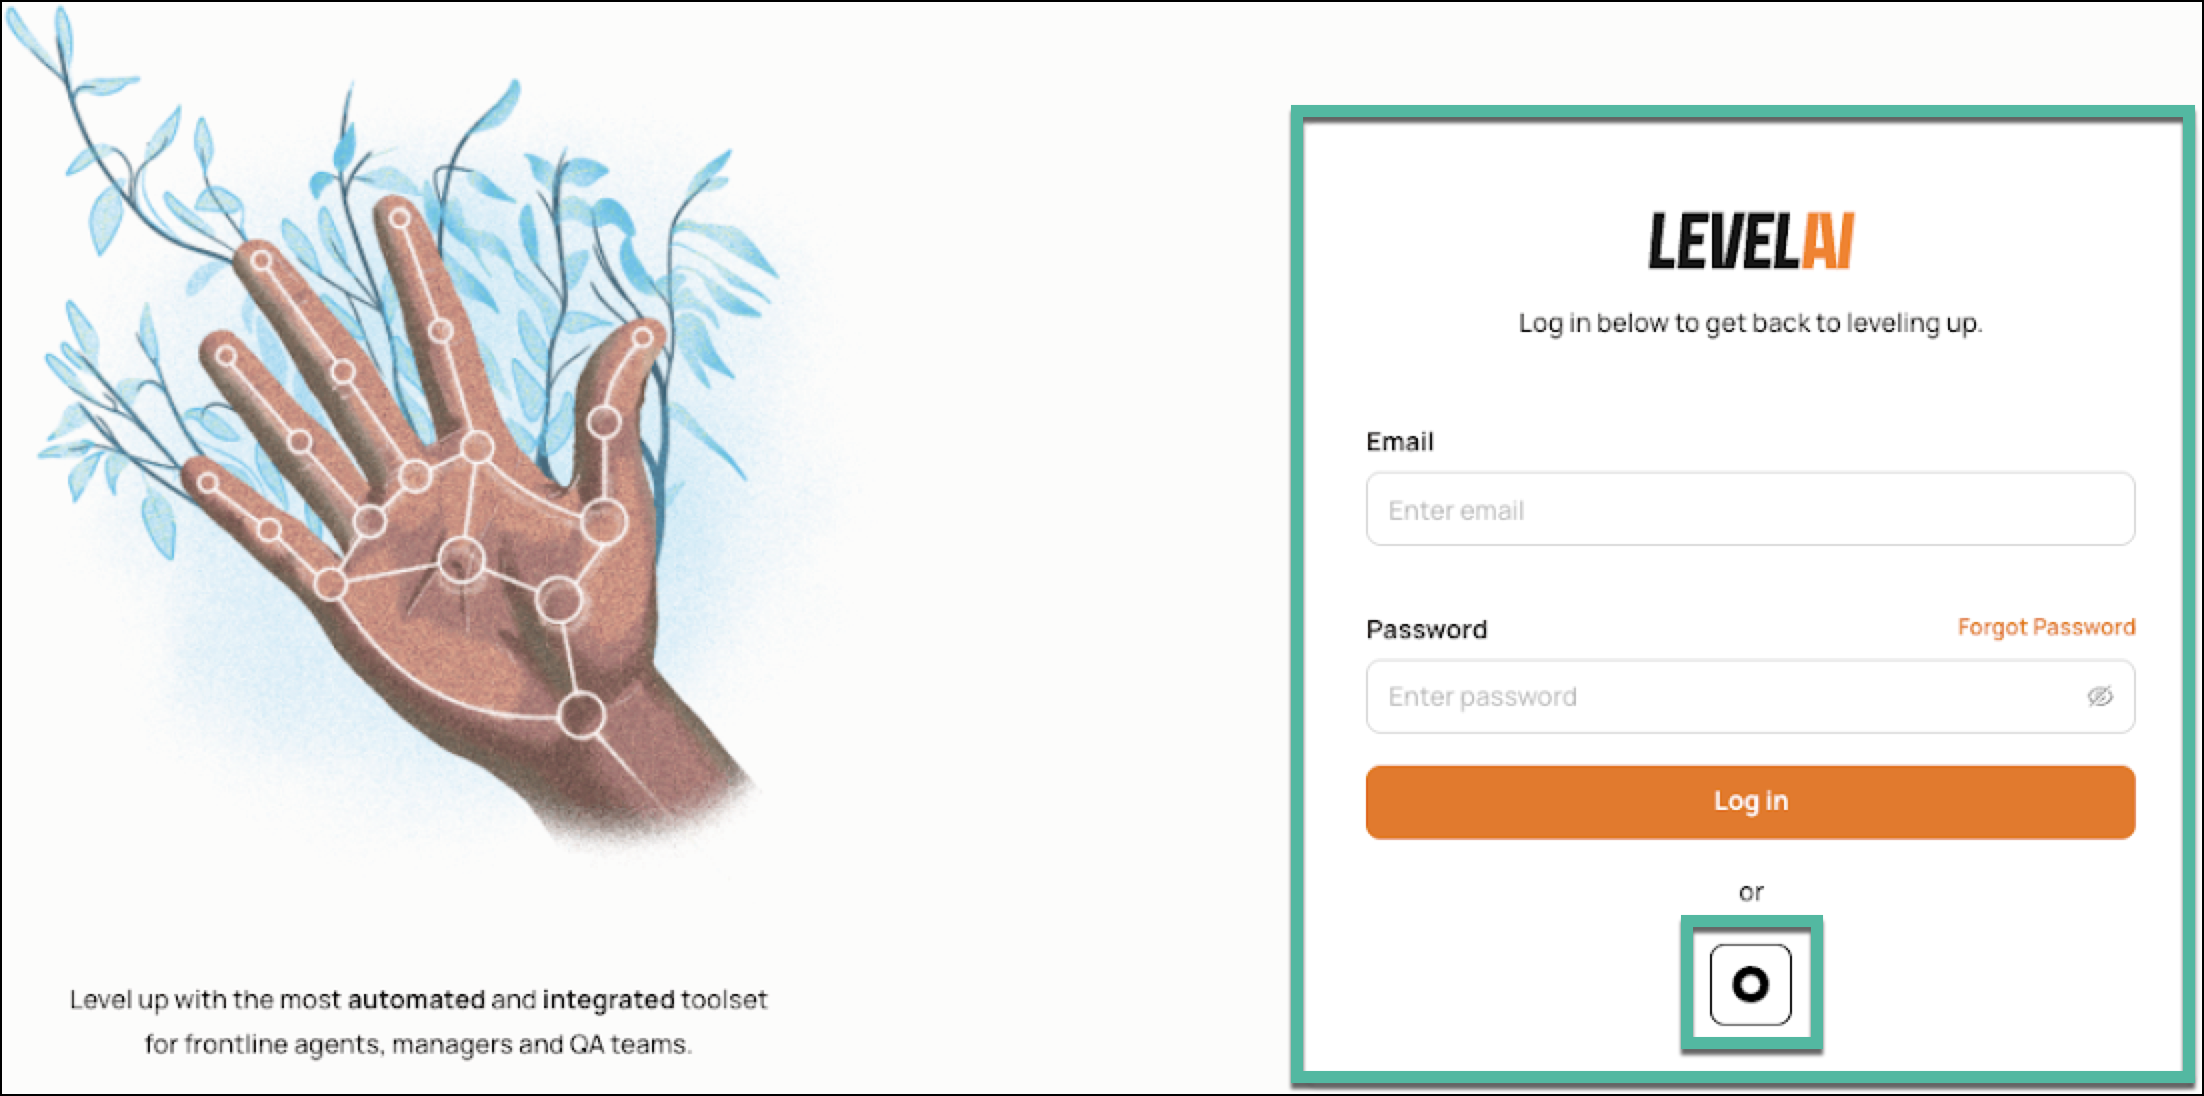
Your users will be able to view the Okta SSO option in the Level AI login page.
Additional Information
Since only SP-initiated flow is supported, we recommend hiding the application icon for users.
The following SAML attributes are supported:
Name
Value
Email
user.email
FirstName
user.firstName
LastName
user.lastName
SP-initiated SSO
Go to your Level AI login URL.
Click Log in with Okta.