Setting Up SFTP Metadata Enrichment in LevelAI
Last updated: September 2, 2026
Overview
SFTP Metadata Enrichment lets you attach additional metadata to your Level AI data from CSV files you drop into a dedicated SFTP folder. Once configured, Level AI picks up those files automatically, matches each row to the right record, and adds the remaining columns as metadata.
You can configure this yourself from the Level AI UI.
Enrichment can be applied to either of two target entities:
Conversation — attributes such as customer tier, order value, disposition codes, or campaign details are added to the conversation and appear in the Case details section of the conversation.
User Profile — attributes about your agents or users are added to their profile, which can then be used for team creation and user-level reporting.
Enriched metadata is available for analytics, filtering, team creation, and case assignment rules.
If you are looking for the CSV file format and column requirements, see Enriching Conversations with Metadata via SFTP.
Before You Begin
Make sure you have the following ready:
SFTP credentials — the SFTP username and password for your Level AI SFTP location. These are shared by your Technical Account Manager (TAM). Reach out to your TAM if you have not received them.
A designated upload folder — the folder path on the SFTP server where your enrichment files will land (for example, enrichment_files/). You will enter this path during configuration.
At least one file already uploaded to that folder — the configuration screen reads your file to populate the list of available columns, so upload a representative file before you start.
A confirmed identifier column — the column in your CSV that Level AI will use to match rows to records (for example, call_id, session_id, or the Level AI Conversation ID). This is referred to as the join key.
Note: Metadata files should be uploaded only after the corresponding conversations have been ingested into Level AI. Rows that reference a conversation that does not yet exist are skipped and are not retried automatically. |
Steps for Configuration and Enablement
Step 1: Open the SFTP Metadata Enrichment integration
Go to Settings → Integrations and select the Metadata Enrichment tab. Click the SFTP Metadata Enrichment card.
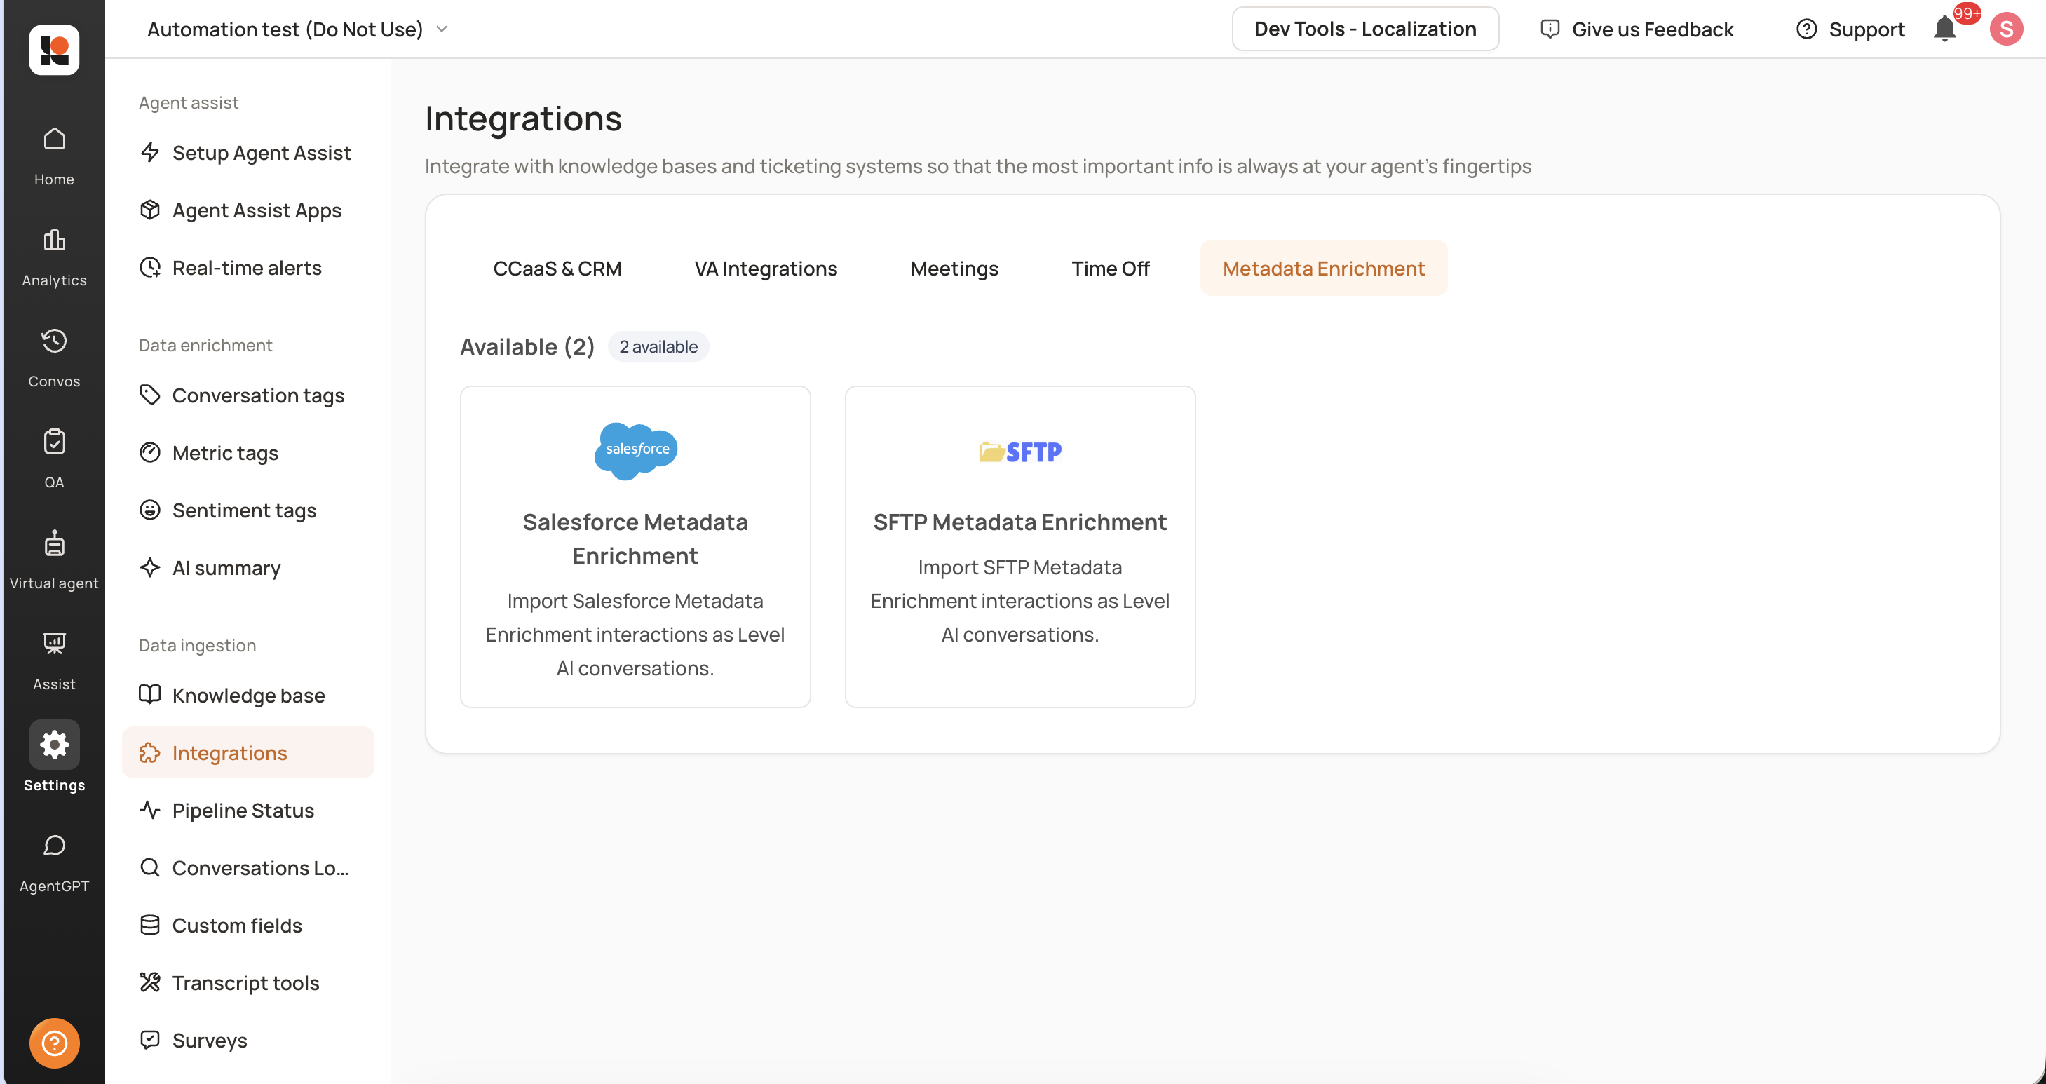
The Metadata Enrichment tab under Settings → Integrations
Step 2: Authenticate
Enter the SFTP Username and SFTP Password provided by your TAM, then click Install.
This establishes the data connection between your SFTP location and Level AI. You only need to do this once per SFTP account.
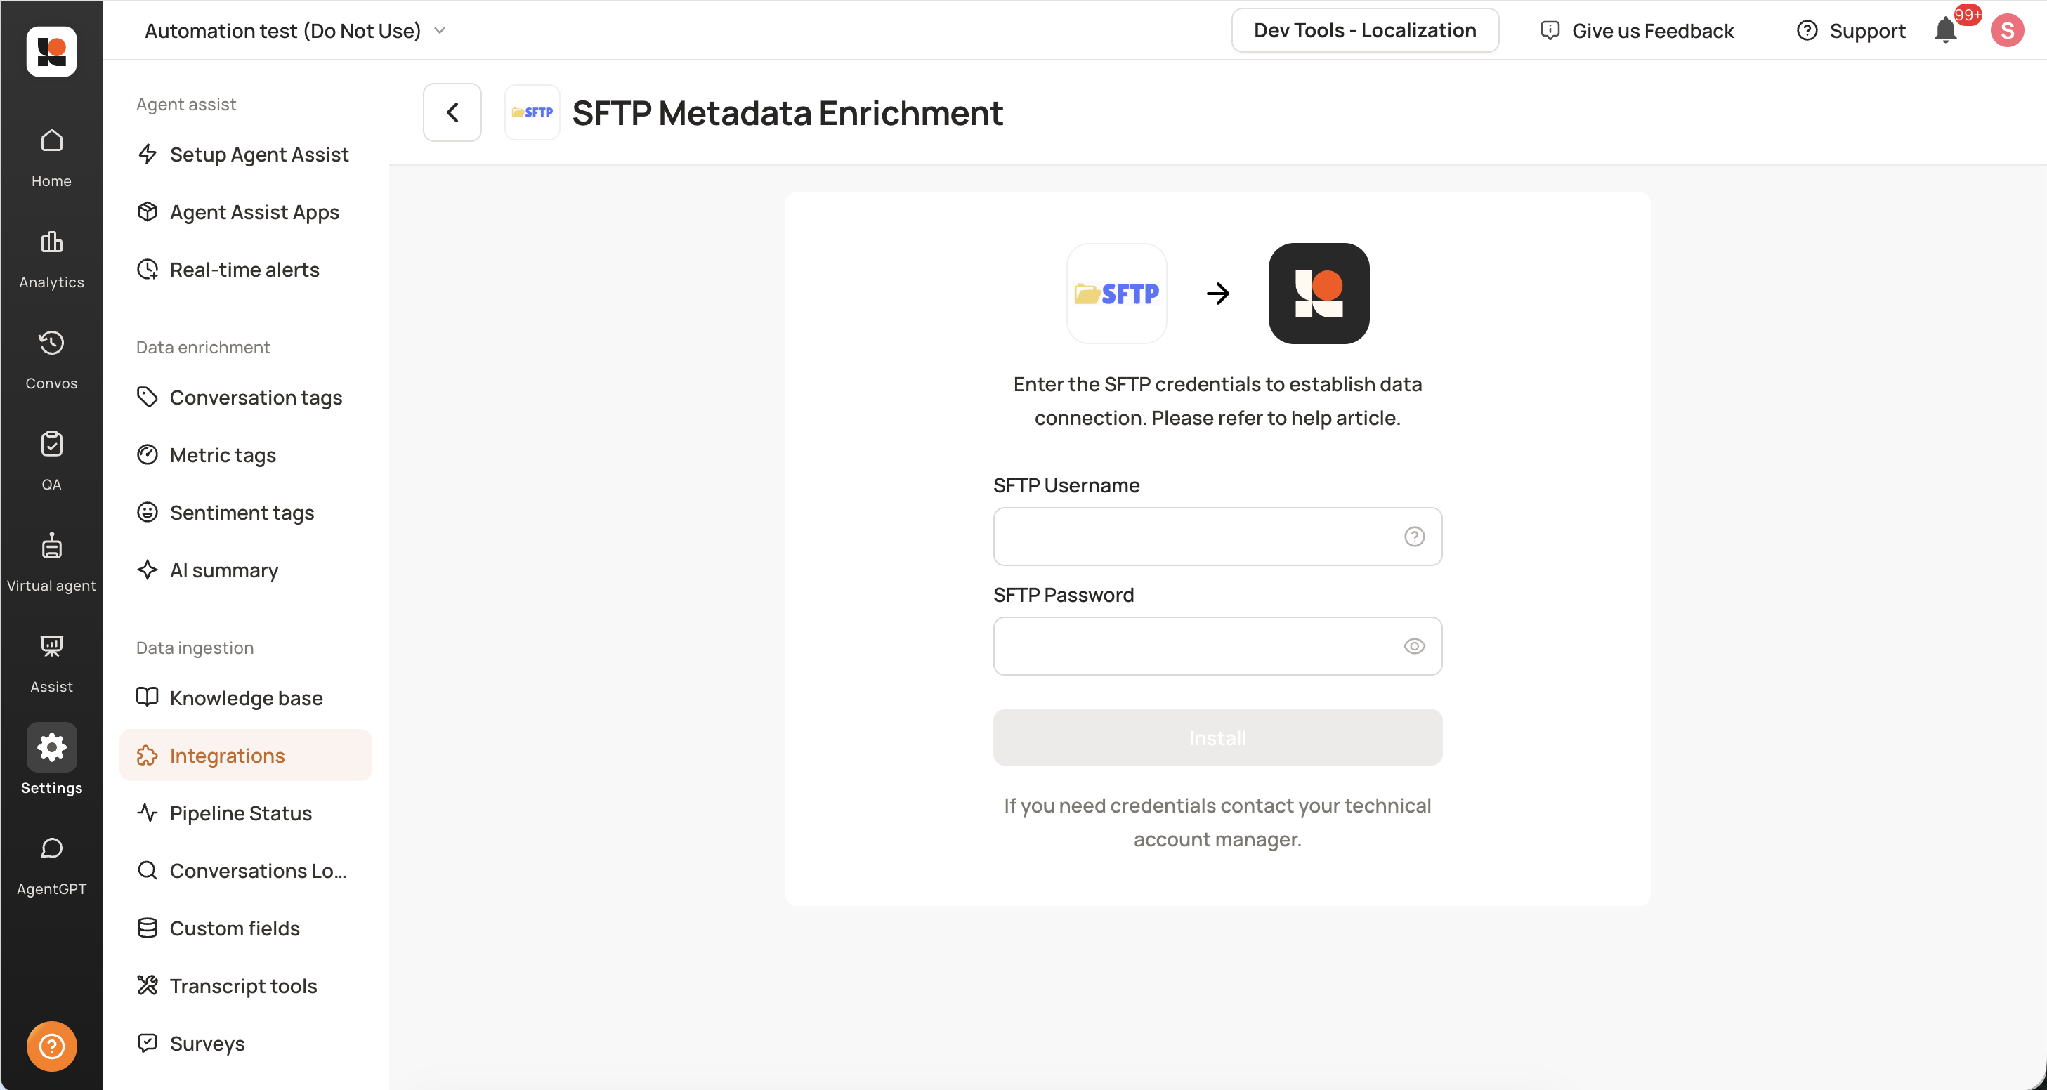
Entering SFTP credentials to establish the data connection
Once installed, the account appears under Connected Accounts on the account management screen. Click the account to complete its setup.
Tip: You can connect more than one SFTP account. Use Add Account on the account management screen to connect additional ones — for example, one account for conversation enrichment and another for user profile enrichment. |
Step 3: Configure the account
The setup wizard has three stages: Configure → Import sample → Enable.
On the Configure stage, fill in the following:
Target entity — choose what the data gets attached to:
Conversation — metadata is added to matched conversations.
User Profile — metadata is added to matched user profiles.
SFTP folder path — enter the folder on the SFTP server that Level AI should read from, for example enrichment_files/.
Join key mapping — this is how Level AI matches each row in your file to the correct record:
File column (join key) — the column name in your uploaded CSV file, for example call_id.
Level AI field (match to) — the Level AI field that column should be matched against, for example ext_emp_id for a user profile.
Column handling — choose which CSV columns to import as metadata fields:
Import all columns — every column in the CSV except the join key is imported. Any new columns you add to future files appear automatically, with no reconfiguration needed.
Select specific columns — pick only the columns you want. Columns not selected are ignored.
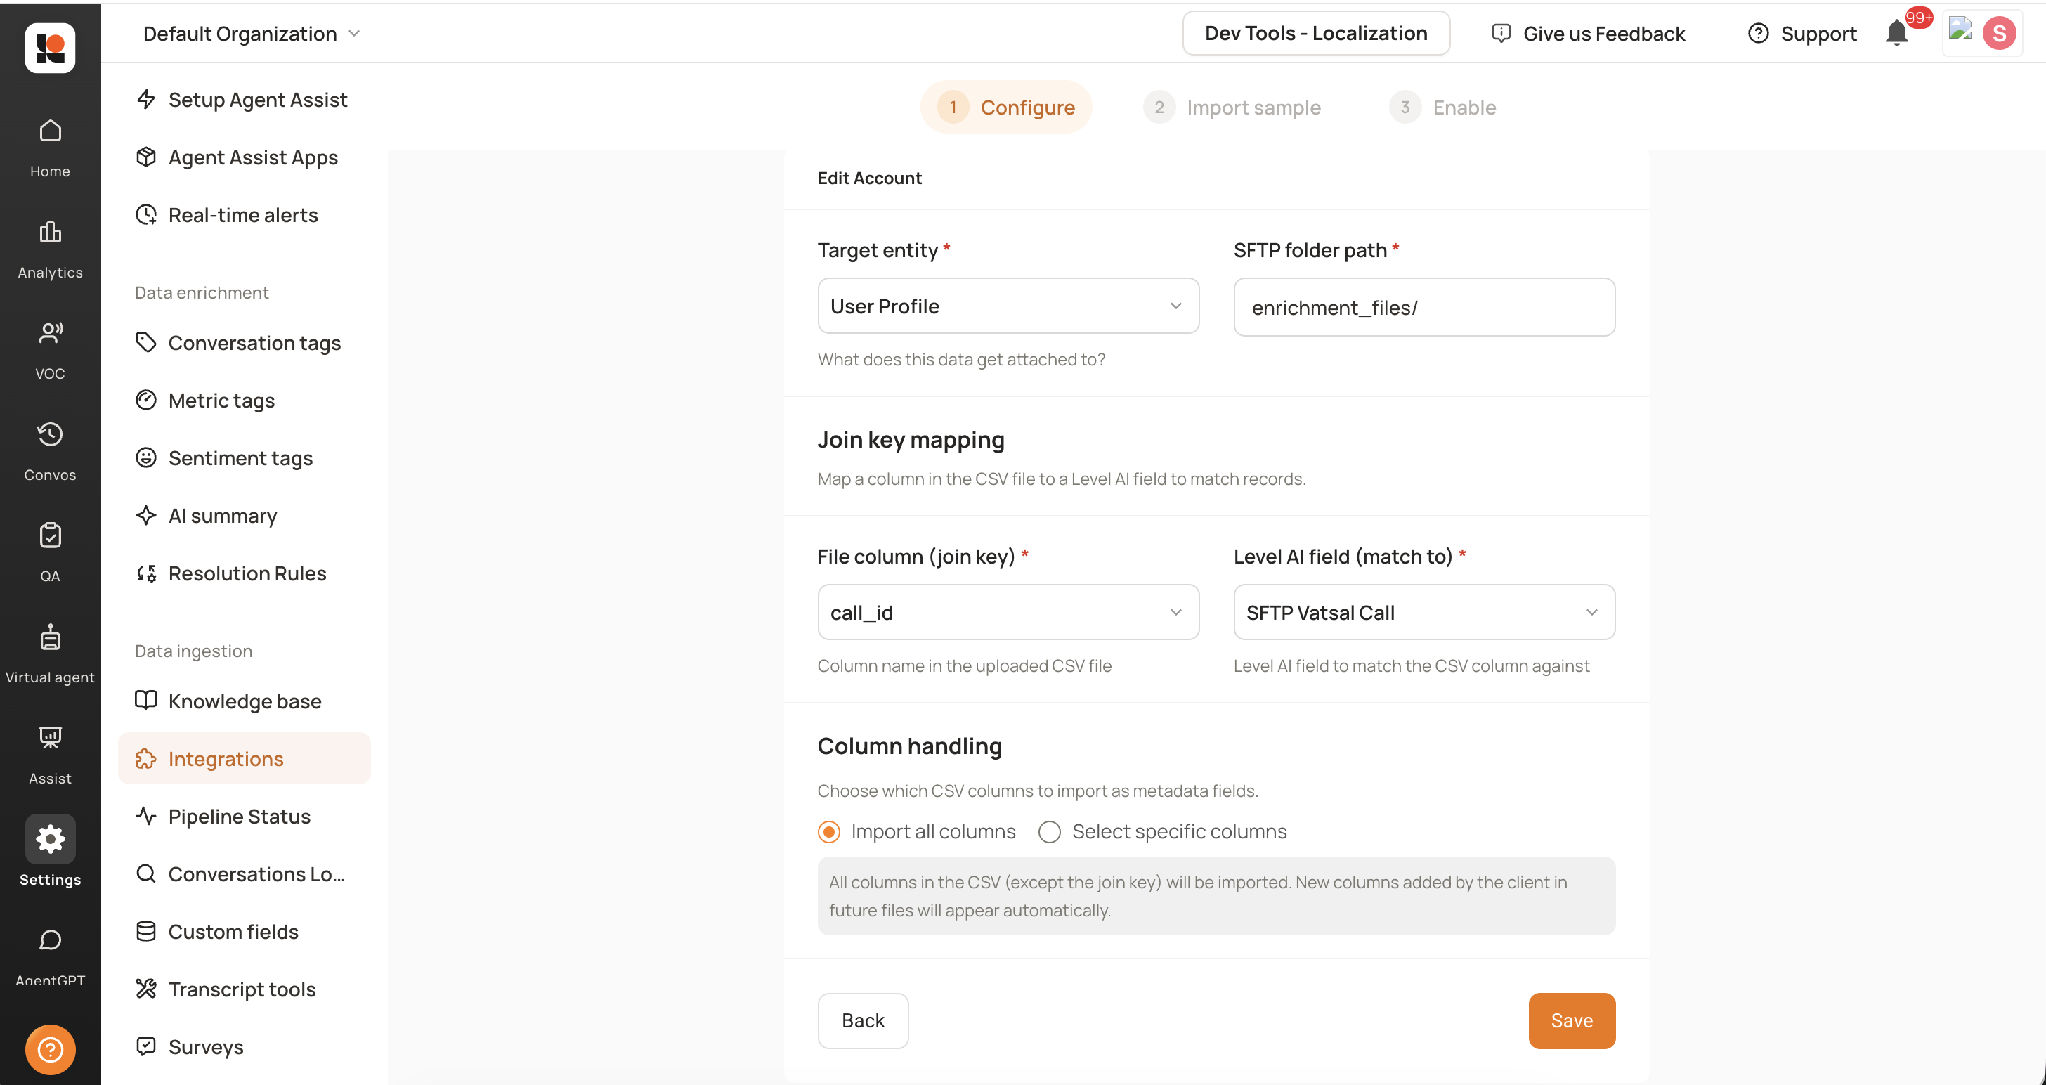
Configure stage with Import all columns selected
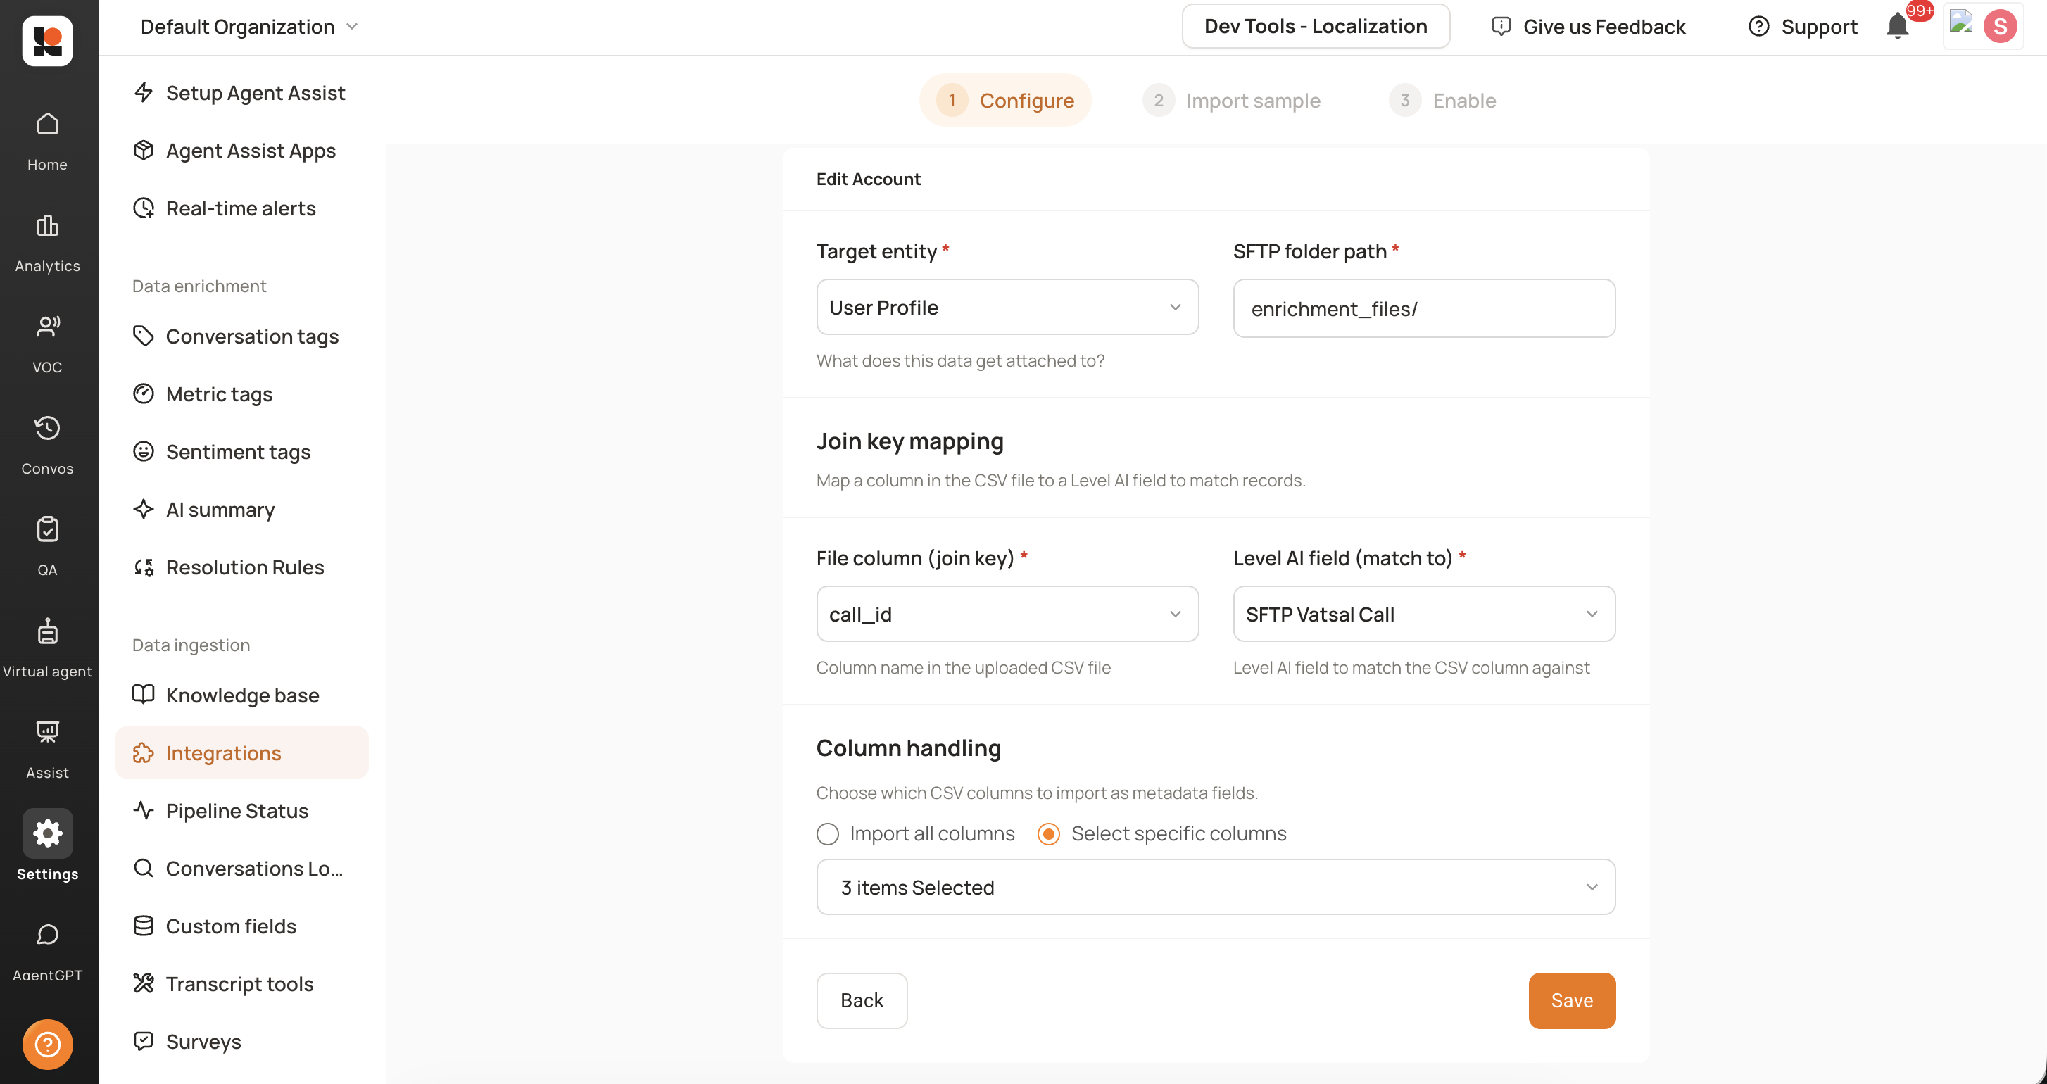
Configure stage with Select specific columns chosen
Click Save to move to the next stage.
Step 4: Import a sample
Before going live, import a sample set of enrichments so you can verify that the mapping is producing the results you expect.
Choose a sample size — Last 100, Last 500, or Last 1000 enrichments. We recommend 100 to 200 enrichments.
Tick I have verified all configurations and click Import sample.
If you have already validated the configuration and want to move straight to enablement, click Skip.
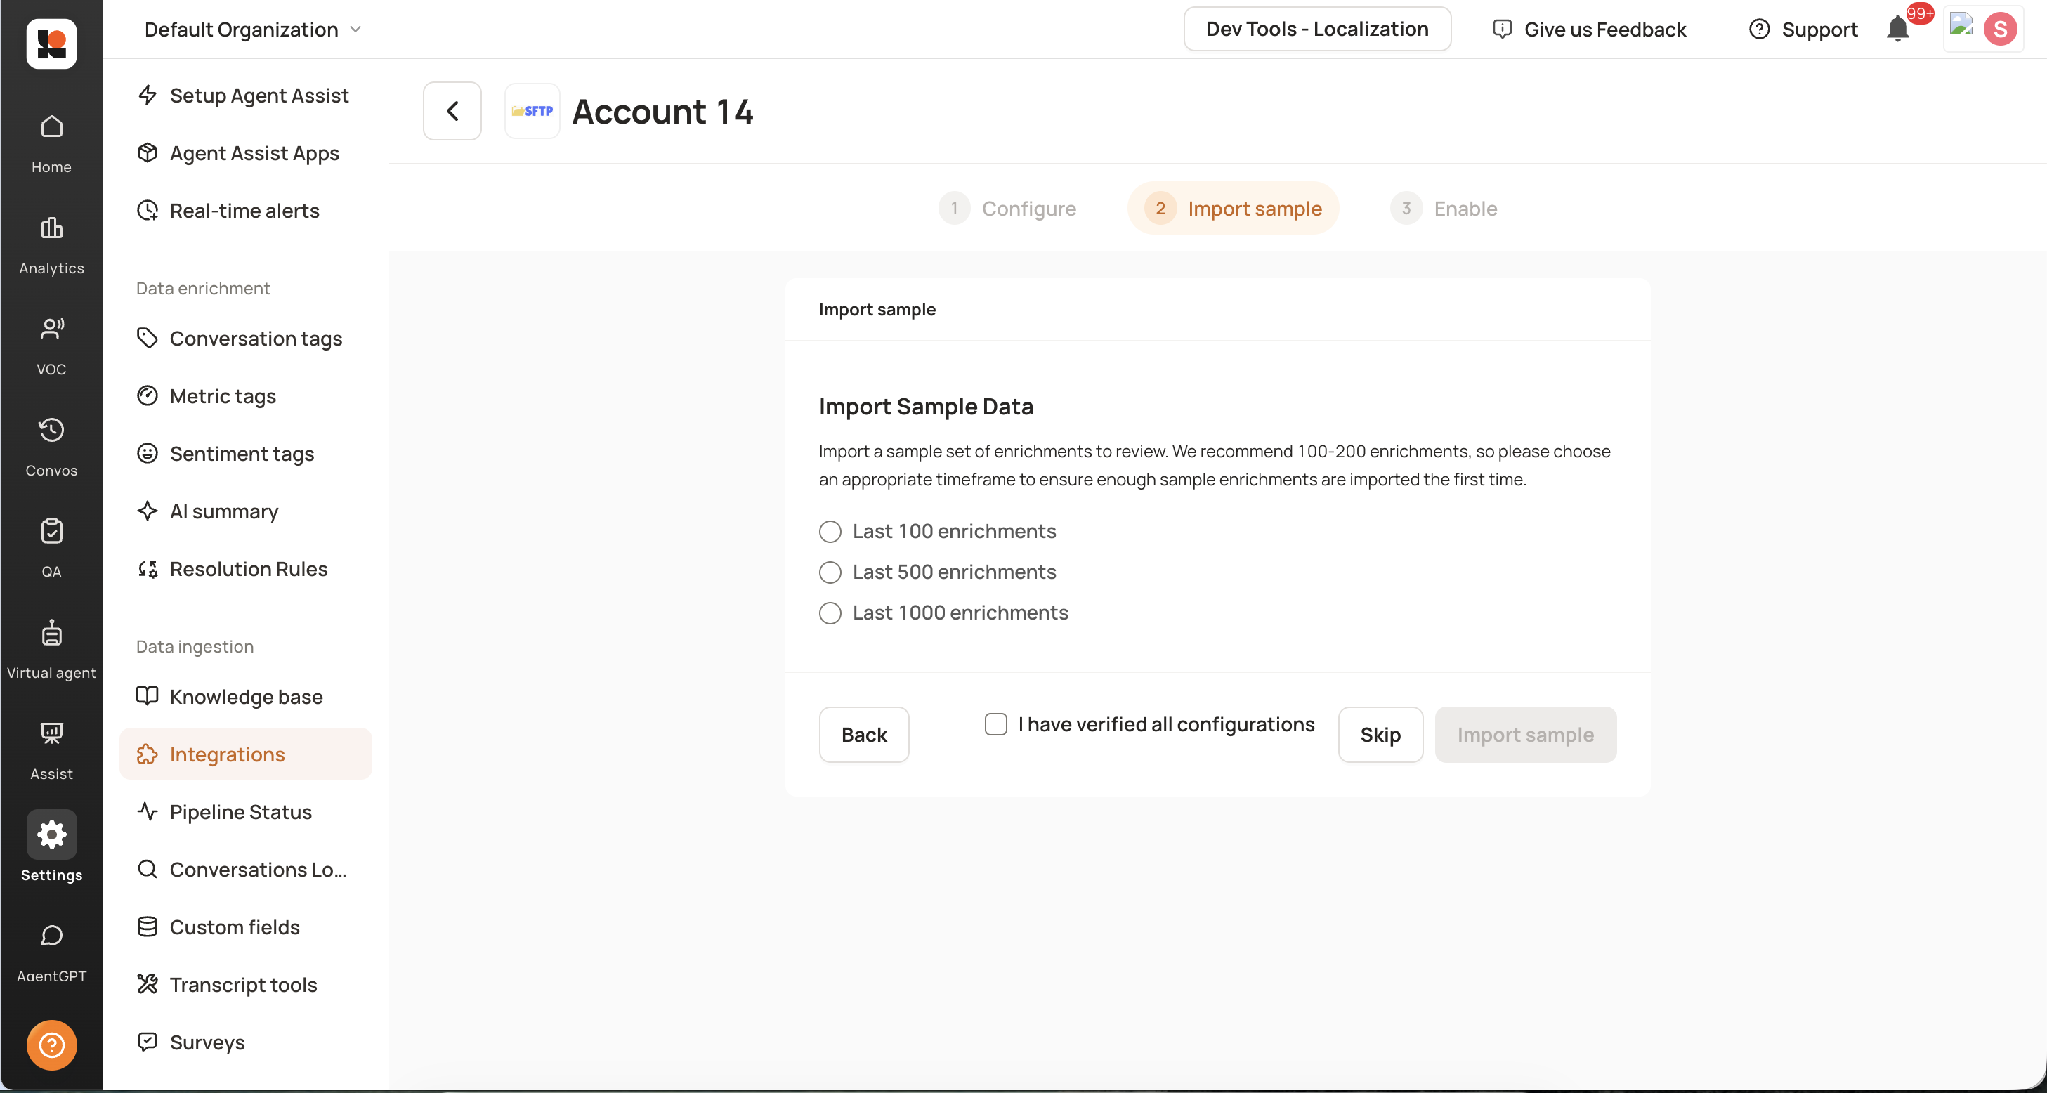
Importing a sample set of enrichments for review
After the sample import completes, review the enriched records in Level AI to confirm the fields landed correctly.
Step 5: Review and enable
The final stage shows a summary of your configuration — target entity, SFTP folder path, join key mapping, and column handling.
Review the summary, then click Enable.
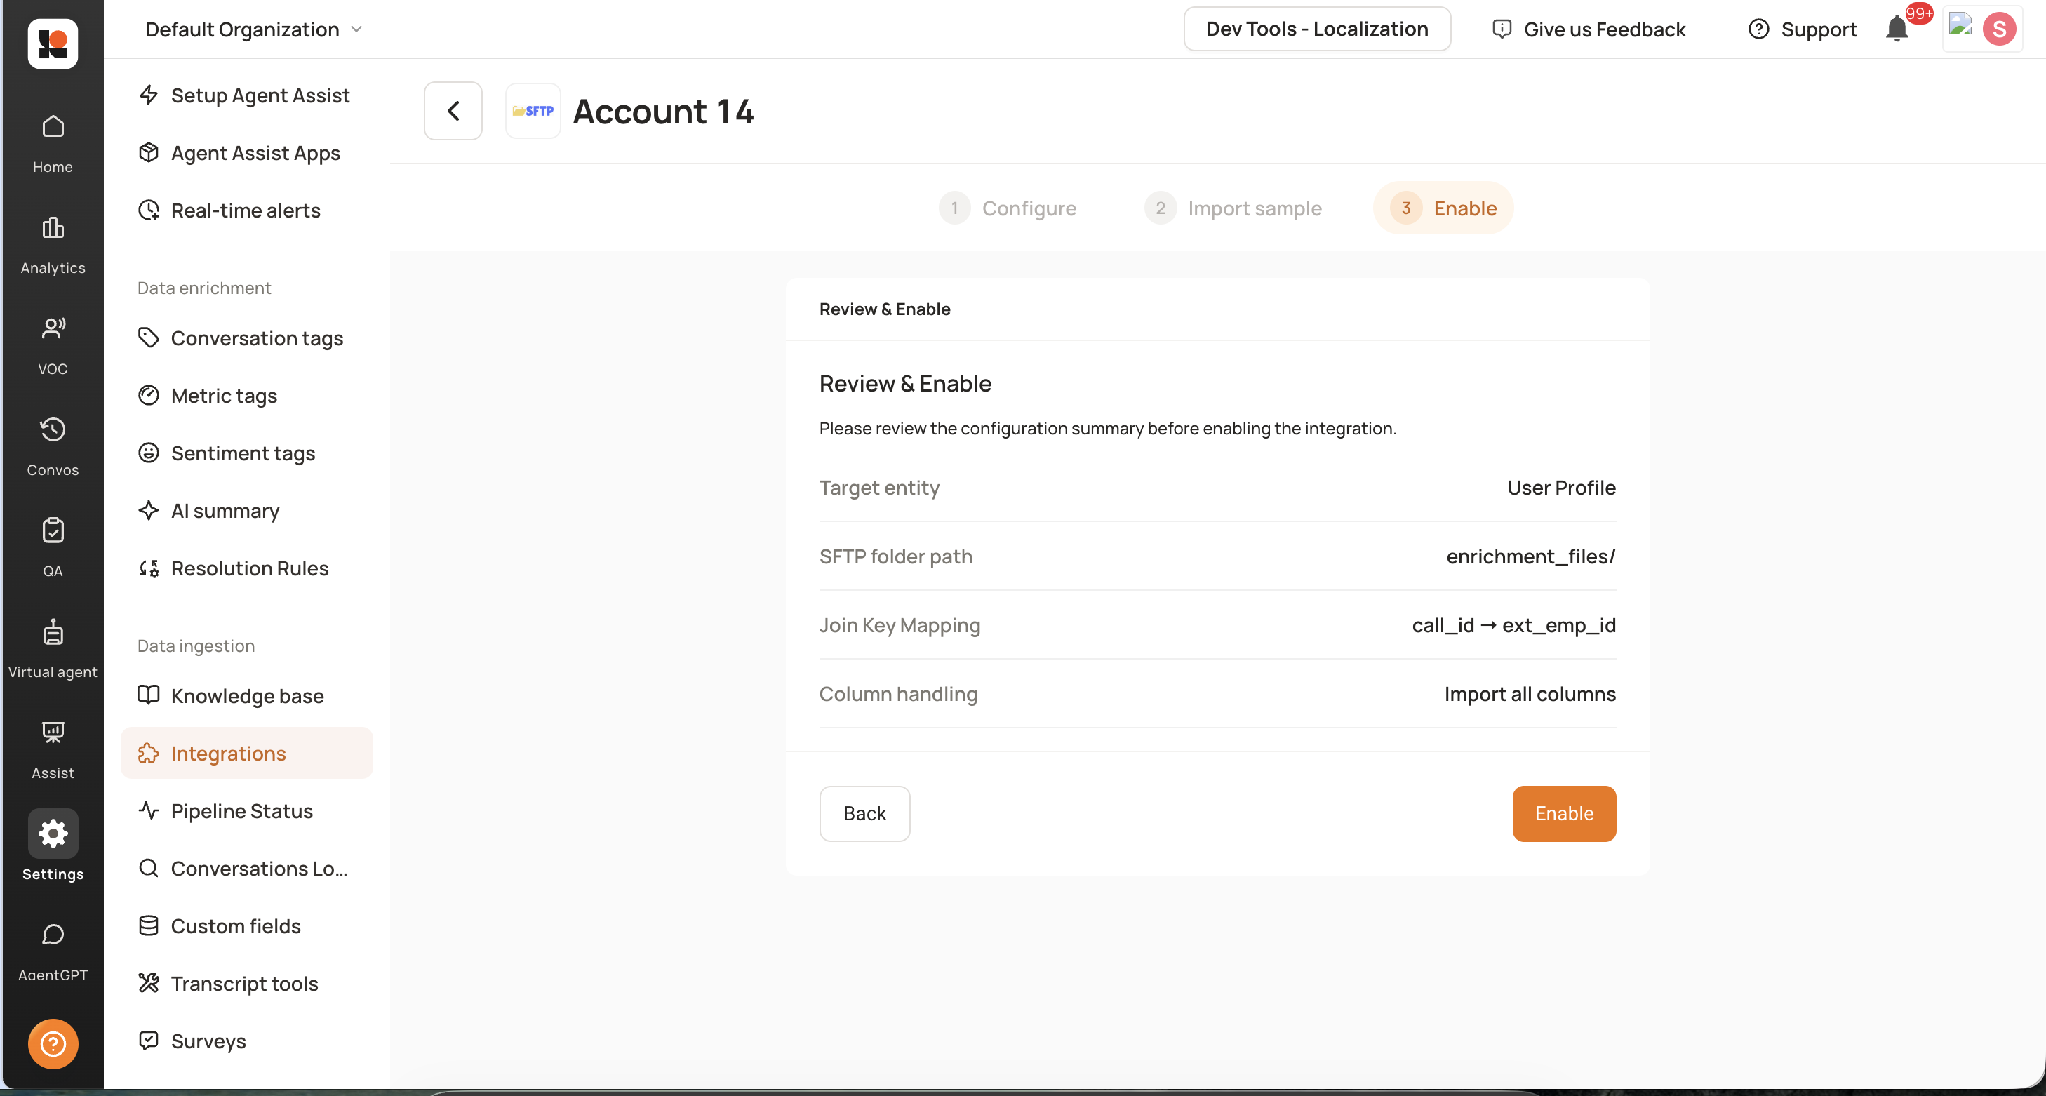
Reviewing the configuration summary before enabling
The account now moves to Enabled Accounts and begins syncing data automatically. New files dropped into the configured SFTP folder are picked up and processed without any further action.
Managing an Enrichment
All connected SFTP accounts are managed from Settings → Integrations → Metadata Enrichment → SFTP Metadata Enrichment.
The account management screen has two sections:
Enabled Accounts — accounts that are fully configured and syncing data automatically.
Connected Accounts — accounts that are authenticated but not yet fully configured. Click one to complete its setup.
Use the three-dot menu next to an account to manage it.
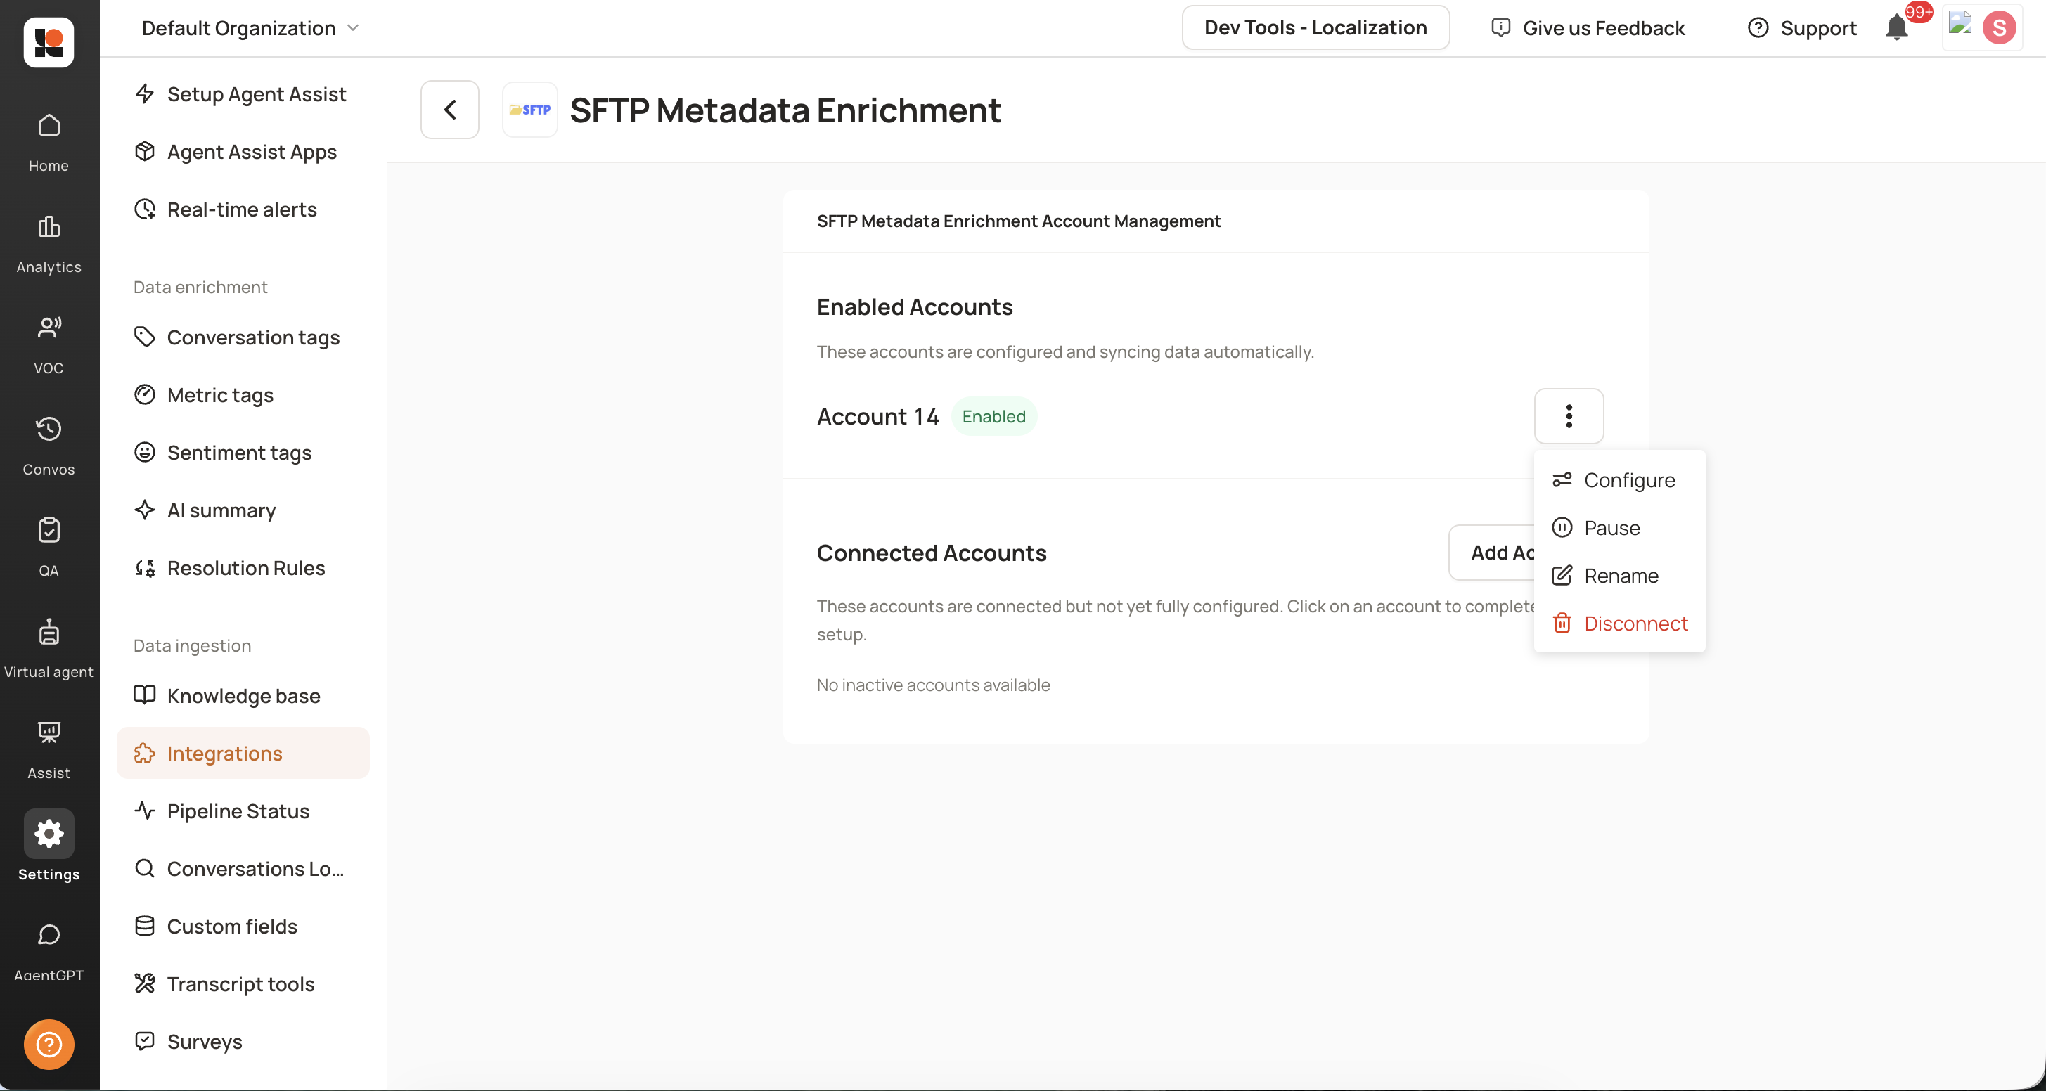
Account management options: Configure, Pause, Rename, Disconnect
Action | What it does |
|---|---|
Configure | Reopens the setup wizard so you can change the target entity, folder path, join key mapping, or column selection. |
Pause | Temporarily stops the account from syncing. Existing enriched metadata is unaffected. |
Rename | Changes the display name of the account. Useful when you have multiple accounts and want to identify them by purpose, for example "Conversation enrichment" or "Agent roster". |
Disconnect | Removes the SFTP connection entirely. Syncing stops and the credentials are removed. |
Frequently Asked Questions
Can I change the columns being imported after enabling?
Yes. Use Configure on the account to switch between importing all columns and selecting specific columns, or to change which columns are selected.
What happens if I add a new column to my file?
If the account is set to Import all columns, new columns appear automatically. If it is set to Select specific columns, reconfigure the account to include the new column.
Can one SFTP account enrich both conversations and user profiles?
No. Each account targets a single entity. Connect a second account using Add Account and configure it with the other target entity.
What happens to rows that don't match?
Unmatched rows are skipped and the rest of the file is processed normally. See the file requirements article for details.
Where does enriched metadata appear?
Conversation metadata appears in the Case details section of the conversation details page. User profile metadata appears on the user's profile.