Five9 VCC Voice Config for Historical Import
Last updated: June 22, 2026
This article is for performing VCC changes for importing historical data from five9.
Follow the steps of VCC Setup for respective channels and drop the files in different paths:
📄 Five9 VCC Setup for Voice Channel
📄 Five9 VCC Setup for Chat/SMS/Email channels
Paths for different channels
For Voice:
Calls: /historical/files
Metadata reports: /historical/files/reports
For Chat/Email/SMS:
Reports: /historical//reports
Sending Historical Data
For Metadata and Agent Reports
Metadata Report
From the Five9 homepage, log in to your Five9 Cloud Contact Center.
Navigate to Dashboard and Reports
Navigate to Custom Reports
Click Create New Custom Report
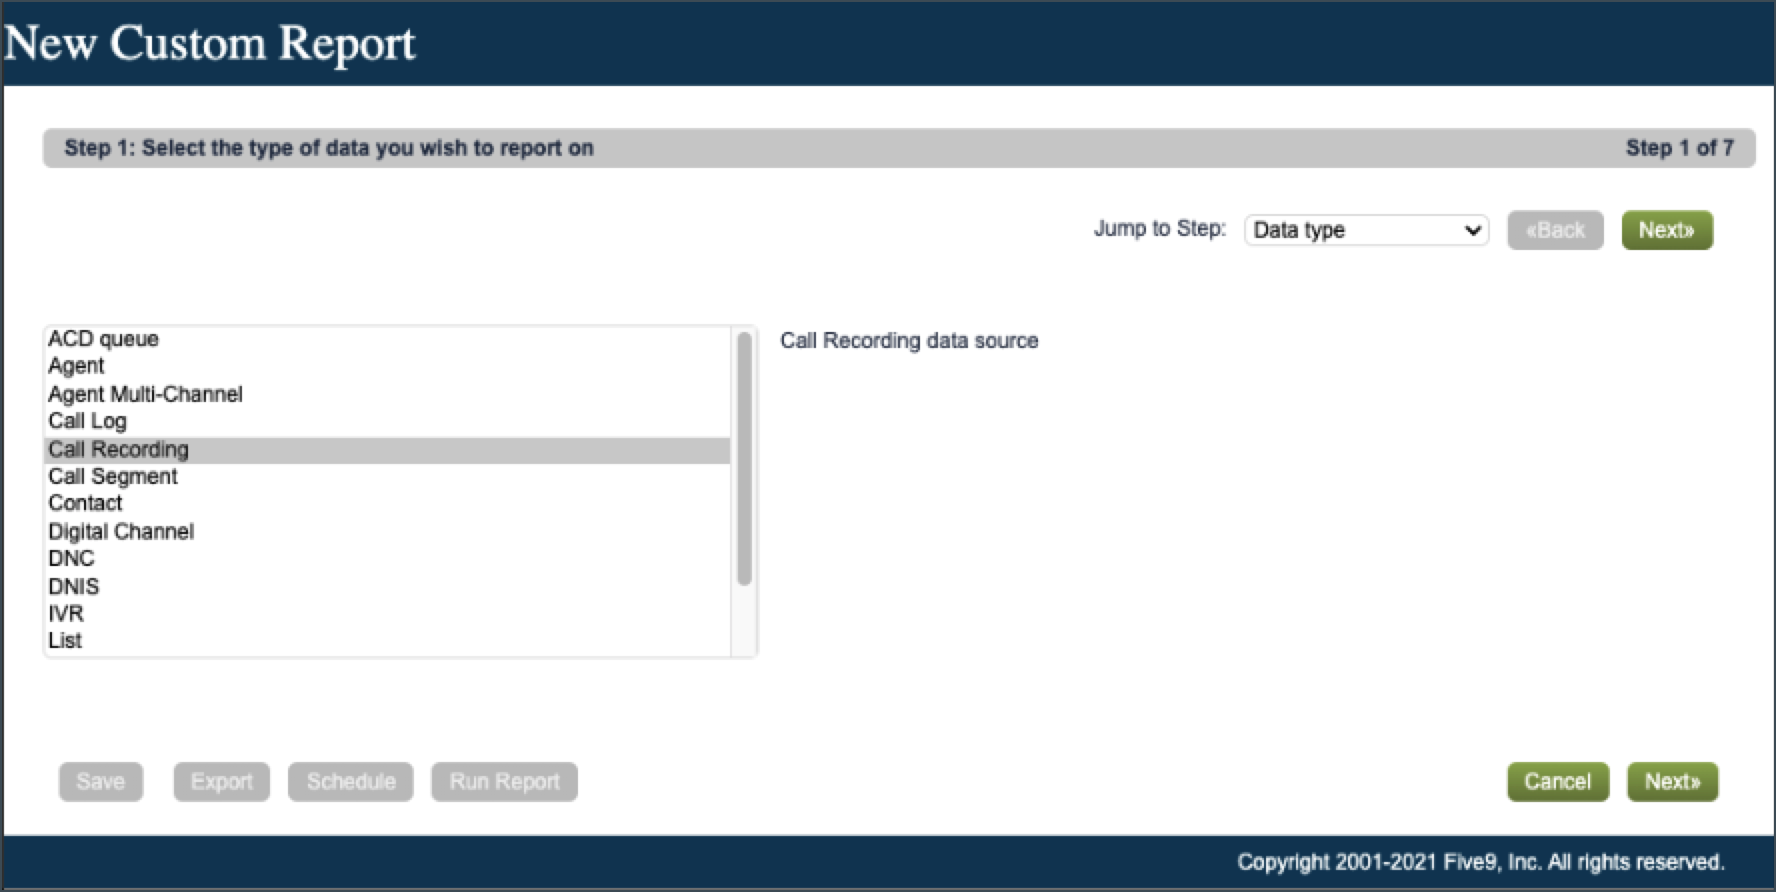
Complete each respective step of the report creation process as follows
Step 1: Call Recording
Step 2: Tabular Report
Step 3: Level AI recommends that you select all columns EXCEPT for Worksheet data since these are the fields you’ll be able to see and potentially filter on in Level AI
The minimum set of columns Level AI needs to successfully process a conversation are: AGENT, FILENAME, AGENT LAST NAME, AGENT ID, AGENT FIRST NAME, AGENT NAME, TIMESTAMP, SESSION ID
Step 4: <accept default and click Next>
Step 5: <accept default and click Next>
Step 6: TIMESTAMP
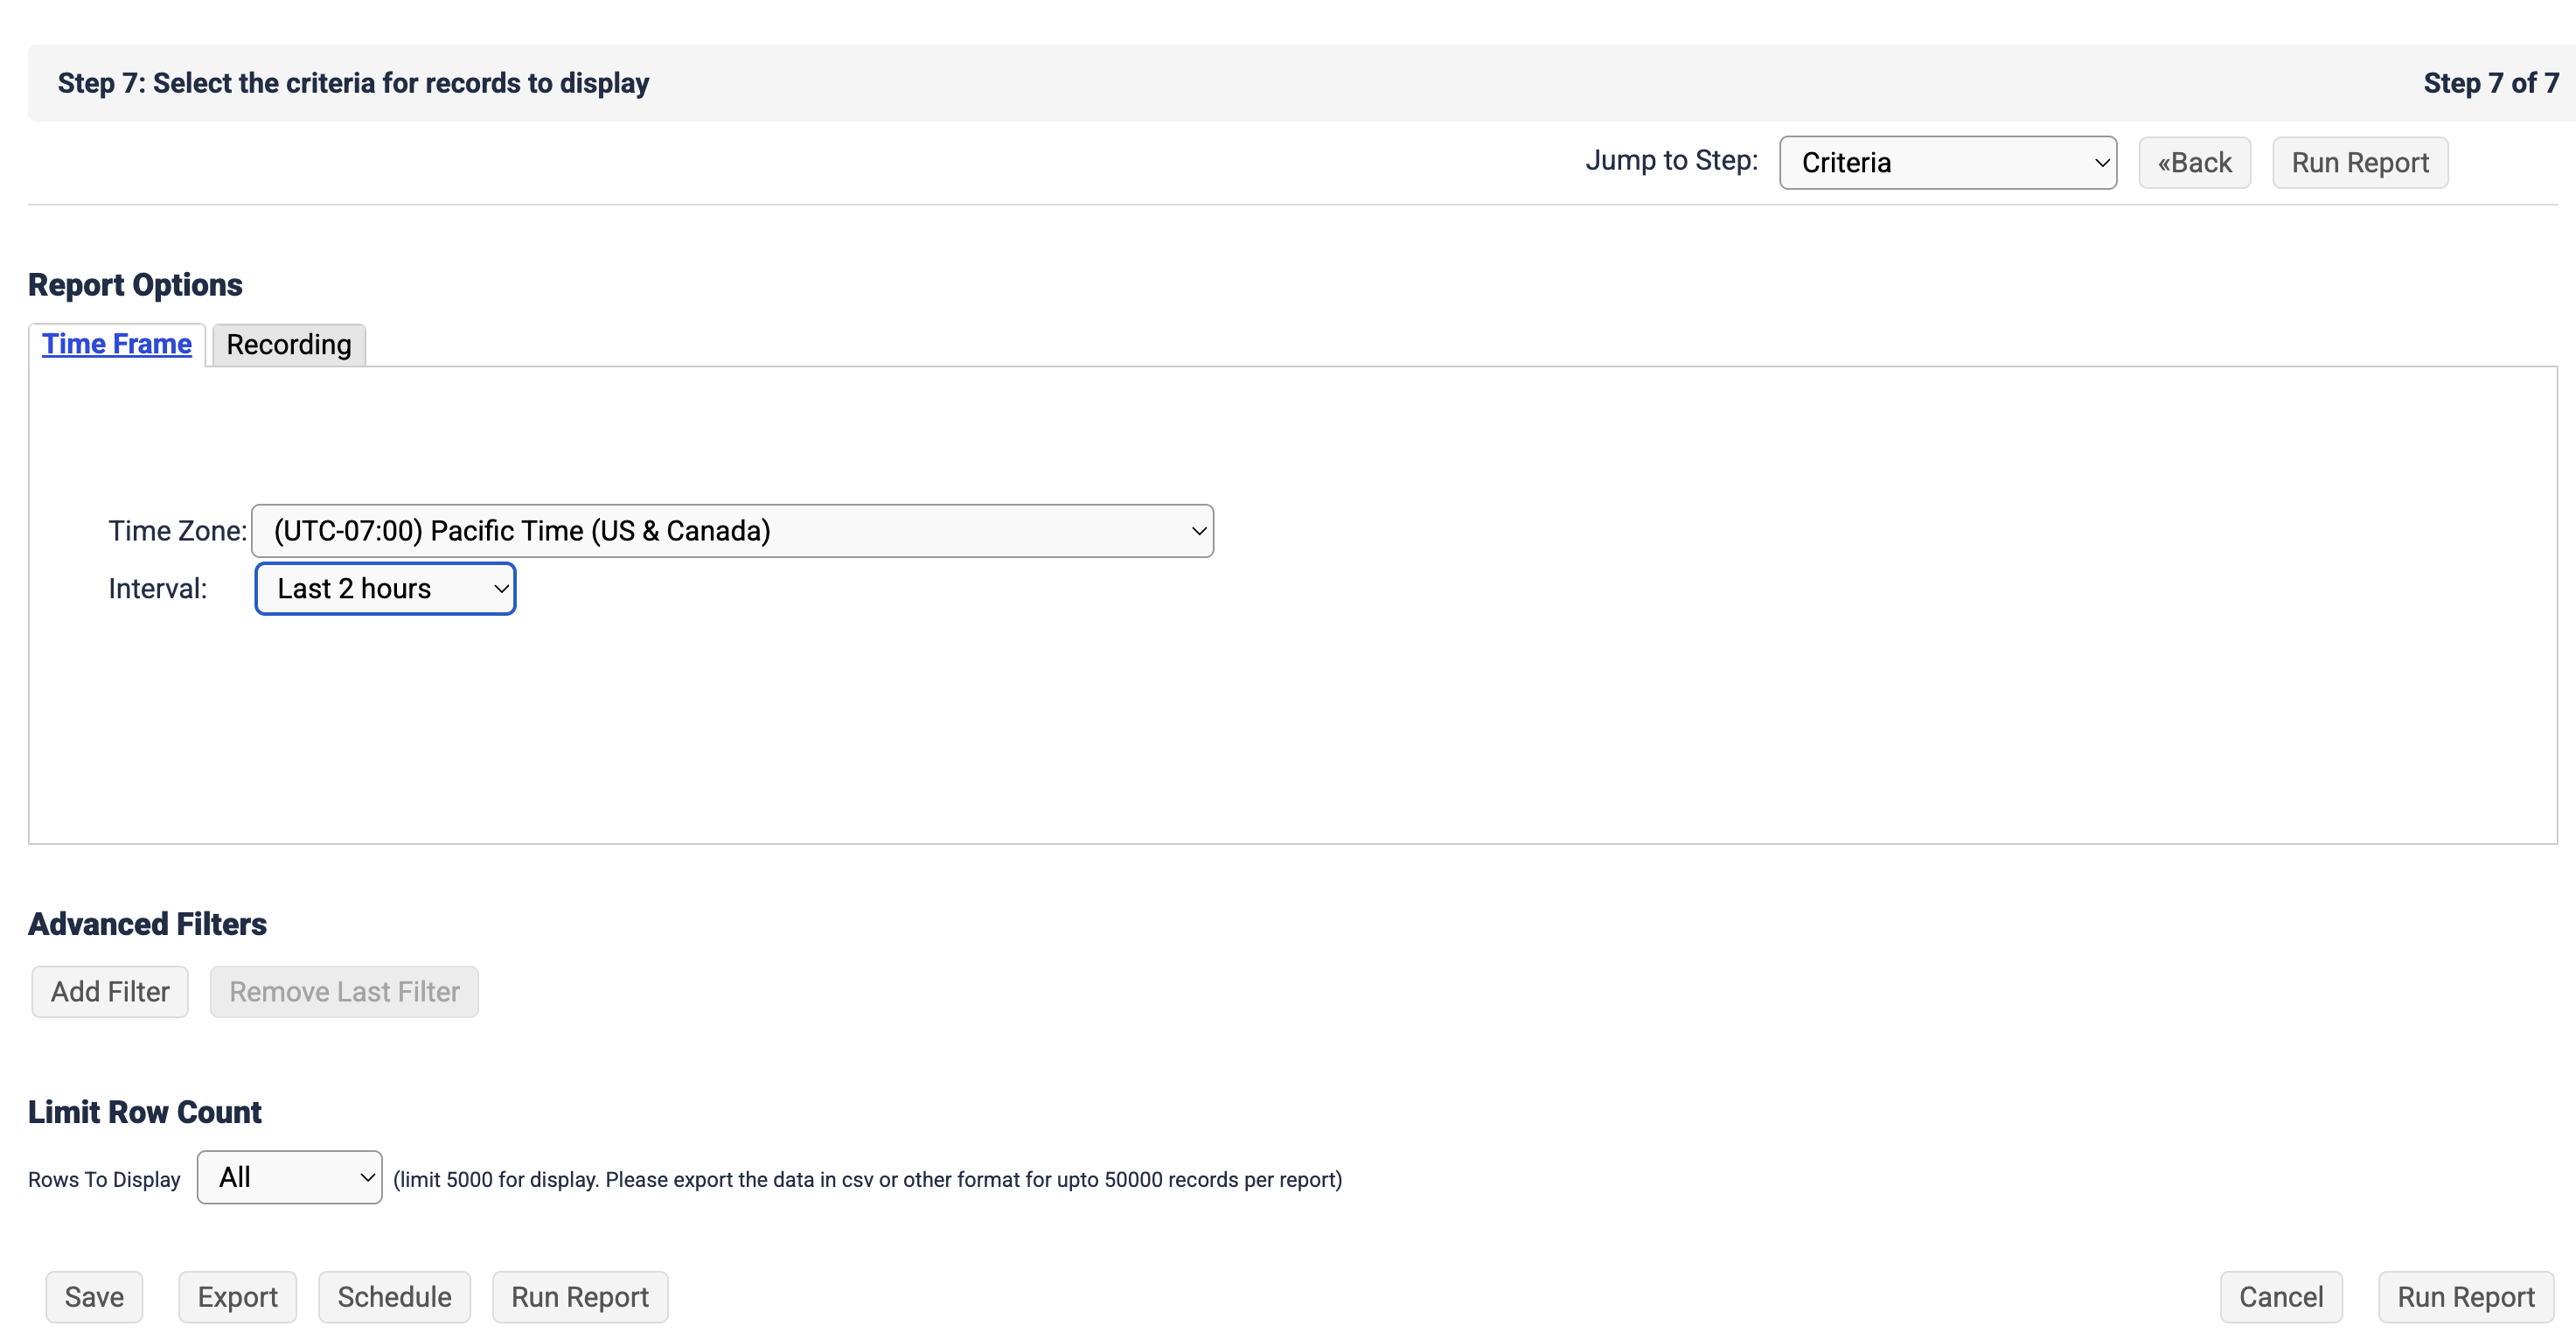
Step 7:
Time Zone: choose your timezone
Interval: Last 2 Hours
Add any additional filters you might need; e.g. CAMPAIGN
OPTIONAL: Click Save to save the report in the event you need to make adjustments in the future.
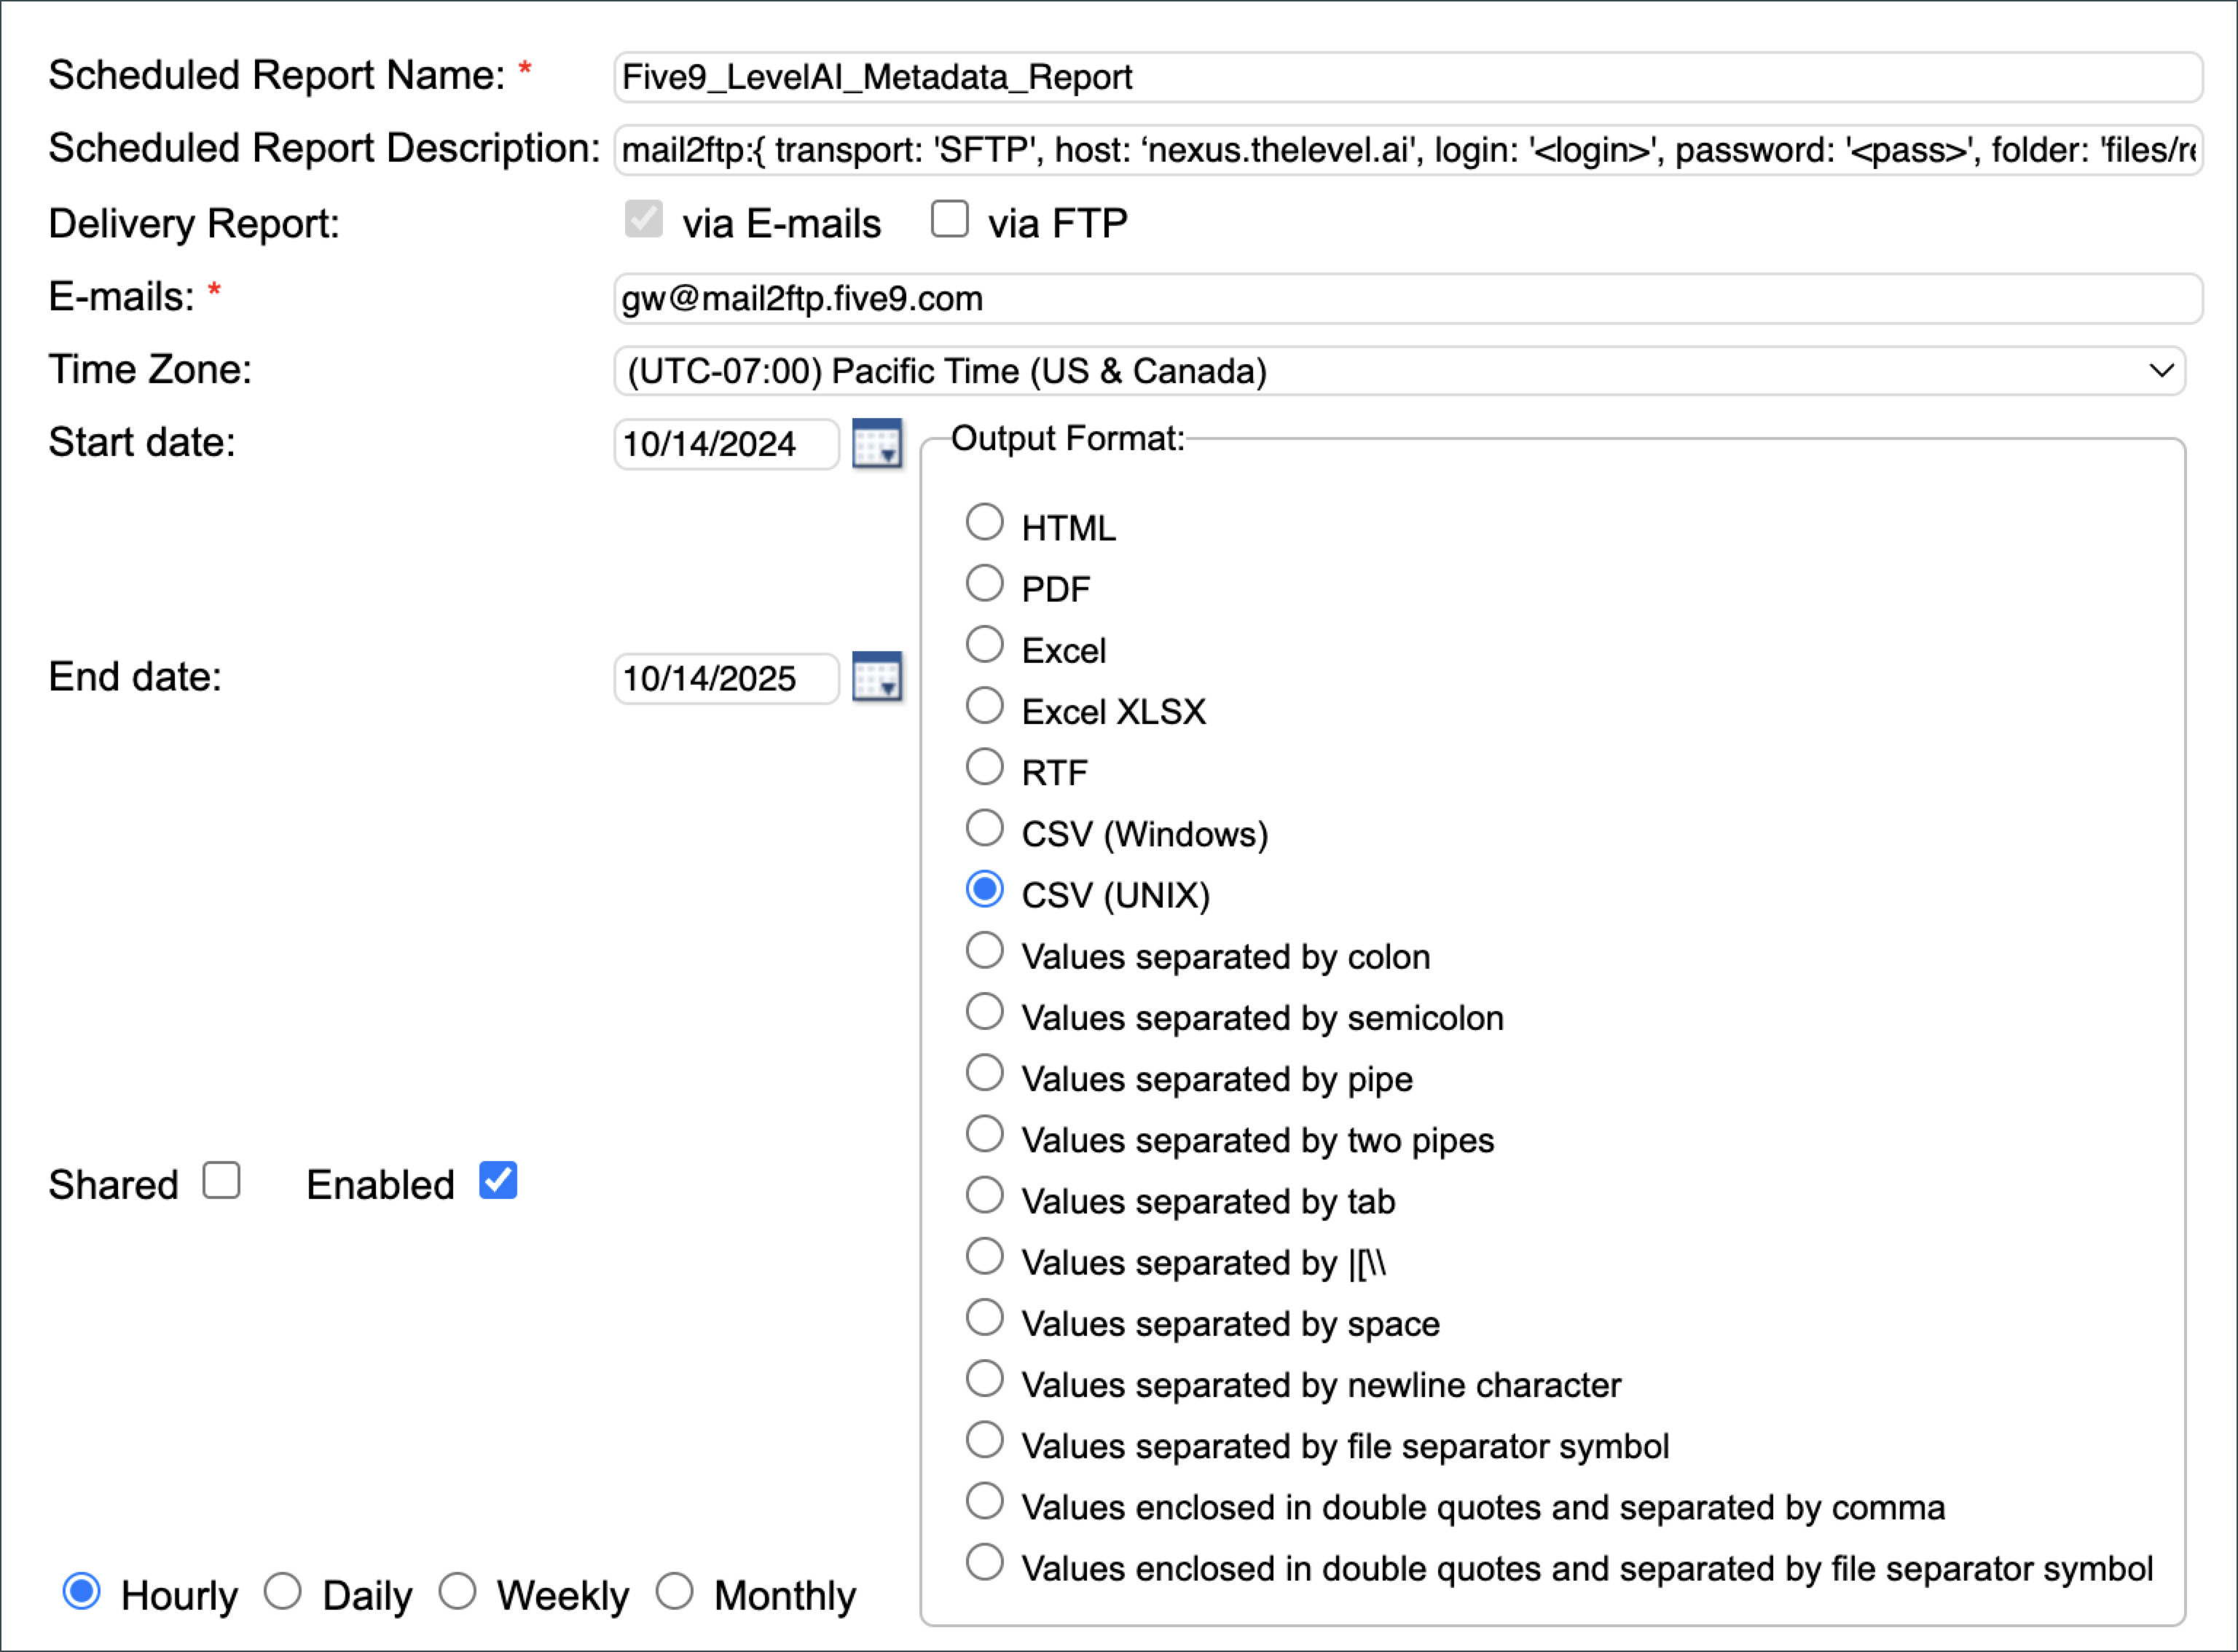
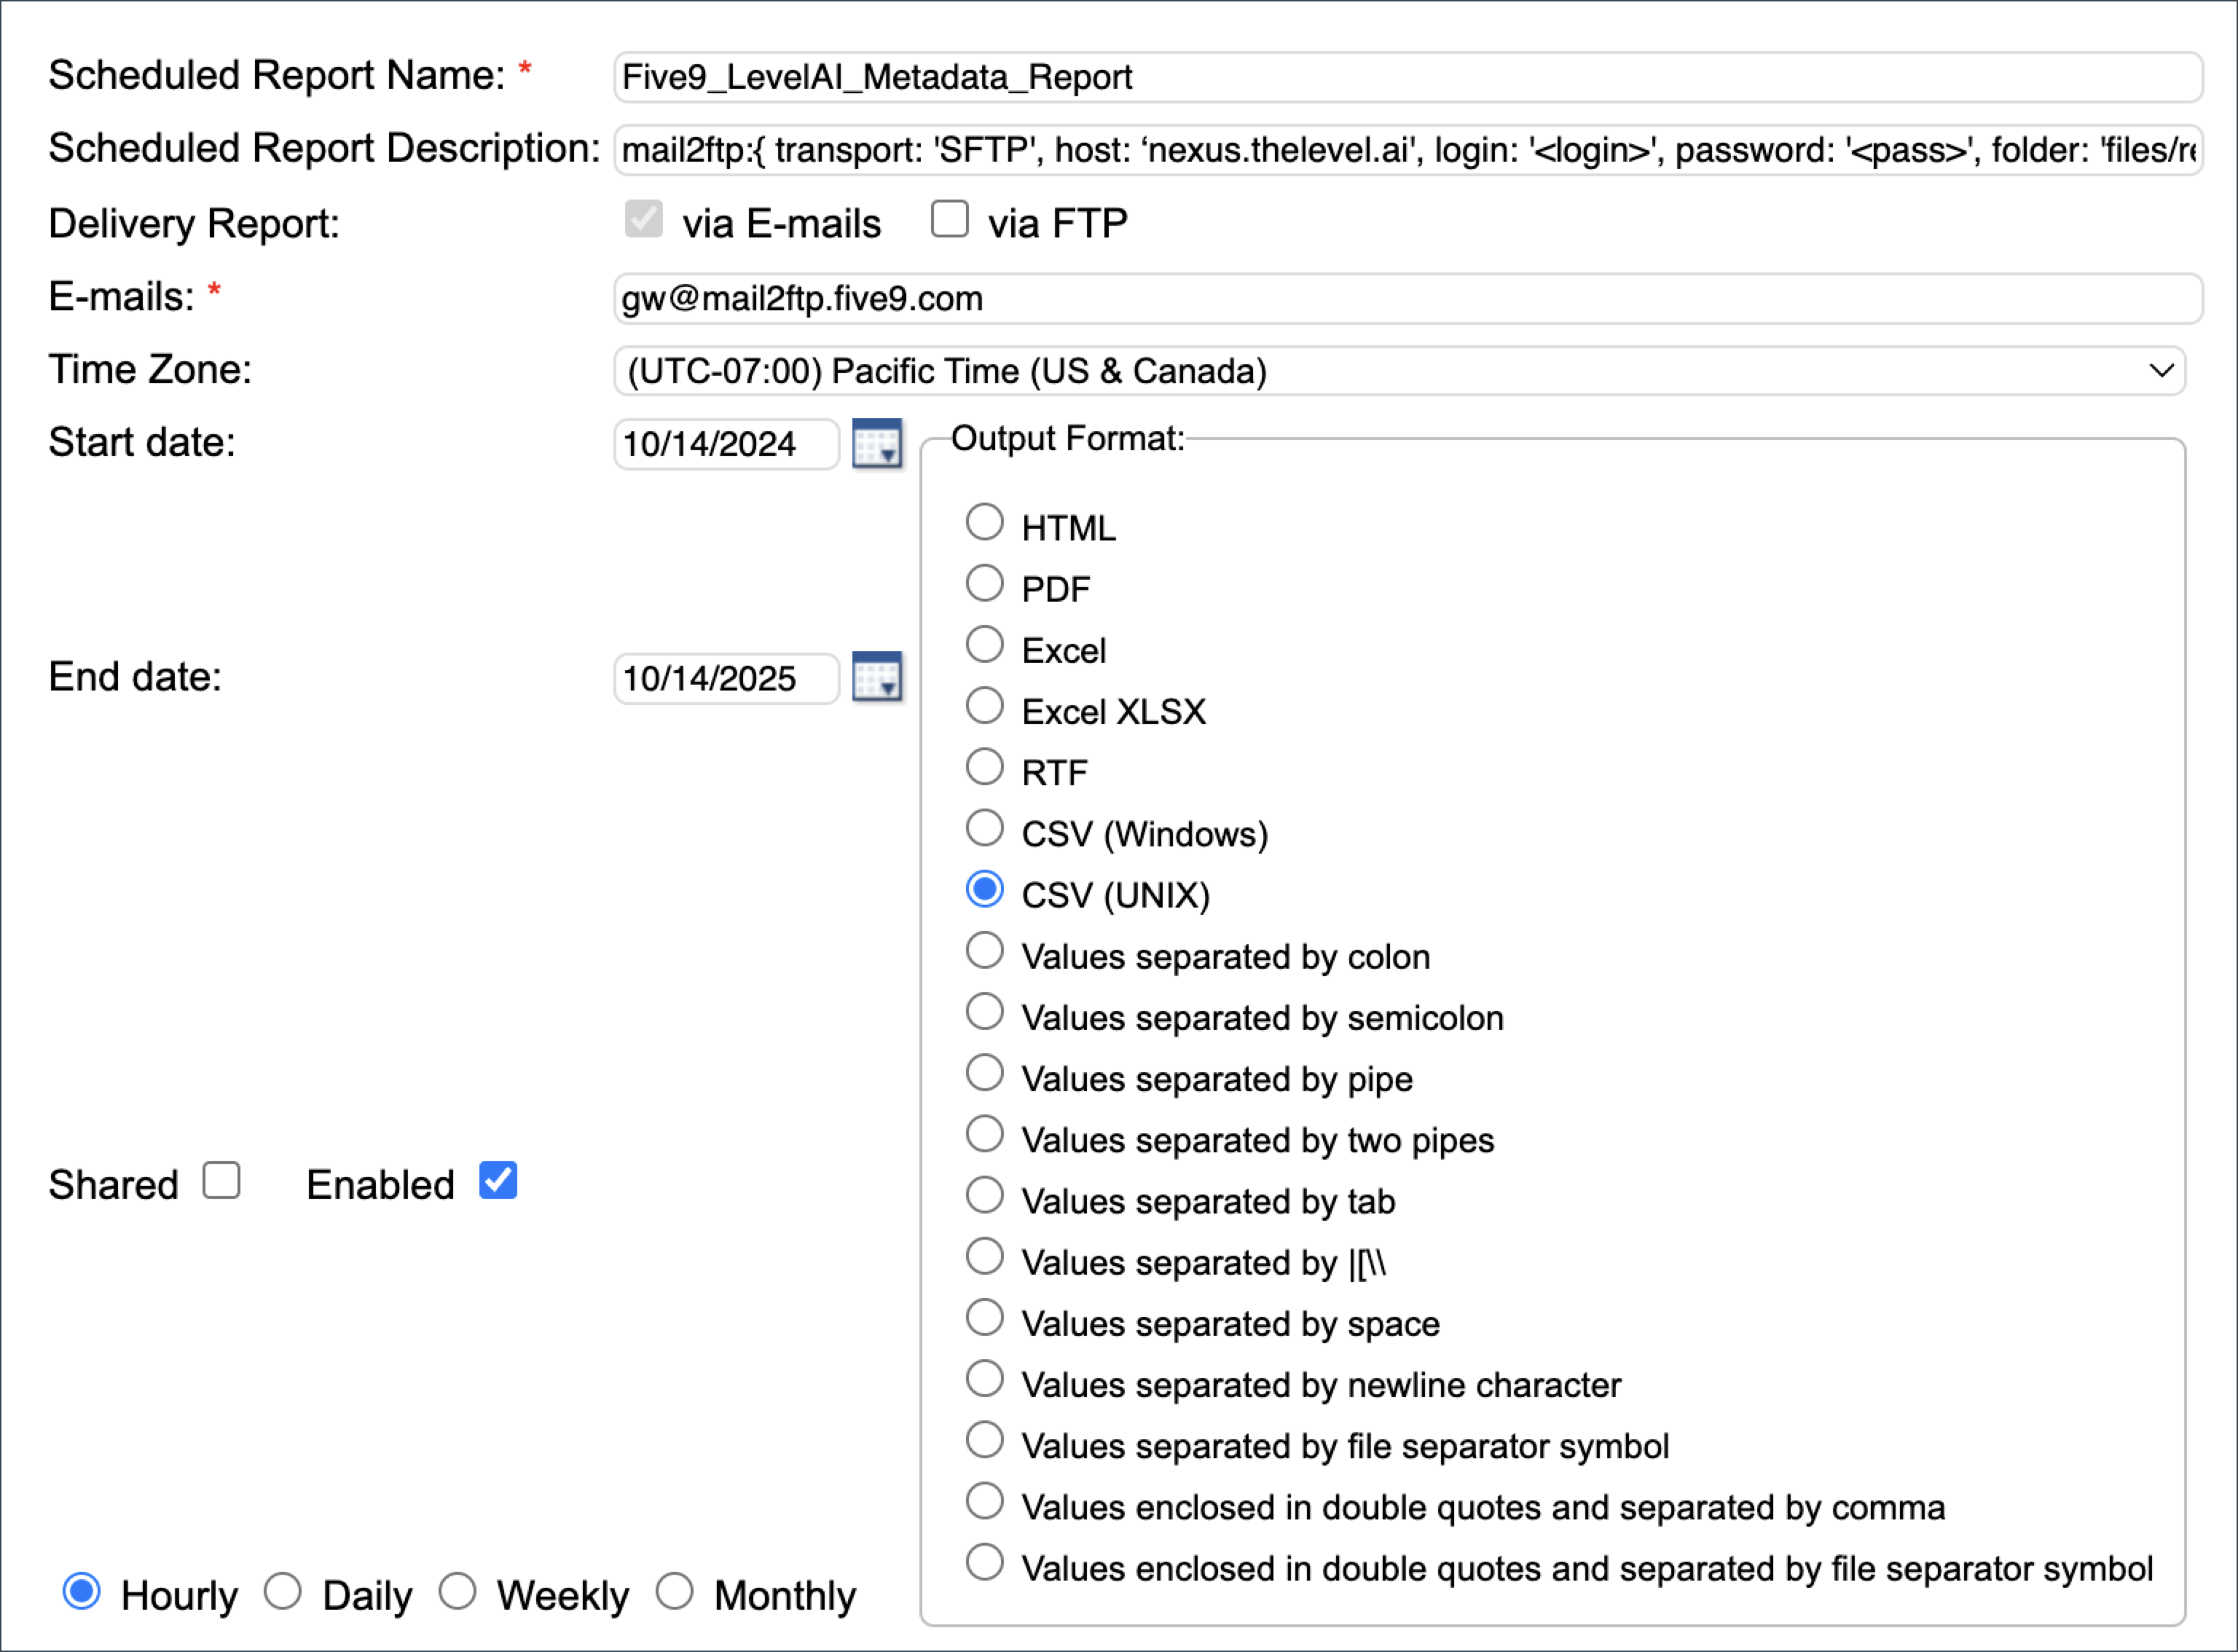
Set the schedule for the report as illustrated.
Scheduled Report Name: Five9_LevelAI_Metadata_Report
Scheduled Report Description: copy and paste the text below and make the adjustments listed
Replace <login> and <password> with the actual values provided by your IM/TAM
Set the onfailure <email> to that of your Five9 Admin. This will notify your Admin in case of any failures in sending the scheduled report to Level AI.
mail2ftp:{ transport: 'SFTP', host: 'nexus.thelevel.ai', login: '', password: '', folder: 'historical/files/reports', onFailure: '', filename:'Metadata_Report%Y_%m-%d_%H_%M.csv', port: '22'}NOTE
- The field has a 255 character limit.
- Replace the terms within ' ' with the relevant values. Make sure you use single quotes and not back ticks.
Delivery Report: via E-mails
Emails: gw@mail2ftp.five9.com
Time Zone: choose your timezone
Start date: today's date or other desired start date
End date: choose a date that is as far out as the screen allows
Enabled:
Output Format: CSV (UNIX)
Hourly - check the box for each hour
Agent Report
This report helps link calls to the proper agent during transfers.
From the Five9 homepage, log in to your Five9 Cloud Contact Center.
Navigate to Dashboard and Reports
Navigate to Custom Reports
Click Create New Custom Report
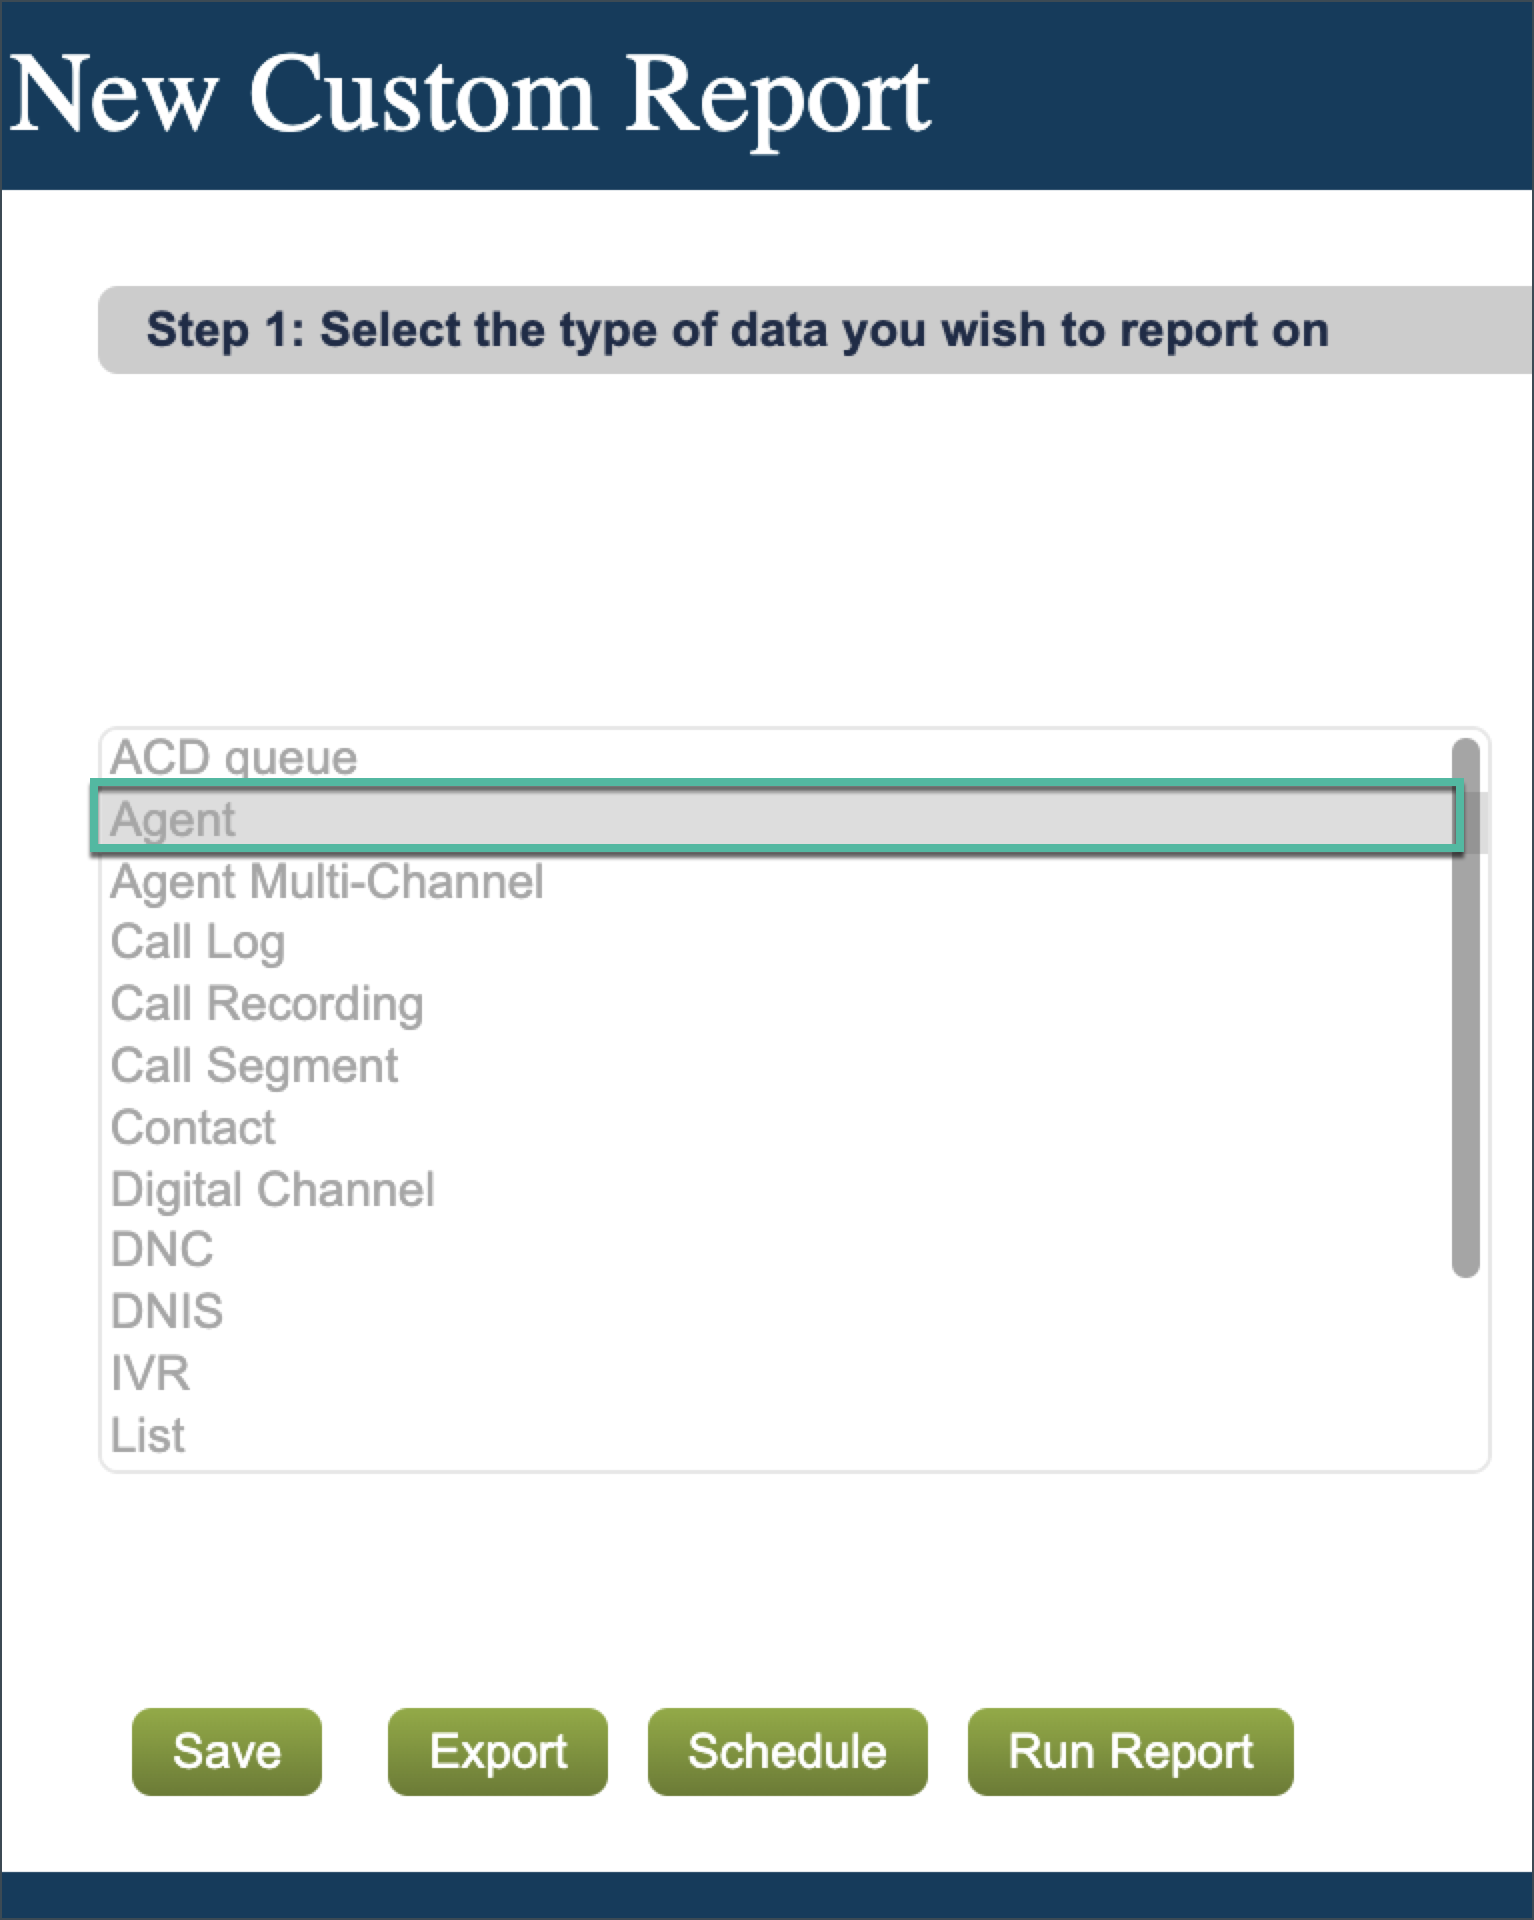
Complete each respective step of the report creation process as follows
Step 1: Agent
Step 2: Tabular Report
Step 3: Select these columns: AGENT, AGENT EMAIL, AGENT GROUP, AGENT ID, AGENT NAME, DATE, TIMESTAMP
Step 4: <accept default and click Next>
Step 5: <accept default and click Next>
Step 6: TIMESTAMP
Step 7:
Time Zone: choose your timezone
Interval: Last 2 Hours
Add any additional filters you might need; e.g. CAMPAIGN
OPTIONAL: Click Save to save the report in the event you need to make adjustments in the future
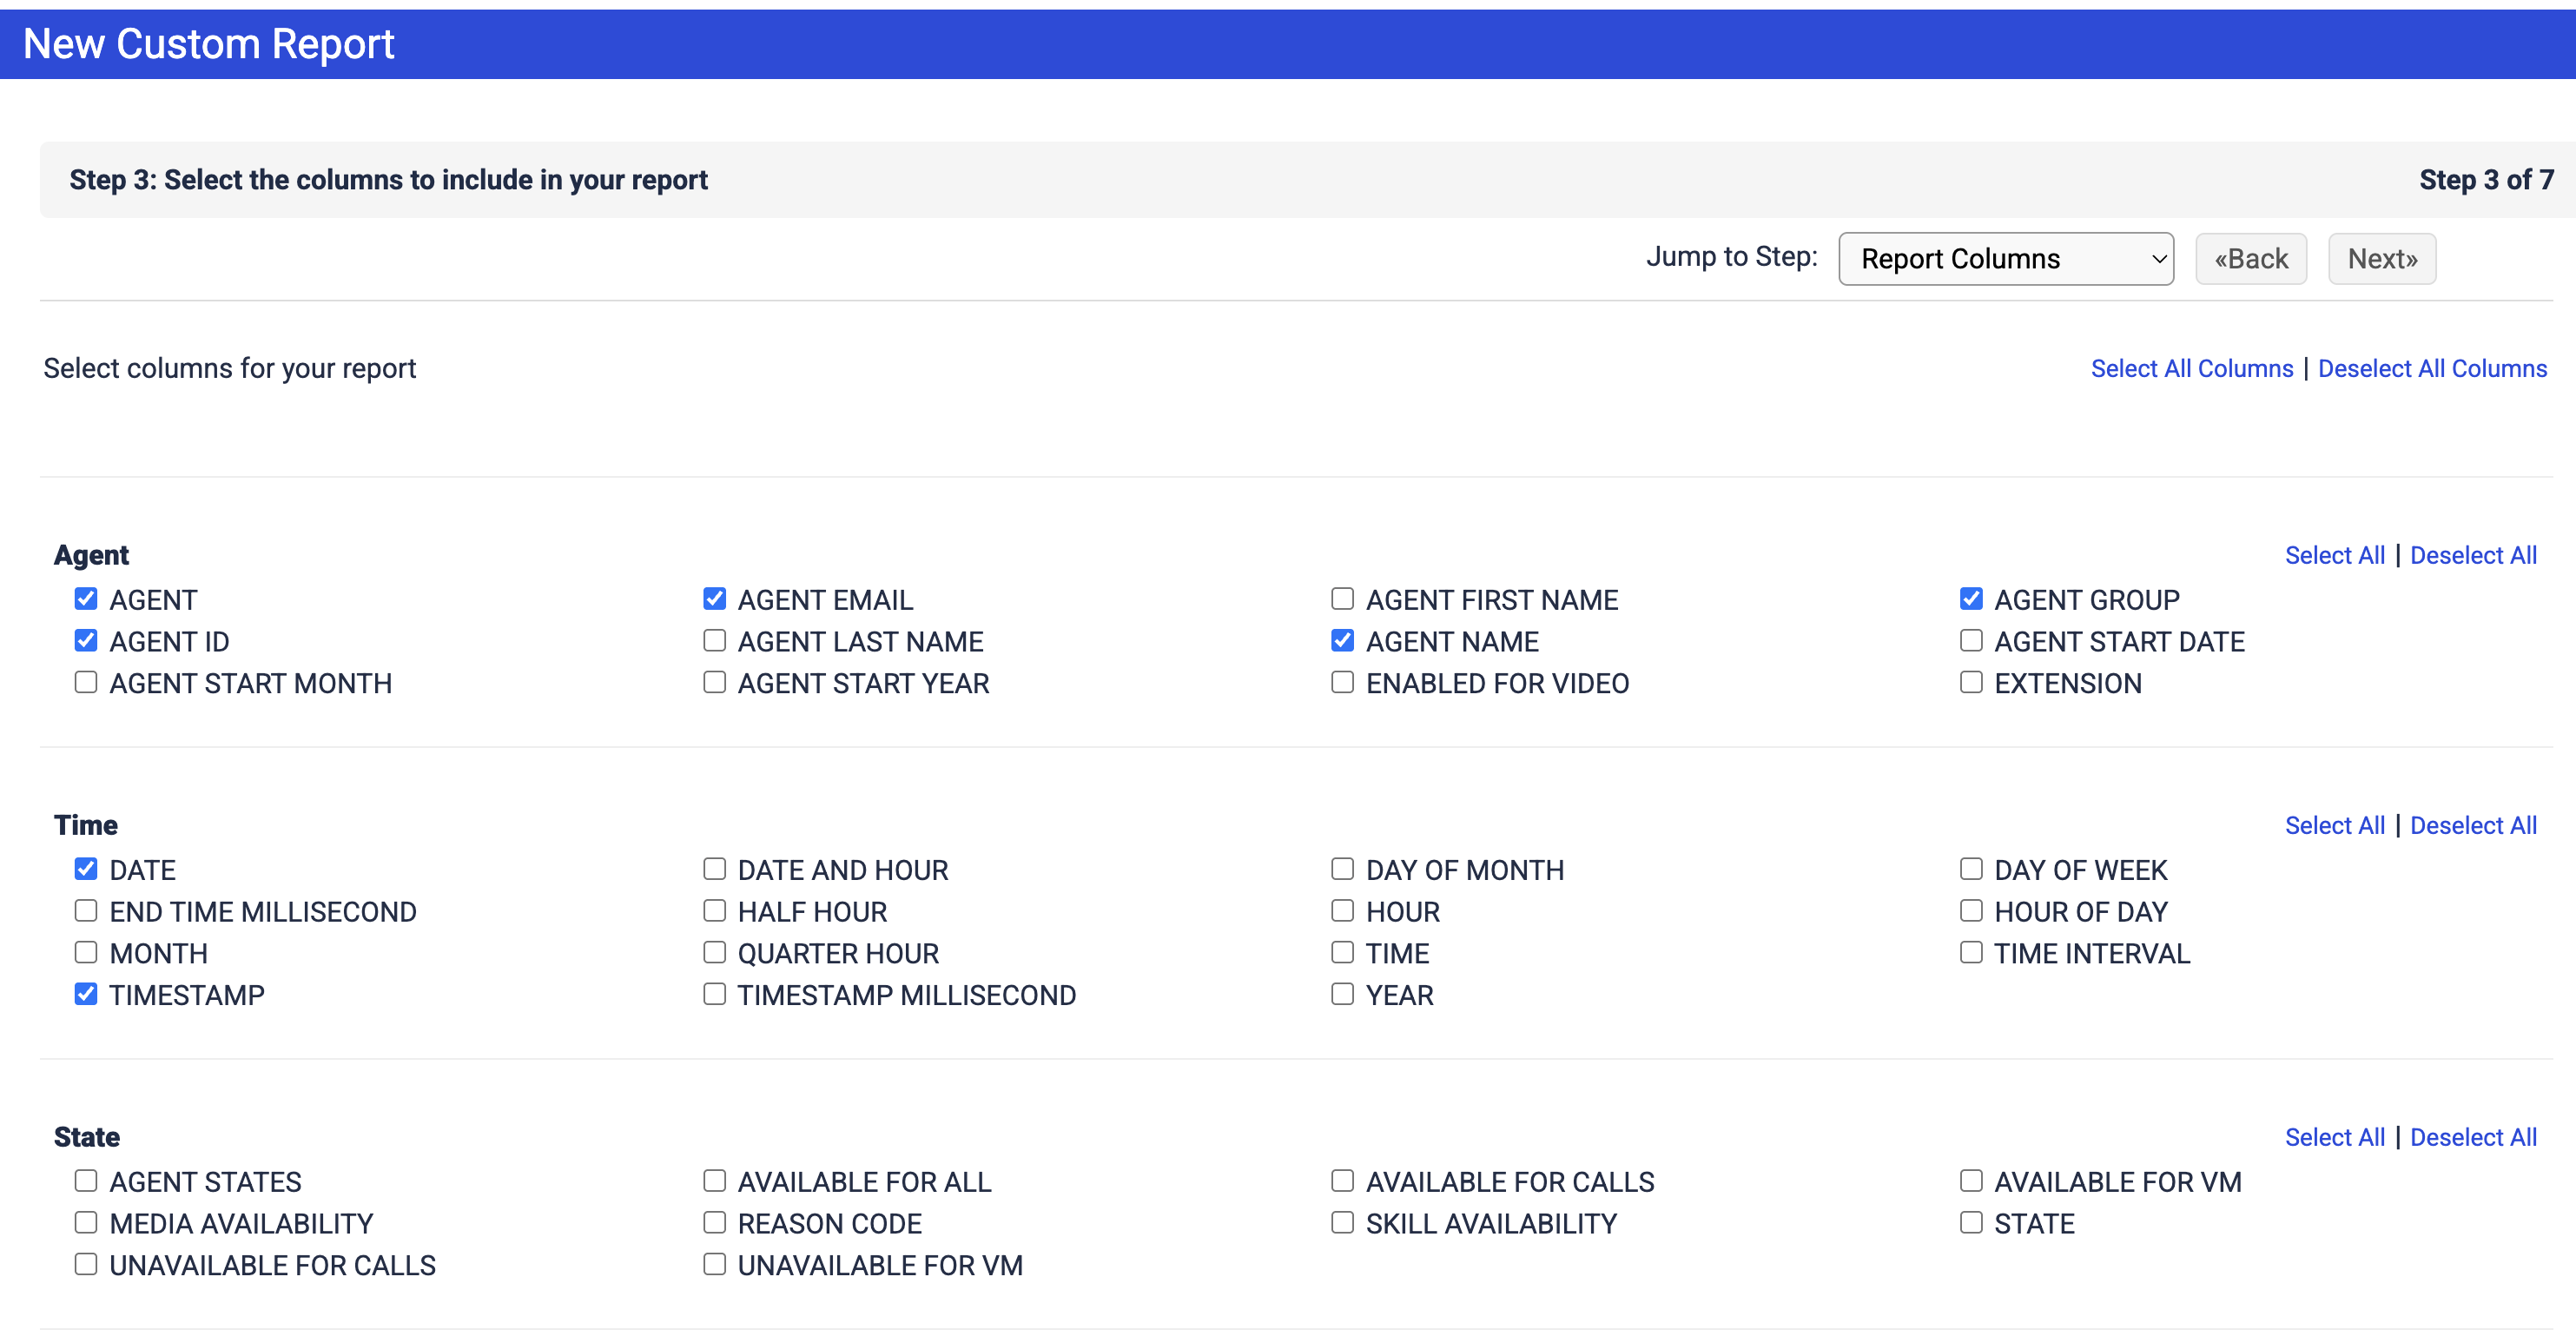
Set the schedule for the report as illustrated.
Scheduled Report Name: Five9_LevelAI_Agent_Report
Scheduled Report Description: copy and paste the text below and make the adjustments listed
Replace and with the actual values provided by your IM/TAM
Set the onfailure to that of your Five9 Admin. This will notify your Admin in case of any failures in sending the scheduled report to Level AI.
mail2ftp:{ transport: 'SFTP', host: 'nexus.thelevel.ai', login: '', password: '', folder: 'historical/files/reports', onFailure: '', filename:'Agent_Report%Y_%m-%d_%H_%M.csv', port: '22'}NOTE
- The field has a 255 character limit.
- Replace the terms within ' ' with the relevant values. Make sure you use single quotes and not back ticks.
Delivery Report: via E-mails
Emails: gw@mail2ftp.five9.com
Time Zone: choose your timezone
Start date: today's date or other desired start date
End date: choose a date that is as far out as the screen allows
Enabled:
Output Format: CSV (UNIX)
Hourly - check the box for each hour
For Recordings
Log in to your Five9 VCC. Navigate to Export > Advanced Recordings.
From the Upload rule that was set up above, trigger a re-upload.
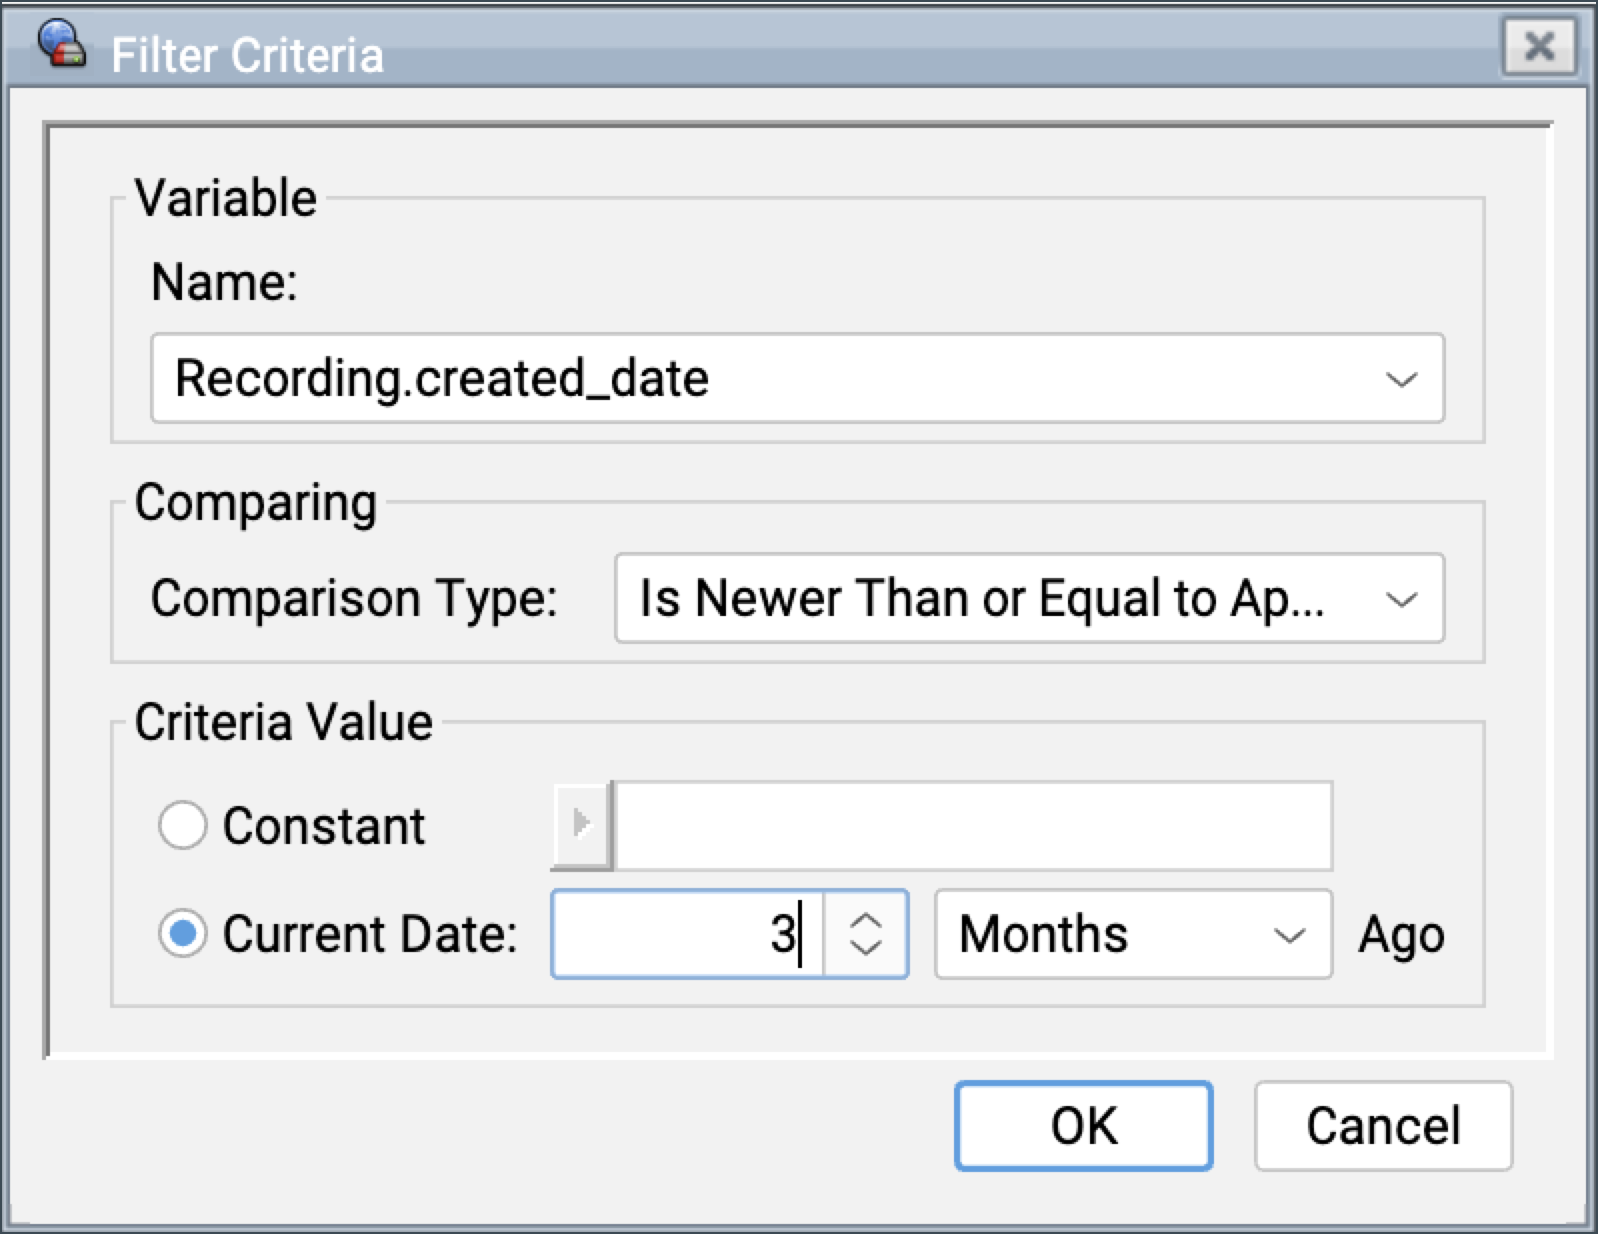
Select the recording created dates for sending voice recordings and make sure the process is Running.
You can download the metadata reports (Call Recording and Agent) for the same duration and send it to the SFTP server or via email to your Level Contact.