Five9 VCC Setup for Chat/SMS/Email channels
Last updated: June 21, 2026
NOTE
Before proceeding make sure that the SFTP bucket folder name and tenant name are the same.
Overview
Connecting your Five9 Virtual Contact Center (VCC) to your Level AI account is a two-stage process that leverages Five9's Secure File Transfer Protocol (SFTP) upload capability and establishes a connection with Level AI's servers. This guide provides step-by-step details of the configuration process to help you enable the automated transfer of chat/SMS/email transcripts and metadata reports from Five9 to Level AI. Full documentation of the Five9 VCC is available here.
This integration allows for seamless data transfer, eliminating manual processes and ensuring Level AI has access to the necessary information for analysis and insights. On completing these steps, Five9 will begin to automatically upload your chat/SMS/email transcripts and associated metadata reports to Level AI, streamlining your workflow.
INFO
For details about Five9 Voice integration, please refer to 📄 Five9 VCC Setup for Voice Channel
Chat/SMS/Email
Part 1 - Configuring Transcript Uploads in the Five9 VCC
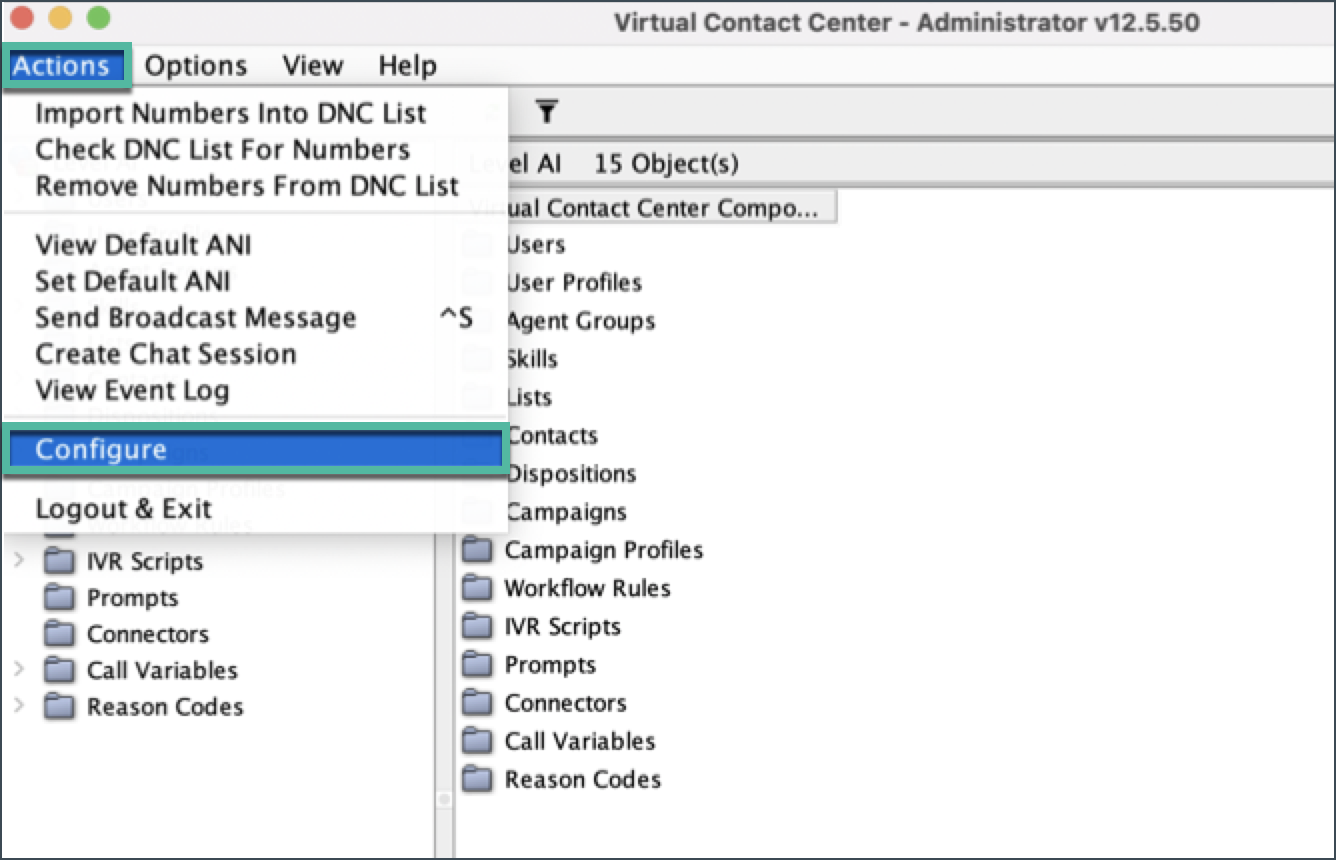
Login to your Five9 VCC - Administrator program. Click the Actions menu and select Configure to open your VCC Configuration screen.
Navigate to the Export tab > Transcripts and configure the setup as shown below. Your Level AI point of contact will share the SFTP credentials. Ensure to specify the file name format as illustrated:
The path for dropping the transcripts would need to beorg_N/MEDIA_TYPE/INTERACTION ID by AGENT NAME @ TIME.htmlSo an example would be
org_N/Chat/439454ee-0d53-11e6-8945-005056a45e01 by AGENT NAME @ 08:10:14.html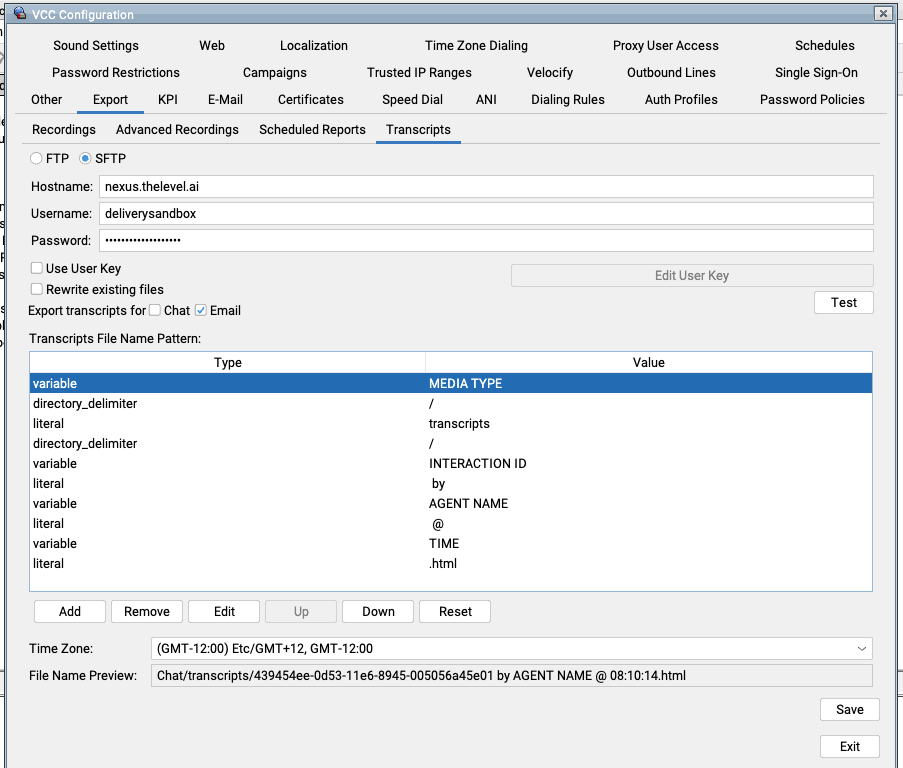
Part 2 - Metadata Scheduled Report
Log in to your Five9 Cloud Contact Center from the Five9 homepage.
Navigate to Dashboard and Reports and create a new Custom Report.
Select Digital Channel.
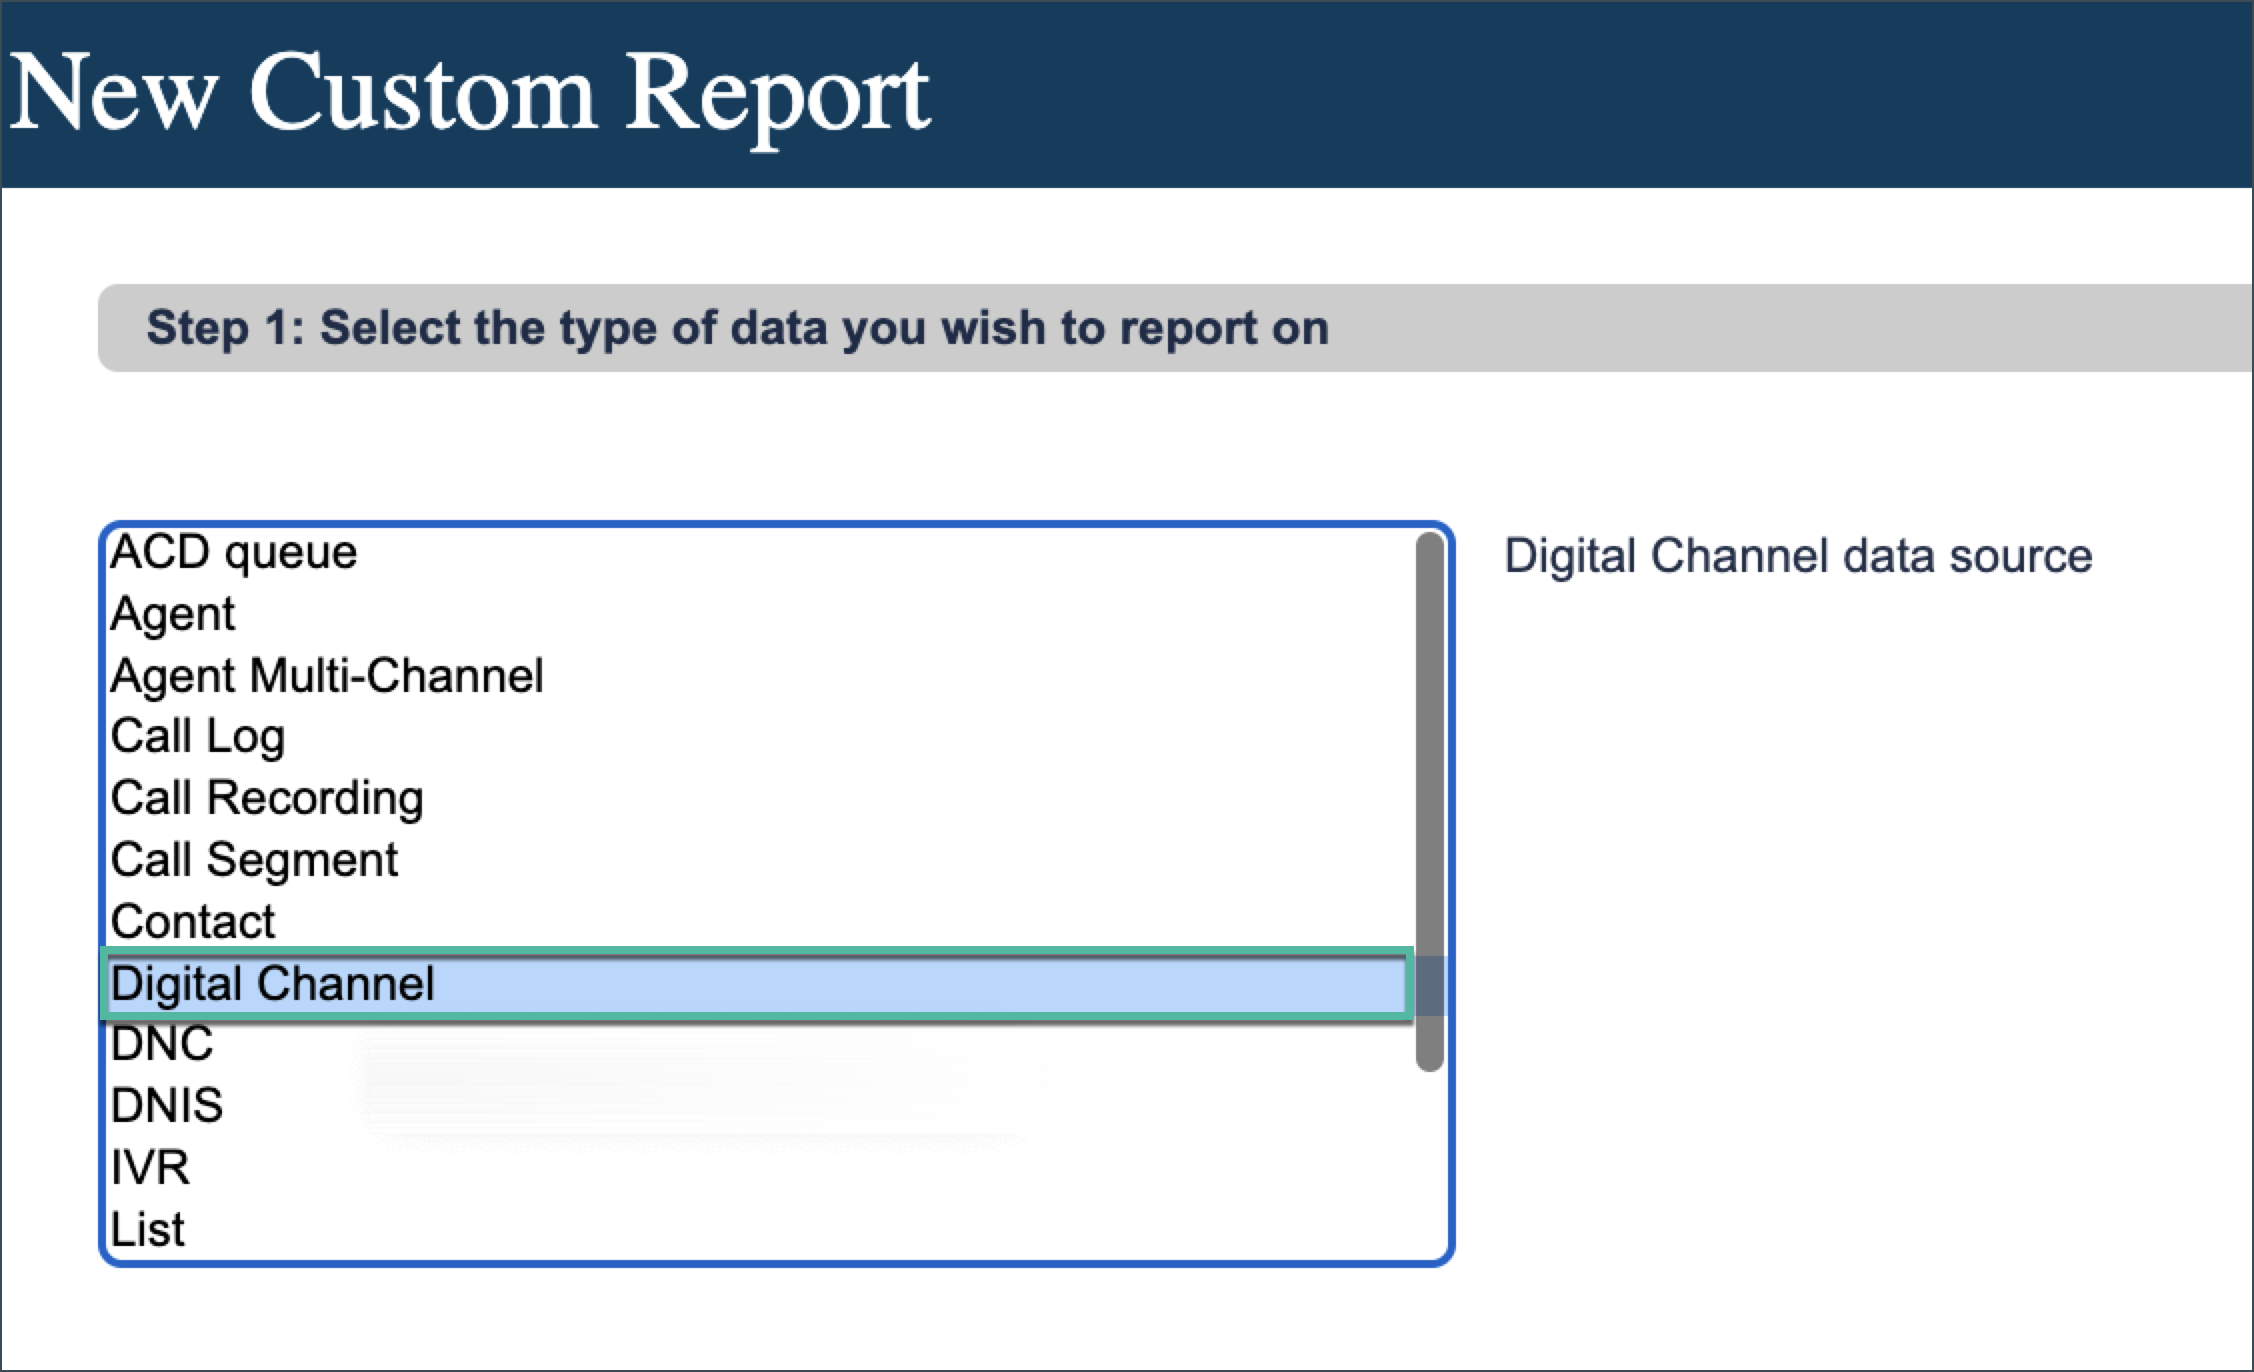
Use the following choices for each respective step of the report creation process.
- Digital Channel
- Tabular Report
We highly recommend that you send all metadata fields
- Any Order
- No Summarization
- Order information by TIMESTAMP
- Pick Timeframe of Hourly and set filter for MEDIATYPE based on whether you are sending email or chat metadata
- Also review the MEDIASUBTYPE to make sure the proper ones are selected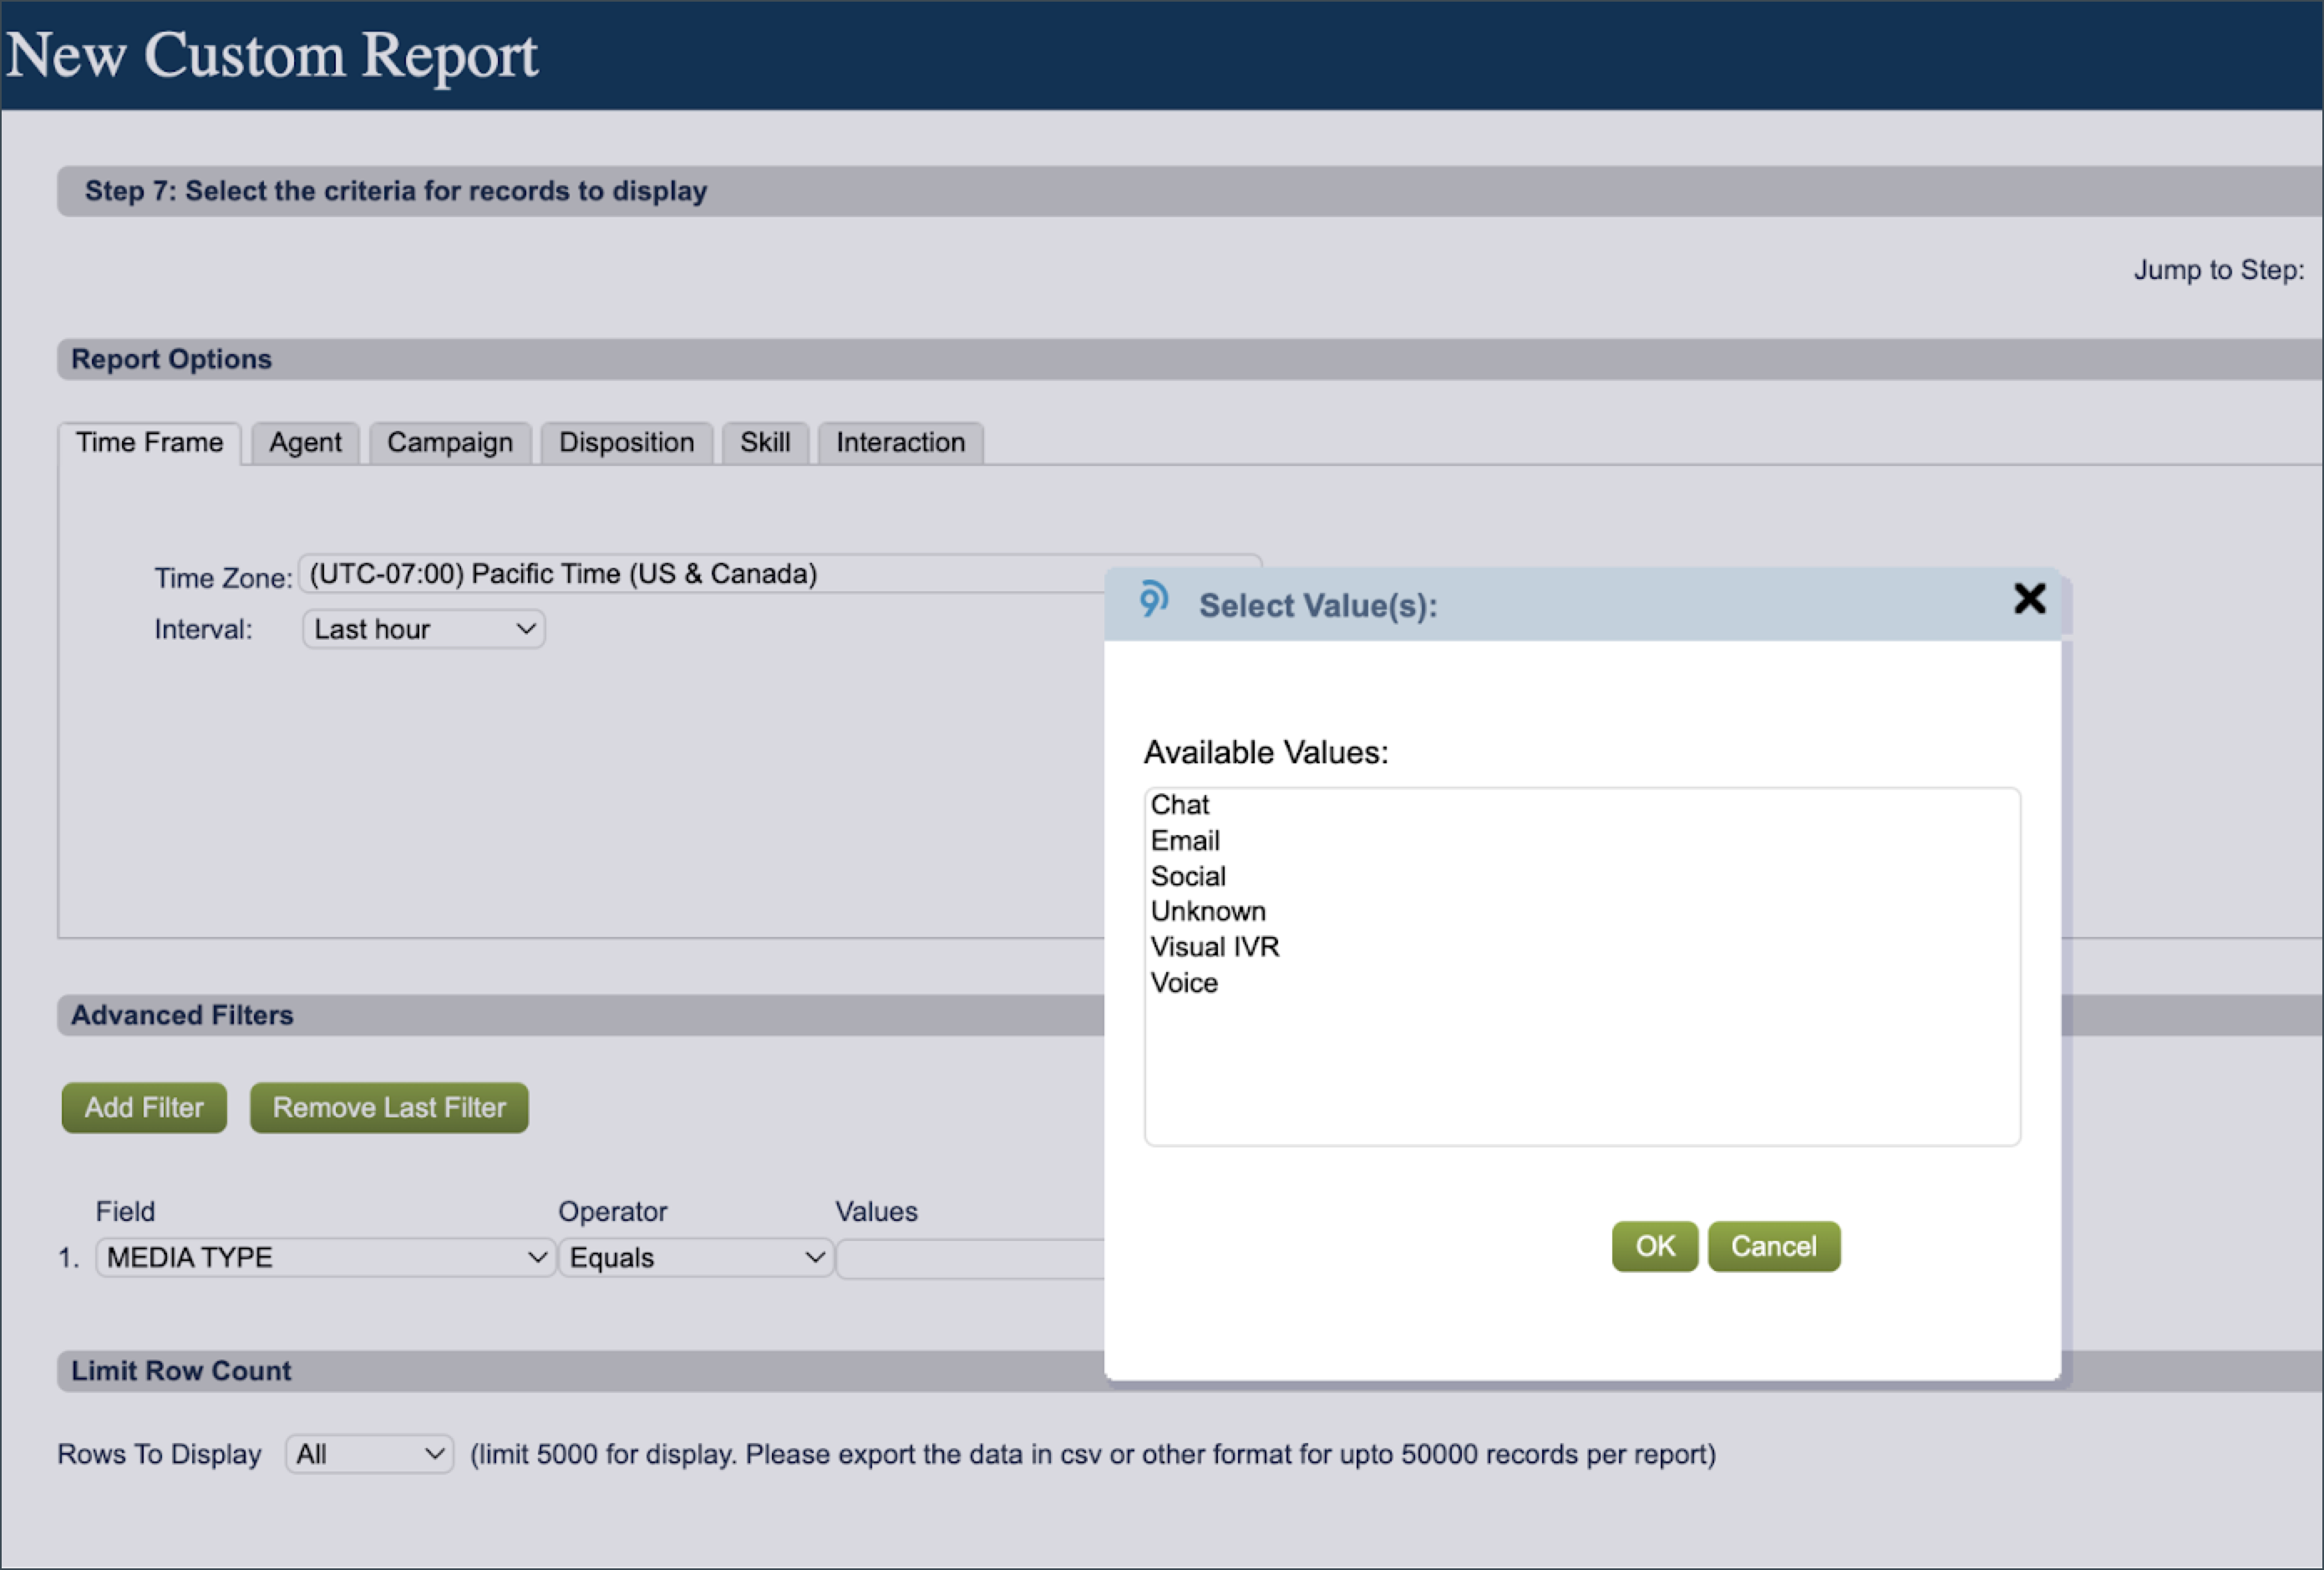
Set the schedule for the report as illustrated:
For the End Date choose a date that is many years into the future. For the Emails section add gw@mail2ftp.five9.com
For the Scheduled Report Description use the below format. Replace the login, password and tenant with details shared by your Level TAM :
mail2ftp:{transport:'SFTP',host:'nexus.thelevel.ai',login:'',password:'',folder:'org_N//reports',onFailure:'',filename:'_Five9_LAI_Metadata_Report%Y_%m-%d_%H_%M.csv',port:'22'}NOTE
- The filename has a 255 character limit
- Replace the terms within ' ' with the relevant values. Make sure you use single quotes and not back ticks.
- Set the failure email to that of your Five9 Admin. This will notify your Admin in case of any failures in sending the scheduled report.
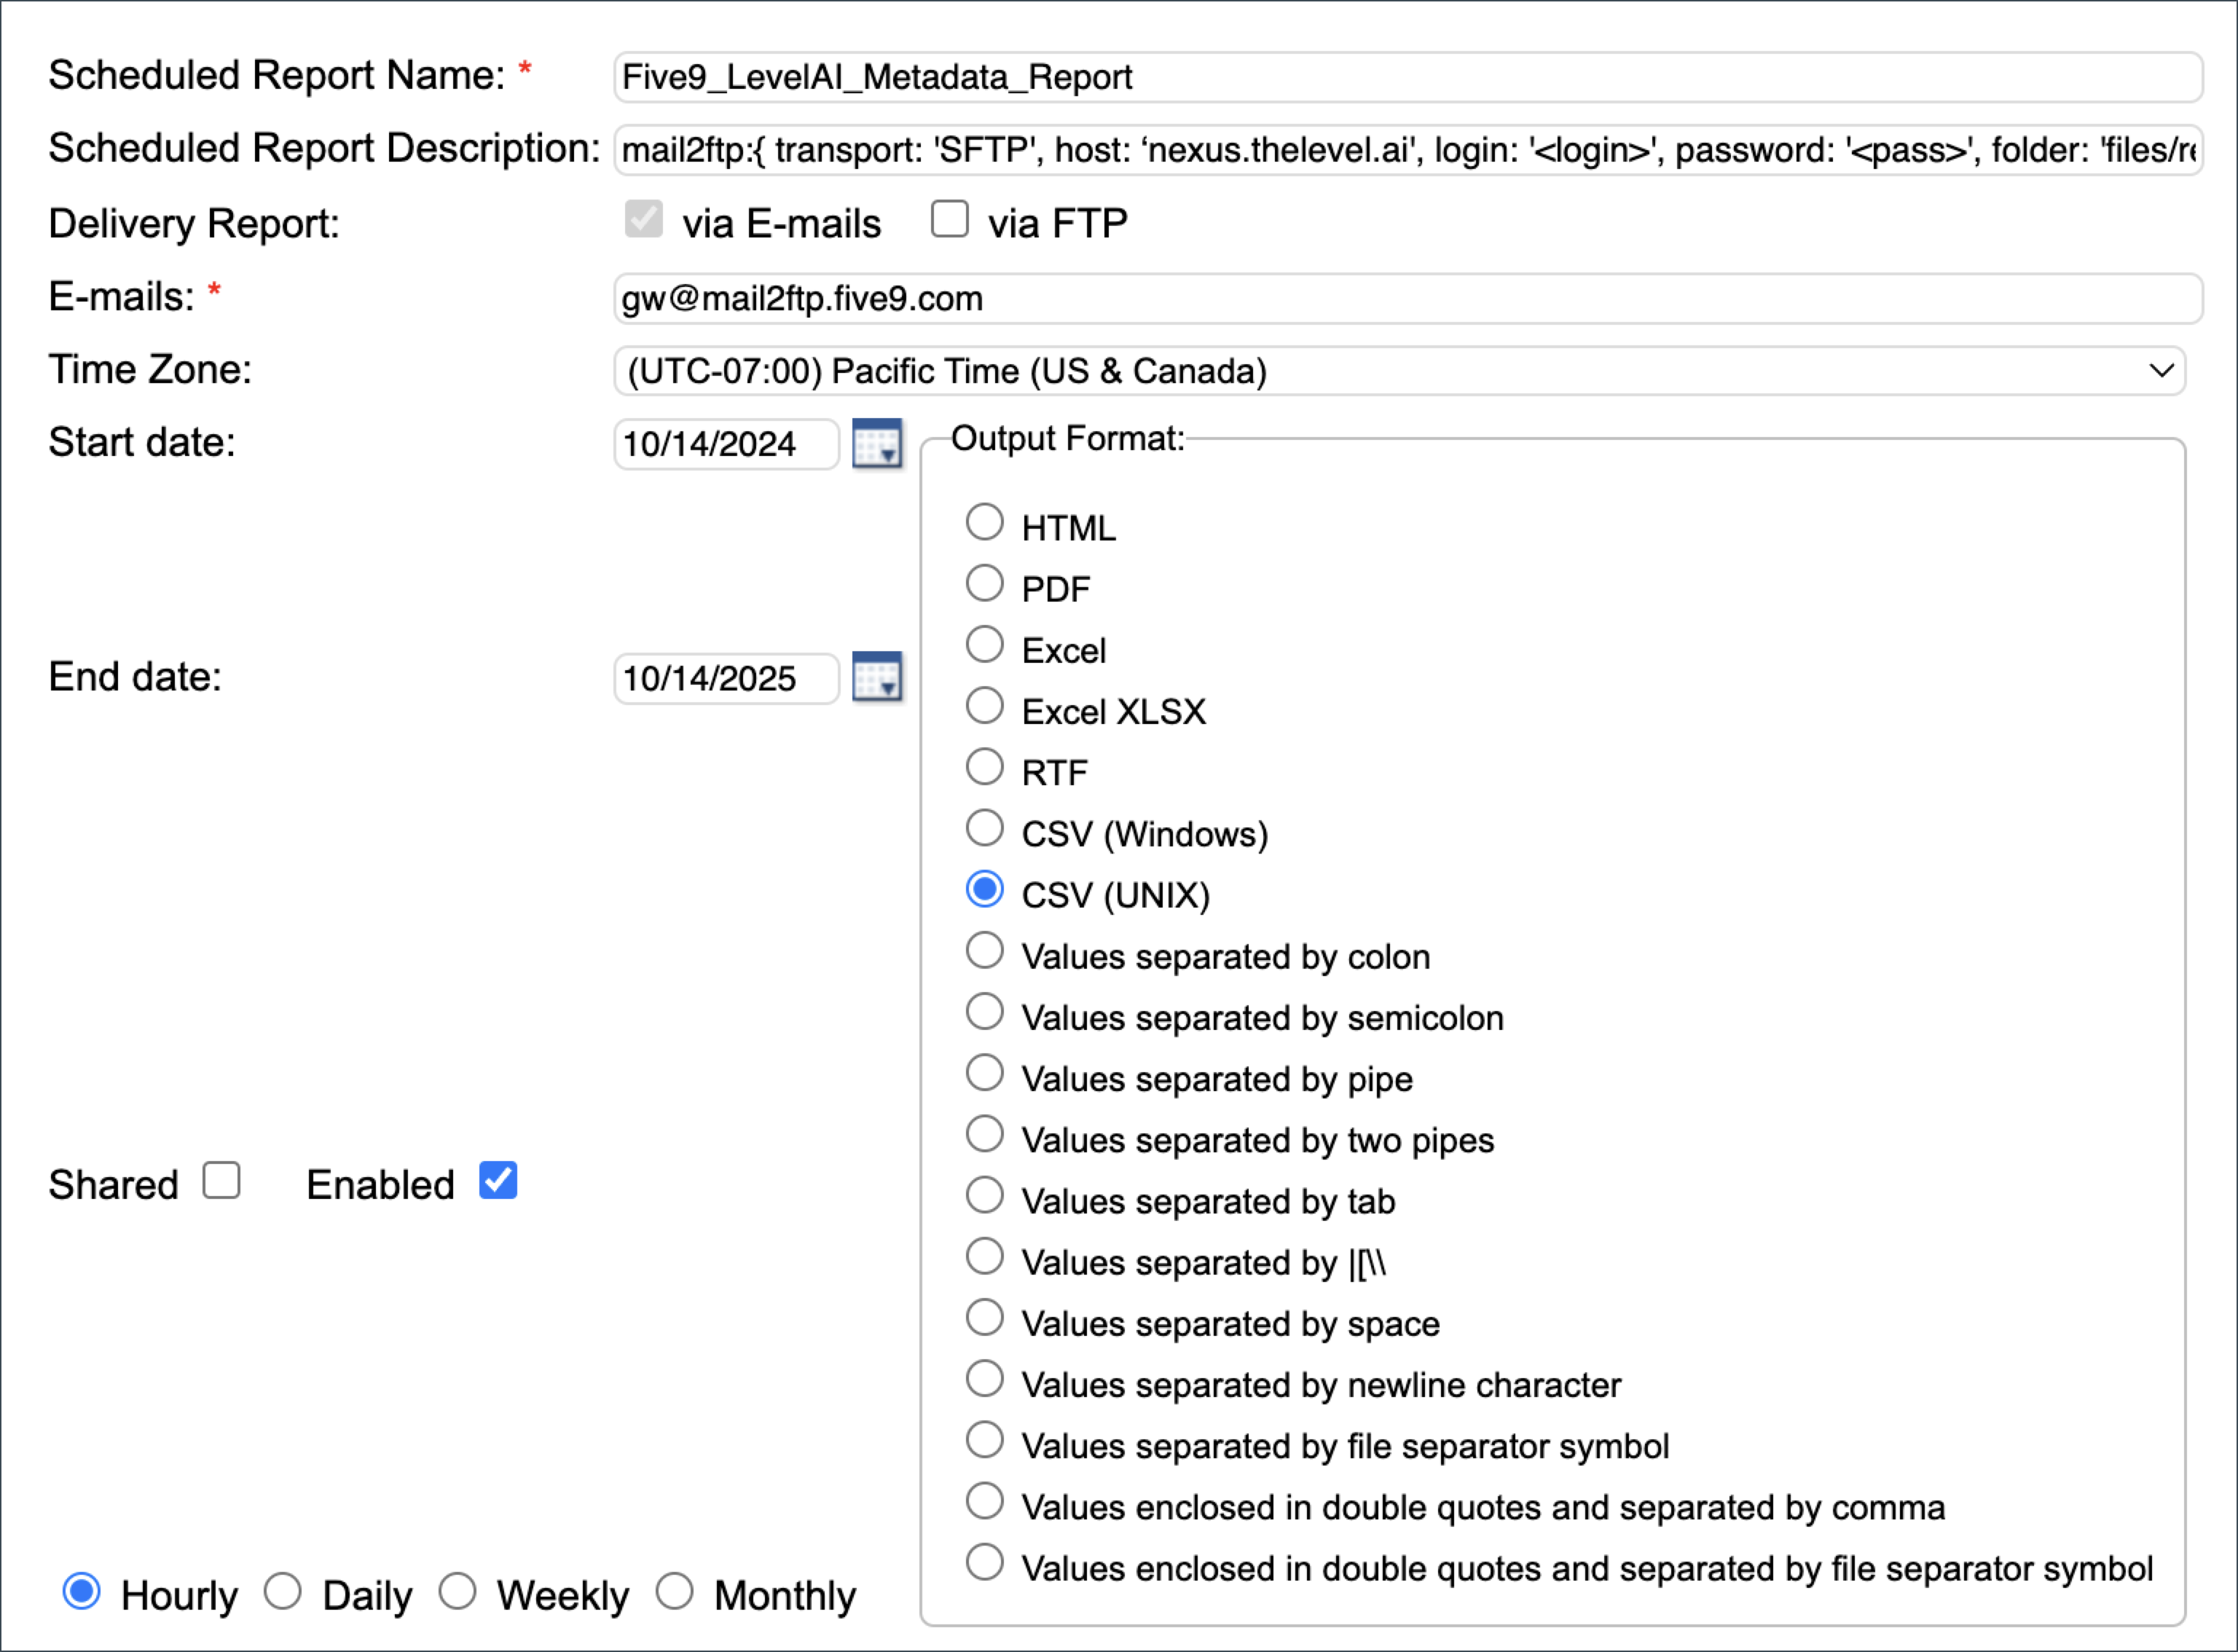
Optionally, you can define the Report Cadence options:
If you would like your Level AI instance to update on a quicker cadence, select Hourly and then select all the checkboxes next to Hours.
If you would like an even quicker cadence, please inform your Level AI representative. This will require multiple reports (with different Minute triggers) to be set up.
The chosen cadence affects what is selected in Report Options > Time Frame > Interval
- If a metadata report should be run hourly, select Past Hour.
- If multiple metadata reports should be run per hour, select This Hour.
- If a metadata report should be run once, select the specific date range.