SFTP - LevelAI Integration
Last updated: June 18, 2026
As an Admin or Super Admin, you can independently configure the third party integration through SFTP within your Level AI instance. This is a self-service option and eliminates the need to contact your Level AI Technical Account Managers (TAMs) for initial setup.
NOTE
Before proceeding, make sure that
- The username, folder name of the SFTP and the tenant name should be same
- the export of the third party system is configured correctly with all the necessary metadata fields
- the files are present in the LevelAI SFTP bucket in the proper location
(A) Initiating the SFTP Integration
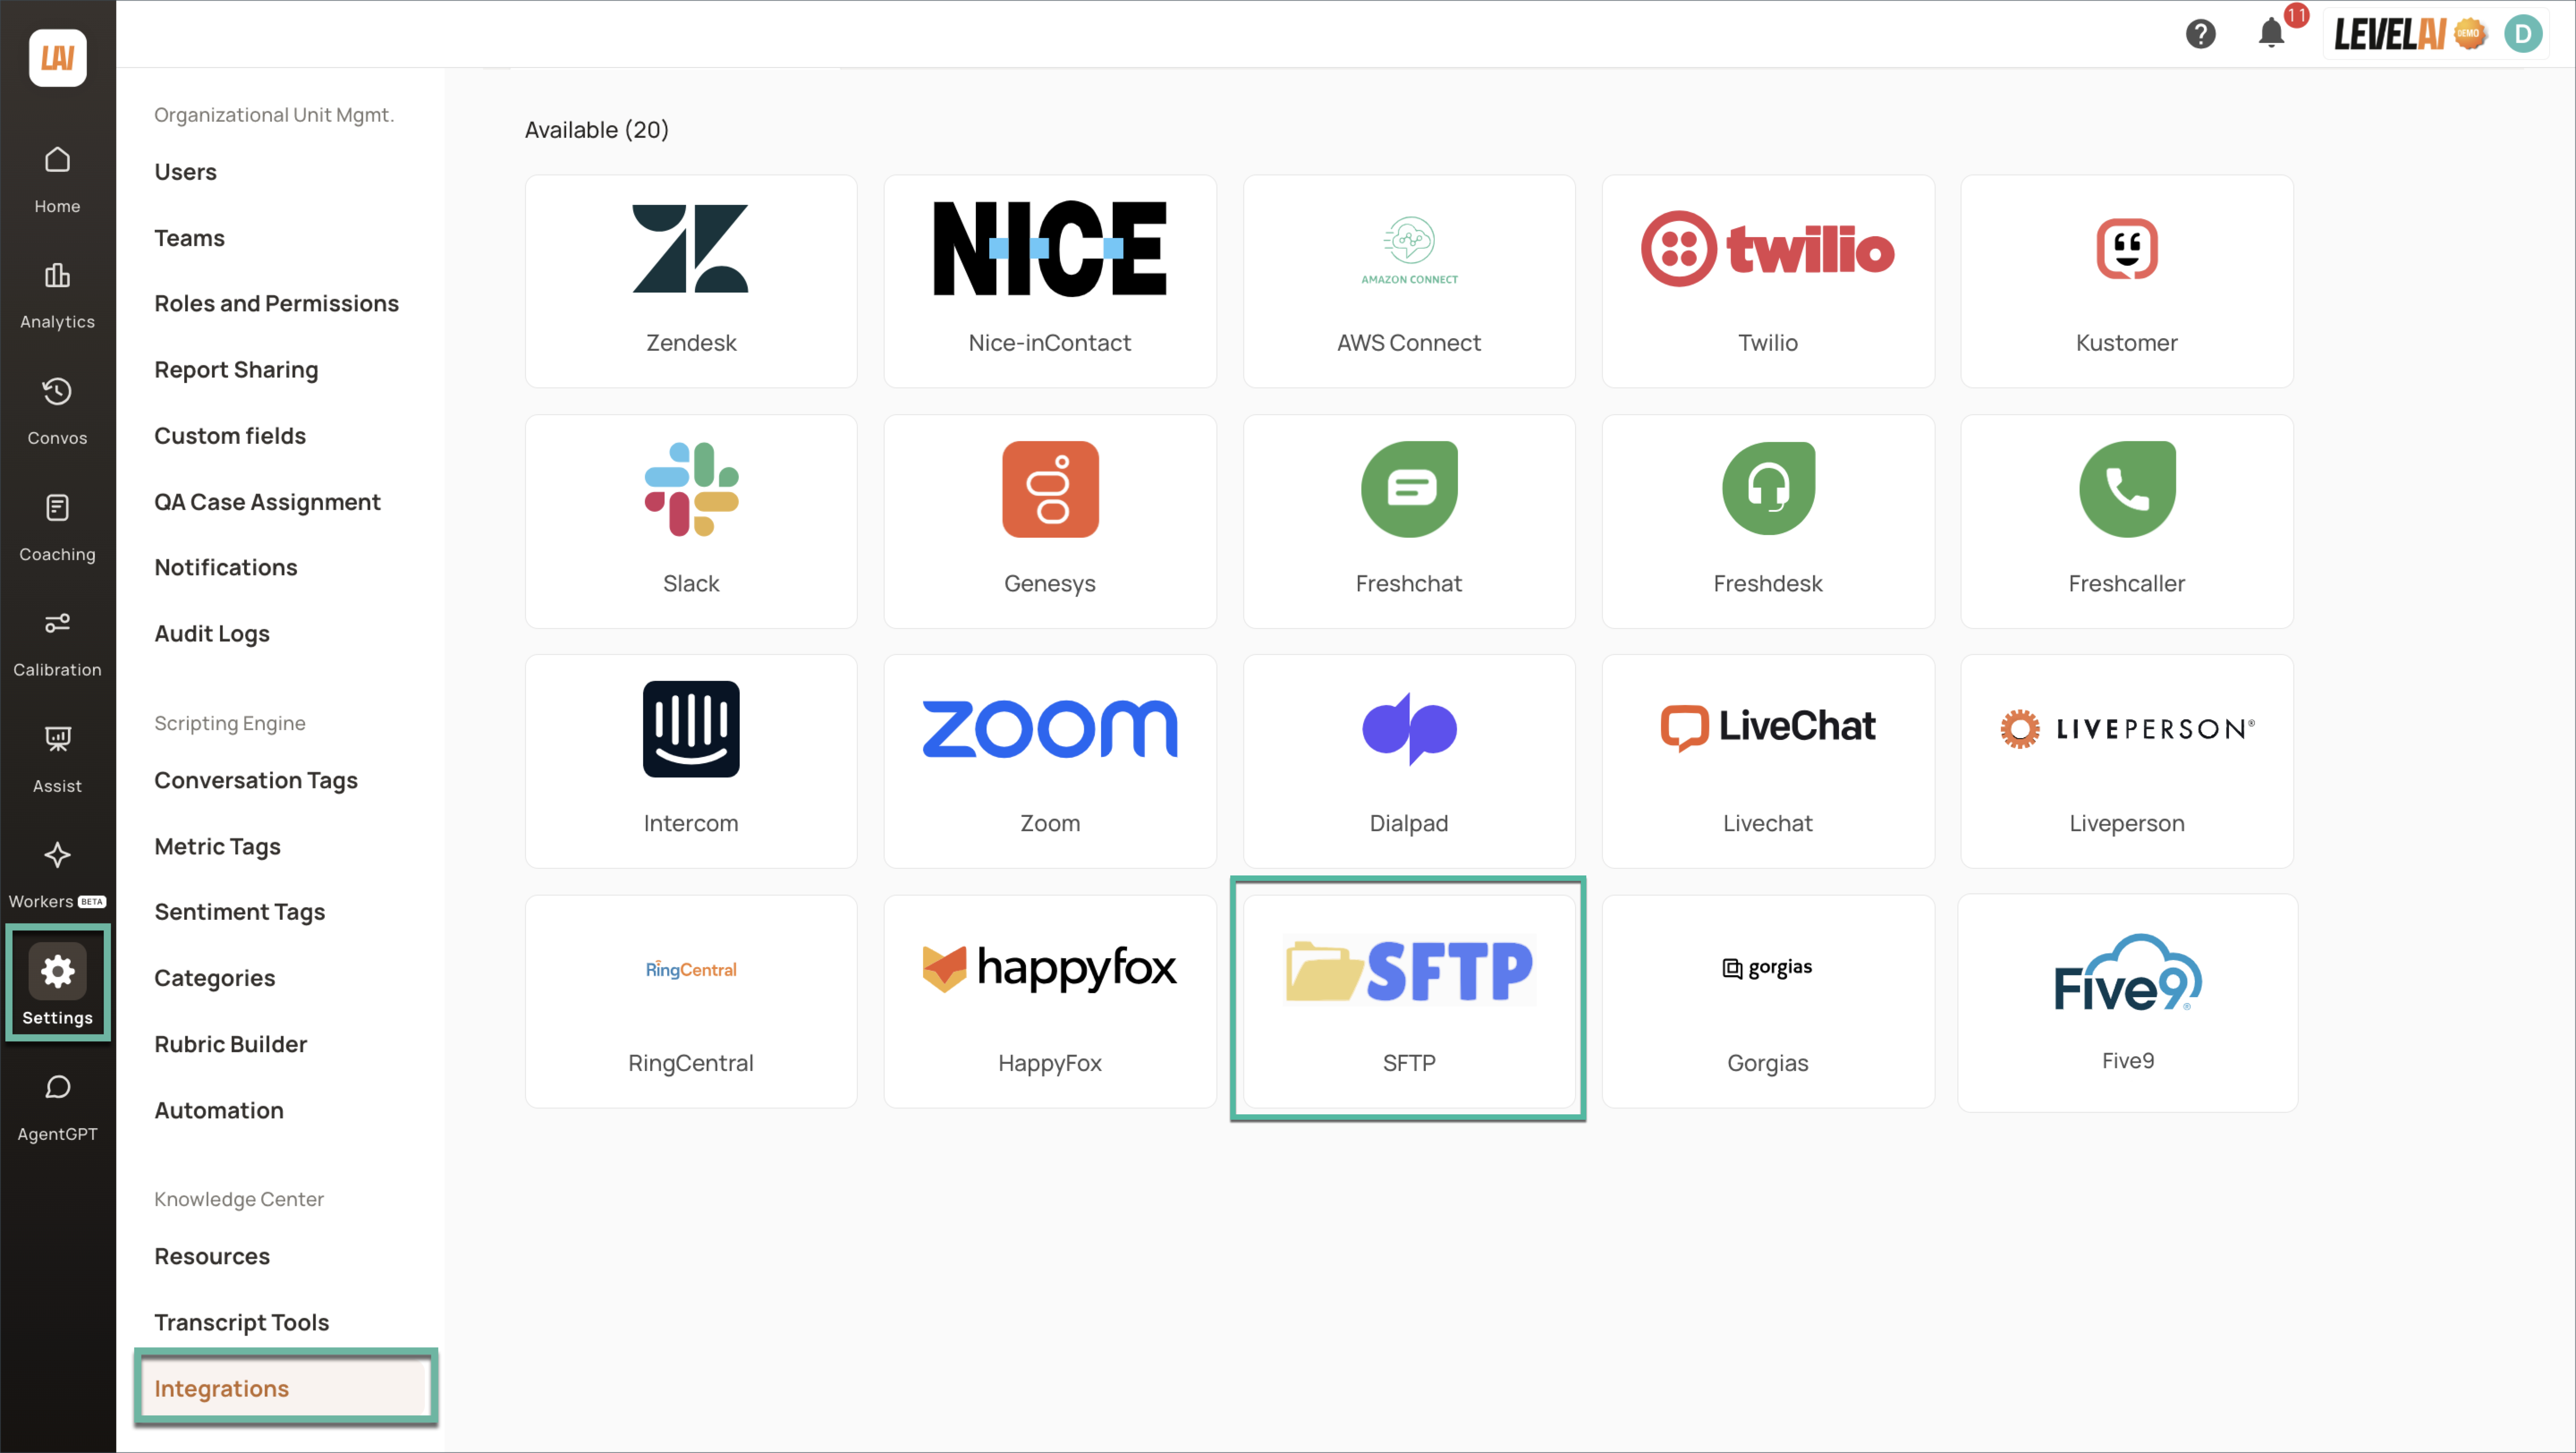
In the left navigation bar, click Settings > click Integrations.
Locate the SFTP integration among the available options and click it to initiate integration.
(B) Connecting SFTP to your Level AI Instance
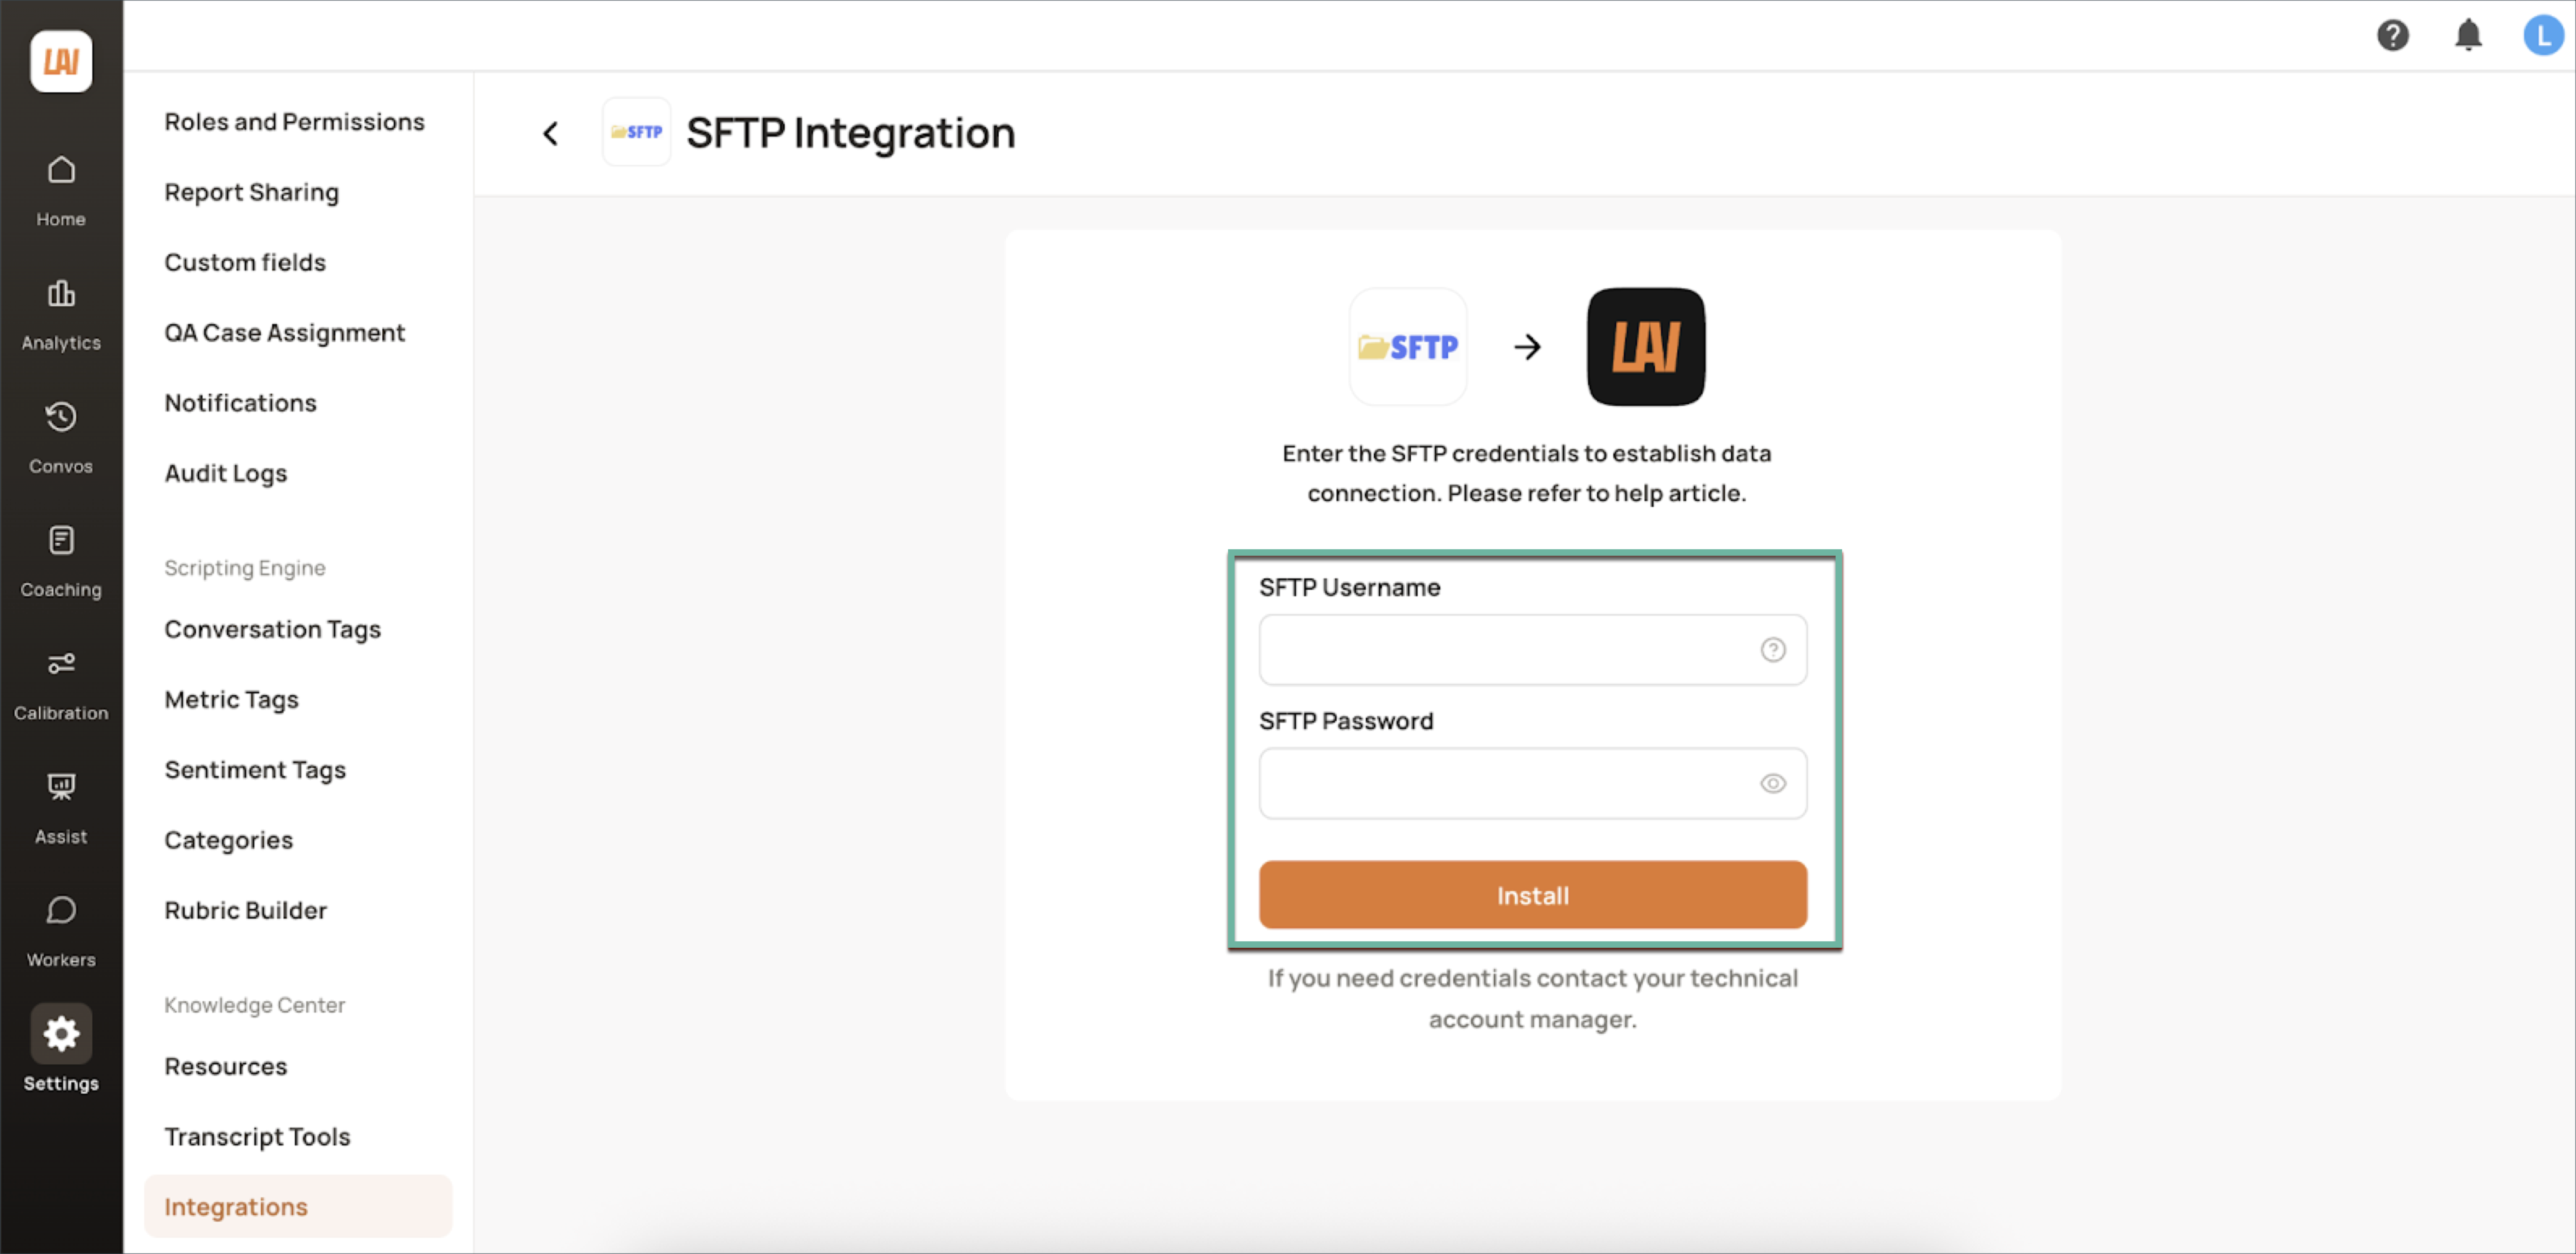
Enter the SFTP Username and password. If you don't have these credentials, please contact your Level AI TAM.
Click Install.
(C) Configuring Data Ingestion Parameters
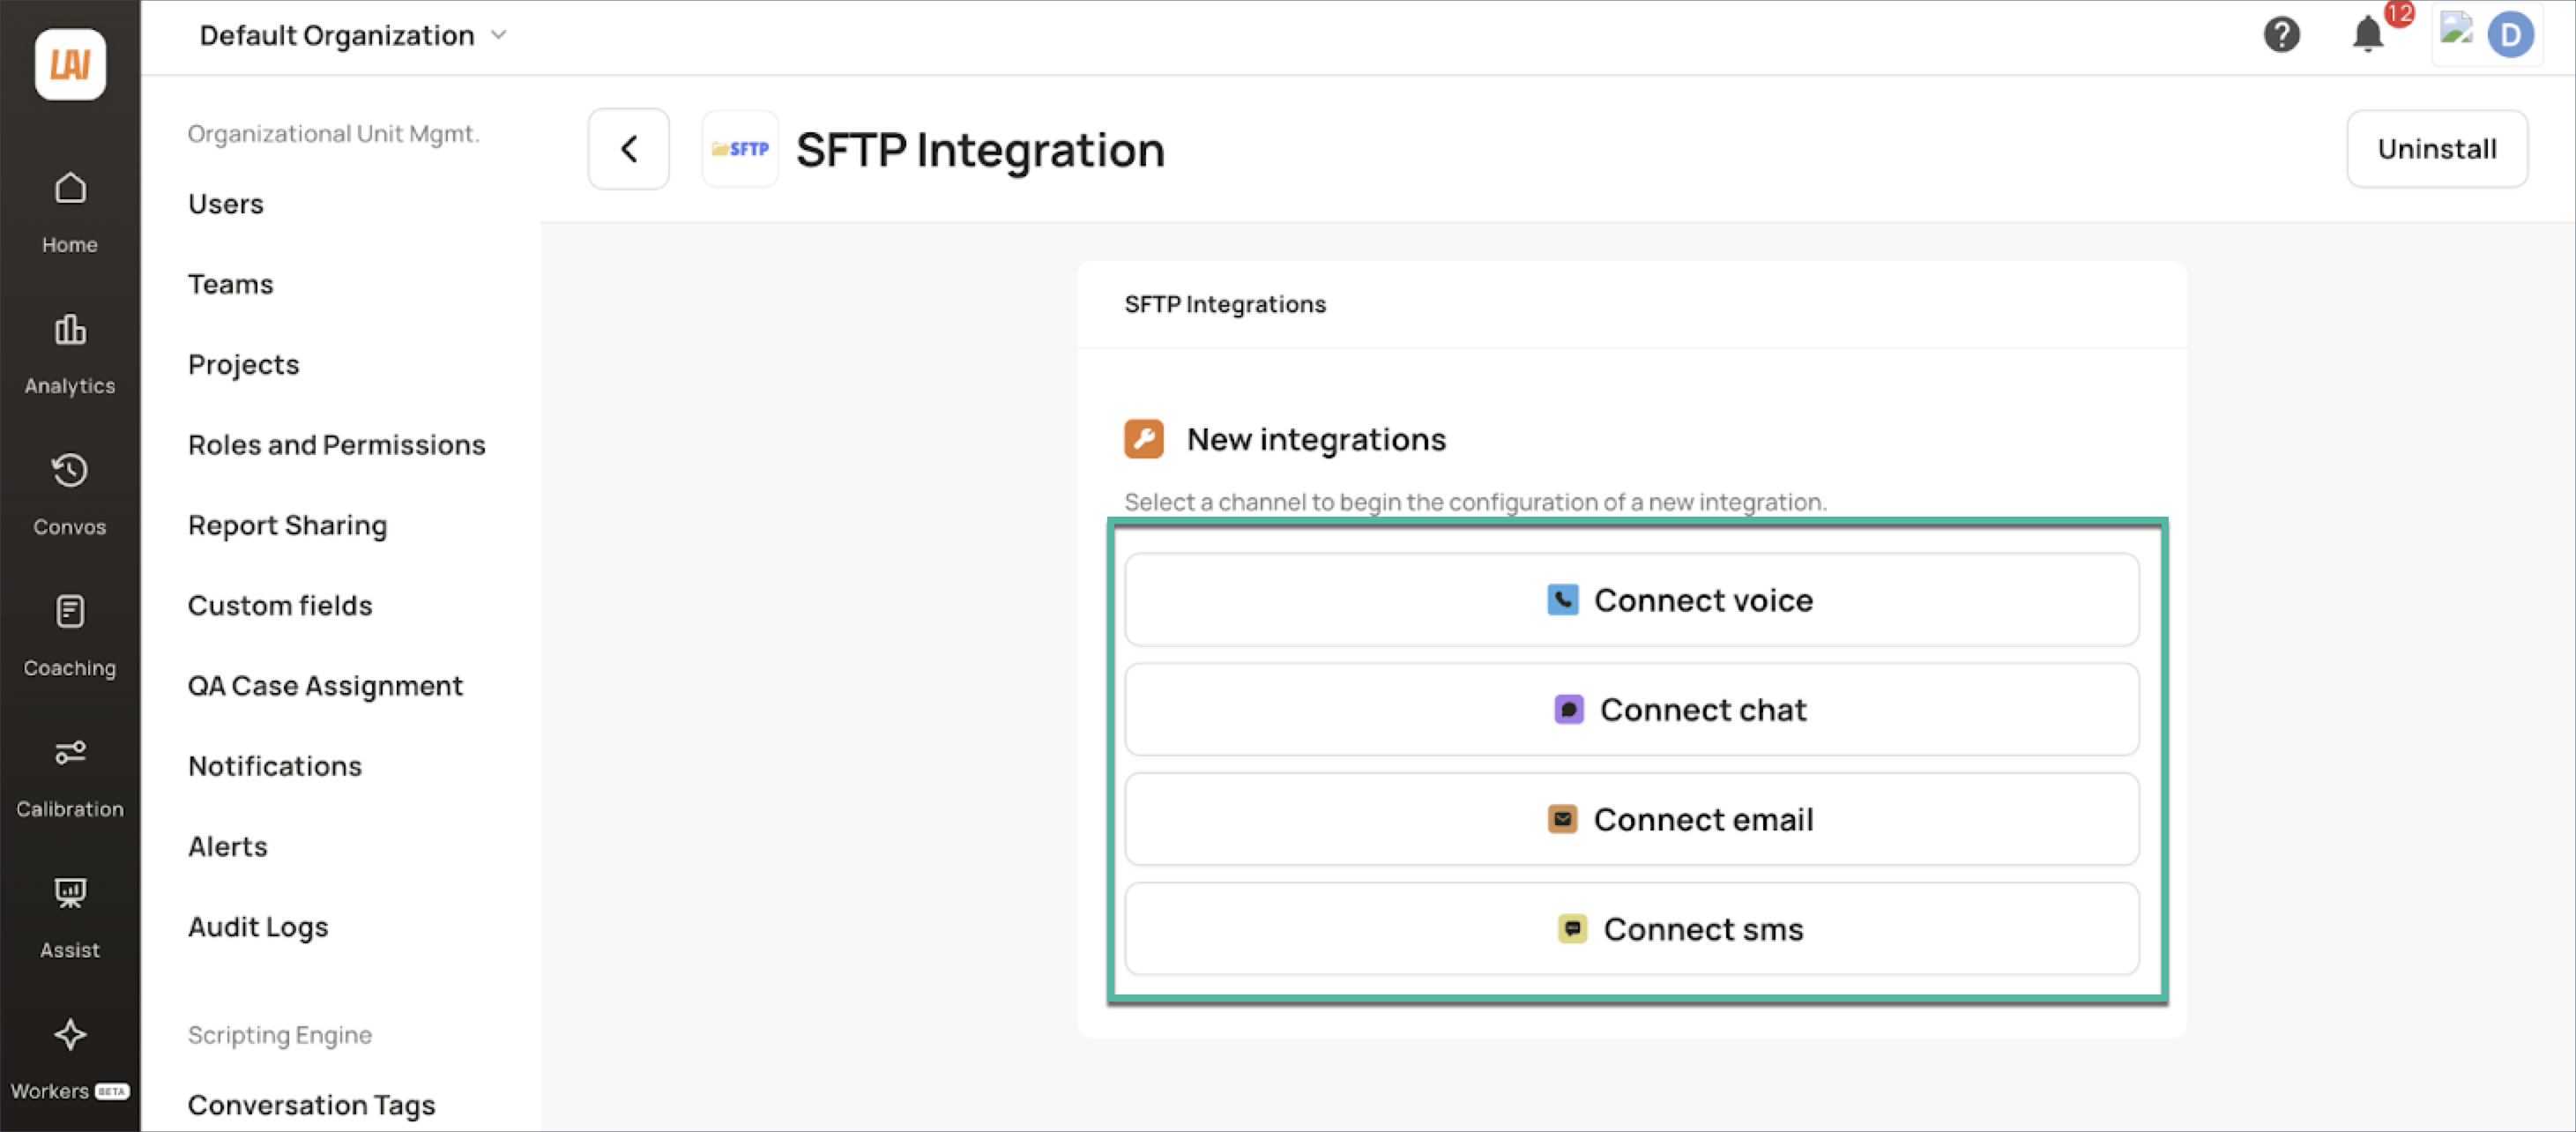
After connecting, you can select and configure the specific SFTP channels you wish to import into Level AI.
Configuring Voice, Chat, Email, SMS Channels
Click
Connect Voice to configure the voice channel.
Connect Chat to begin configuring the chat channel.
Connect Email to begin configuring the email channel.
Connect SMS to begin configuring the SMS channel
Ensure that the respective folder names in SFTP are correct:
For Voice:
- Enter the path of the folder in which recording files such as.mp3,.wavfiles are present.
- The corresponding metadata reports of these recordings should be present in/reportsfolder.For Chat/Email/SMS: Enter the path of the folder in which the metadata files and transcript files are present.
INFO
It is mandatory for both, the metadata files and transcript files, to be placed in the same folder.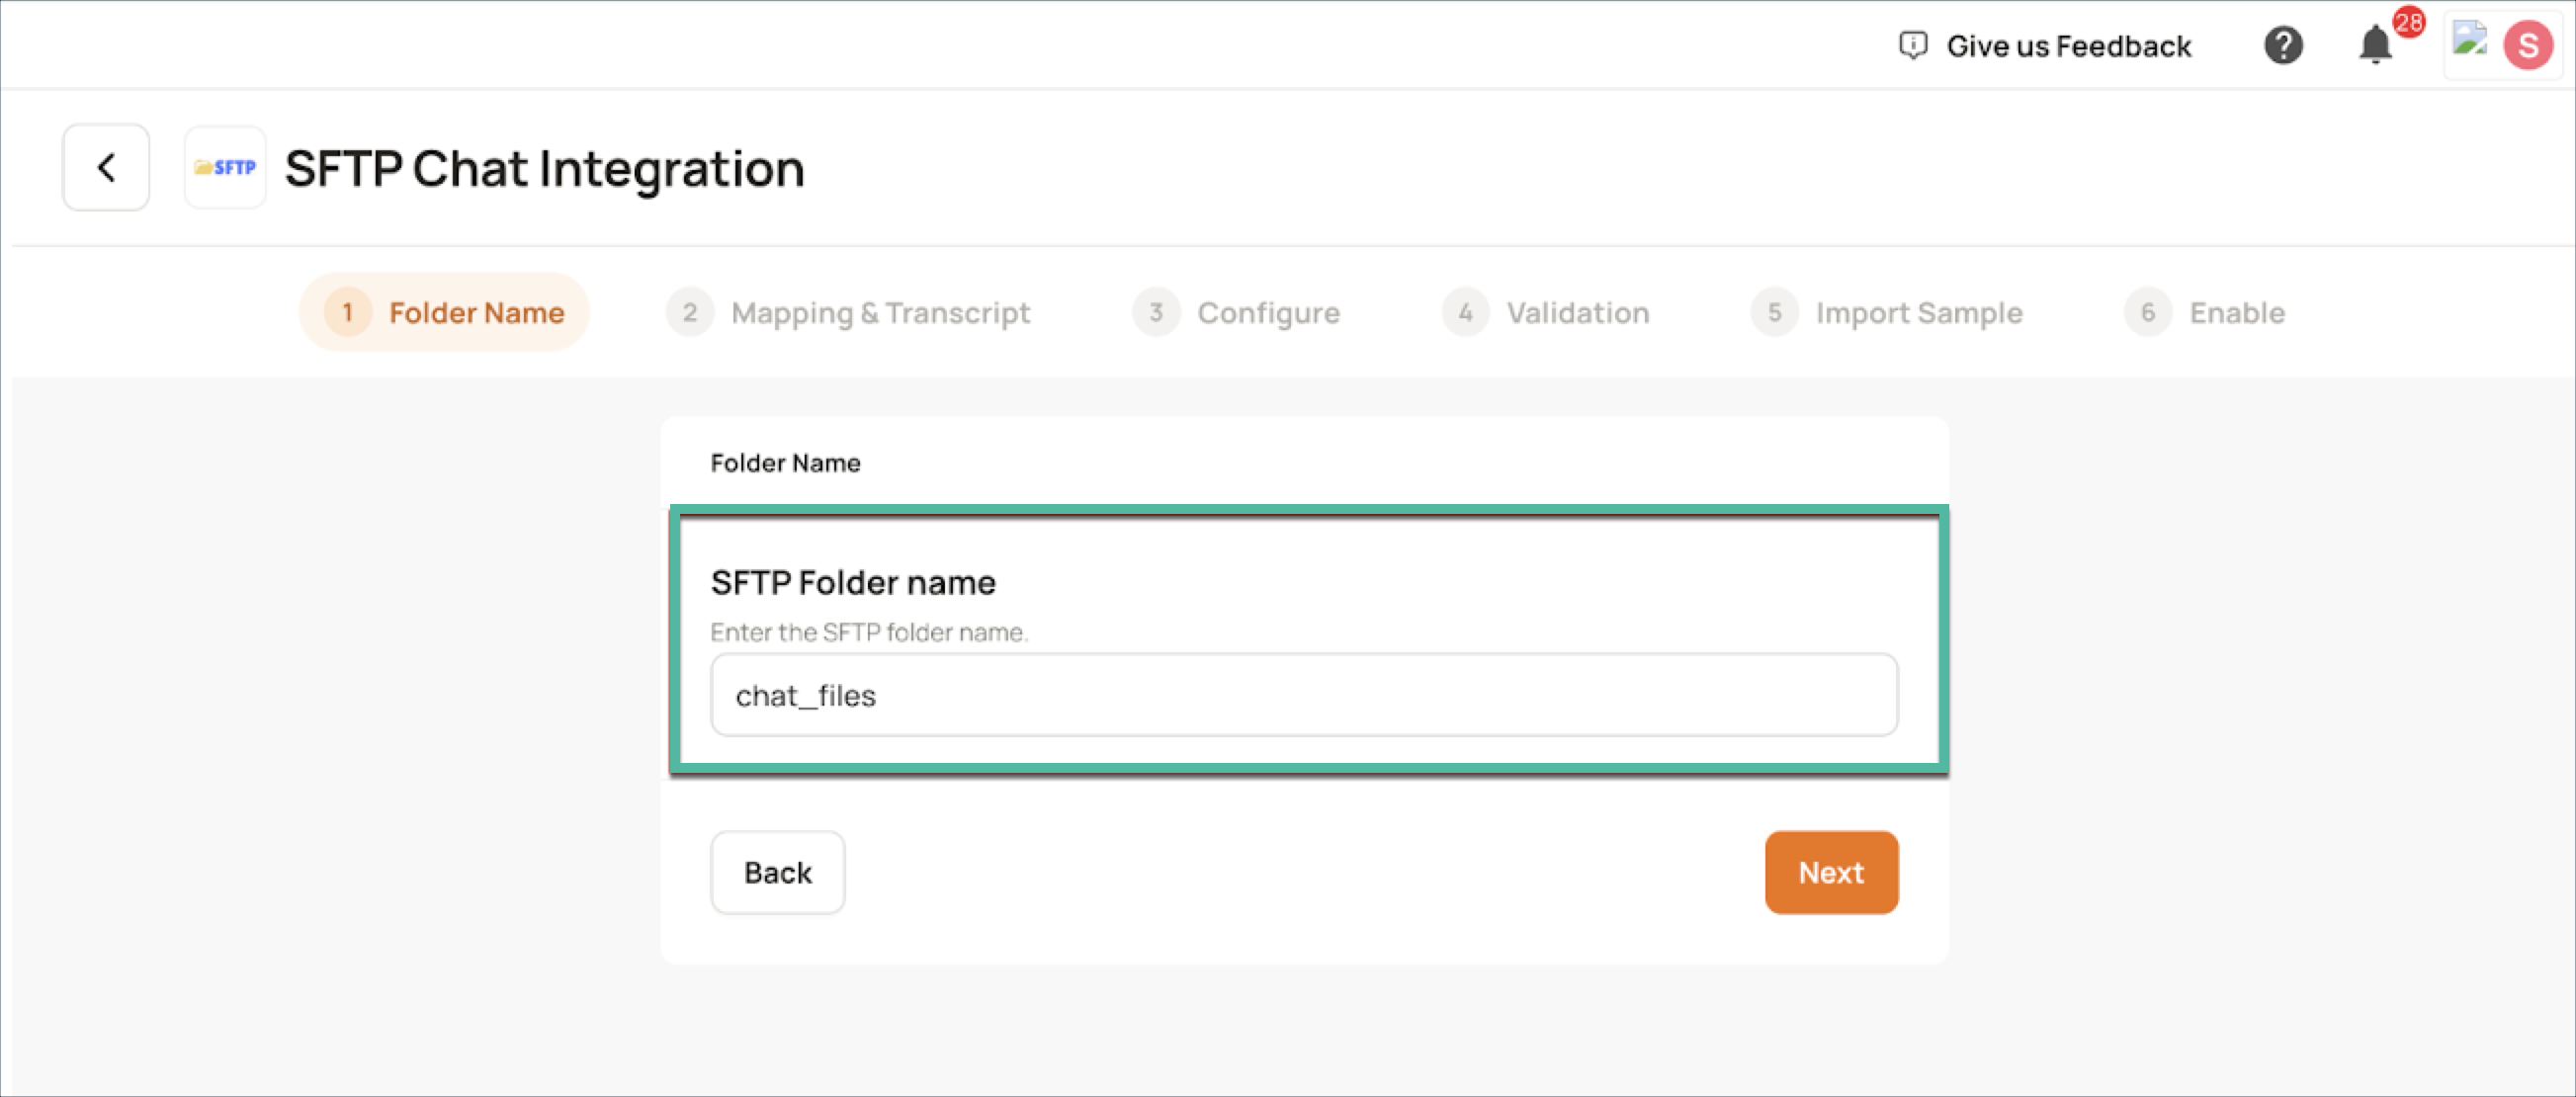
Mapping metadata fields to Level AI
Map the following details from your metadata reports to the Level AI Conversation fields.
INFO
You have to export the relevant metadata reports from your internal system (JIRA, RMT Ticketing, etc.), that you use to manage your conversations.Mandatory Fields
Agent First Name: First Name column of the agent in your metadata file
Agent Email: Email column of the agent in your metadata file
Created Date: Conversation created column in your metadata file (Format: "%a, %d %b %Y %H:%M:%S")
Transcript/Recording Linker:
In case of voice: Map the column of the metadata file which contains the path to the recording file in Call name field.
In case of chat/email/sms: Map the column of the metadata file which either contains the transcript or the link to the transcript file.
Non-Mandatory Fields
Agent Last Name: Last Name column of the agent in metadata file
Agent Employee ID: Employee ID column of the agent in metadata file
External Session ID: Map the column which would be used to map the conversations into a journey.
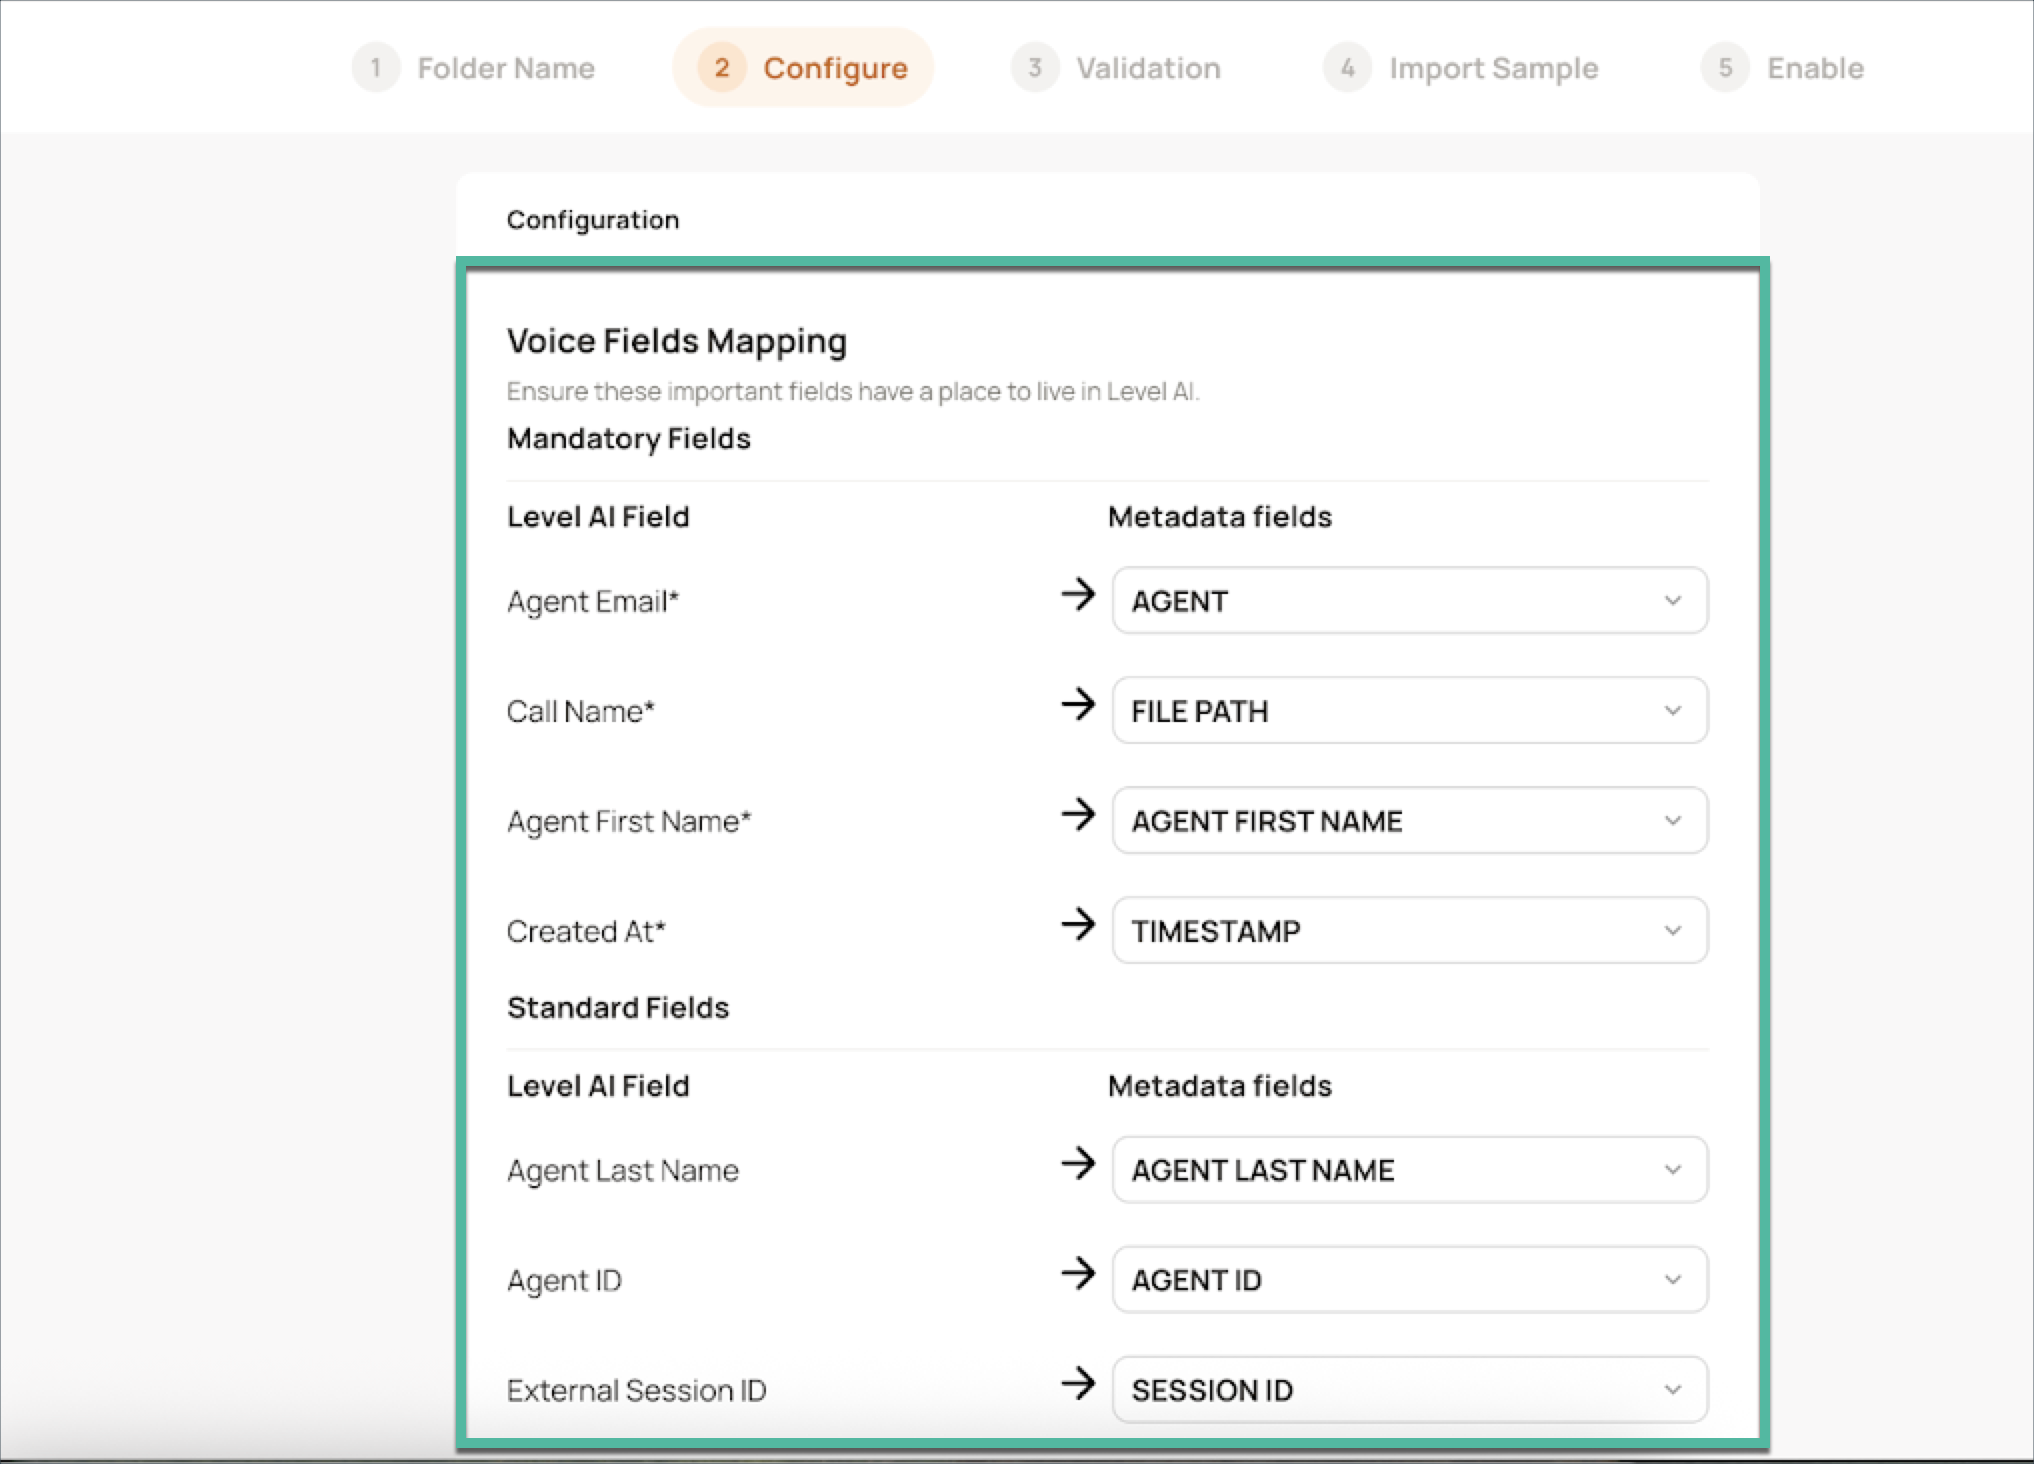
For Voice
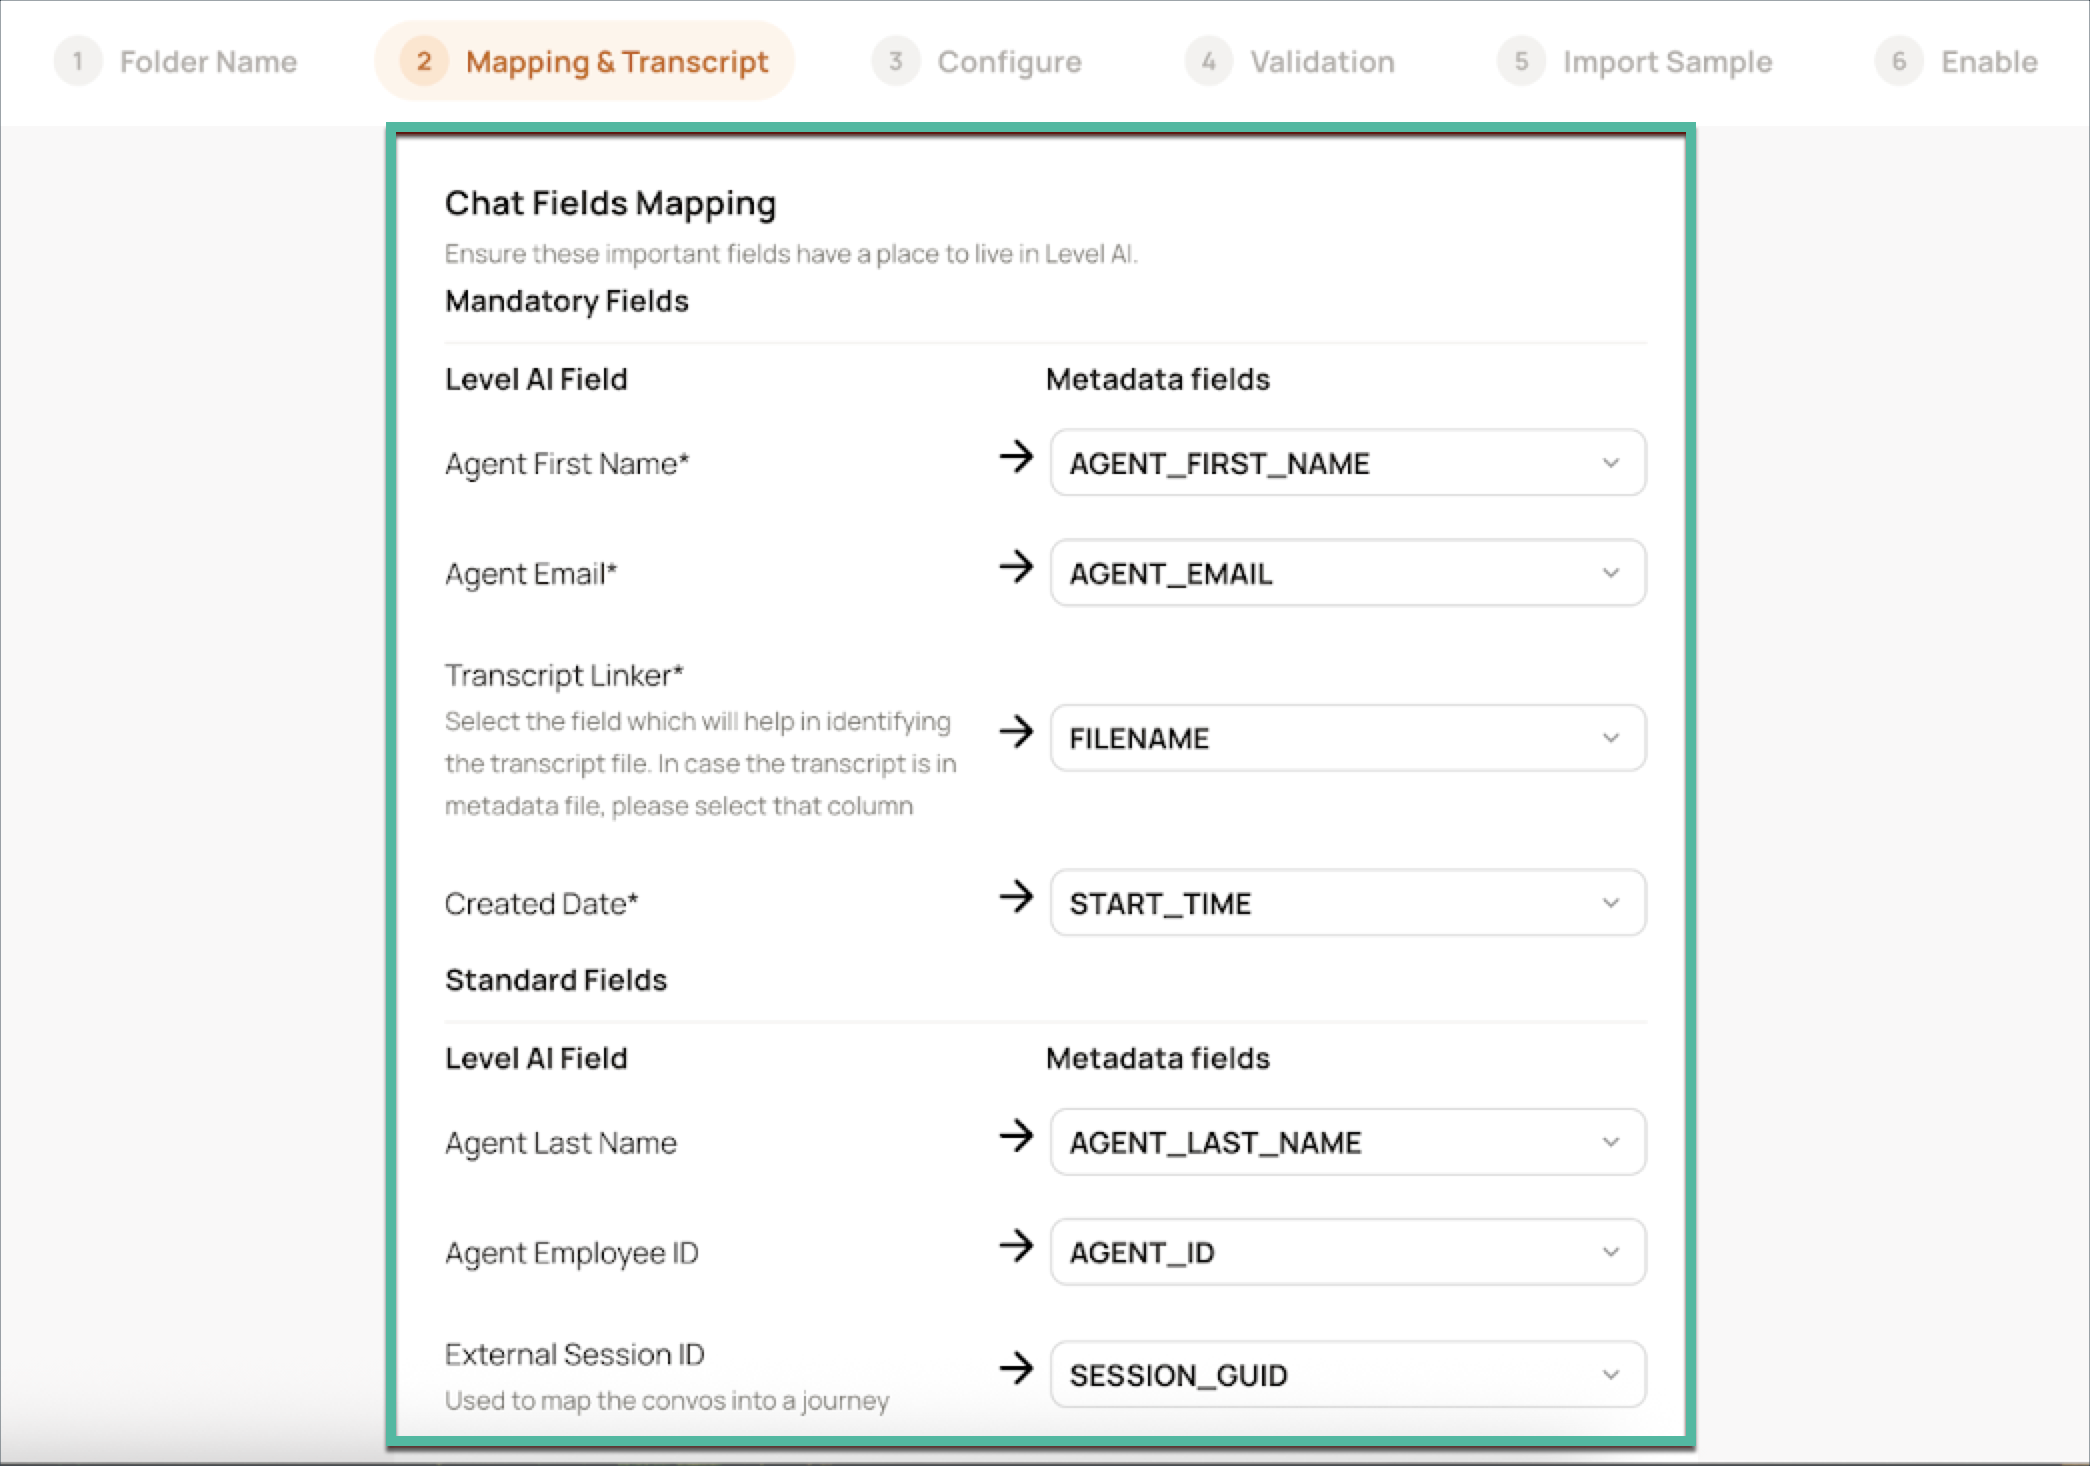
For Chat/Email/SMS
NOTE
For transcript configuration of Chat/Email/SMS, refer to this section.
Ensure the following conditions are met:
You have set up a Third party system to export voice calls/ chat/ email data to your SFTP bucket.
Voice/ Chat/ Email files are enabled, present, and actively flowing into the SFTP bucket you configured earlier.
All standard fields are included in your SFTP metadata reports.
Any required custom fields have been exported to the SFTP bucket.
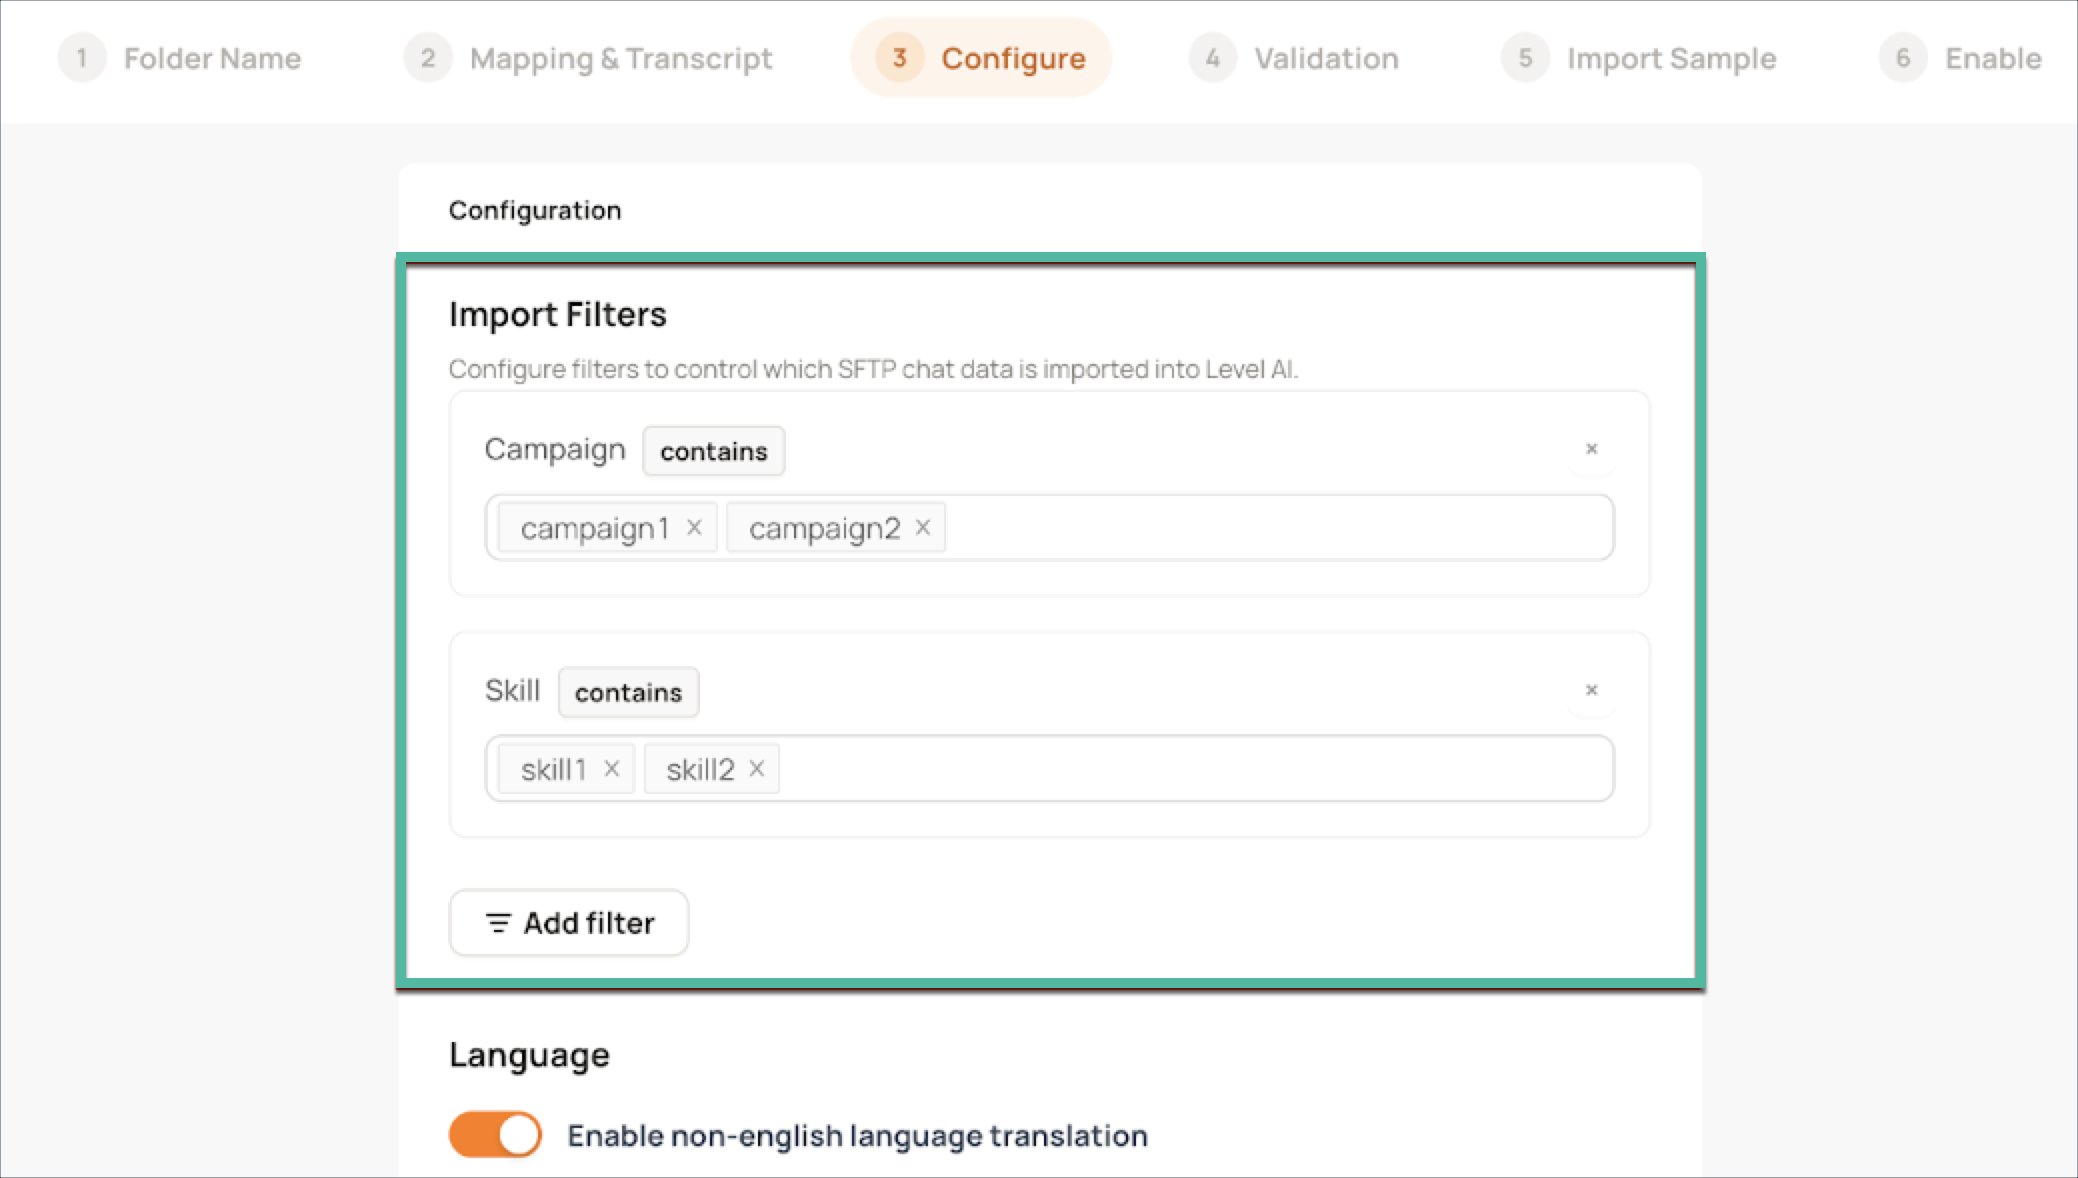
To control which calls/chats/ emails are imported, set up filters based on any of the metadata attributes. Press Enter after typing each name to store it:
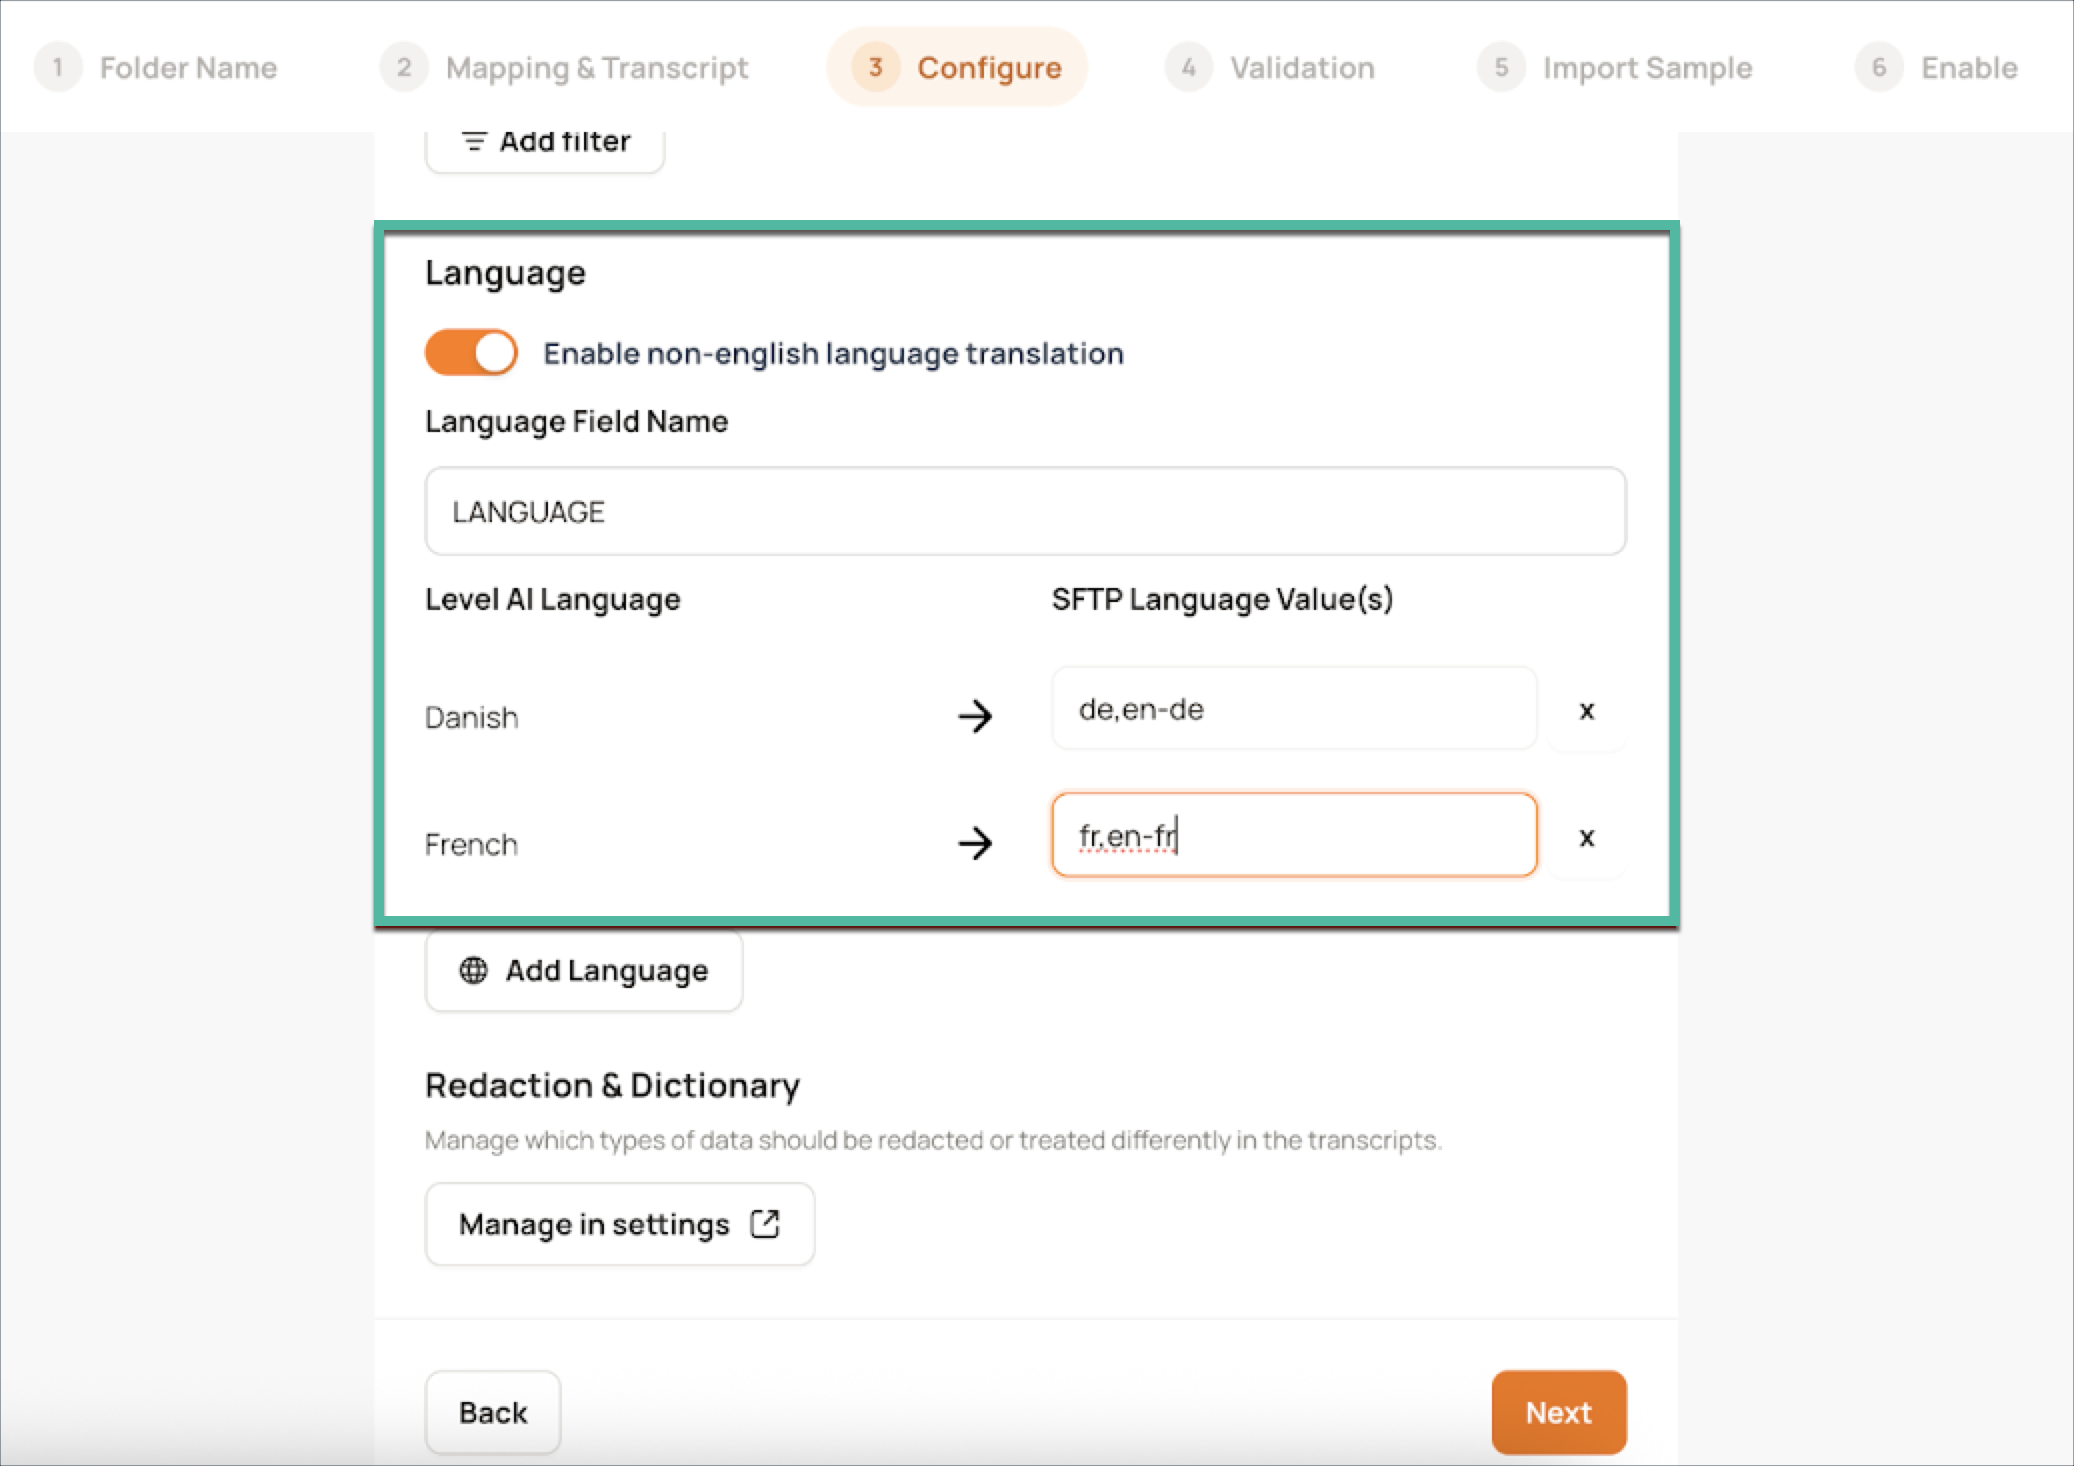
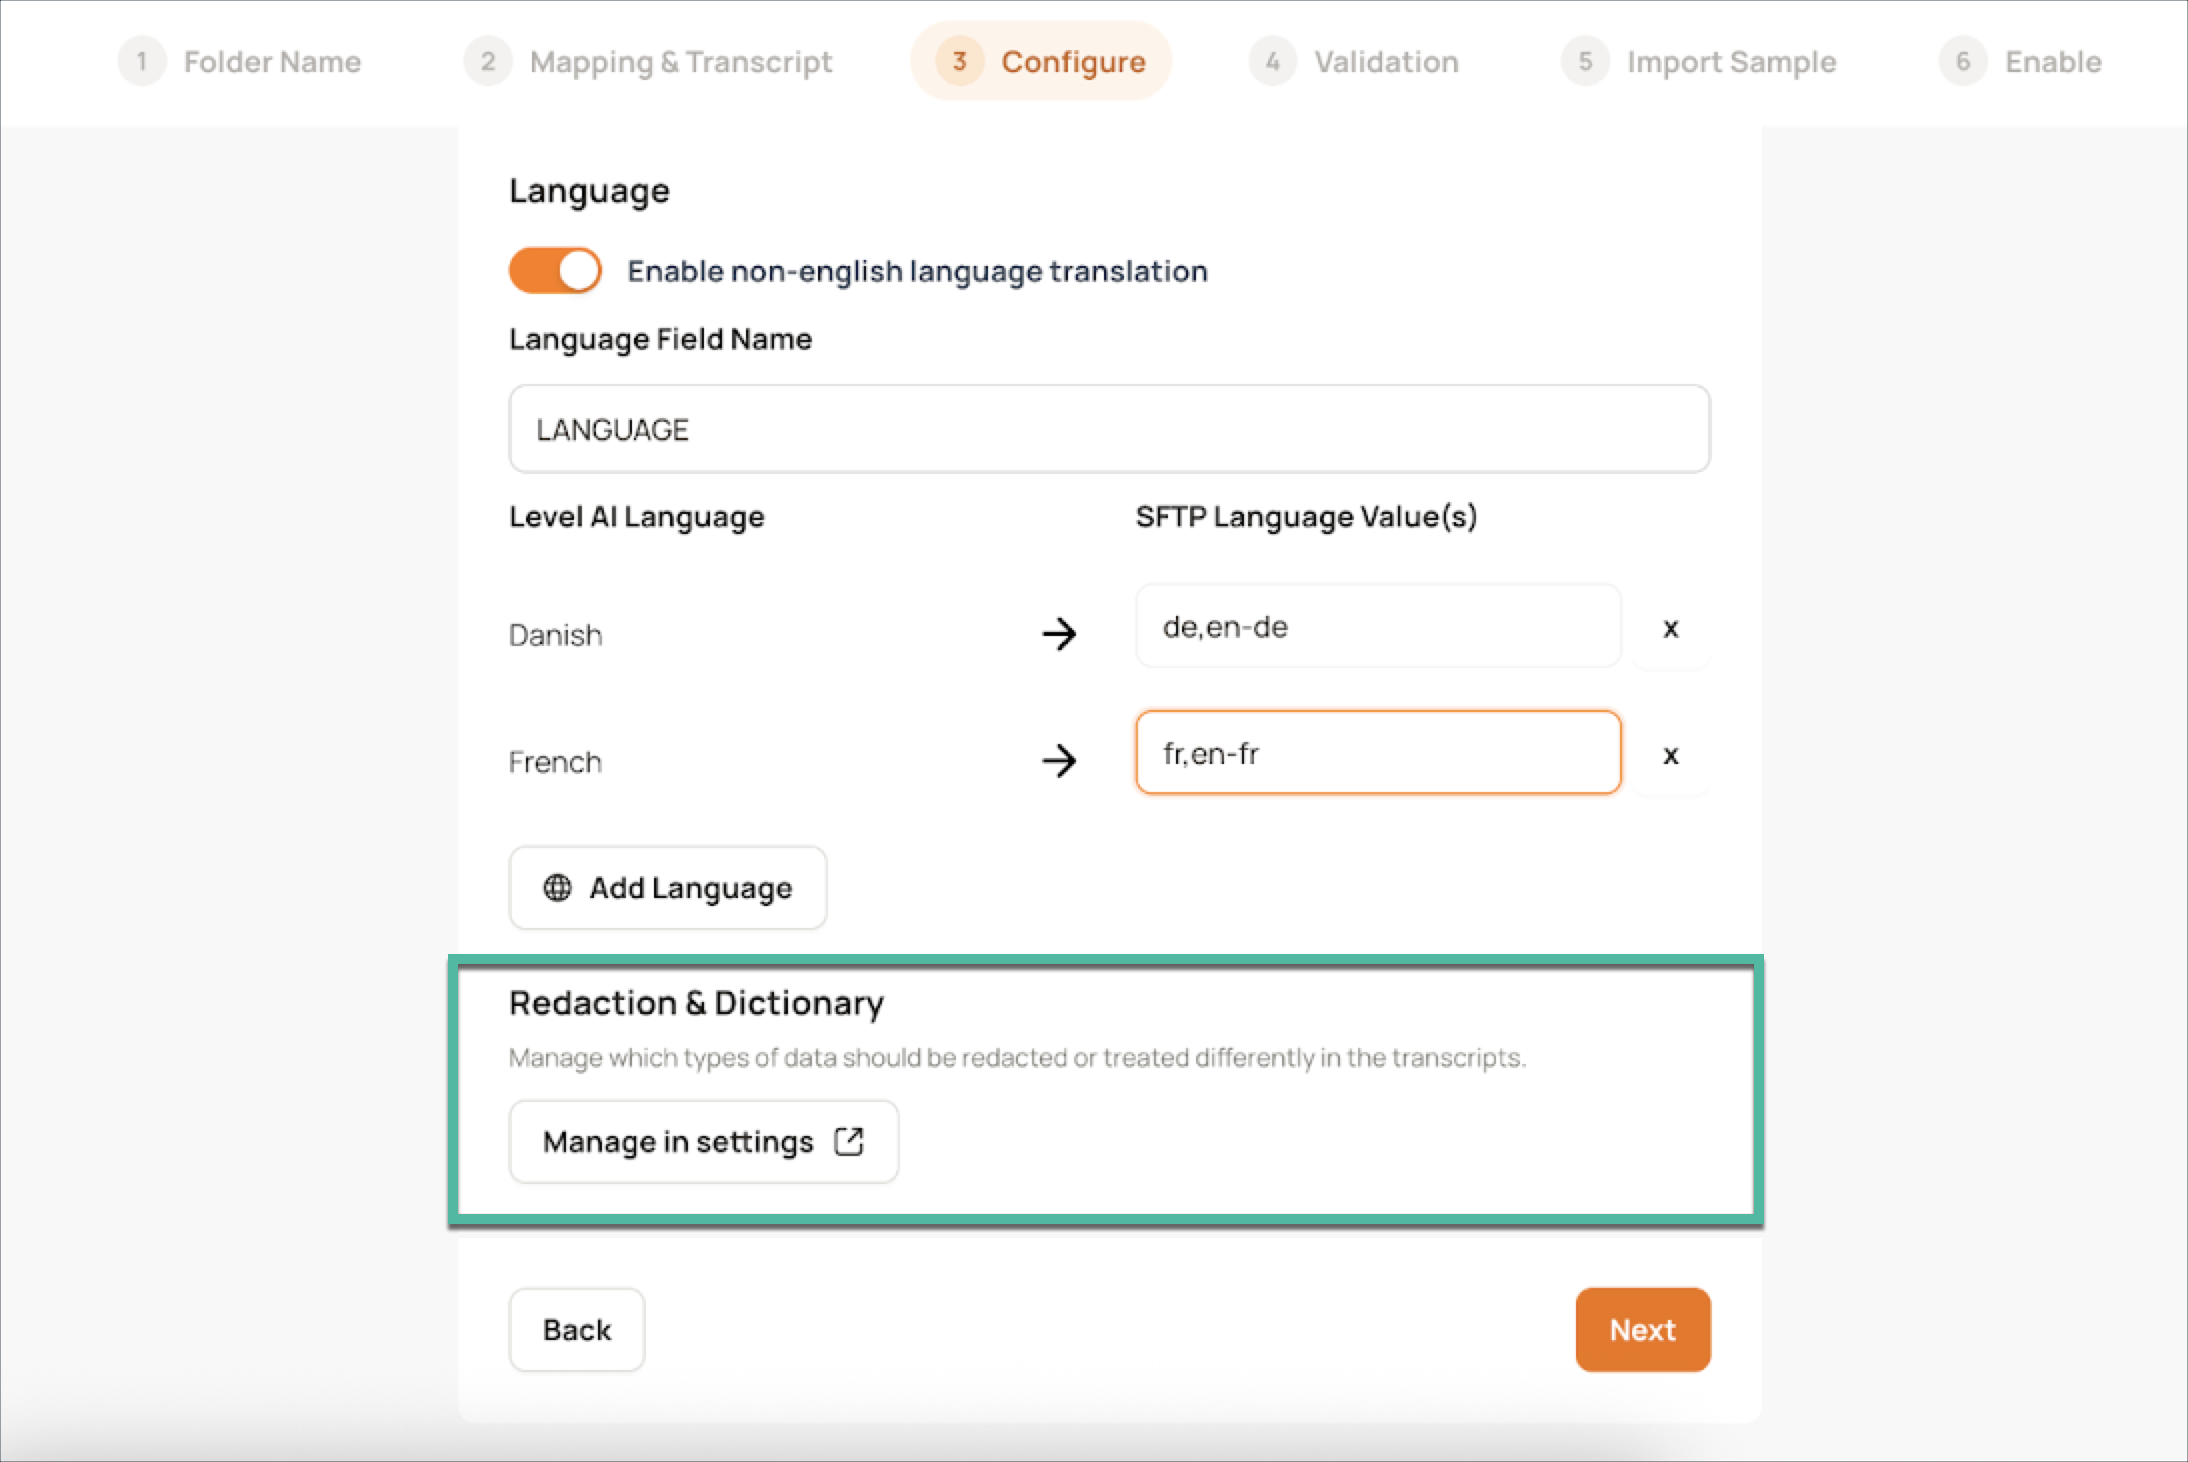
Enter the field name that contains the language code for the voice call/ chat/ email/ SMS conversations.
For each language, enter the corresponding language code that should be matched with the language field value.
You can add multiple codes by separating them with commas.
To manage redaction and booster words, under Redaction and Dictionary, click the Manage in settings button. Refer to 📄 Transcript Tools: Data Redaction and Booster Words
Validation
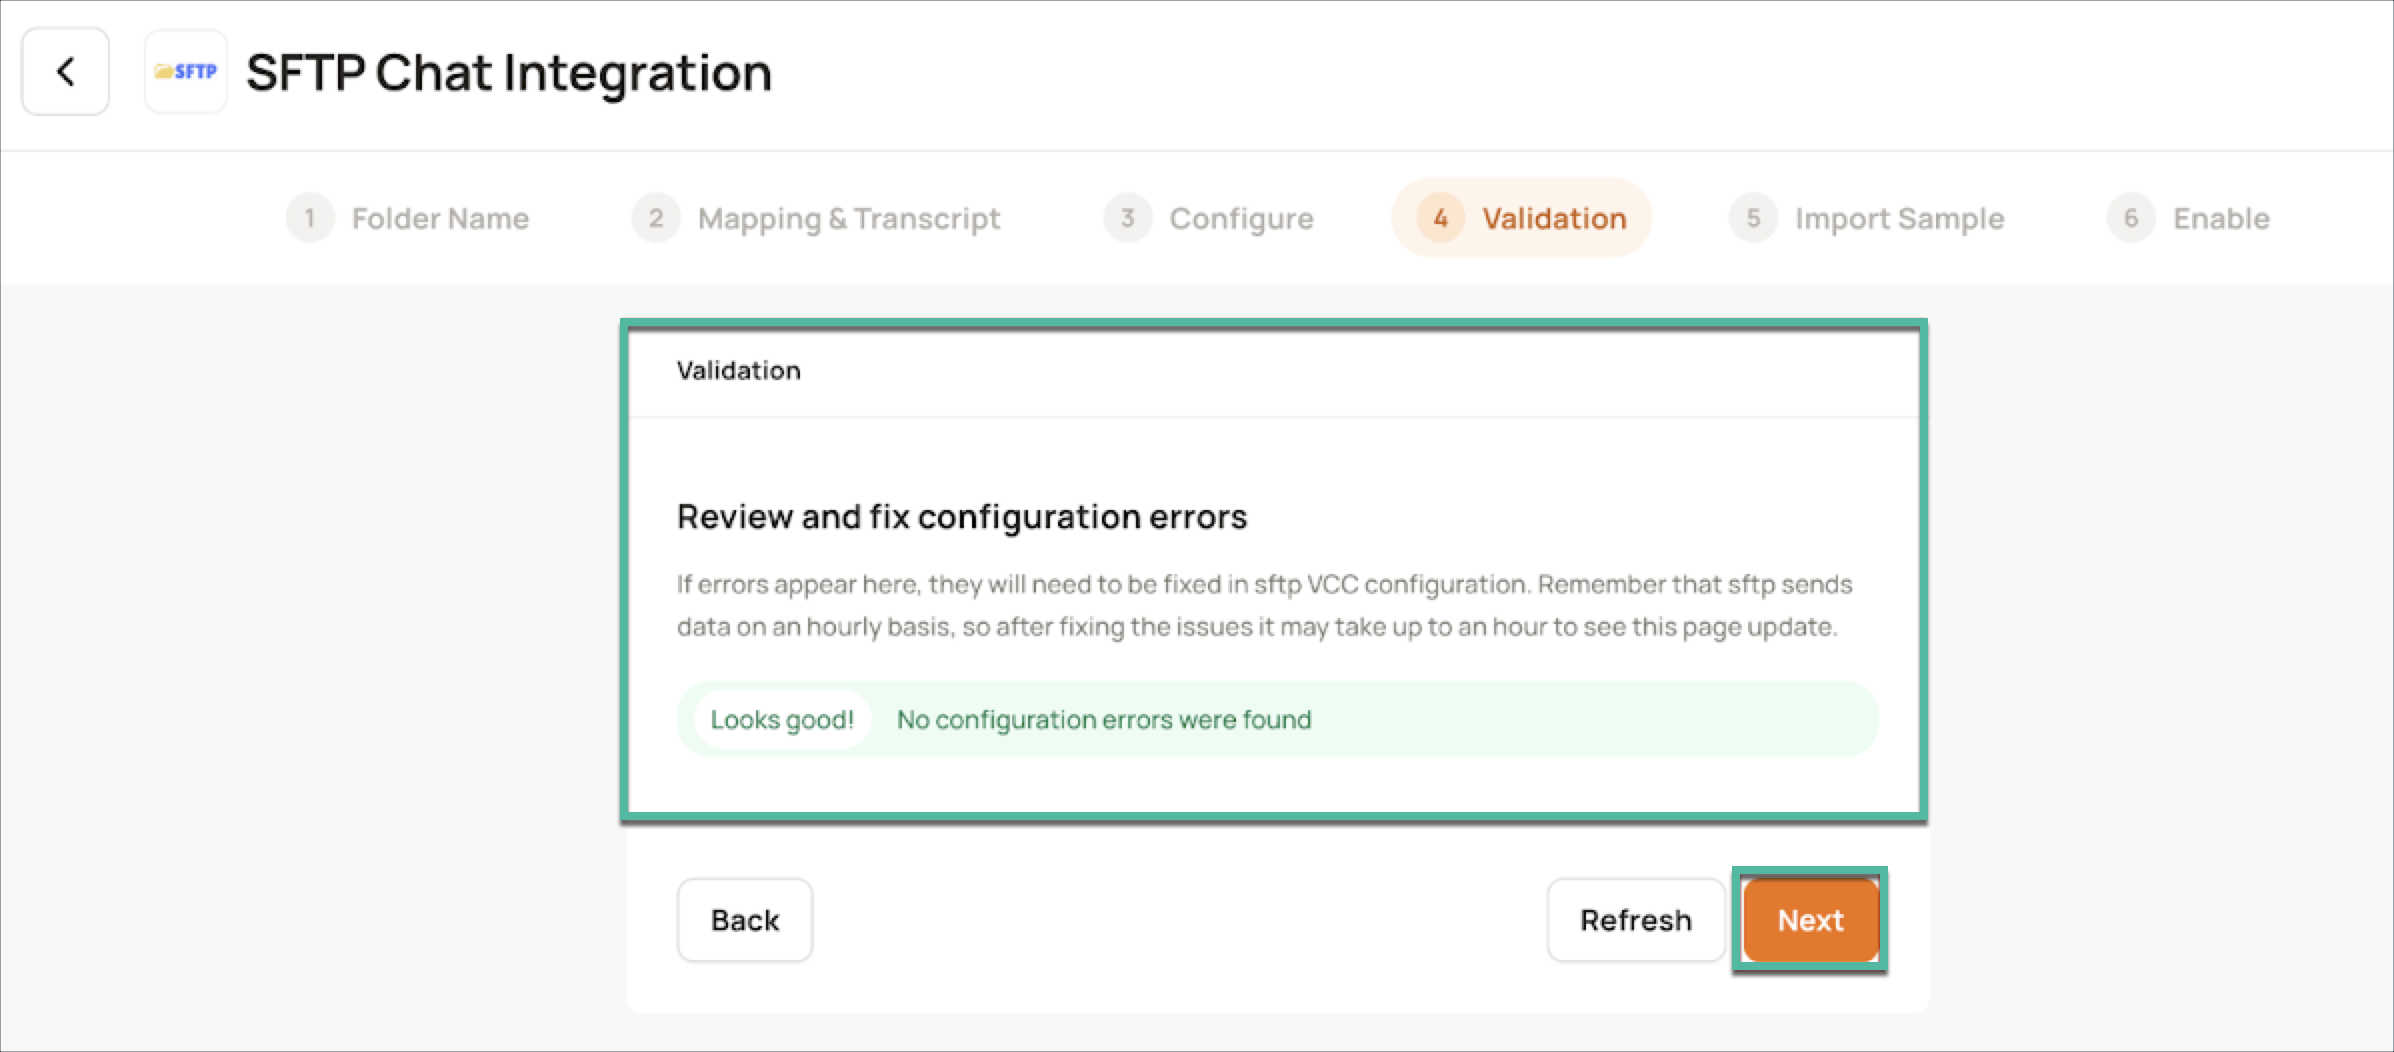
Check the Validation errors section. If any errors appear, resolve them in your Export settings of the third party system.
If you make changes to your VCC, click Refresh to re-run the validations.
If no validation errors are present, click Next.
(D) Importing Sample Data for Verification
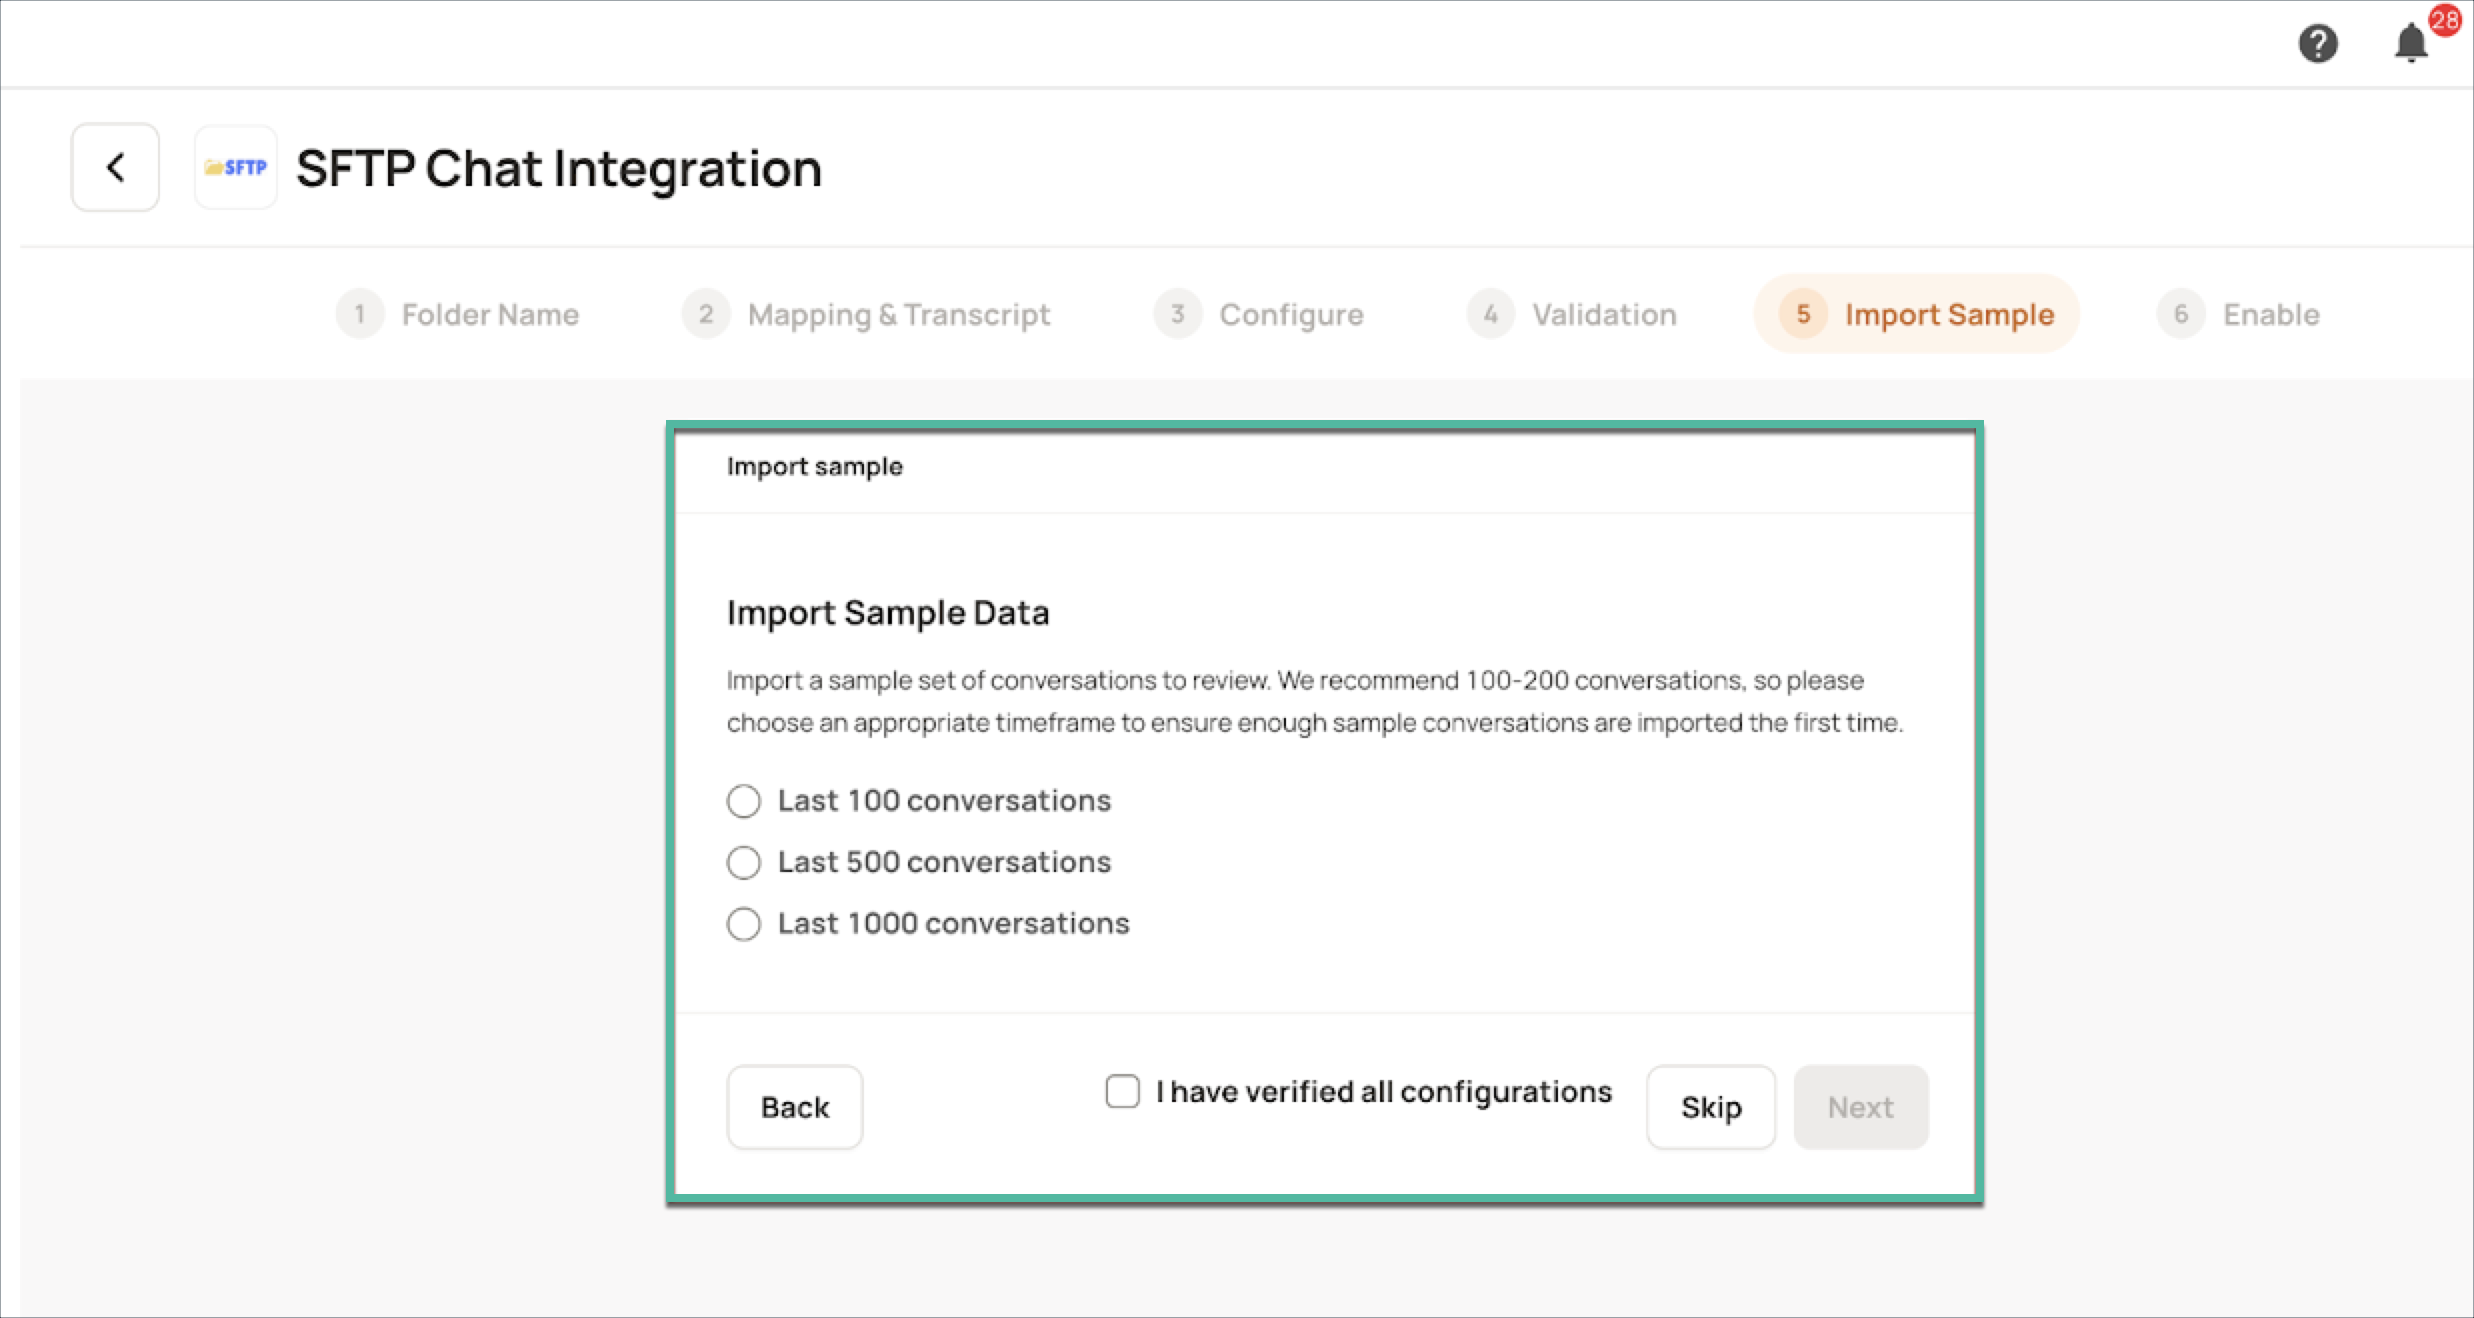
Before fully enabling the integration, it is strongly advised to import a sample of your SFTP data. This allows you to verify your configured filters and ensure the data is being ingested as expected.
Choose the desired number of conversations to import.
Allow approximately 30 minutes for the conversations to be imported after clicking Import Sample.
(E) Reviewing and Enabling the Integration
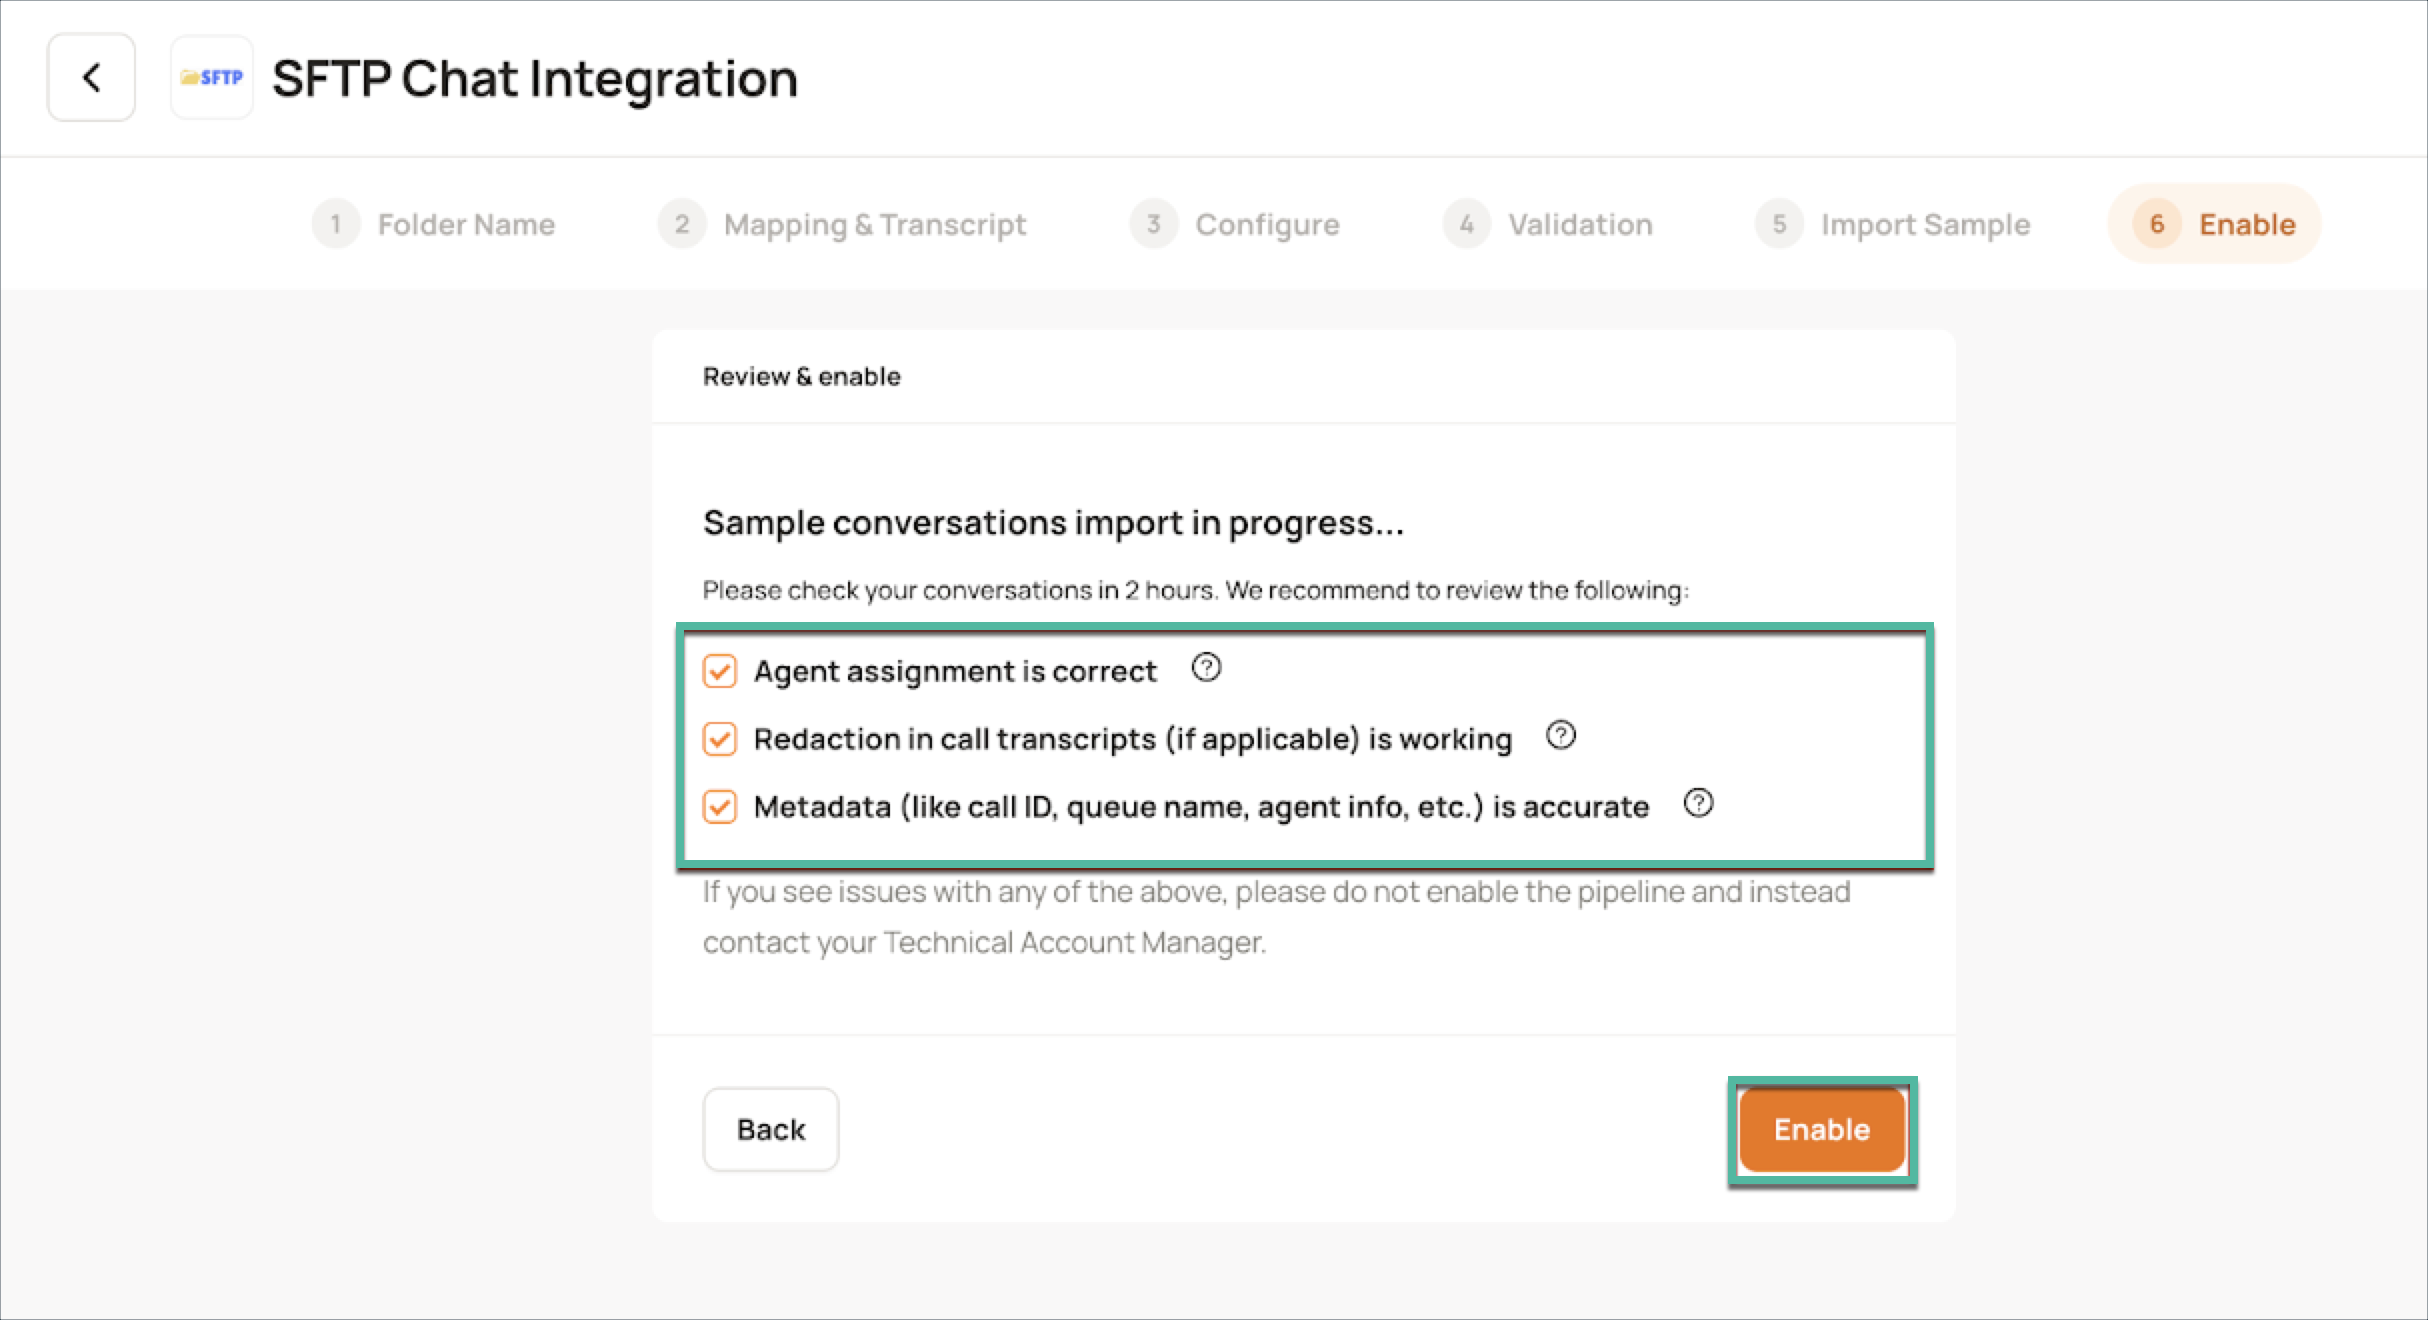
Once the sample data has been imported, carefully review each item in the provided checklist to confirm the accuracy of your configurations and the flow of conversations. Click the corresponding help icon for for detailed instructions and screenshots.
After you have thoroughly verified the sample data and are confident in your configurations, mark all the checkboxes in the checklist and click Enable to activate your SFTP integration.
In the dialog box that appears, click Enable to finalize your integration.
(F) Editing Integration Configurations
Disabling a Channel
You can temporarily halt data ingestion from SFTP to Level AI at any time.
Under Active Channels, click the corresponding Disable button.
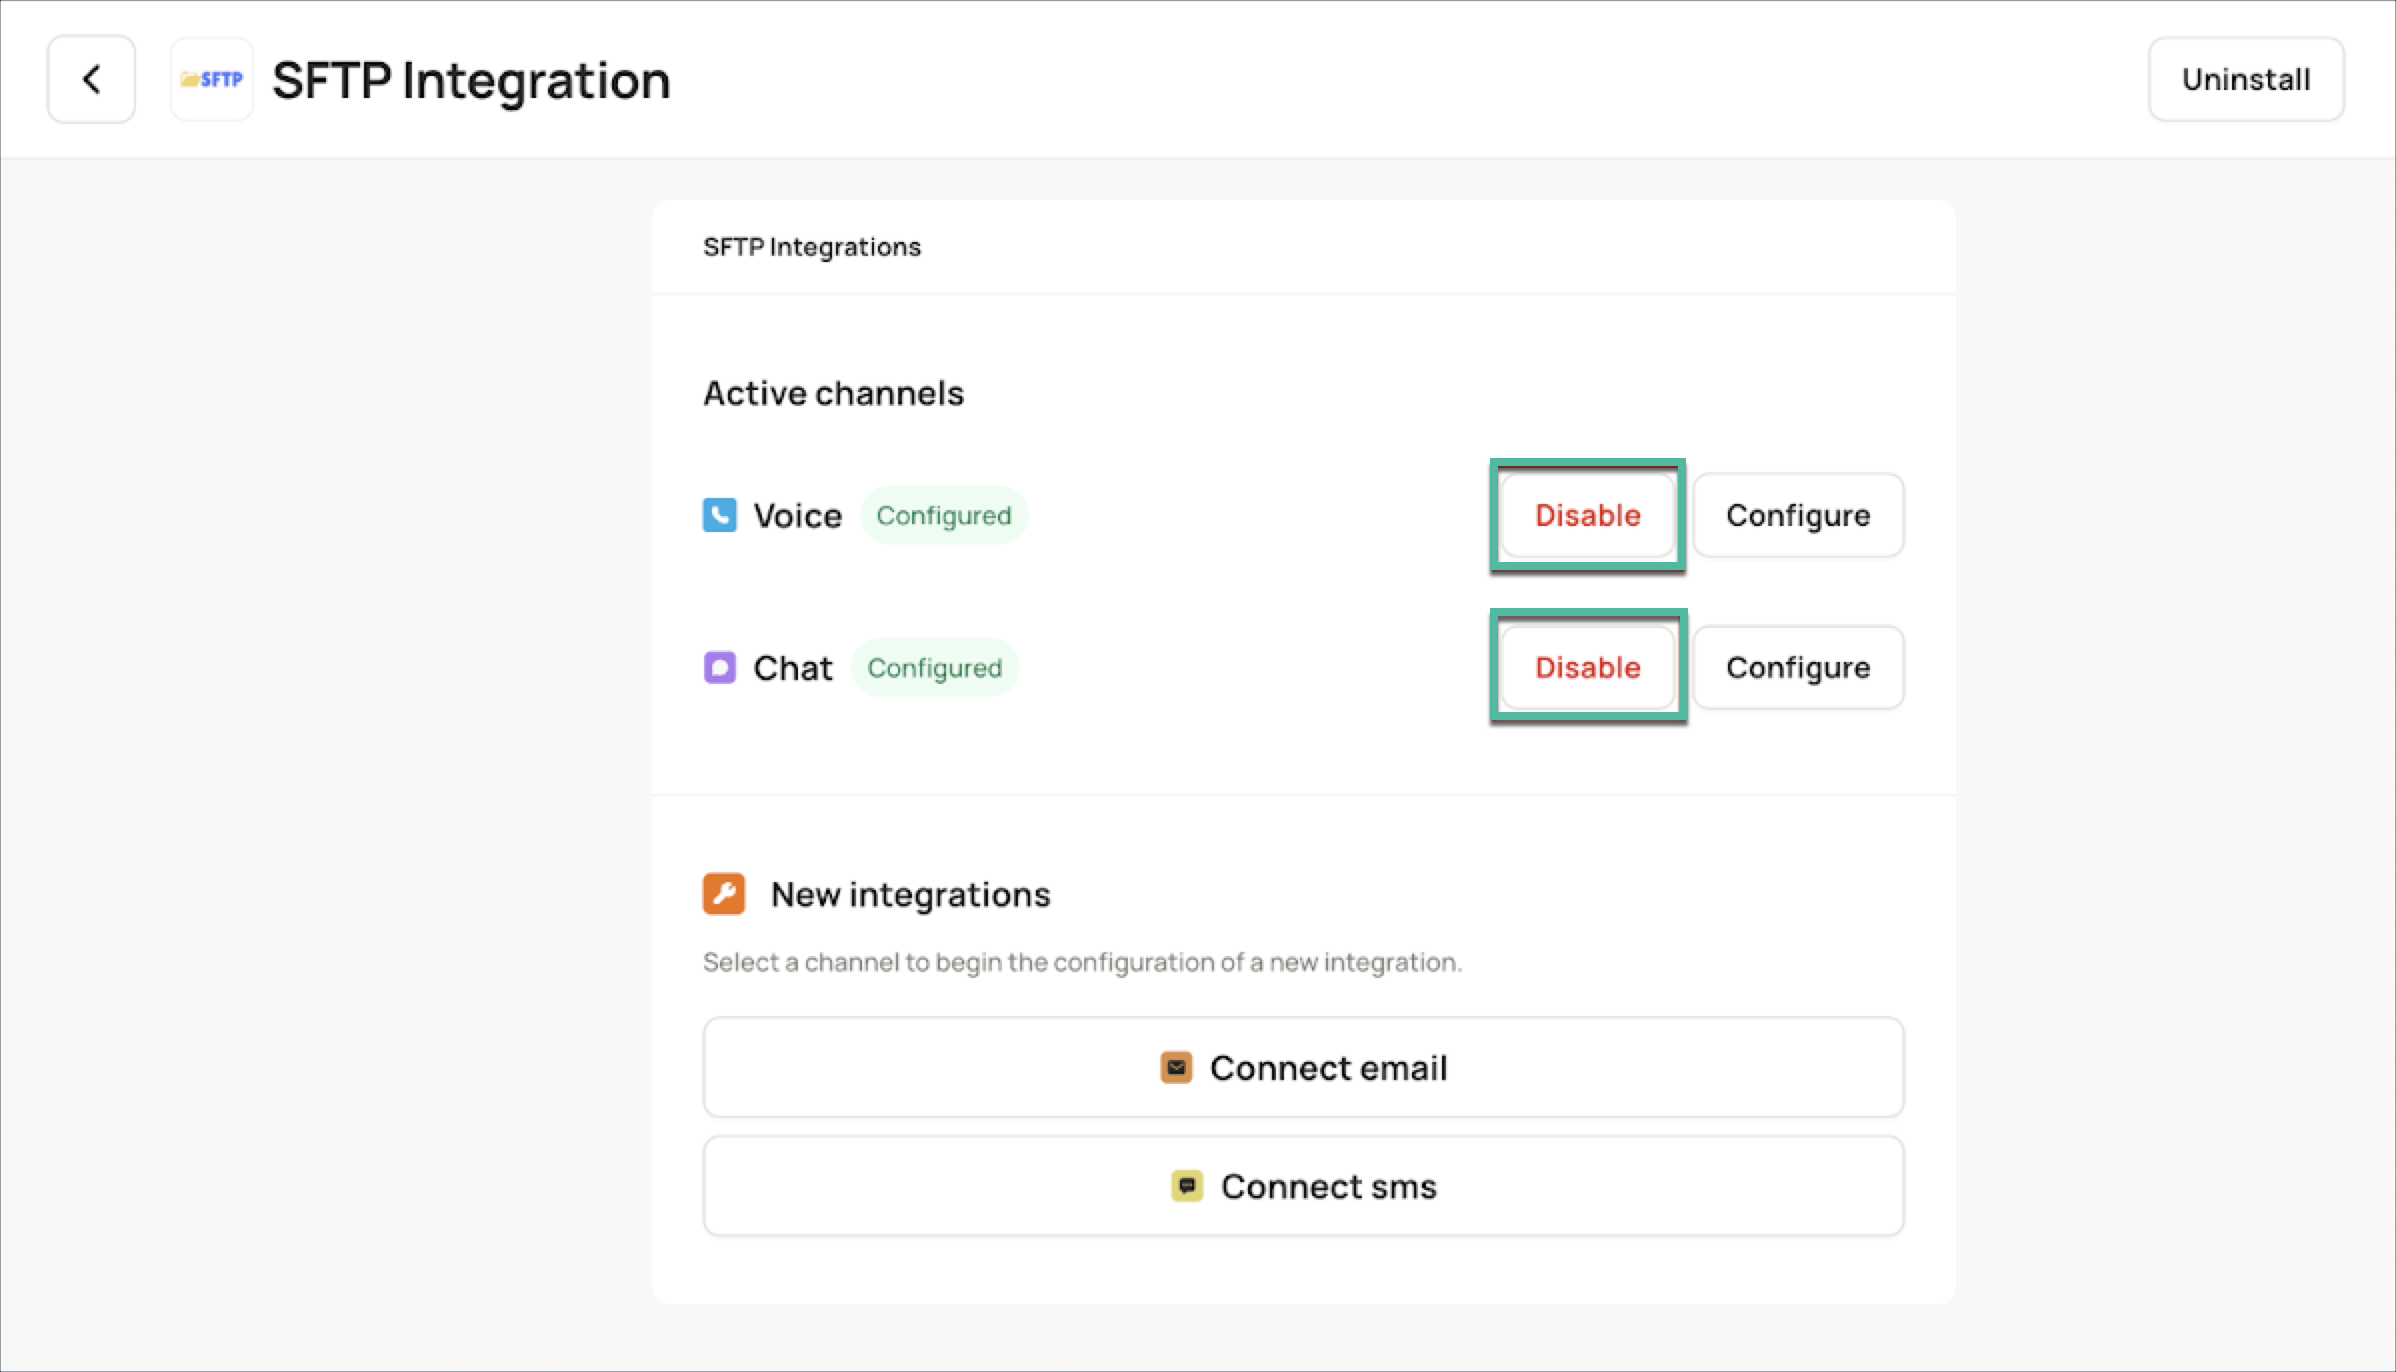
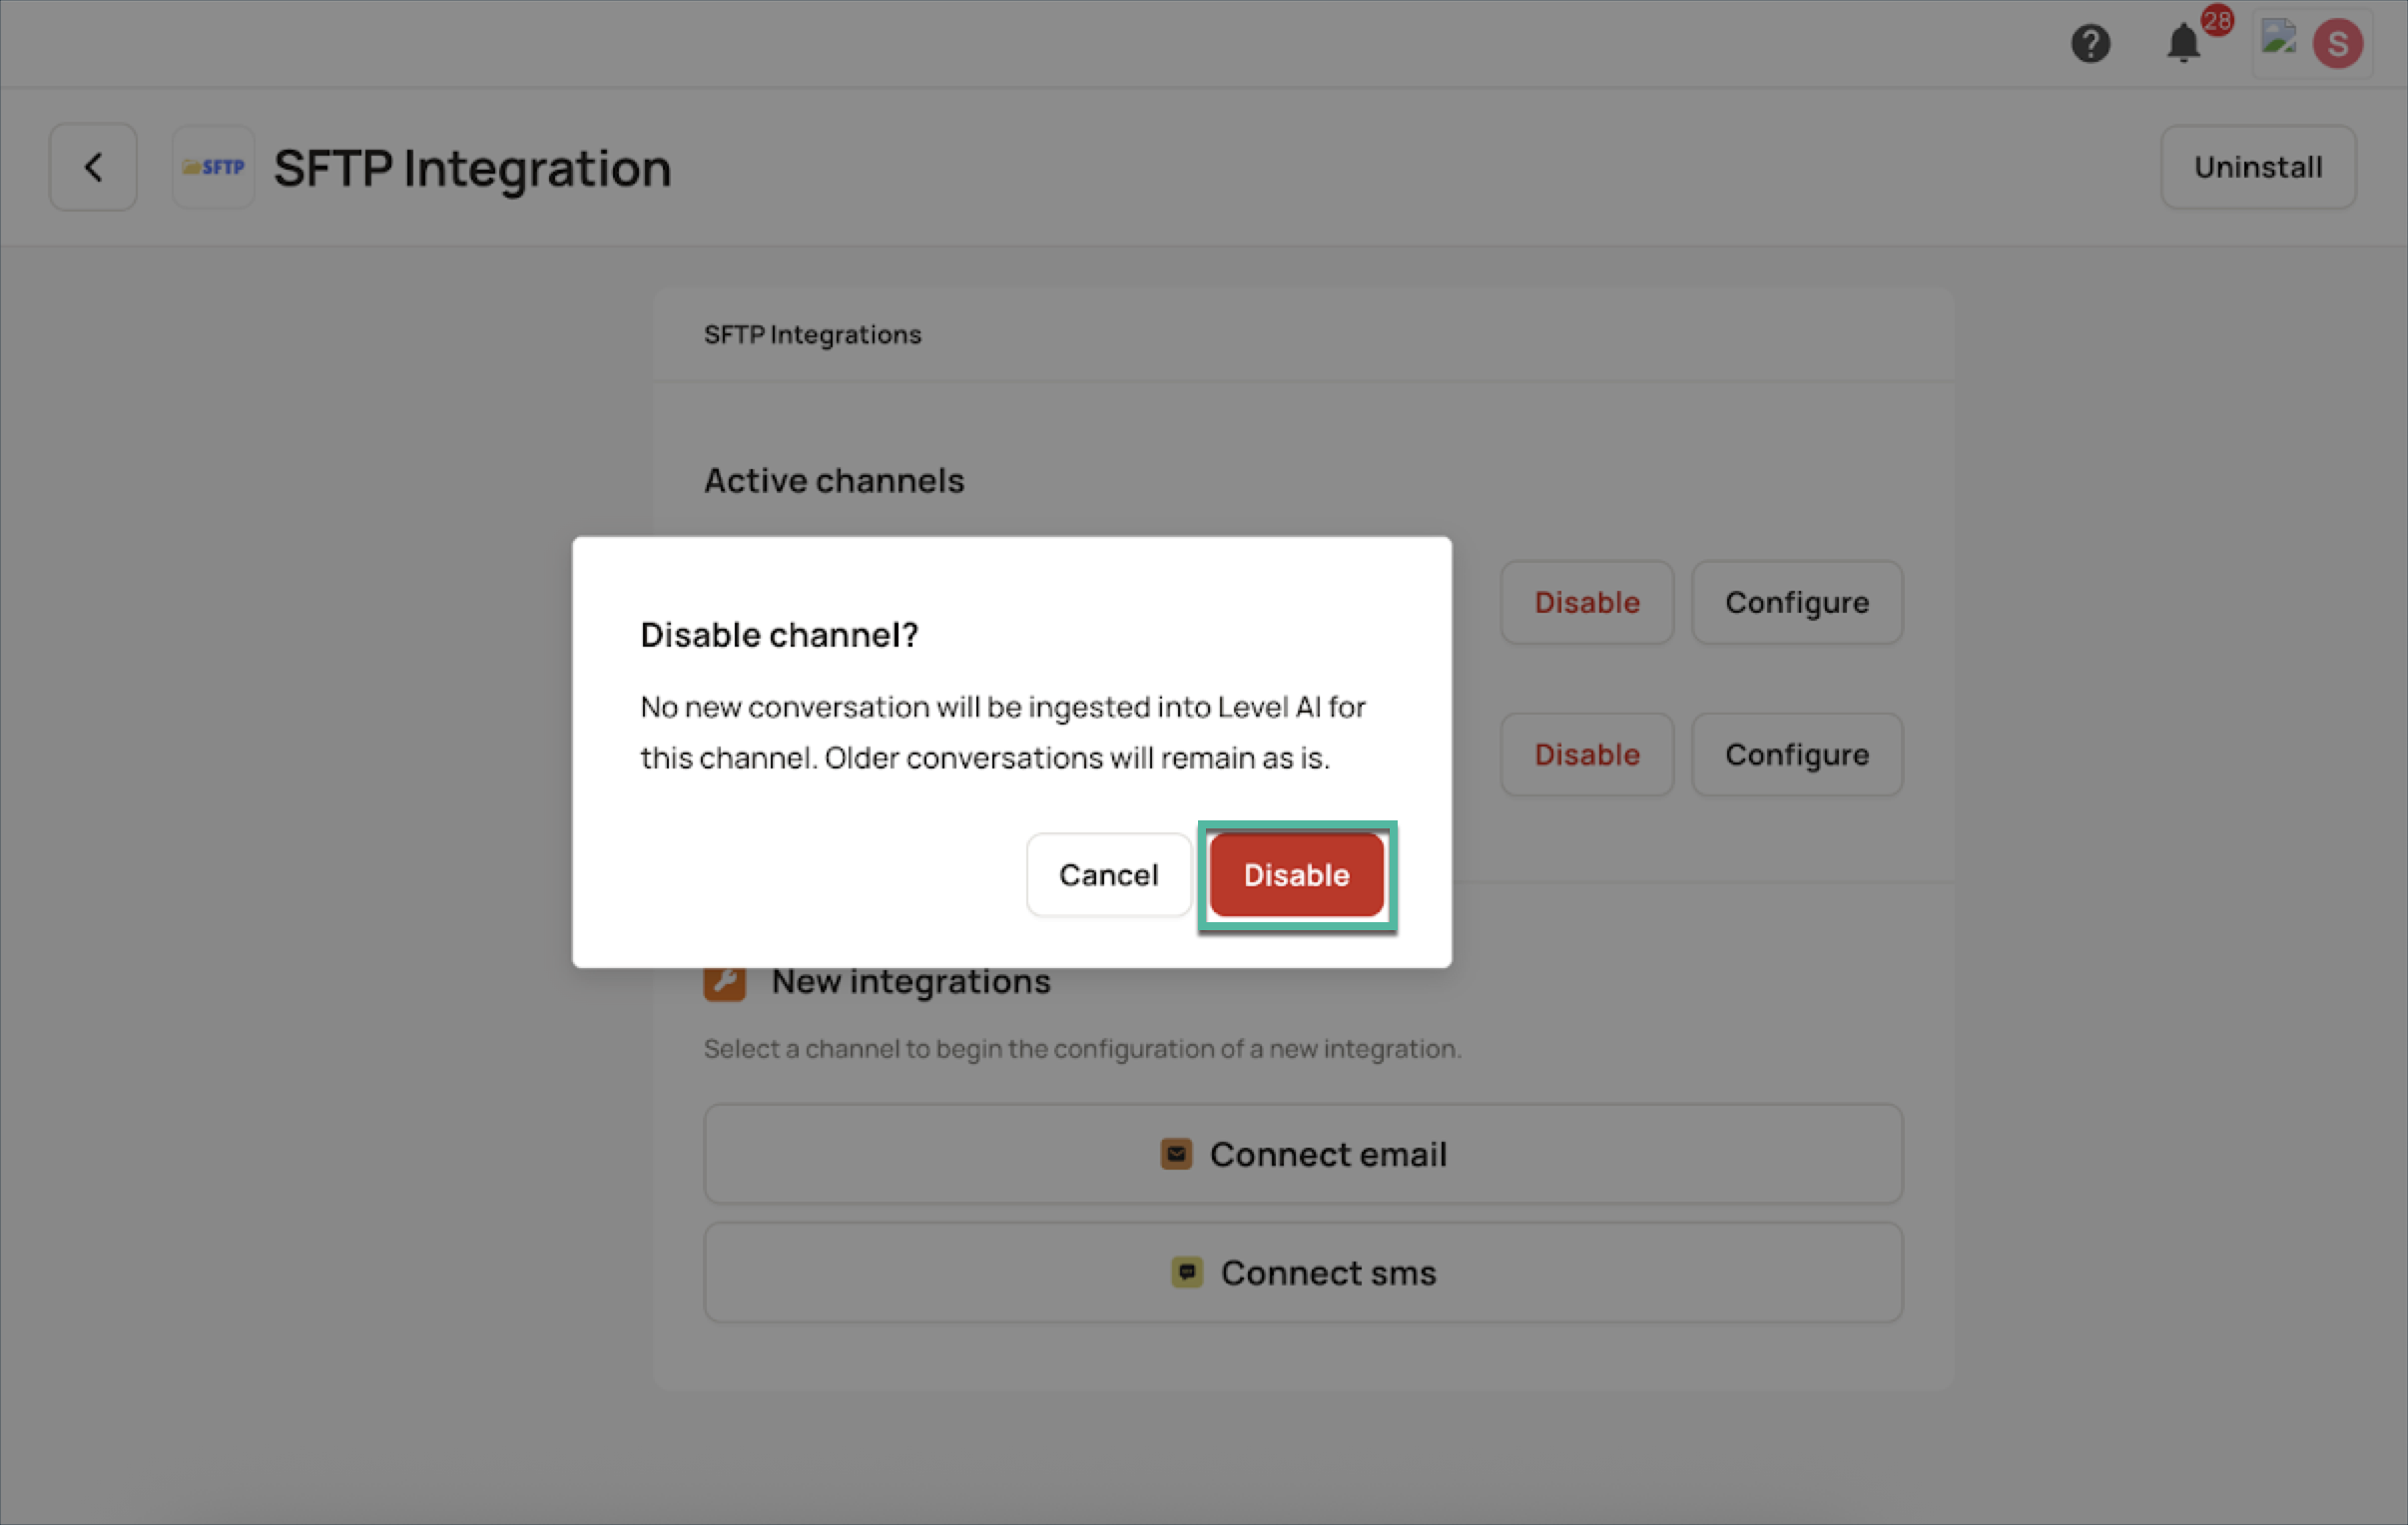
Confirm the action in the dialog box that appears.
NOTE
No new conversation will be ingested once you disable the channel. Older conversations will remain in the Level platform as is.
(G) Transcript configuration for Chat/Email/SMS Channels
In the case of Chat/Email/SMS channels, we would need to configure the structure of the transcript that is going to be present in the SFTP export of the third party system.
INFO
We highly recommend that the transcript should follow the structure present in the following csv files. This would help in setting up the integration in a smooth manner:
For CSV Transcripts: CSV Structure
For HTML Transcripts: HTML Structure
Before configuring the parser, make sure you have linked the proper transcript column configured.
Step 1: Select Transcript Type
This dropdown defines the overall file type that contains the transcript data.
Choose CSV if your transcript content is located within a column of your primary metadata CSV file.
Choose HTML if your transcripts are in separate HTML files, linked via the Transcript Linker.
Step 2a: Parser Configuration (HTML Transcript)
In case of HTML transcript,
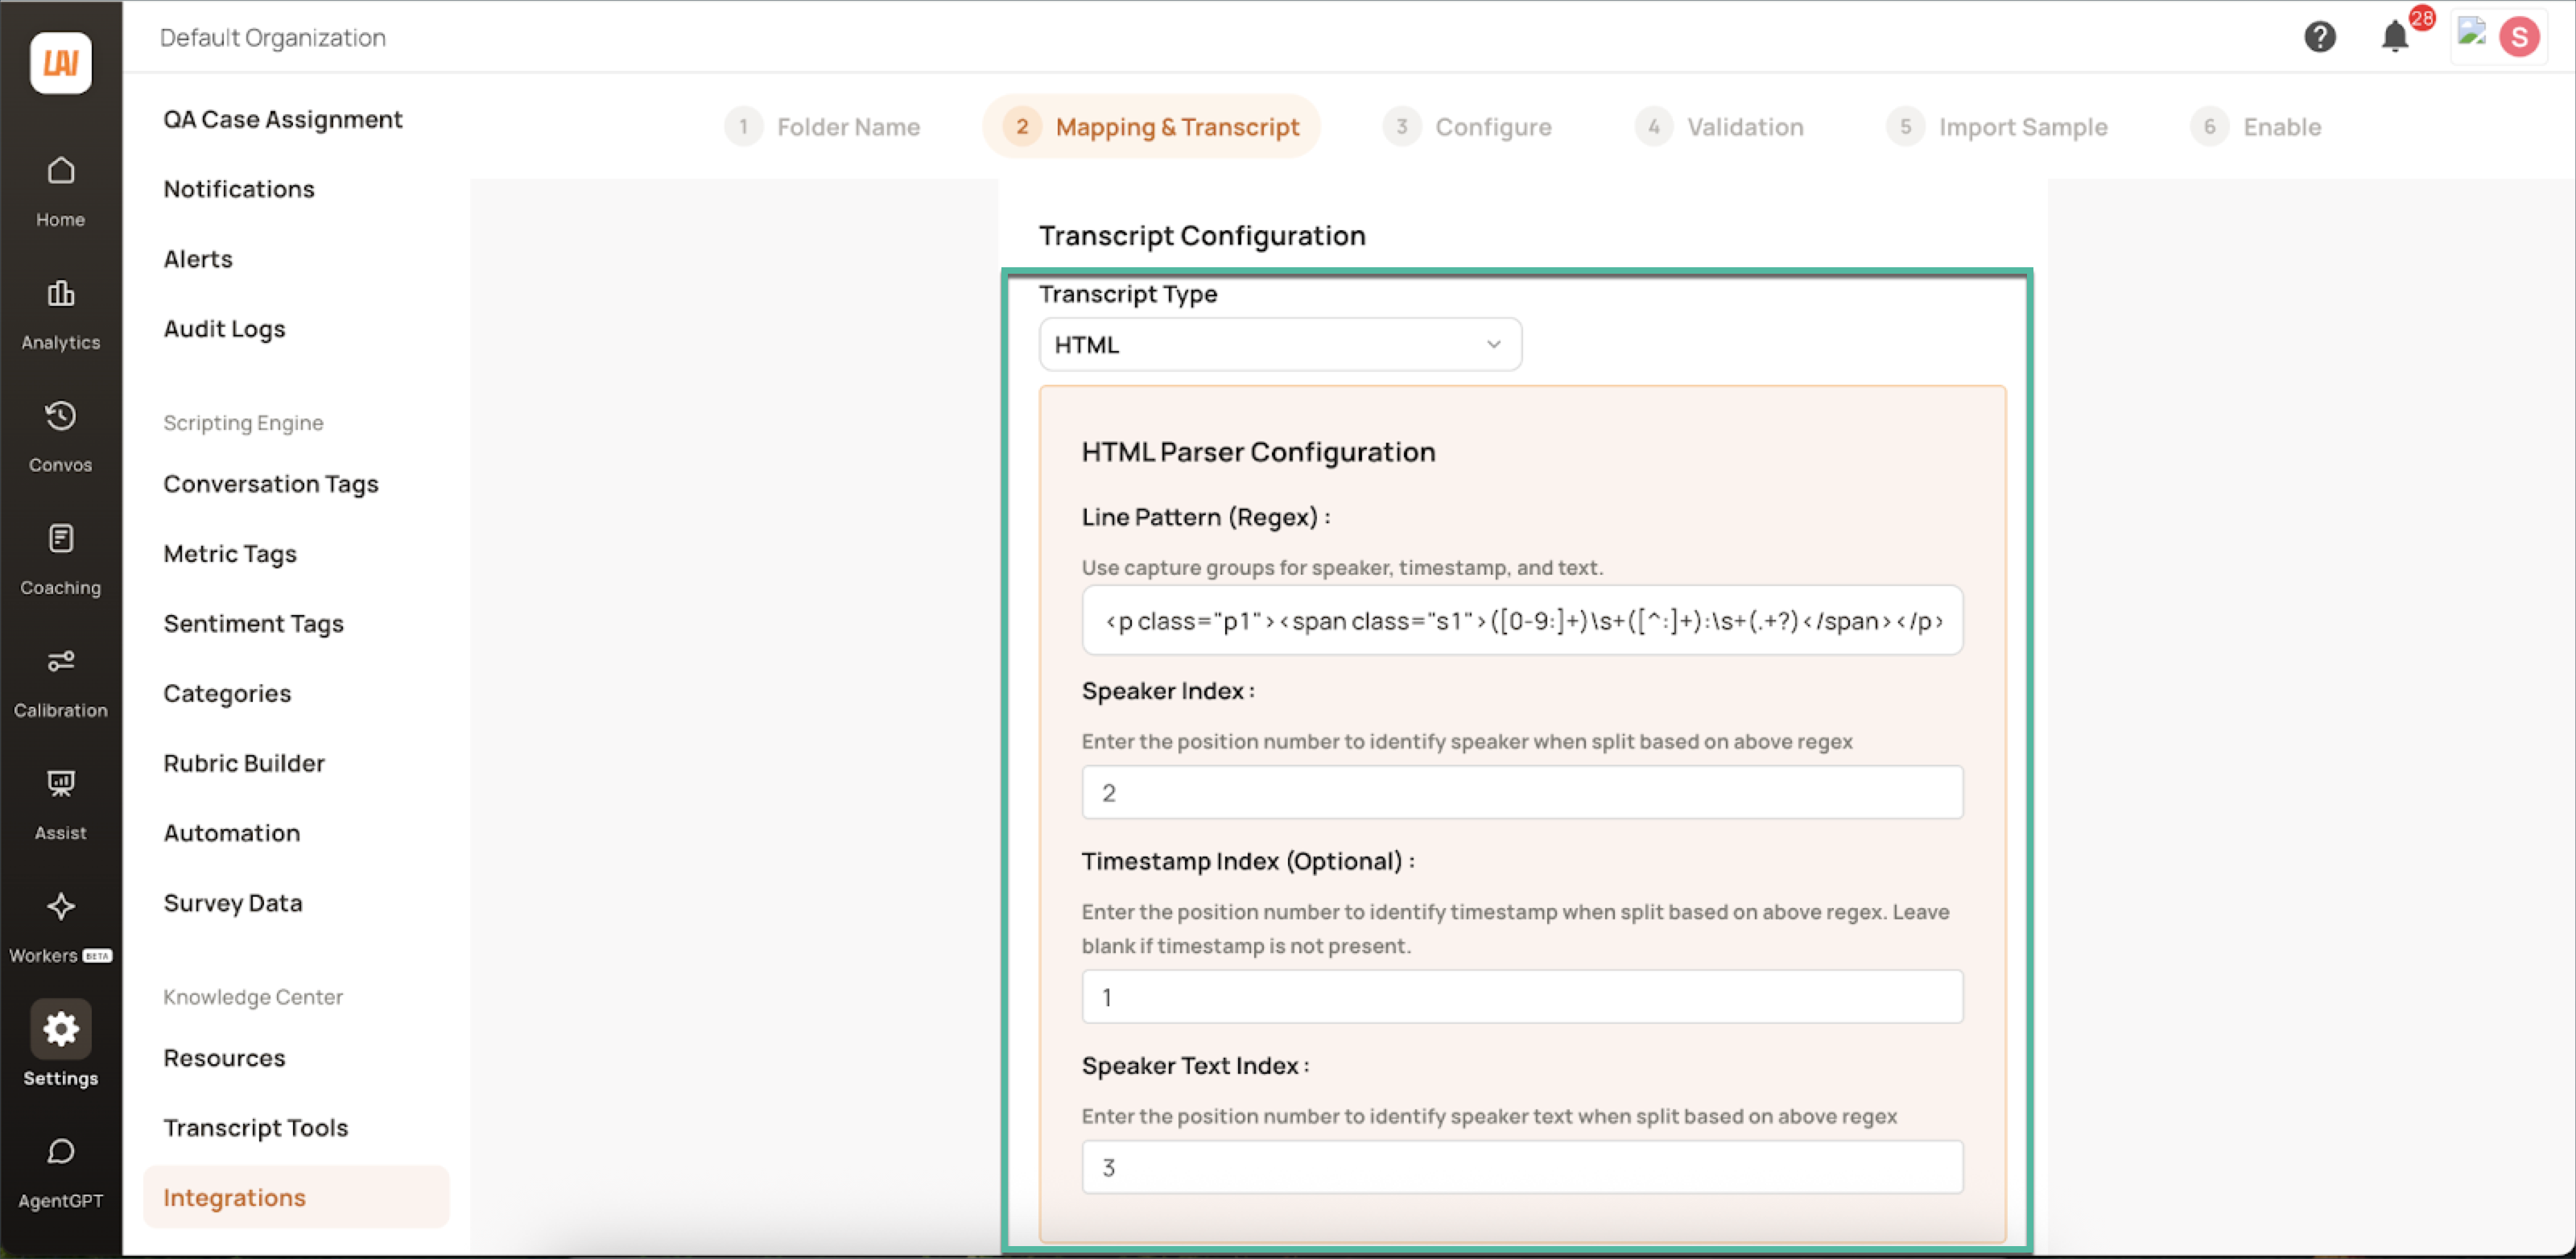
Enter the regex in the Line Pattern, which would divide the html file into 3 parsable fields (Default regex for the above sample files is populated automatically in the UI by default).
Enter the indexes for the 3 parts of the message in the corresponding inputs such as Speaker, Speaker Text, and Timestamp.
Step 2b: Parser Configuration (CSV Transcript)
In case of CSV Transcript
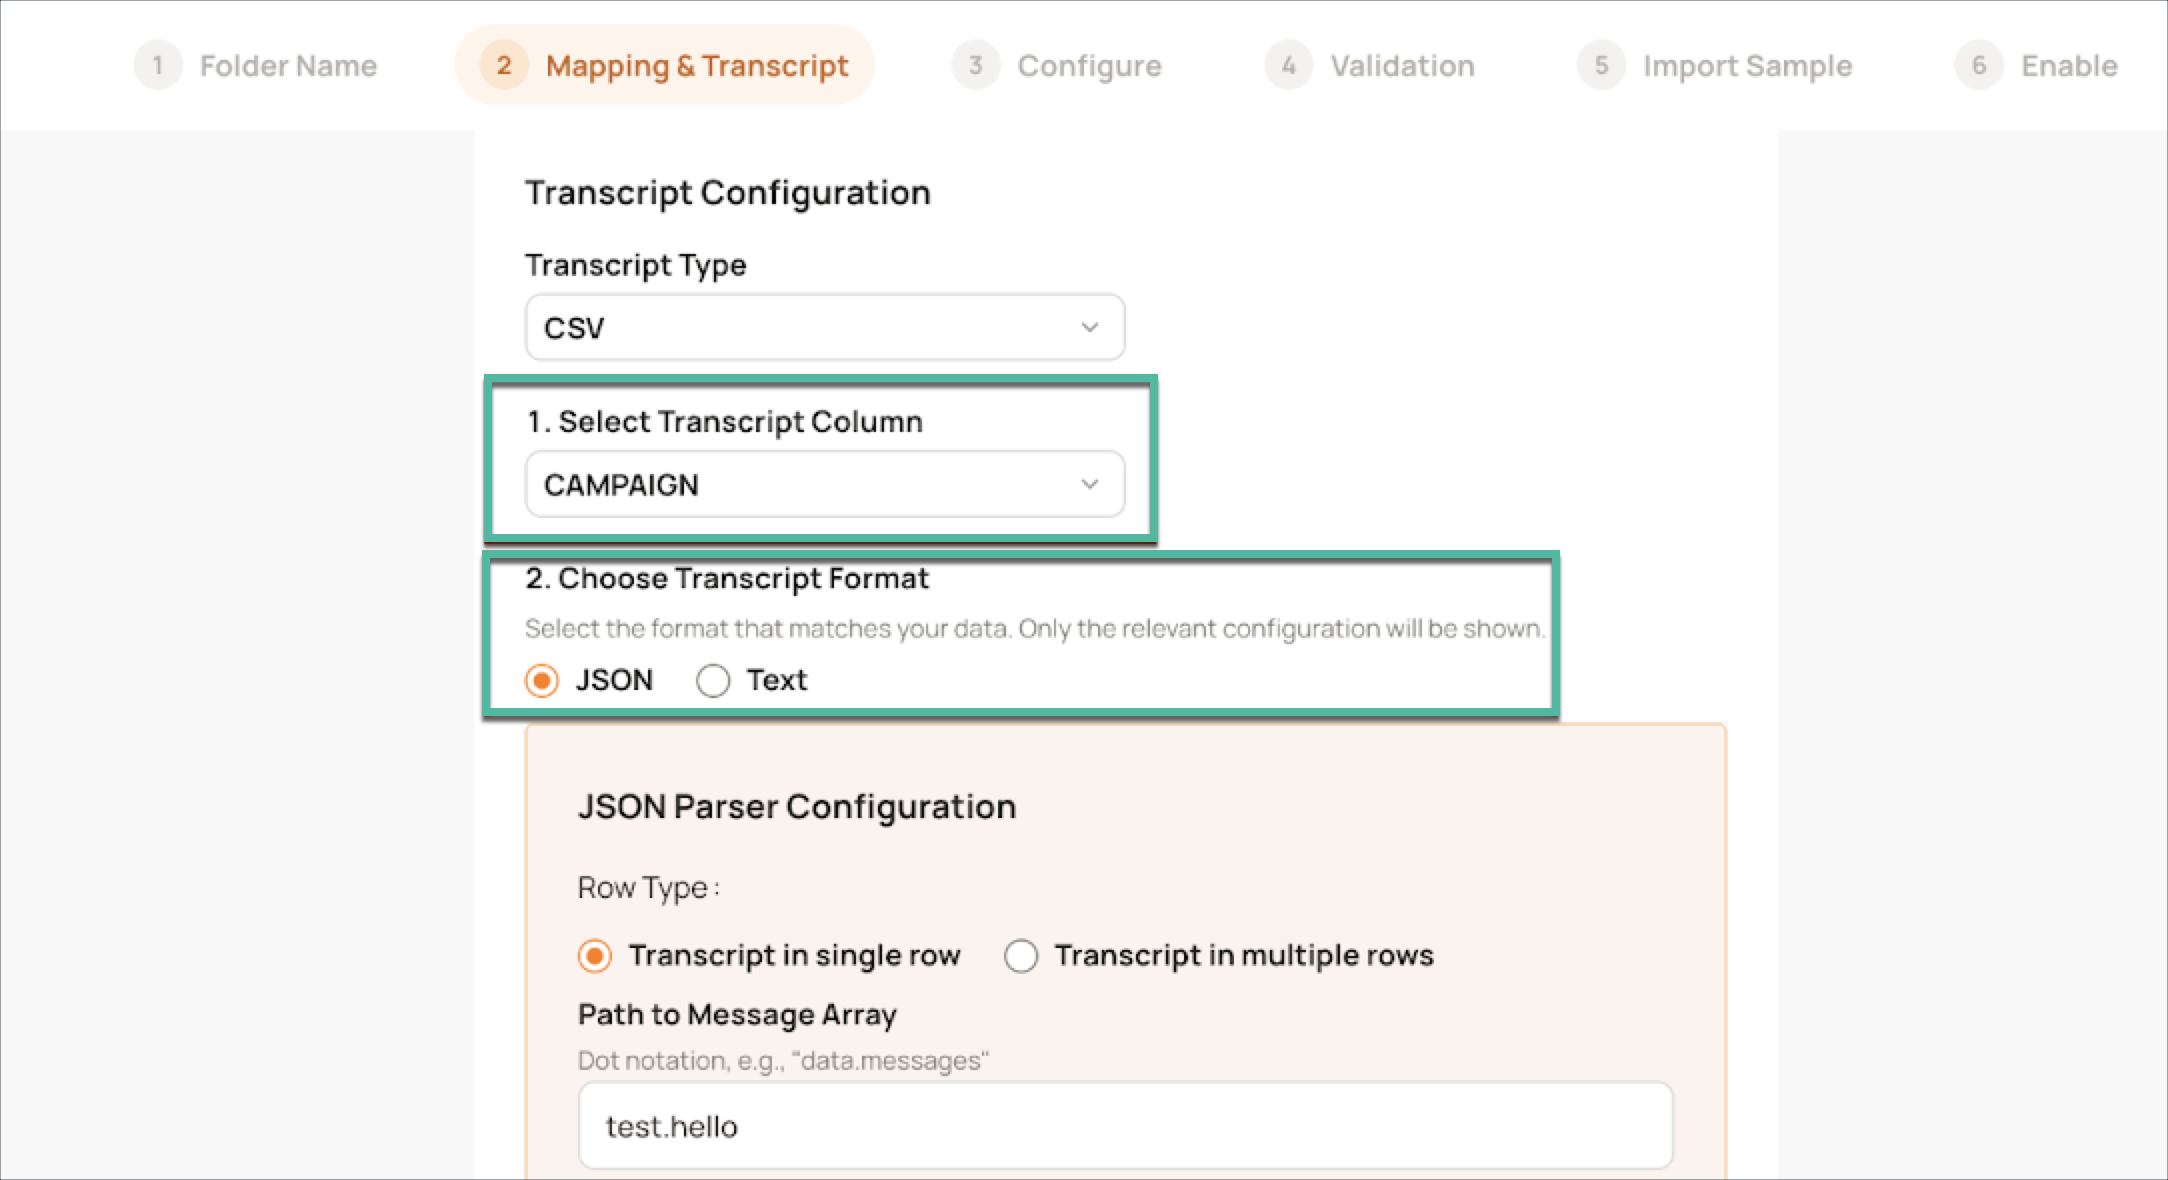
Select the column where the transcript or link to the transcript is present.
Then select the format of the transcript, either JSON or Text.
Select whether the transcript will be in single row/ multiple rows and select the column combing them in the latter case.
If you selected JSON,
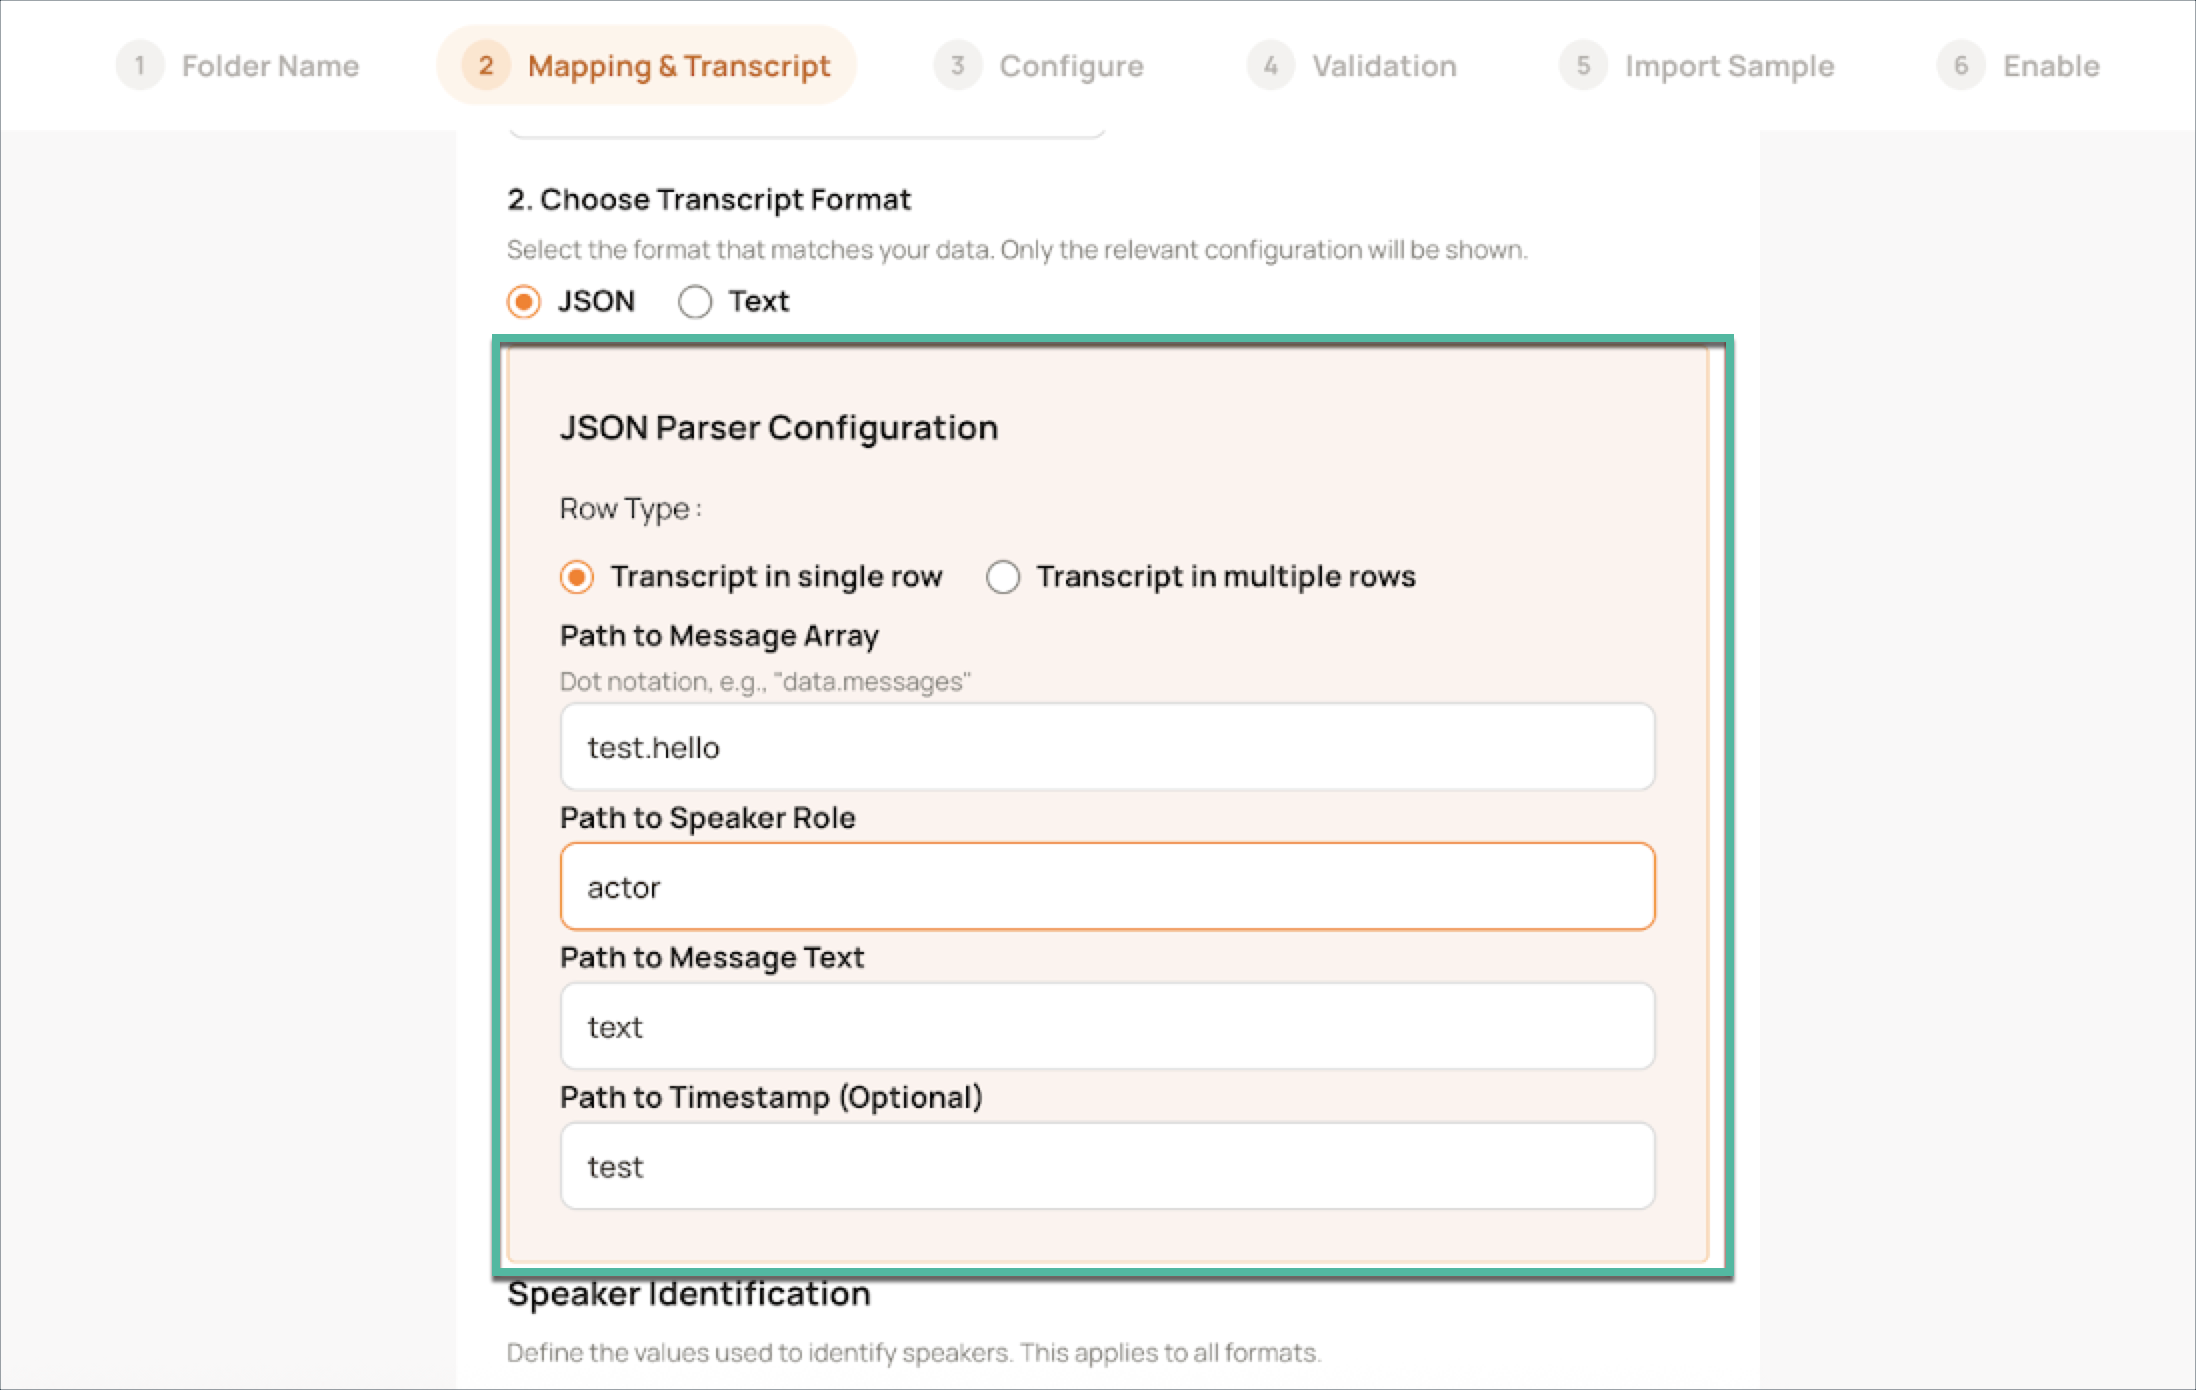
Transcript in single row
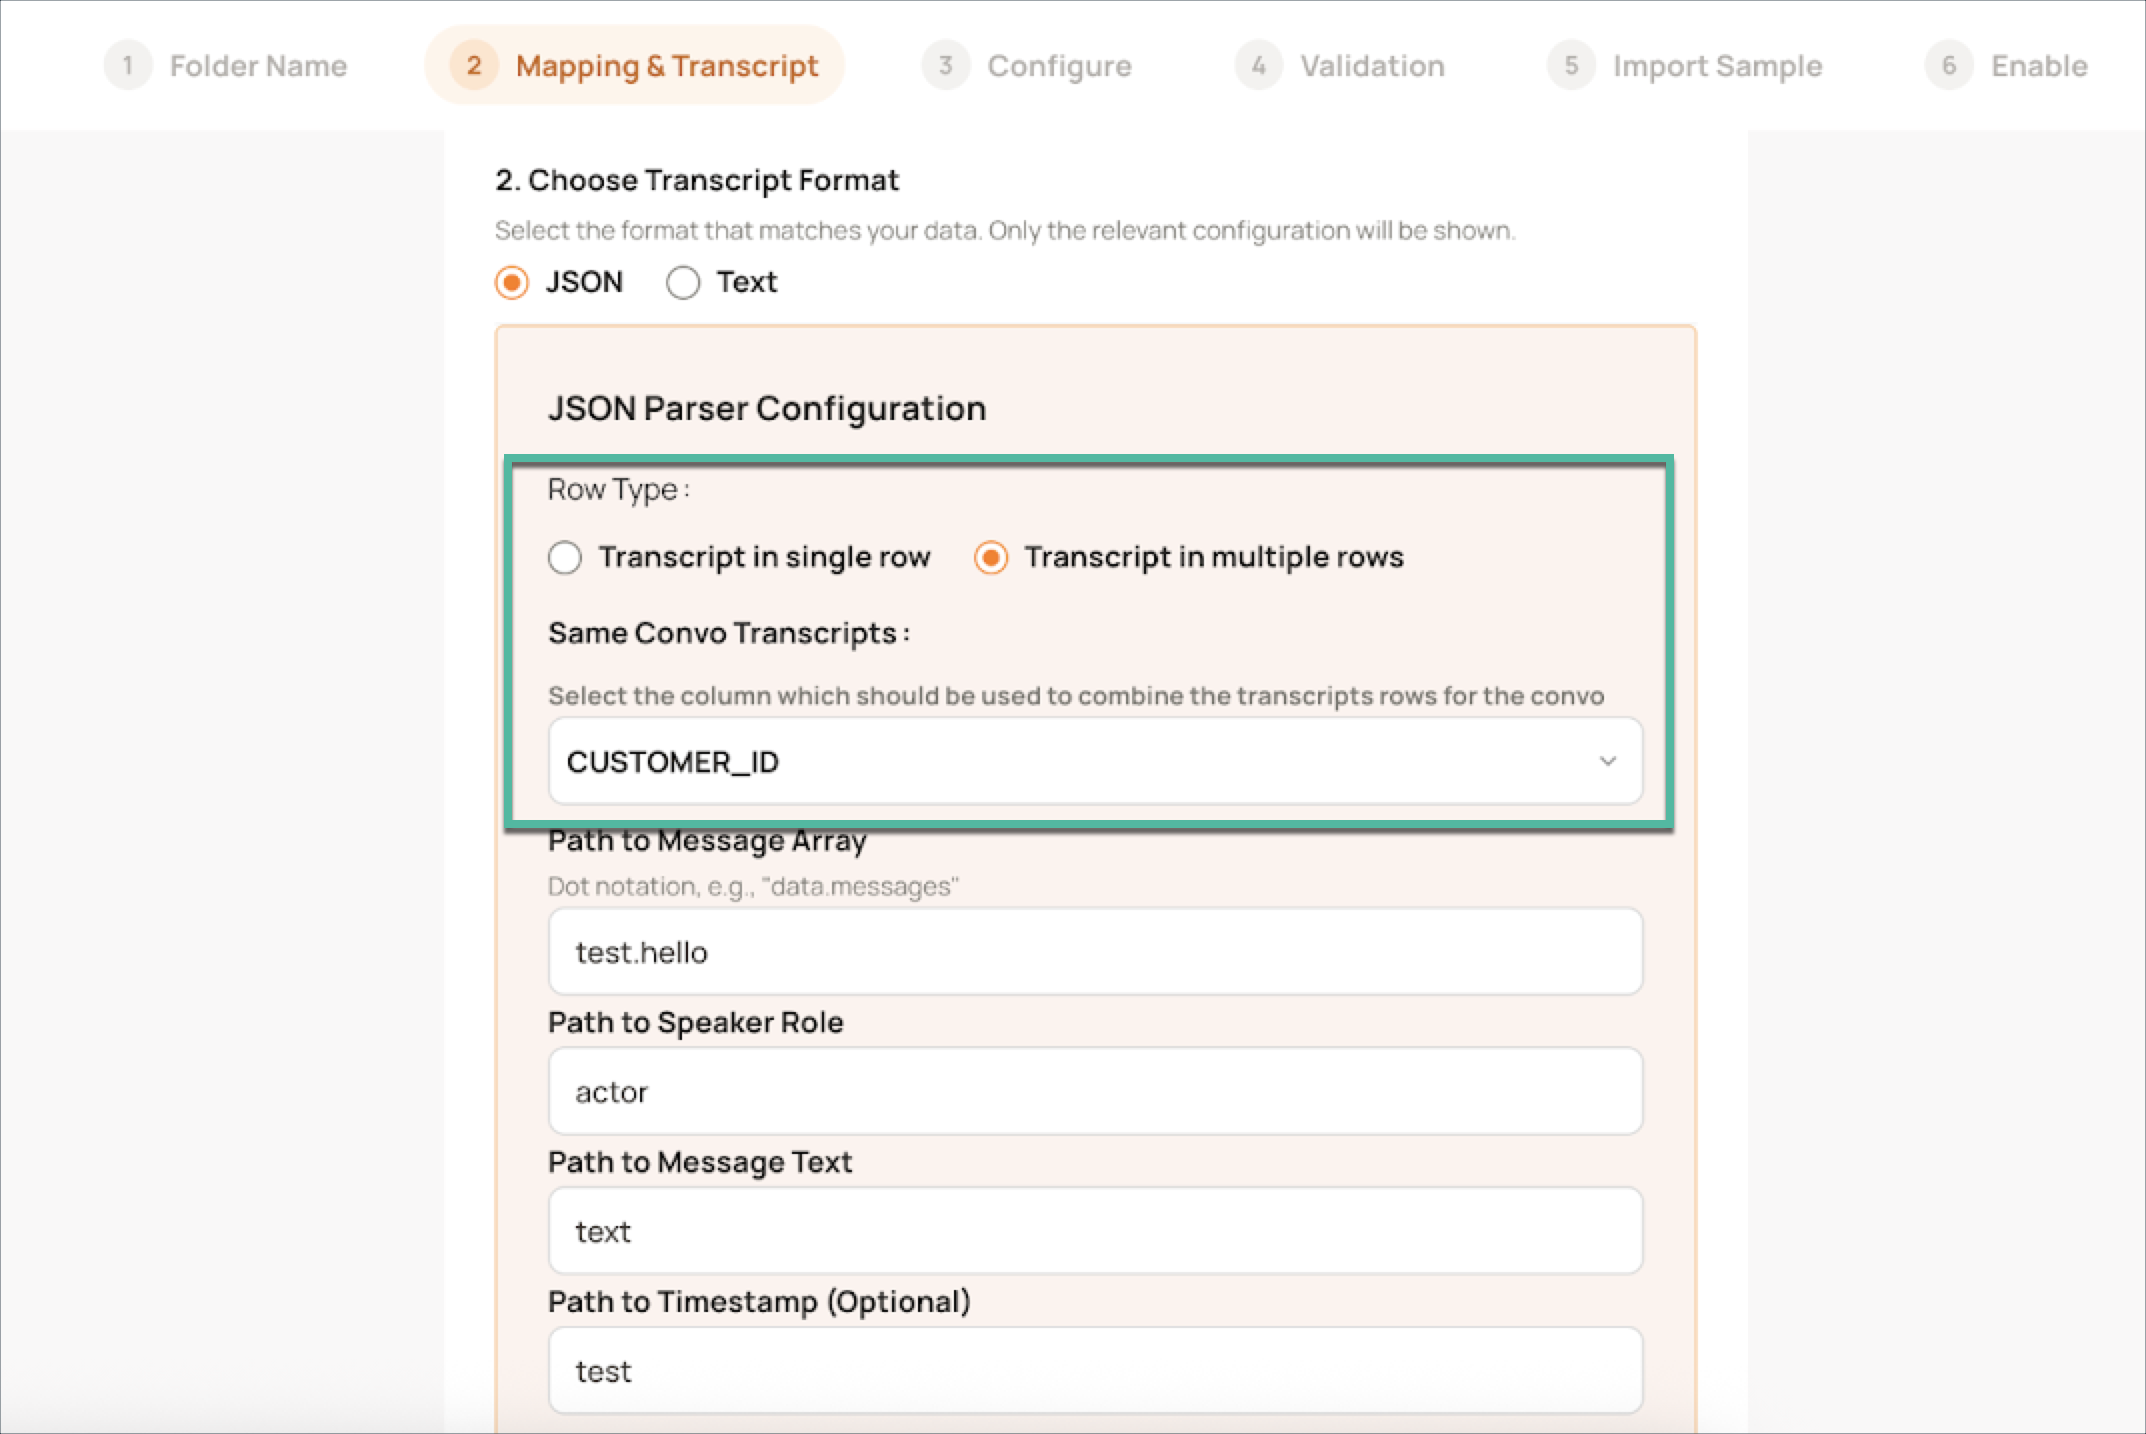
Transcript in multiple row
Enter the field which will indicate the array of messages present in the Path to Message Array field.
Enter the key of the JSON which would indicate the speaker of the message in the Path to Speaker Role.
Enter the key of the JSON which would indicate the text of the message in the Path to Message Text.
(Optional) Enter the key of the JSON which would indicate the timestamp of the message in the Path to Timestamp field.
If you selected Text,
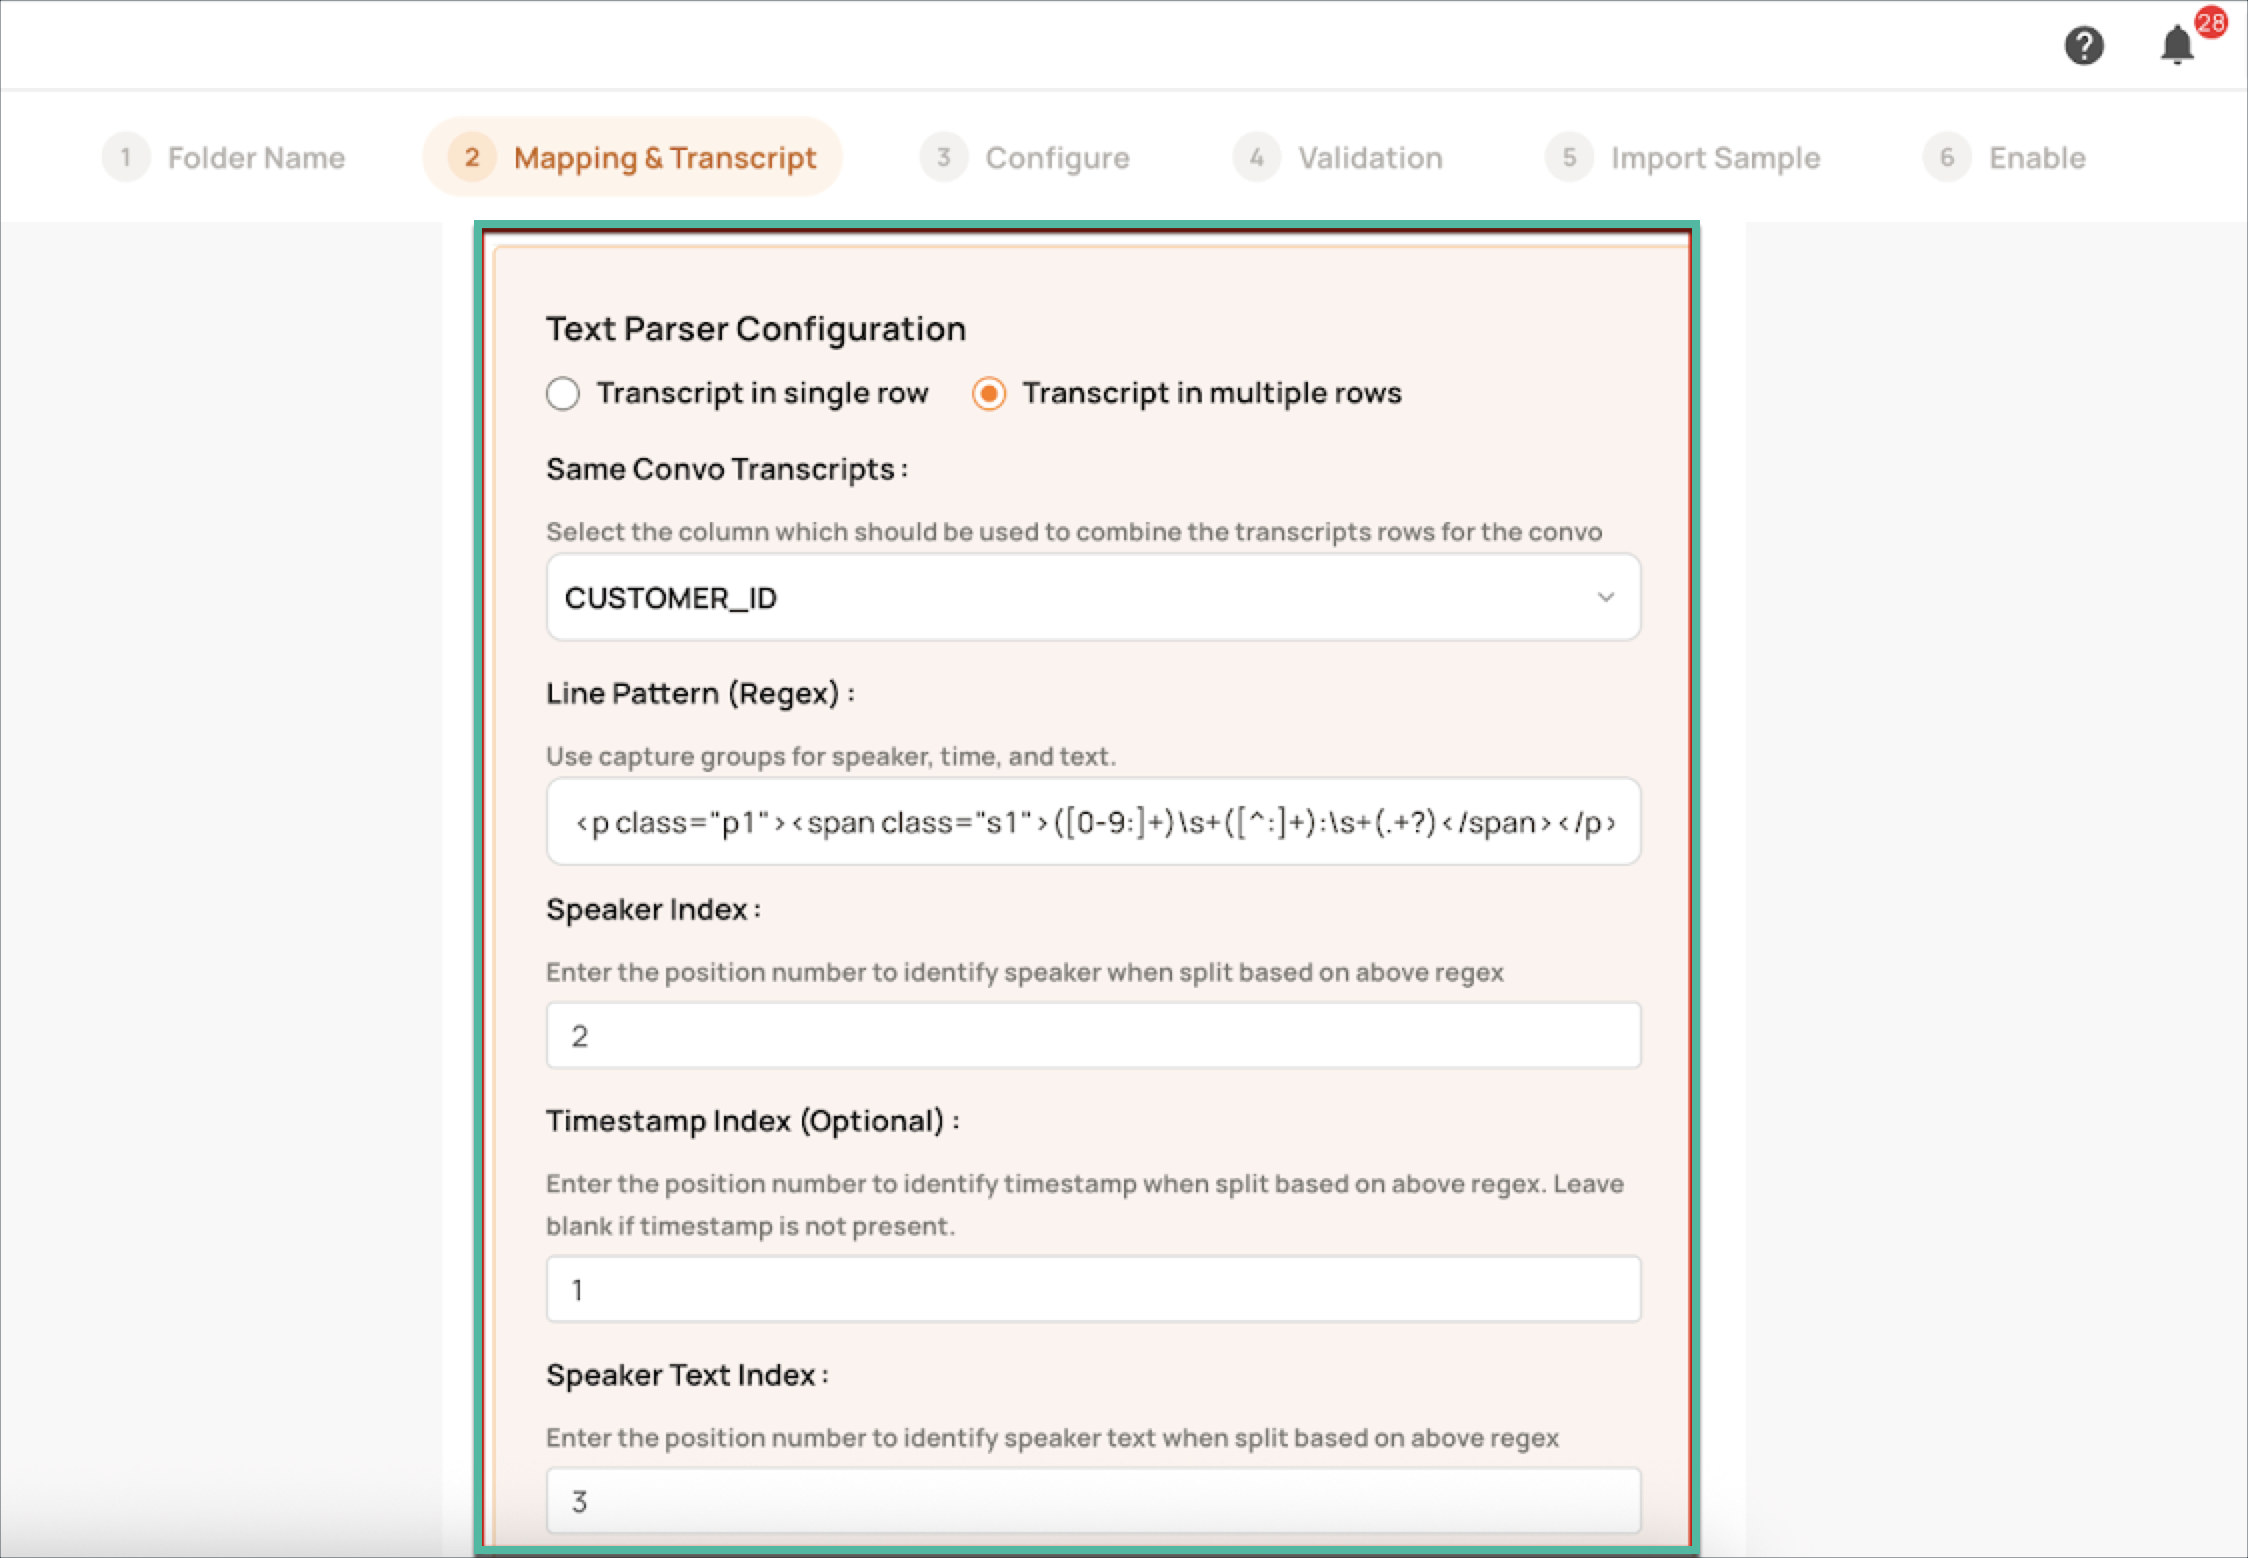
Enter the Regex which would split the transcript into 3 parts containing the speaker, speaker text, and the timestamp.
Enter the indexes for the 3 parts of the message in the corresponding inputs such as Speaker, Speaker Text, and Timestamp.
NOTE
Default values will populate automatically for the above fields in case you have used the recommended file structure.
Step 3: Speaker Identification
Once you have entered the structure of the transcript, you need to indicate how to identify the speaker in the following manner:
For identifying the Agent, you can either
select compare with static text (E.g., ‘Agent’, ‘@client.com’) etc to identify the speaker as an agent Or
select compare with a field in metadata and select the corresponding field to compare the speaker value with.
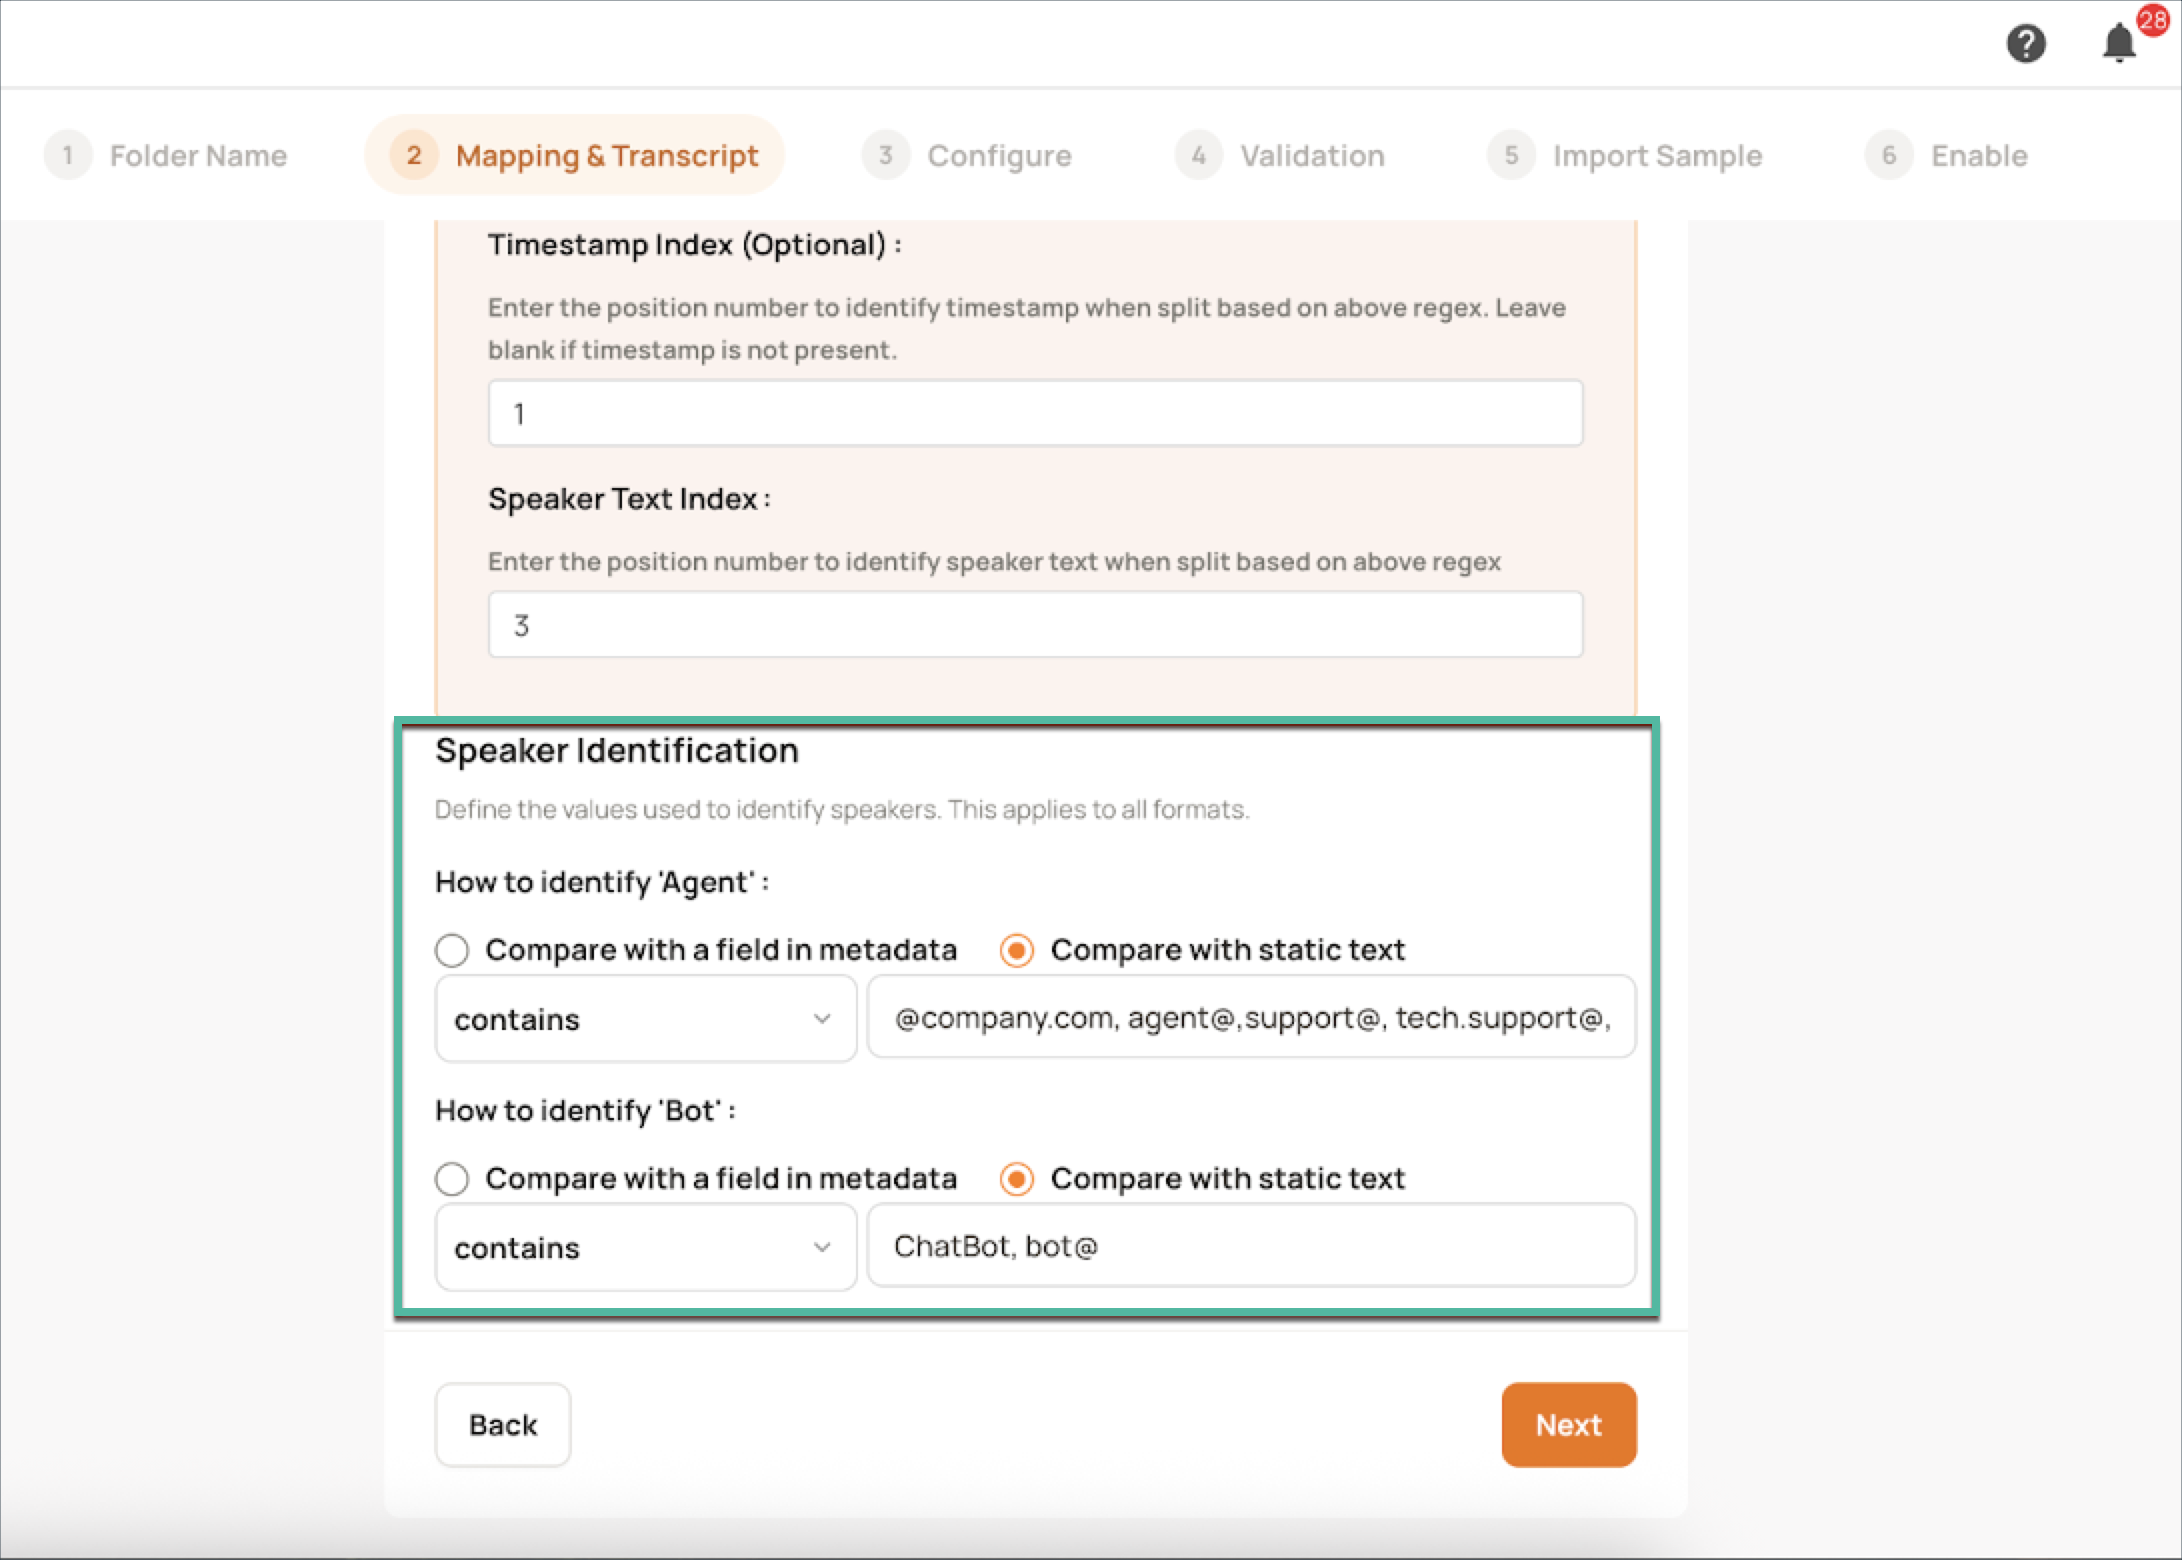
Similarly, for identifying the bot, you can either
select compare with static text (Ex: Bot, ‘Zendesk Bot’) etc. to identify the speaker as a bot
Orselect compare with a field in metadata and select the corresponding field to compare the speaker value with.
Once done, click Next to proceed with the subsequent steps described here.
Frequently Asked Questions (FAQs)
Q: What are the most frequently used configuration options in the SFTP self-serve integration?
A: Users commonly configure the integration to:\
Filter tickets by any fields depending on the system.
Enable Redaction and Booster words for enhanced analysis.
Q: How often is data imported from SFTP to Level AI?
A: The integration supports data import once every hour. This ensures near real-time visibility without overly burdening the system.
Q: Can historical SFTP ticket data be pulled through the self-serve interface?
A: Yes. Load the historical data files into a folder with the path as /Historical/ and raise a request with support or your TAM to ingest this data into Level AI.