Assembled PTO Integration
Last updated: August 4, 2026
Assembled PTO Integration with Level AI
Clients can pull approved time-off (PTO) data from Assembled into Level AI so that agent leave is reflected inside Level AI without manual entry. This document covers the setup on both sides, the filtering options, and how the sync actually behaves once enabled.
1. Assembled side: Create an API key
Log in to the Assembled admin dashboard.
Open Configure from the left navigation.
Under INTEGRATIONS, select Assembled API.
Click Create API key (top right).
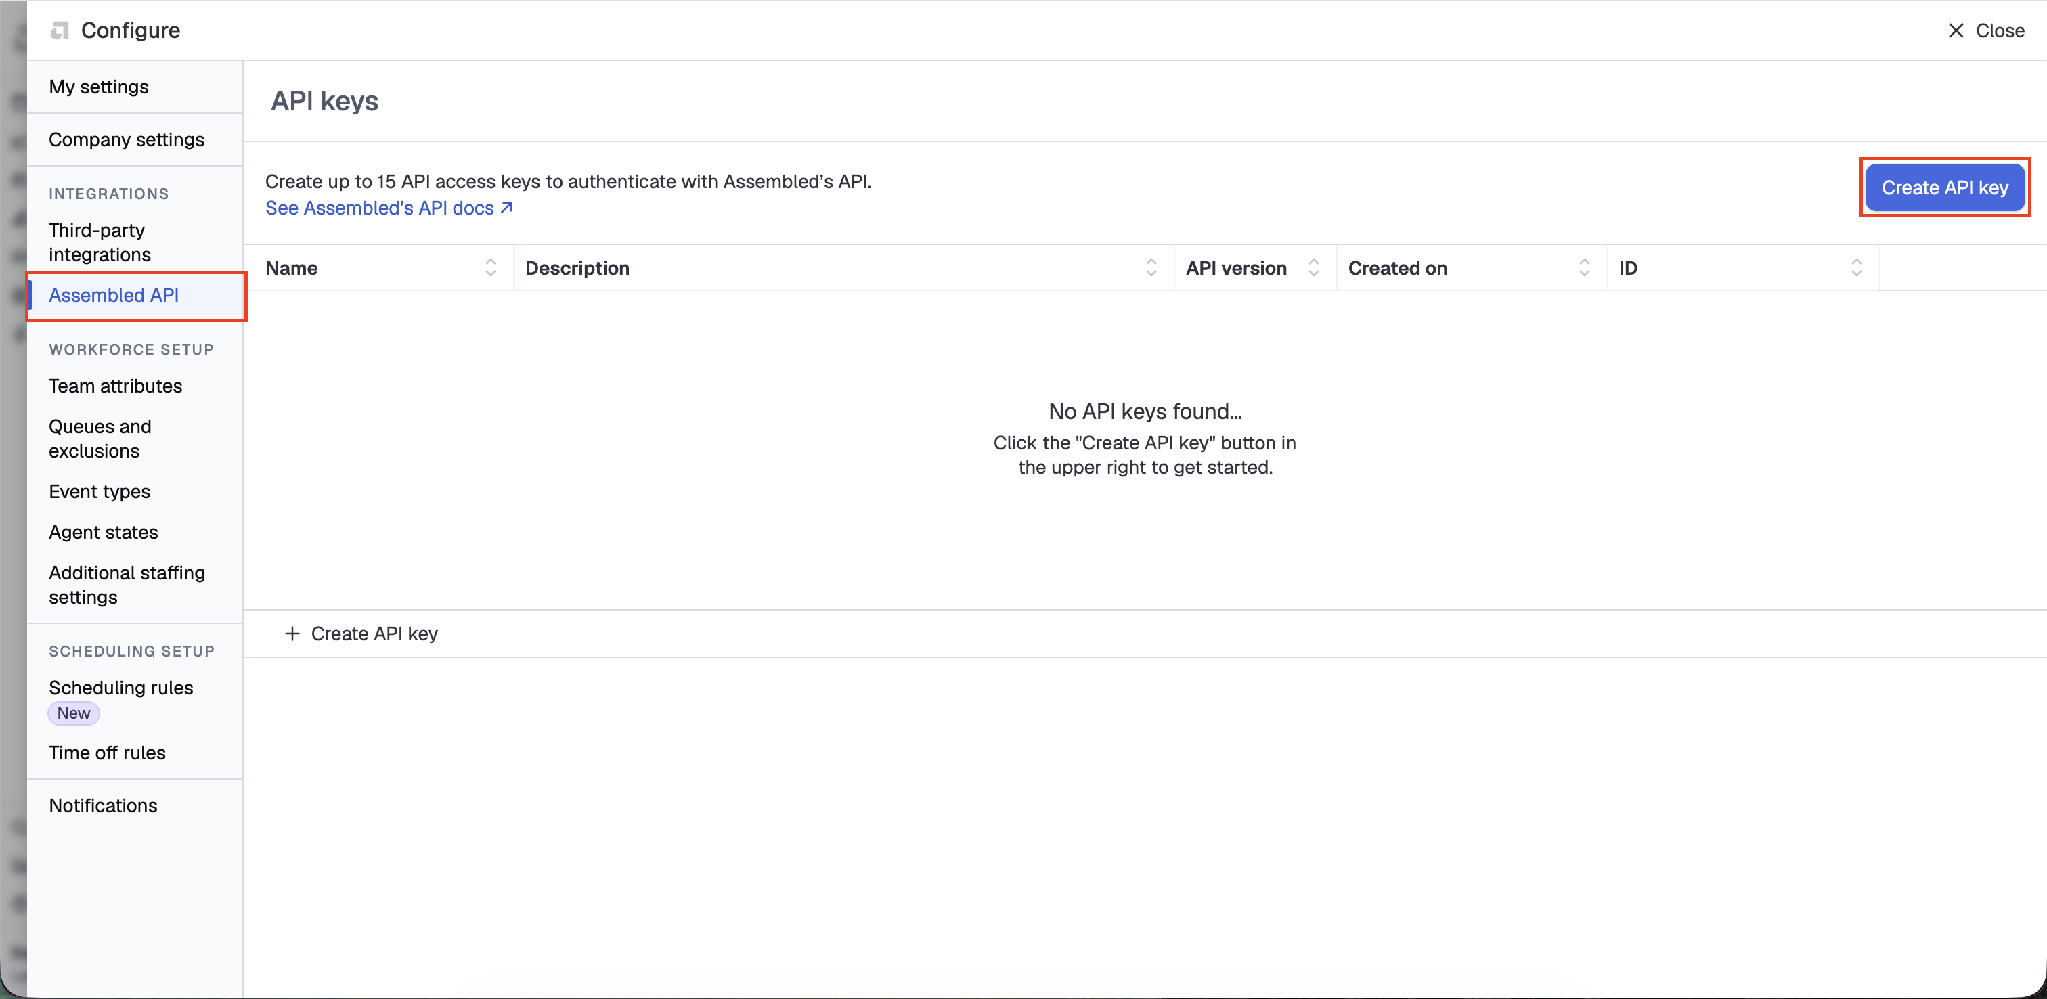
Assembled > Configure > Assembled API > Create API key
Step 1 of 2 - enter a Name (for example, Level AI PTO Sync) and an optional Description, then click Create key.
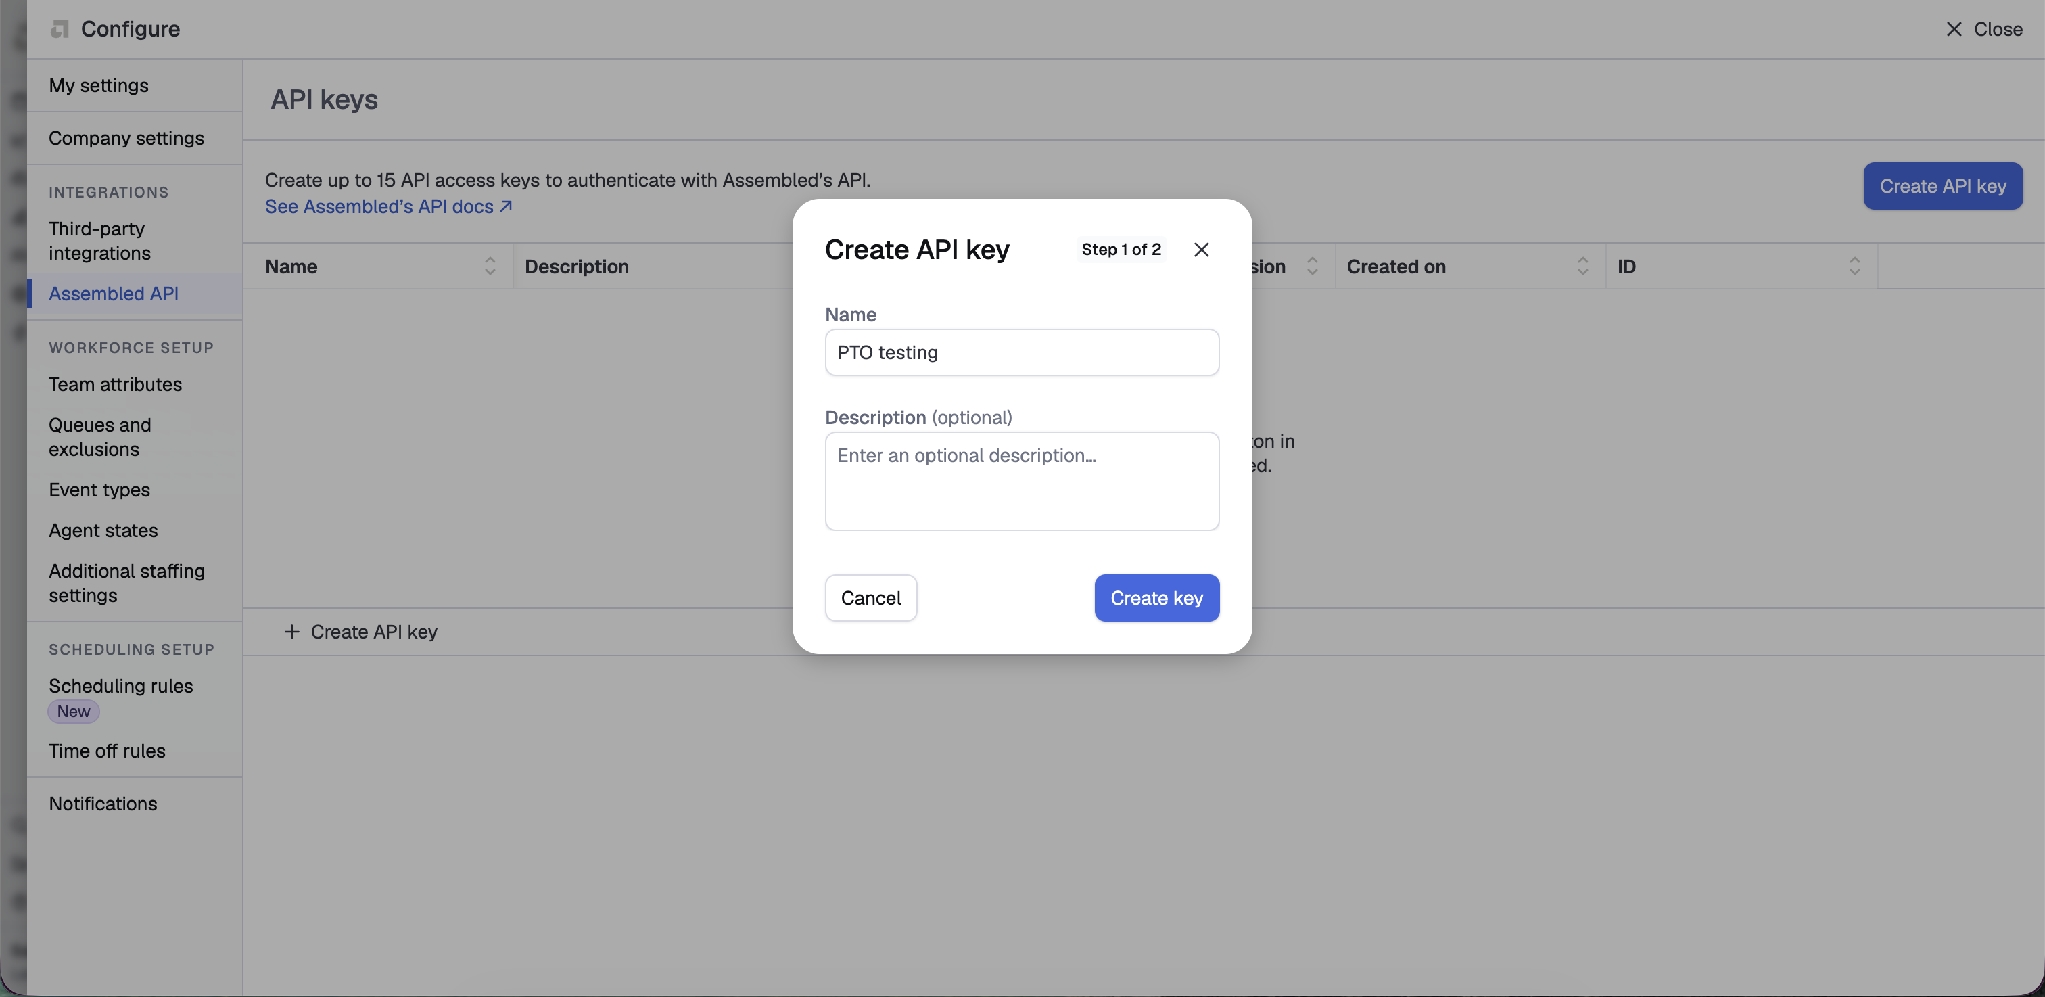
Step 1 of 2: naming the key
Step 2 of 2 - the key is shown once. Click Copy to clipboard and store it securely.
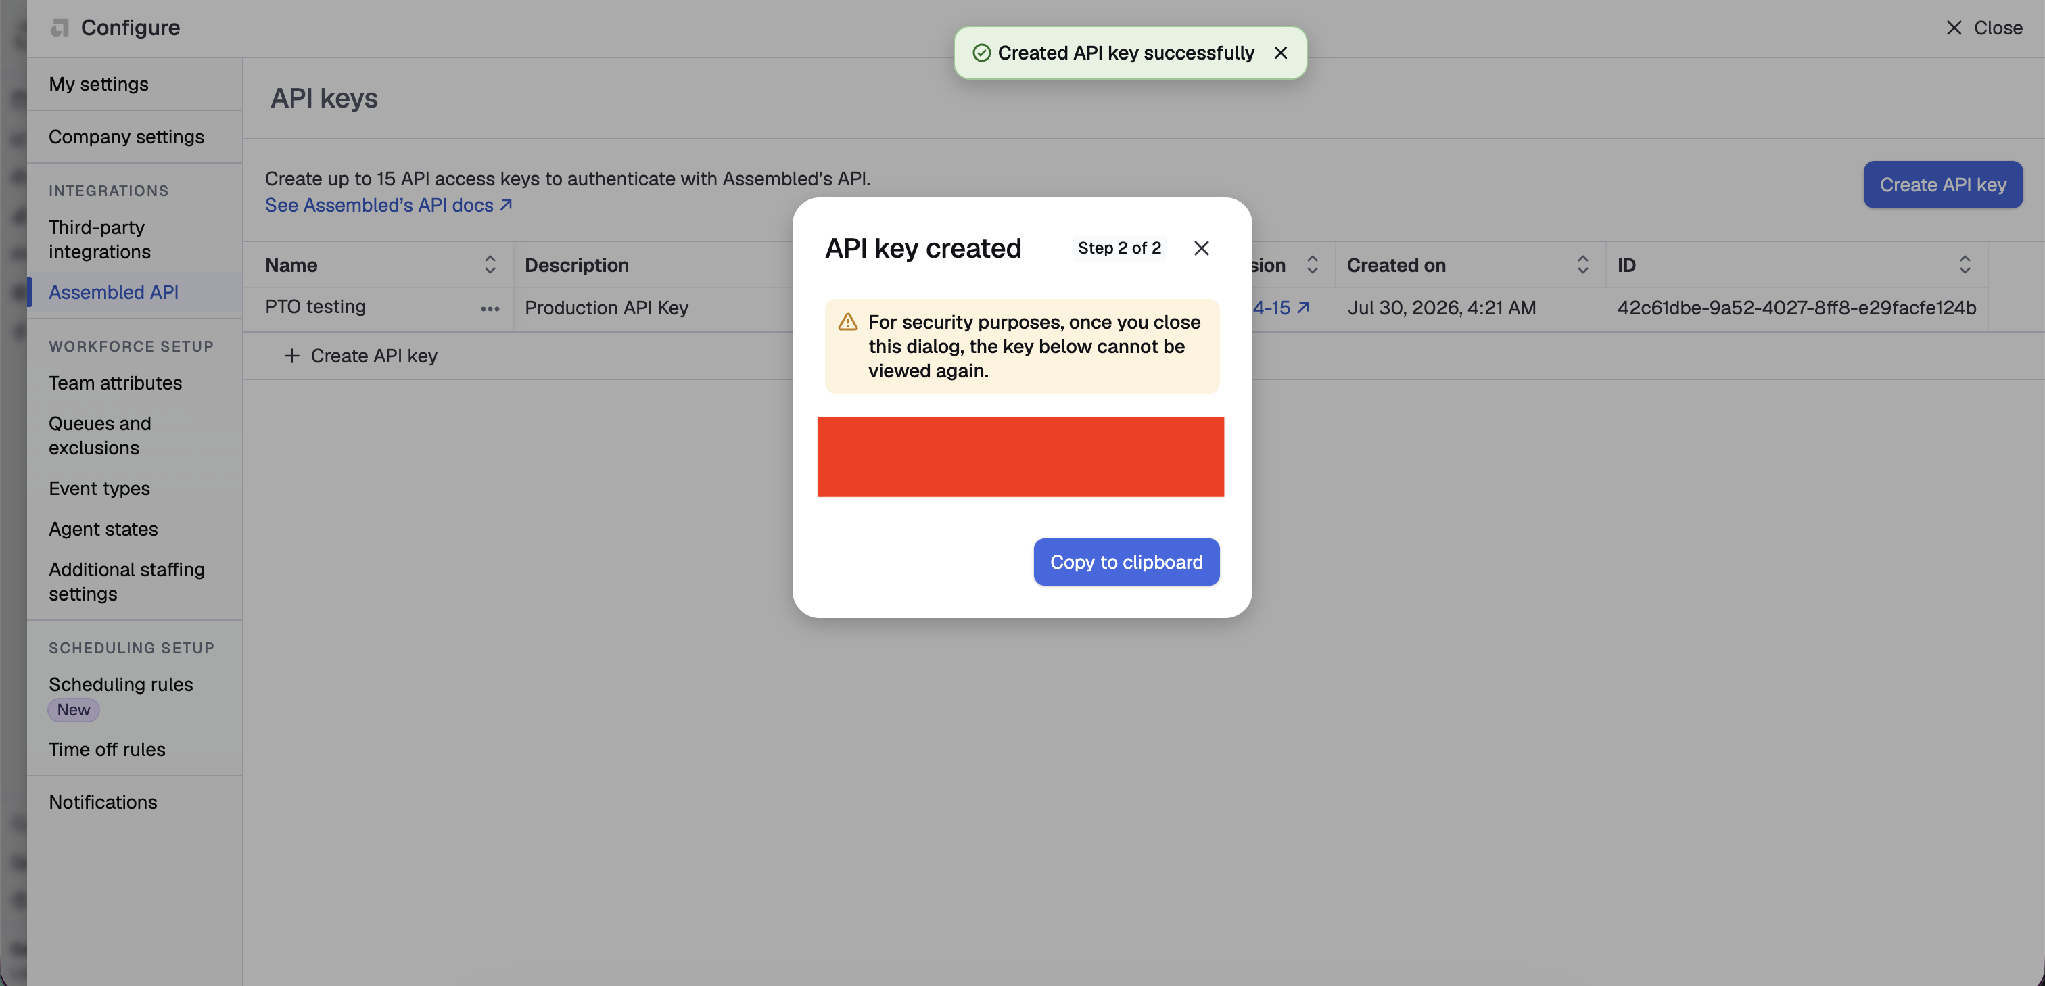
Step 2 of 2: copy the key before closing the dialog
Note: The key cannot be viewed again after the dialog is closed. If it is lost, create a new key.
Use a dedicated key for Level AI rather than reusing an existing one, so it can be revoked independently.
2. Level AI side: Connect and Enable
2.1 Open the integration
In Level AI, go to Settings in the left rail.
Under Data ingestion, click Integrations.
Select the Time Off tab.
Click the Assembled card.
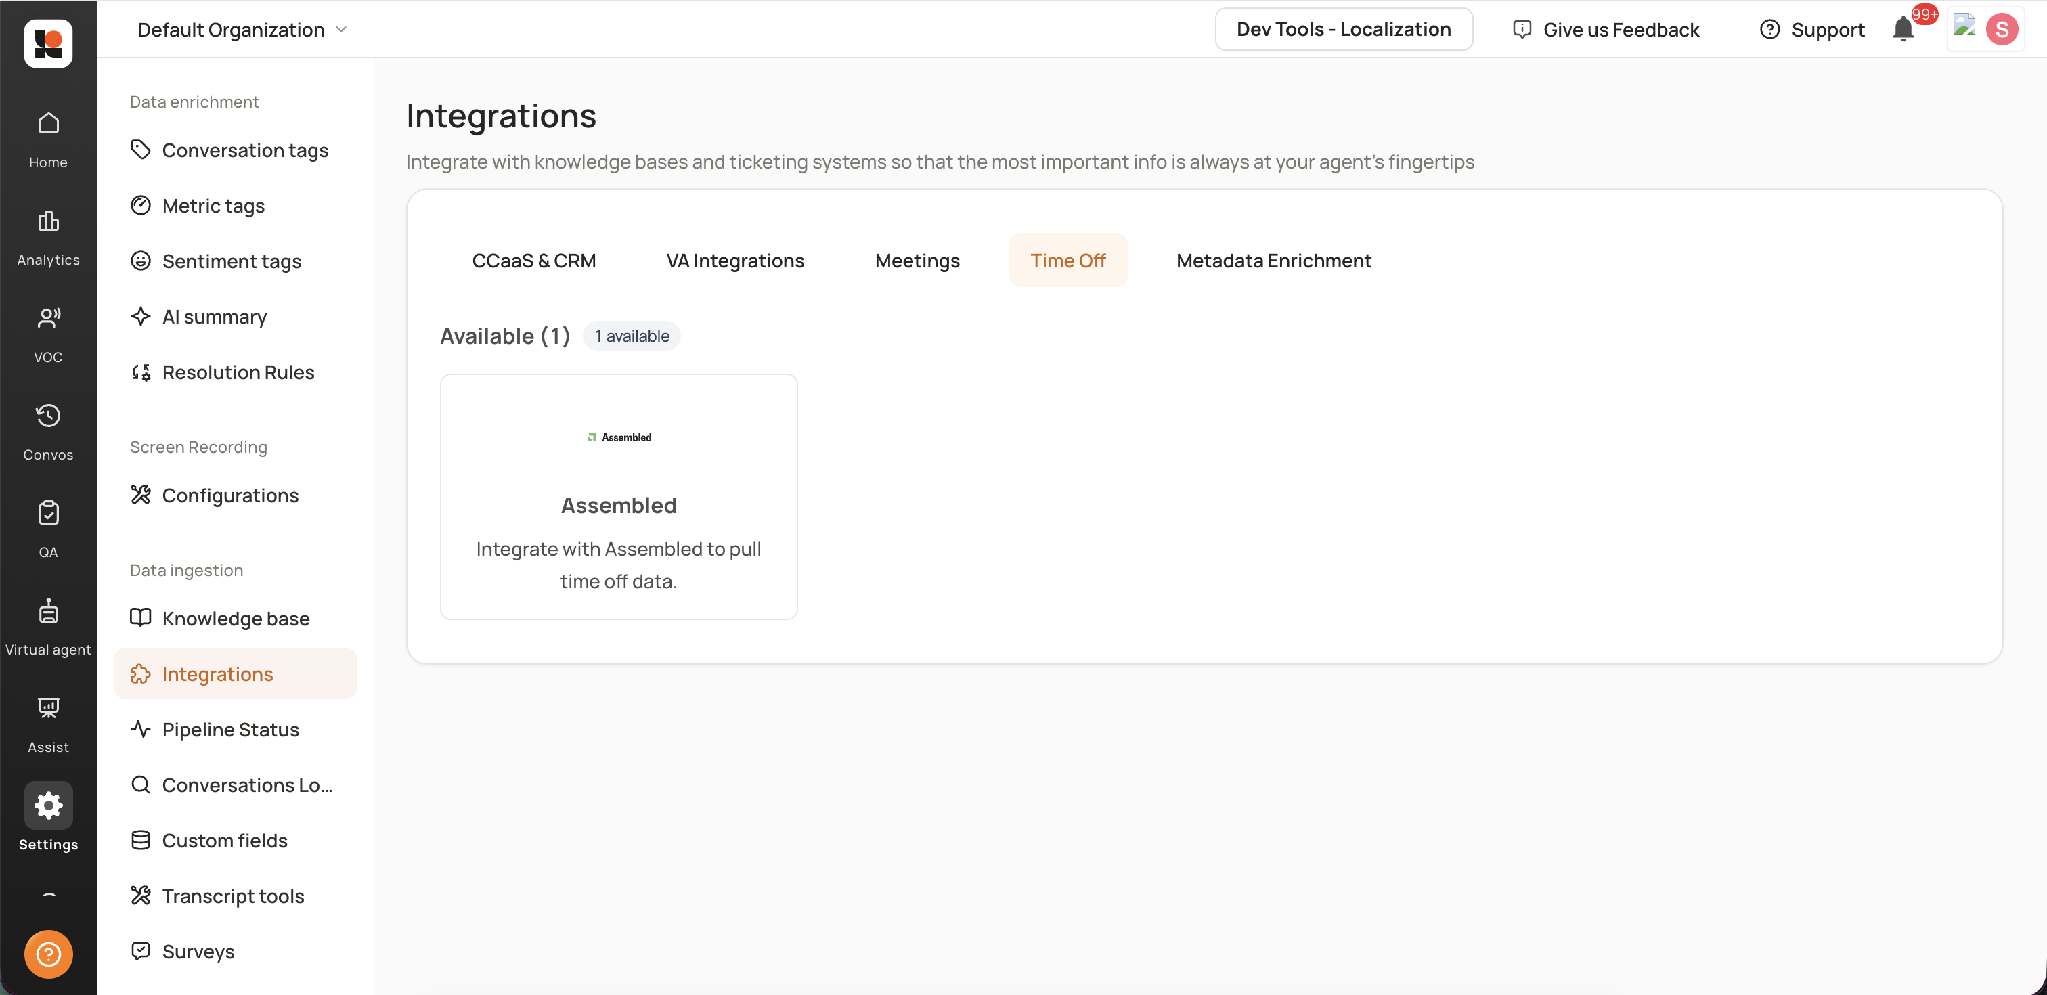
Settings > Integrations > Time Off > Assembled
2.2 Enter the API key
Paste the key copied from Assembled into the Assembled API Key field.
Click Connect to Assembled.
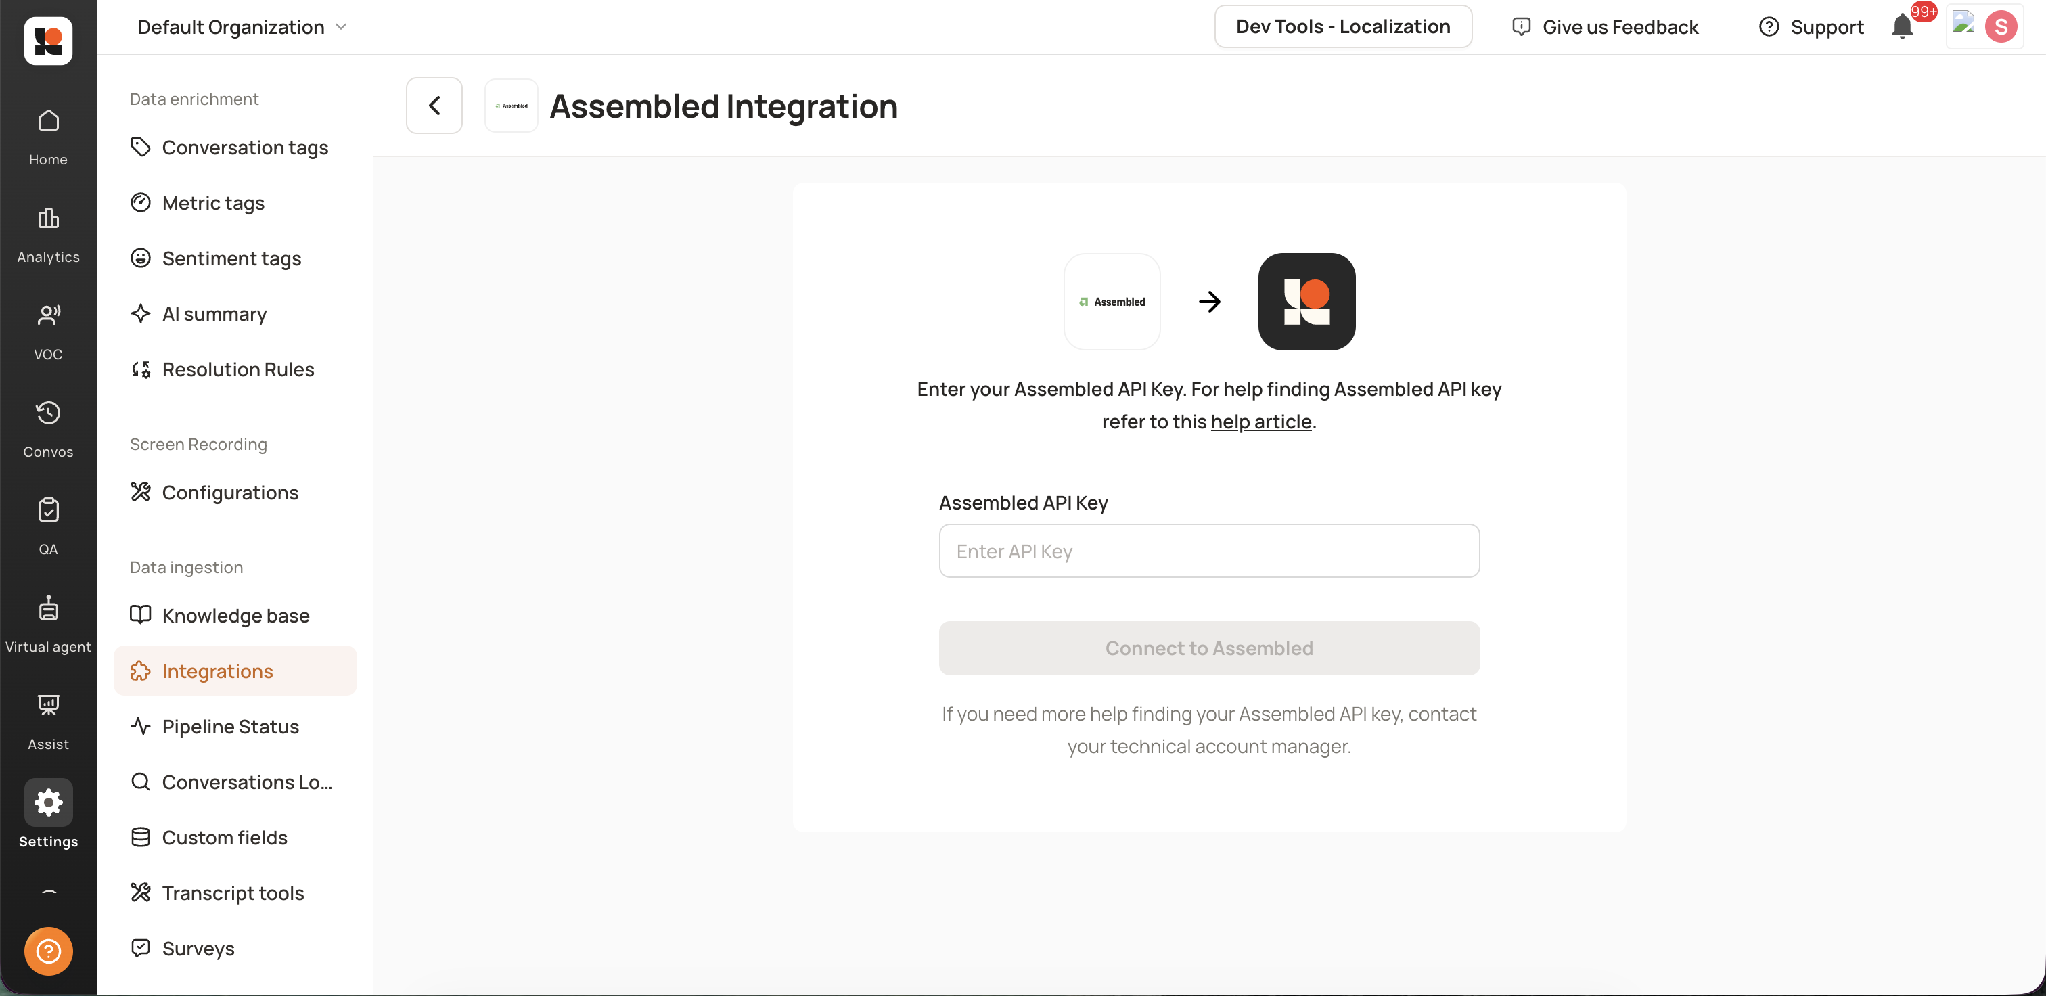
Entering the Assembled API key
On success, the account appears under Connected Accounts as Account 1. At this stage the account is connected but not yet syncing - configuration is still pending.
2.3 Configure PTO sync filters
Click the three-dot menu next to the account.
Choose Configure.
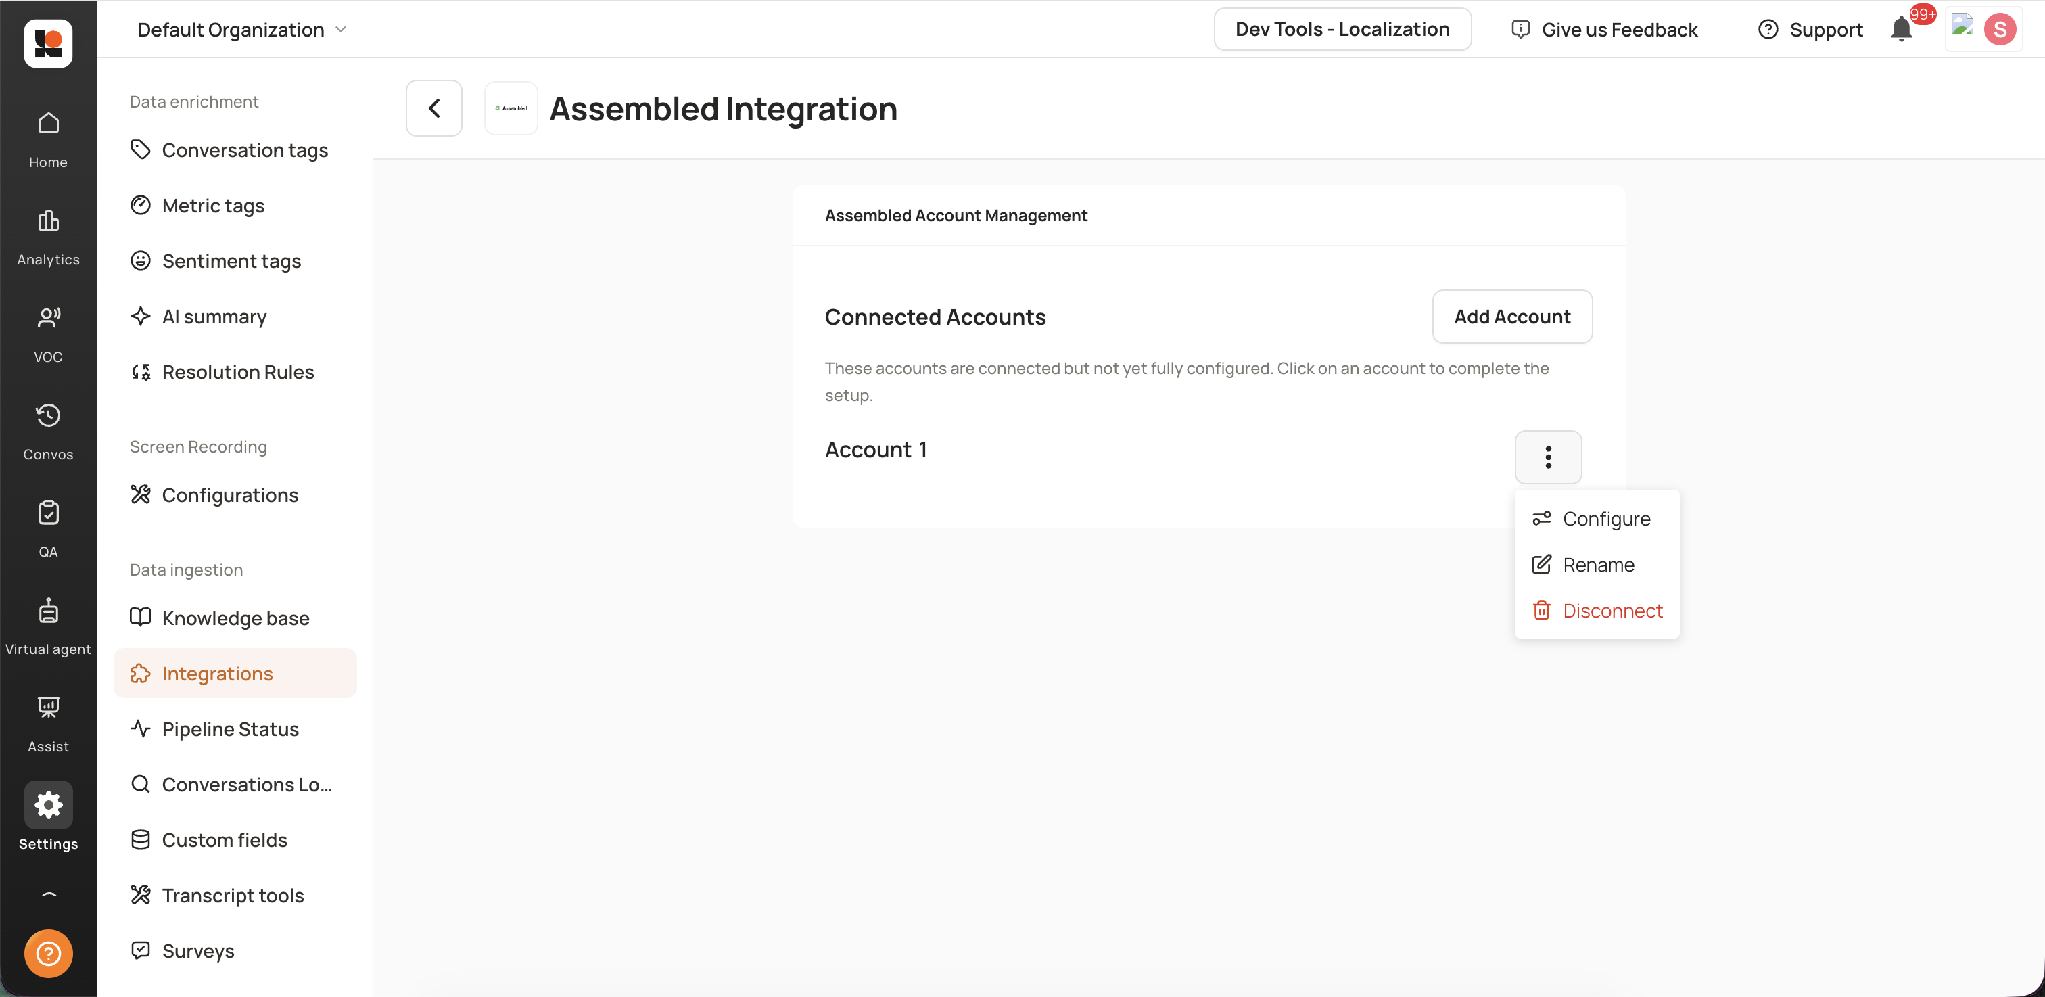
Connected Accounts: open the three-dot menu and choose Configure
You land on the Assembled Configurations > PTO sync filters screen. Filters control which users' leave gets pulled. If no filters are added, PTO is synced for all matched users.
Available filter dimensions
Dimension in UI | Underlying key | What it matches |
|---|---|---|
Level AI teams | team_ids | The team a user belongs to in Level AI |
Level AI roles | role_ids | The role assigned to a user in Level AI |
User emails | user_emails | Specific individual users |
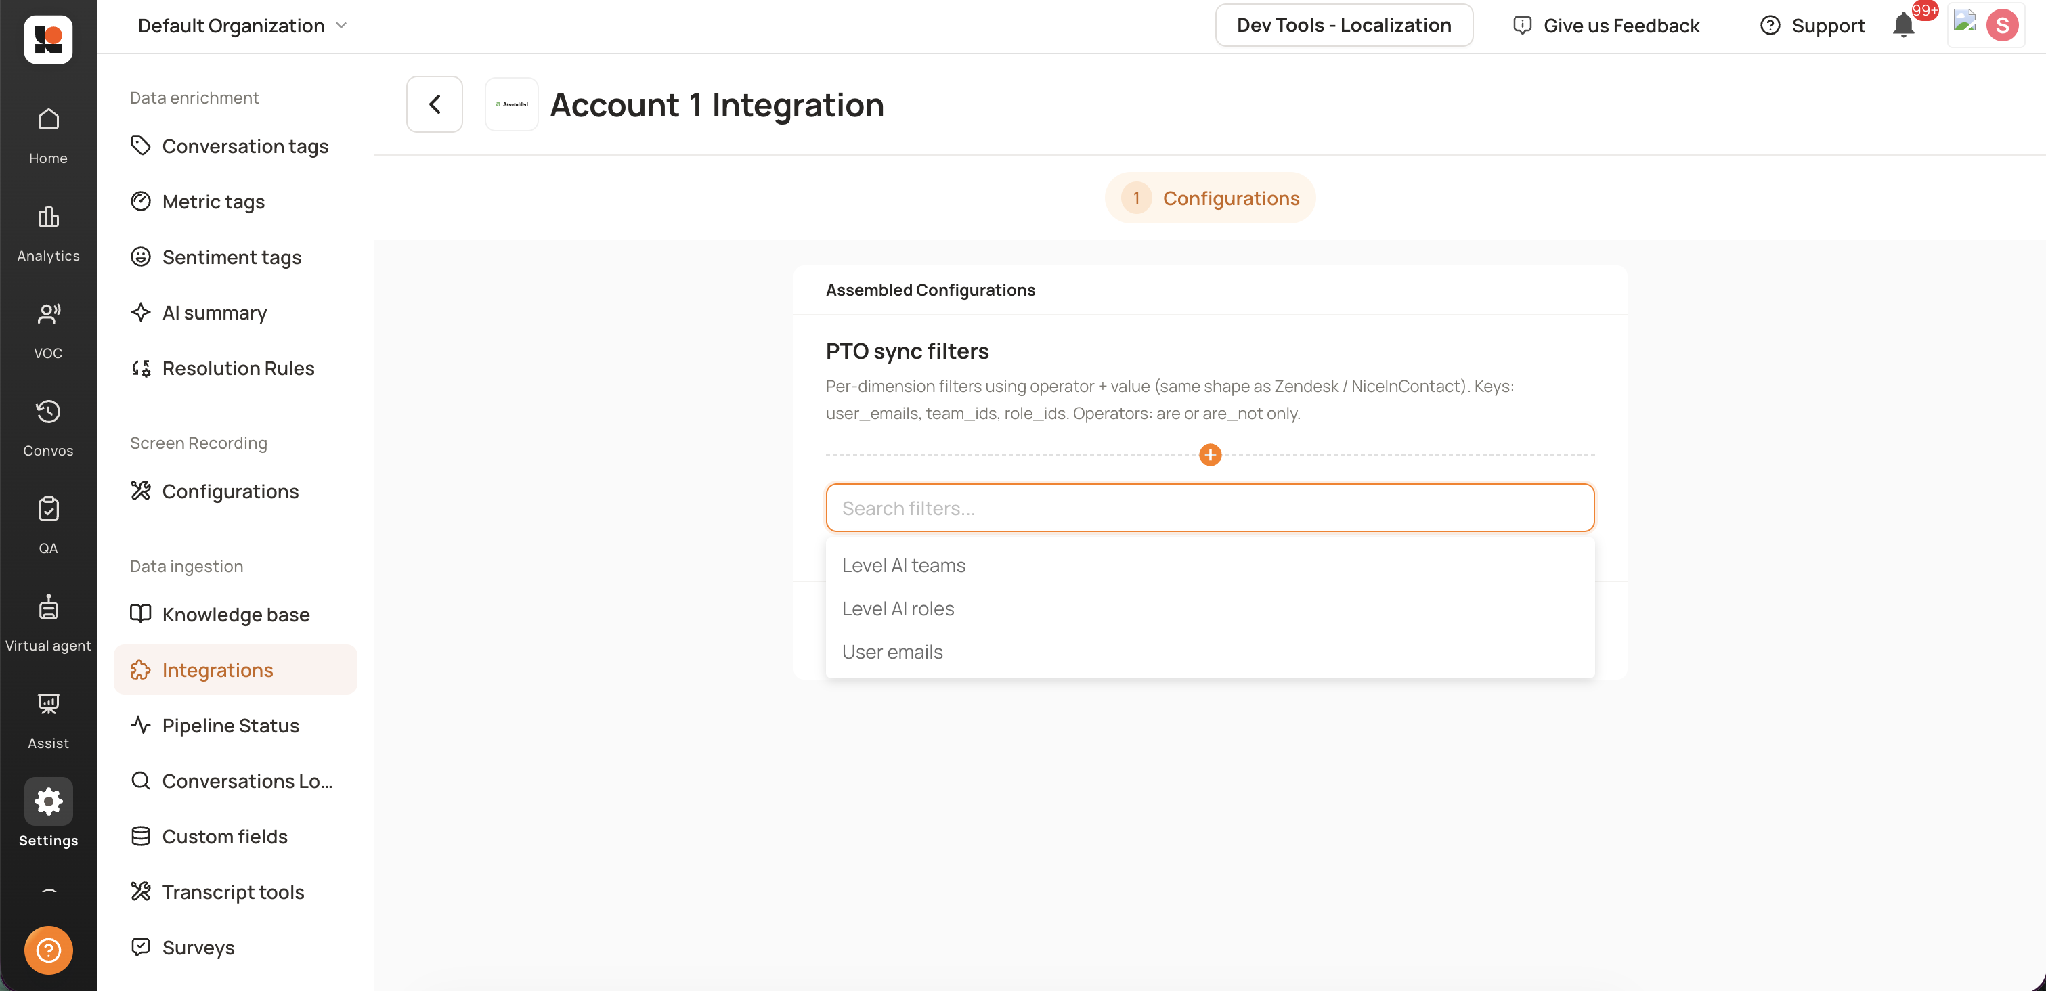
Add Filter > the three available filter dimensions
Available operators
Operator | Type | Effect |
|---|---|---|
are | Inclusion | Sync PTO only for users matching the selected values |
are not | Exclusion | Sync PTO for everyone except users matching the selected values |
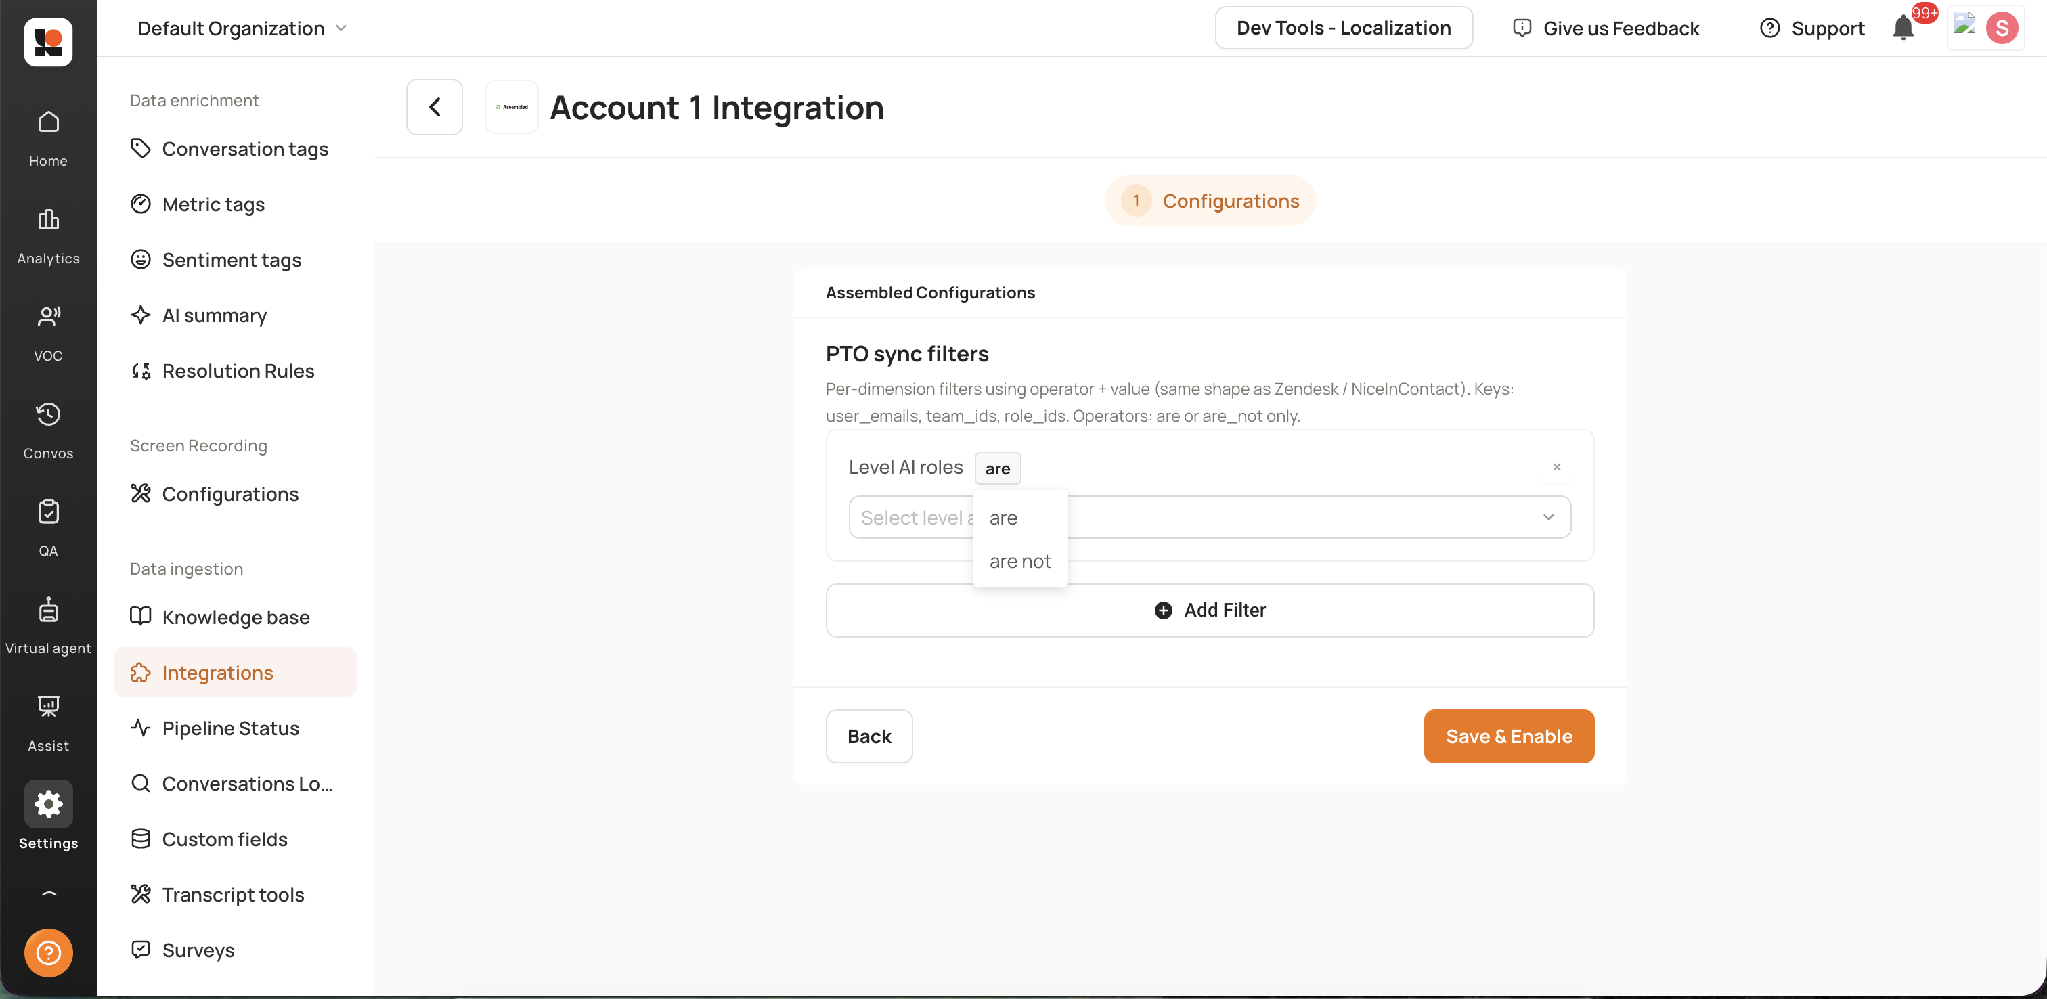
Each filter takes an operator: are (include) or are not (exclude)
Adding filters
Click Add Filter, then pick a dimension from the Search filters dropdown.
Set the operator (are / are not) and select one or more values.
Repeat Add Filter to add conditions on other dimensions.
Use the x on a filter row to remove it.
When the filters are set, click Save & Enable.
3.4 Confirm it is live
Back on the Assembled Integration page the account now sits under Enabled Accounts with an Enabled badge, and the description reads that these accounts are configured and syncing data automatically.
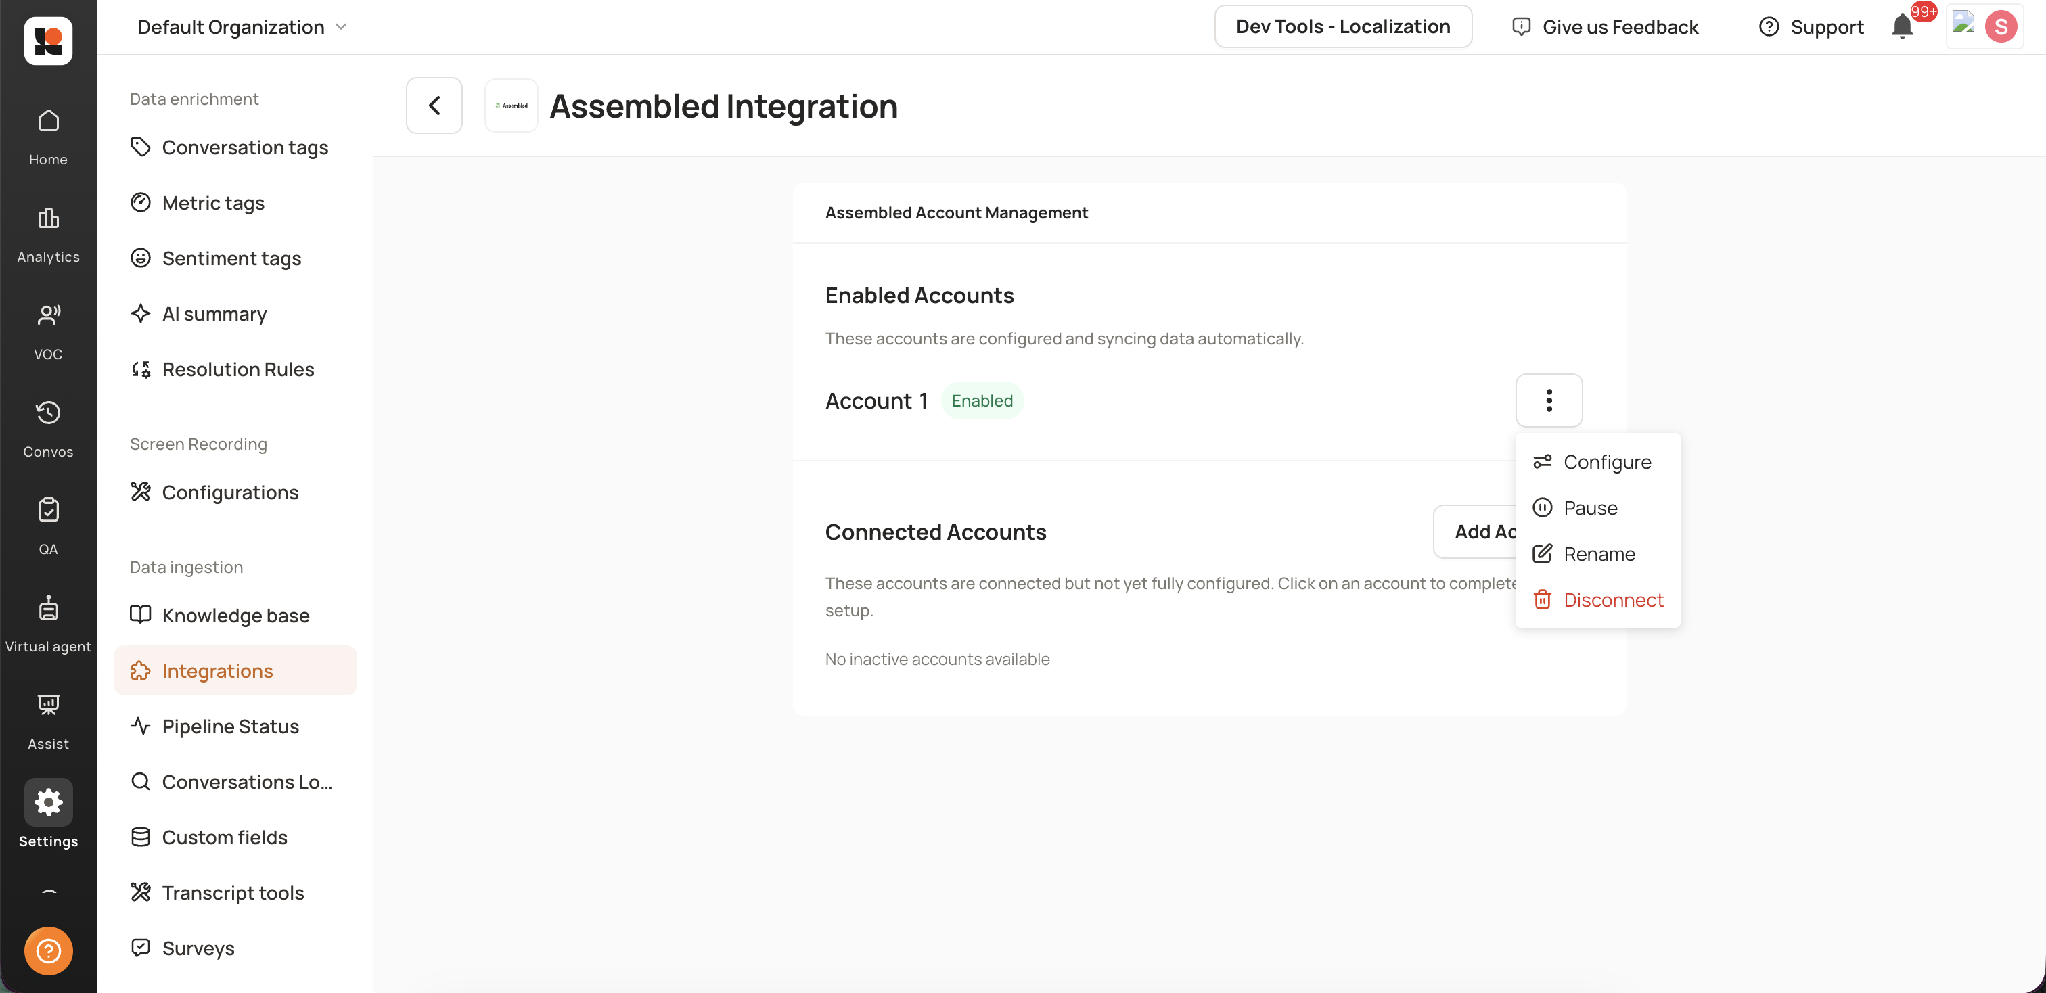
Enabled Accounts: the account is live and the menu now offers Pause as well
3. Managing the integration
The three-dot menu on an enabled account offers the following actions.
Action | Effect |
|---|---|
Configure | Reopen the PTO sync filters screen to change filters, then Save & Enable again |
Pause | Stop pulling new PTO. Credentials and filters are retained, so it can be resumed without re-entering the API key |
Rename | Change the display label of the account, for example Account 1 to Assembled - Prod |
Disconnect | Remove the connection entirely. The stored API key is dropped and a new one must be entered to reconnect |
Use Pause for temporary stops such as testing or investigating a mismatch.
Use Disconnect only when the integration is being retired or the key has been rotated in Assembled.
If the key is rotated or deleted on the Assembled side, the sync will start failing. Create a new key in Assembled and reconnect in Level AI.
4. How the pipeline works
4.1 Sync starts at enablement
The integration is forward-looking, not retroactive.
The clock starts when Save & Enable is clicked.
Leave that was already approved before enablement is not backfilled.
Any leave that becomes approved after enablement is pulled into Level AI.
If historical PTO is needed in Level AI, Please connect with your Technical Account Manager to set it up.
4.2 Only approved leave is pulled
Assembled leave status | Pulled into Level AI? |
|---|---|
Approved | Yes |
Pending | No |
Rejected / Denied | No |
The approval status, not the request date, is what matters:
A request created before enablement but approved after enablement will be pulled, because the transition to approved happens inside the sync window.
A request that stays pending is ignored until it is approved.
A request that is rejected is never pulled.
4.3 User matching is by email
For each approved leave record, Level AI looks up the user by email address:
Assembled user email matches Level AI user email - the time-off record is created against that Level AI user.
No matching Level AI user - the record is skipped.
4.4 Filters are applied during sync
Filters are evaluated on every sync run, not just at setup:
If a user is excluded by the current filters, their approved leave is not pulled.
If the filters are later widened, newly in-scope users start syncing from that point forward. Leave approved while they were out of scope is not retroactively fetched.