Microsoft Teams Integration with Level AI
Last updated: July 1, 2026
Guide for Setting Up App Registration, API Permissions & Module Installation
1. Pre-requisites
Before starting, make sure you have:
- An Azure AD account with sufficient permissions (Global Administrator or Application Administrator)
- A Microsoft 365 tenant
- Access to the Azure Portal (https://portal.azure.com)
2. Access the Azure Portal
Navigate to https://portal.azure.com and sign in with your administrator credentials.
3. App Registration
3a. Go to App Registrations
In the top search bar, search for "App registrations" and select it from the results.
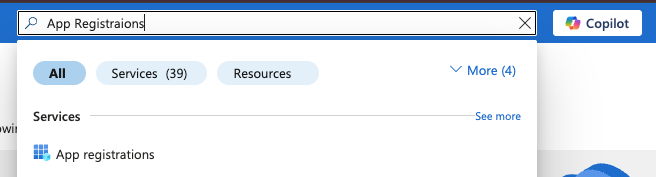
Search for App Registrations
Click "New registration" from the toolbar.
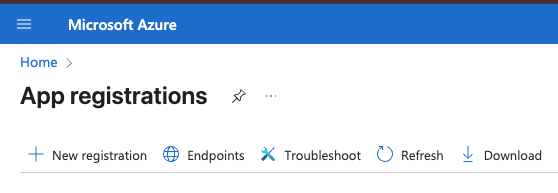
Click New Registration
3b. Fill Out the Registration Form
- Name: Enter a descriptive name (e.g., "LevelAITeamIntegration")
- Supported account types: Choose Single tenant
- Redirect URI: Leave as default
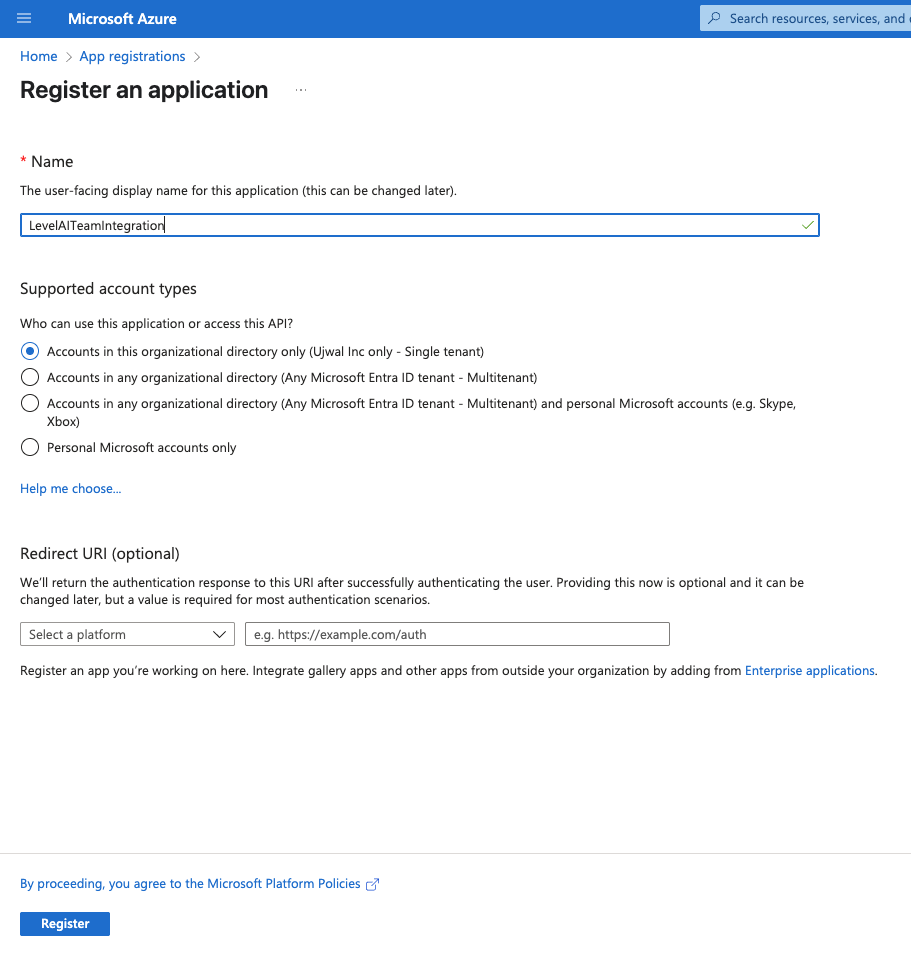
Registration form with recommended settings
3c. Click Register
Click the "Register" button at the bottom of the page.
4. Generate Client Secret
4a. Navigate to Certificates & Secrets
In your app registration, go to "Certificates & secrets" in the left menu under Manage.
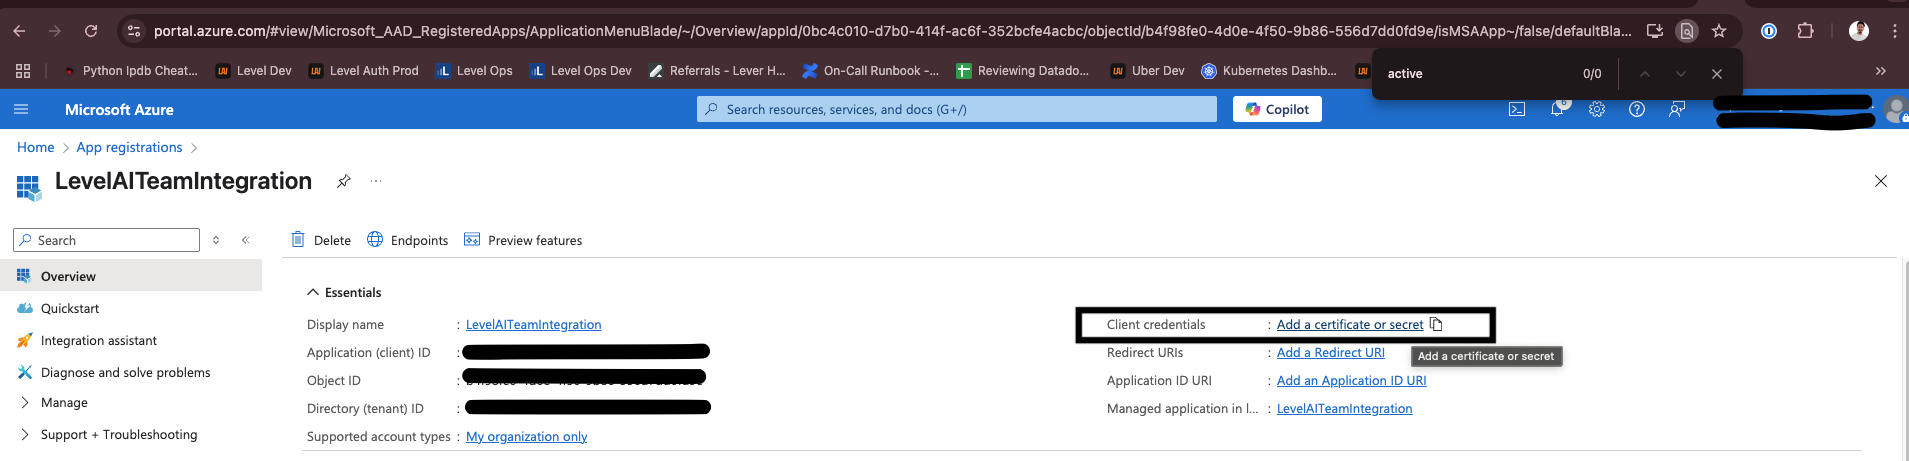
Certificates & Secrets in left nav
4b. Create a New Client Secret
Click "New client secret".
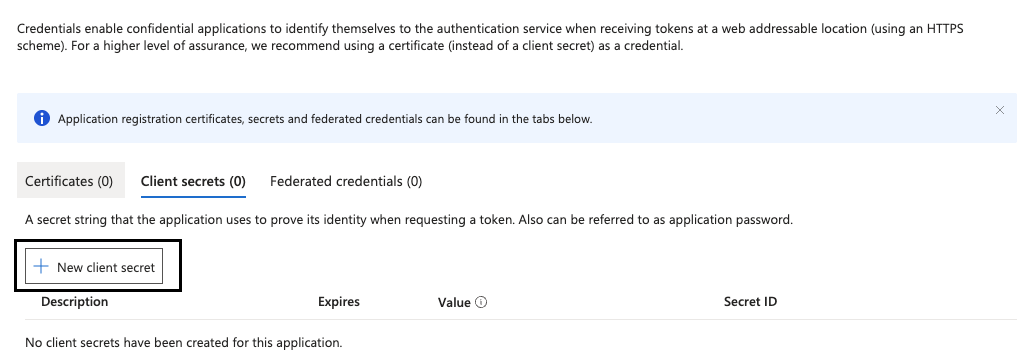
Click New Client Secret
Give it a description (e.g., "LevelAI App Secret") and set an expiration date. Choose a longer expiration to avoid frequent rotation.
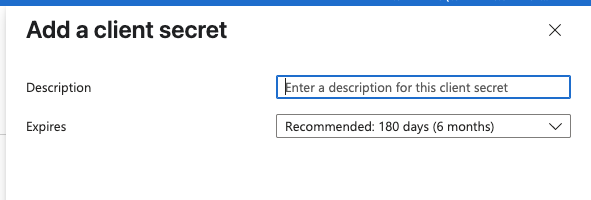
Enter description and expiration
Note: After clicking "Add", copy the secret value immediately. It will not be shown again. You need to share this with the Level AI team.
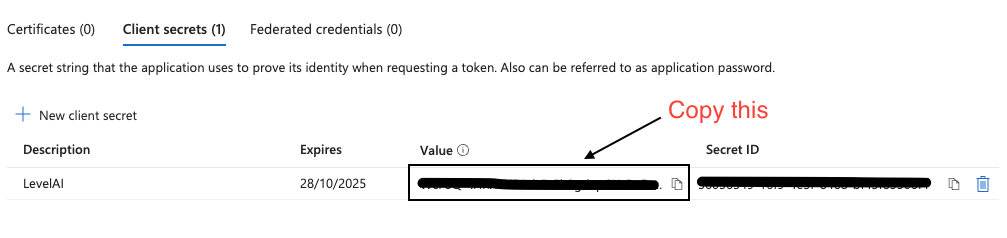
Copy the secret value immediately
5. Set API Permissions
5a. Navigate to API Permissions
In your app registration, go to "API permissions" in the left nav under Manage.
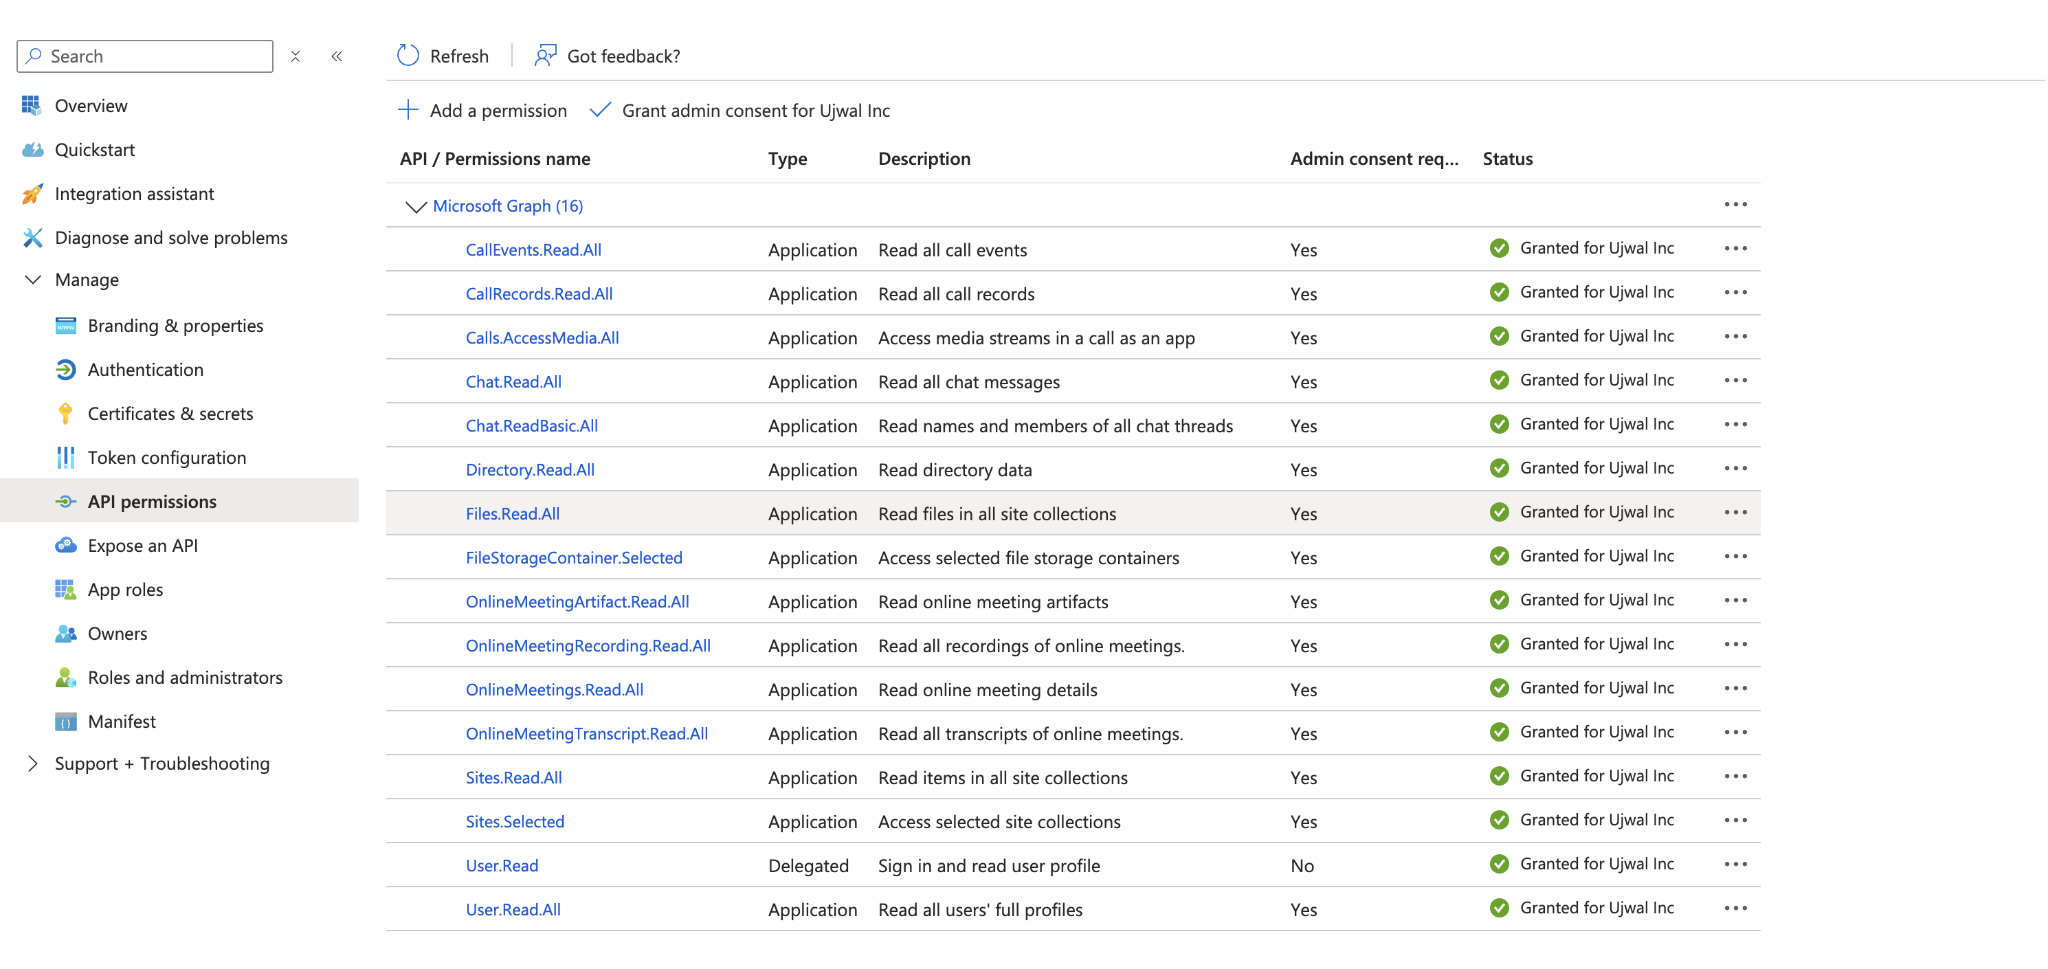
API Permissions in left sidebar
5b. Click Add Permission
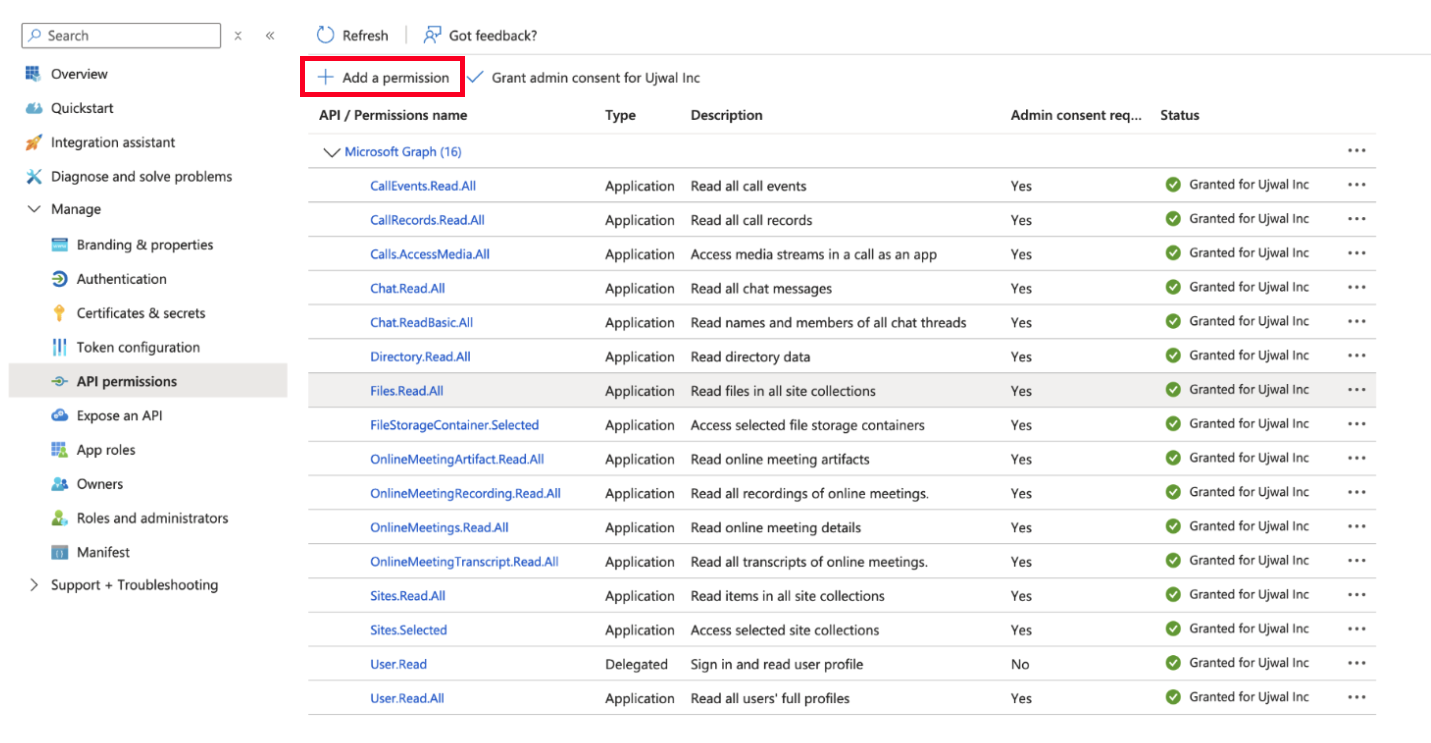
Click Add a Permission
5c. Choose Microsoft Graph
Select "Microsoft Graph" from the commonly used APIs.
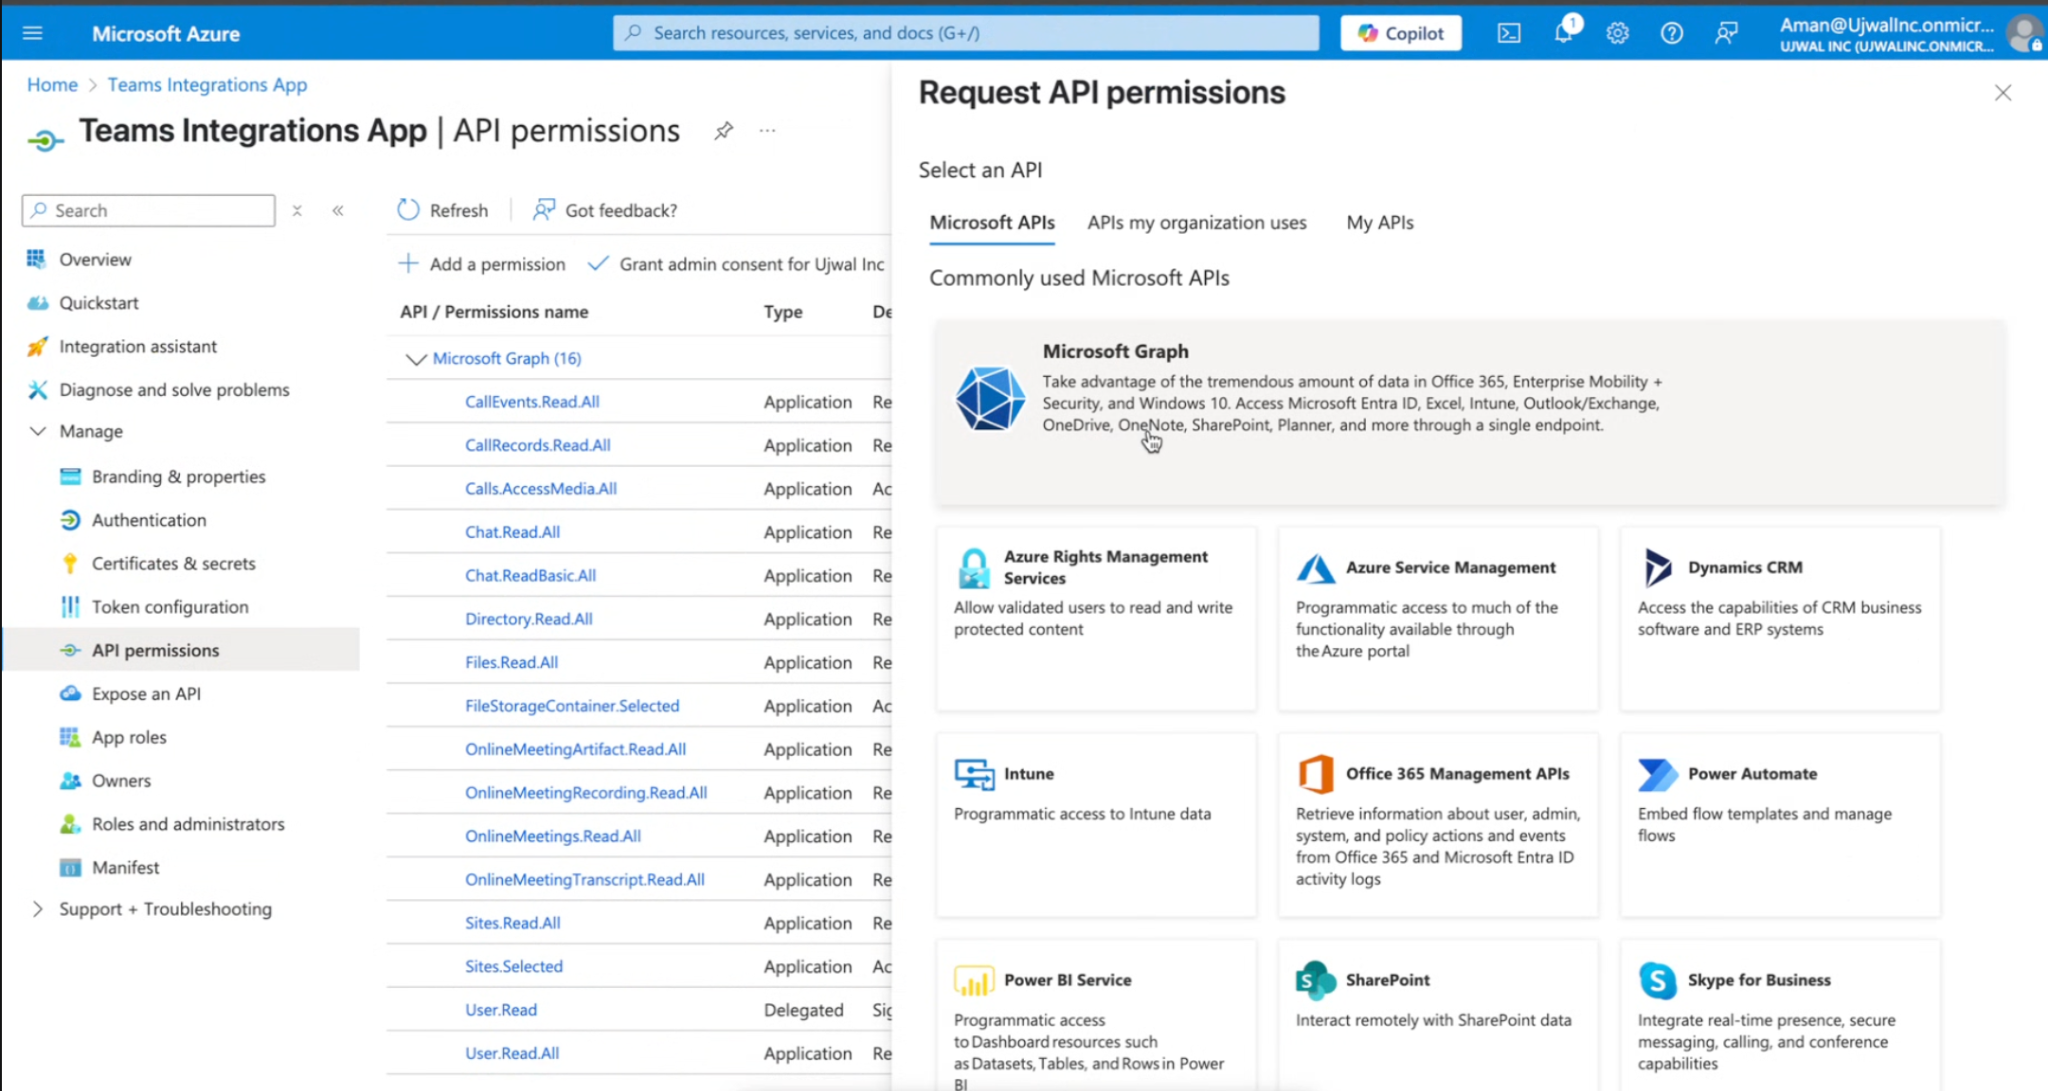
Select Microsoft Graph
5d. Select Application Permissions
Choose "Application permissions" (for background apps).
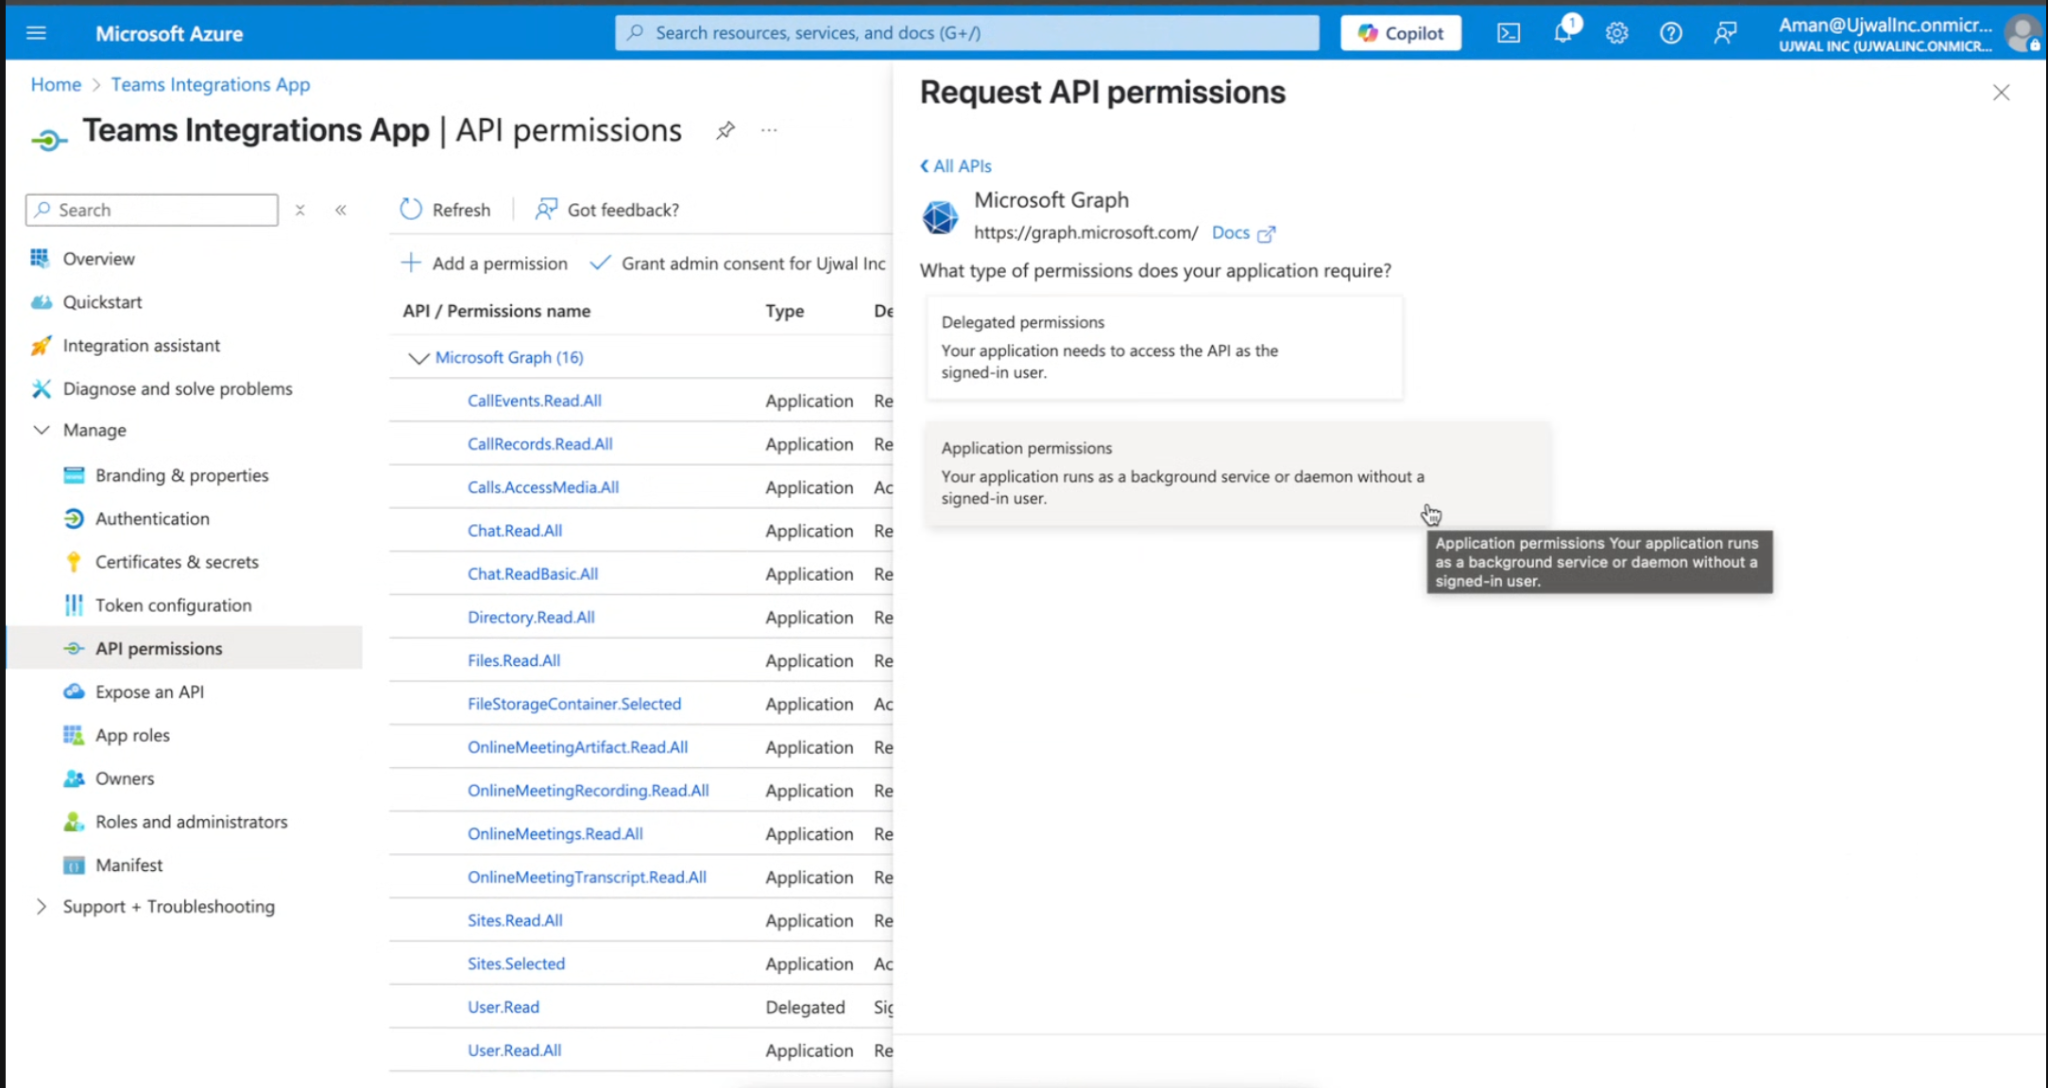
Select Application Permissions
5e. Add Required Permissions
Search for each permission and check the checkbox. The full list:
CallEvents.Read.All
CallRecords.Read.All
Calls.AccessMedia.All
Chat.Read.All
Chat.ReadBasic.All
Directory.Read.All
Files.Read.All
FileStorageContainer.Selected
OnlineMeetingArtifact.Read.All
OnlineMeetingRecording.Read.All
OnlineMeetingTranscript.Read.All
Sites.Read.All
Sites.Selected
User.Read.All
Search for permissions by typing partial names:
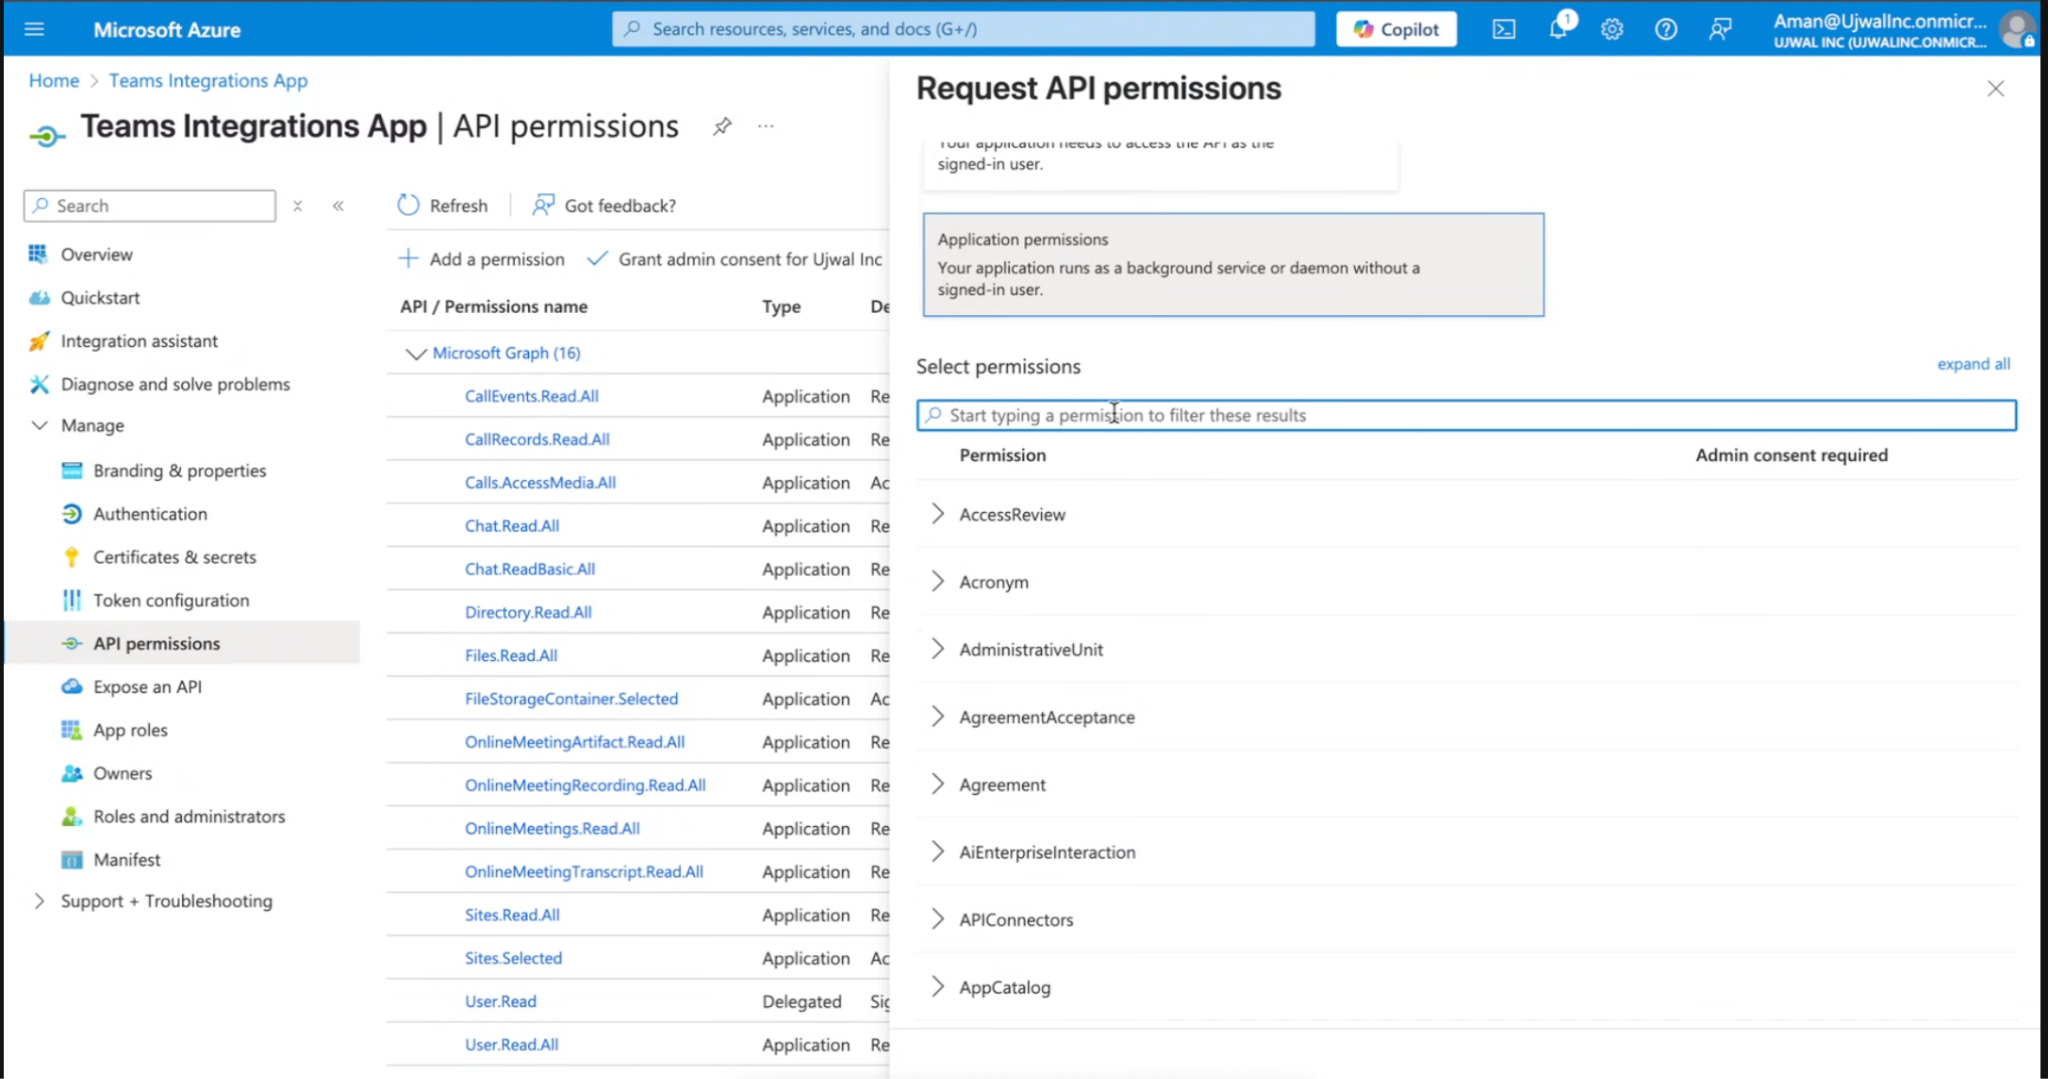
Searching and selecting permissions
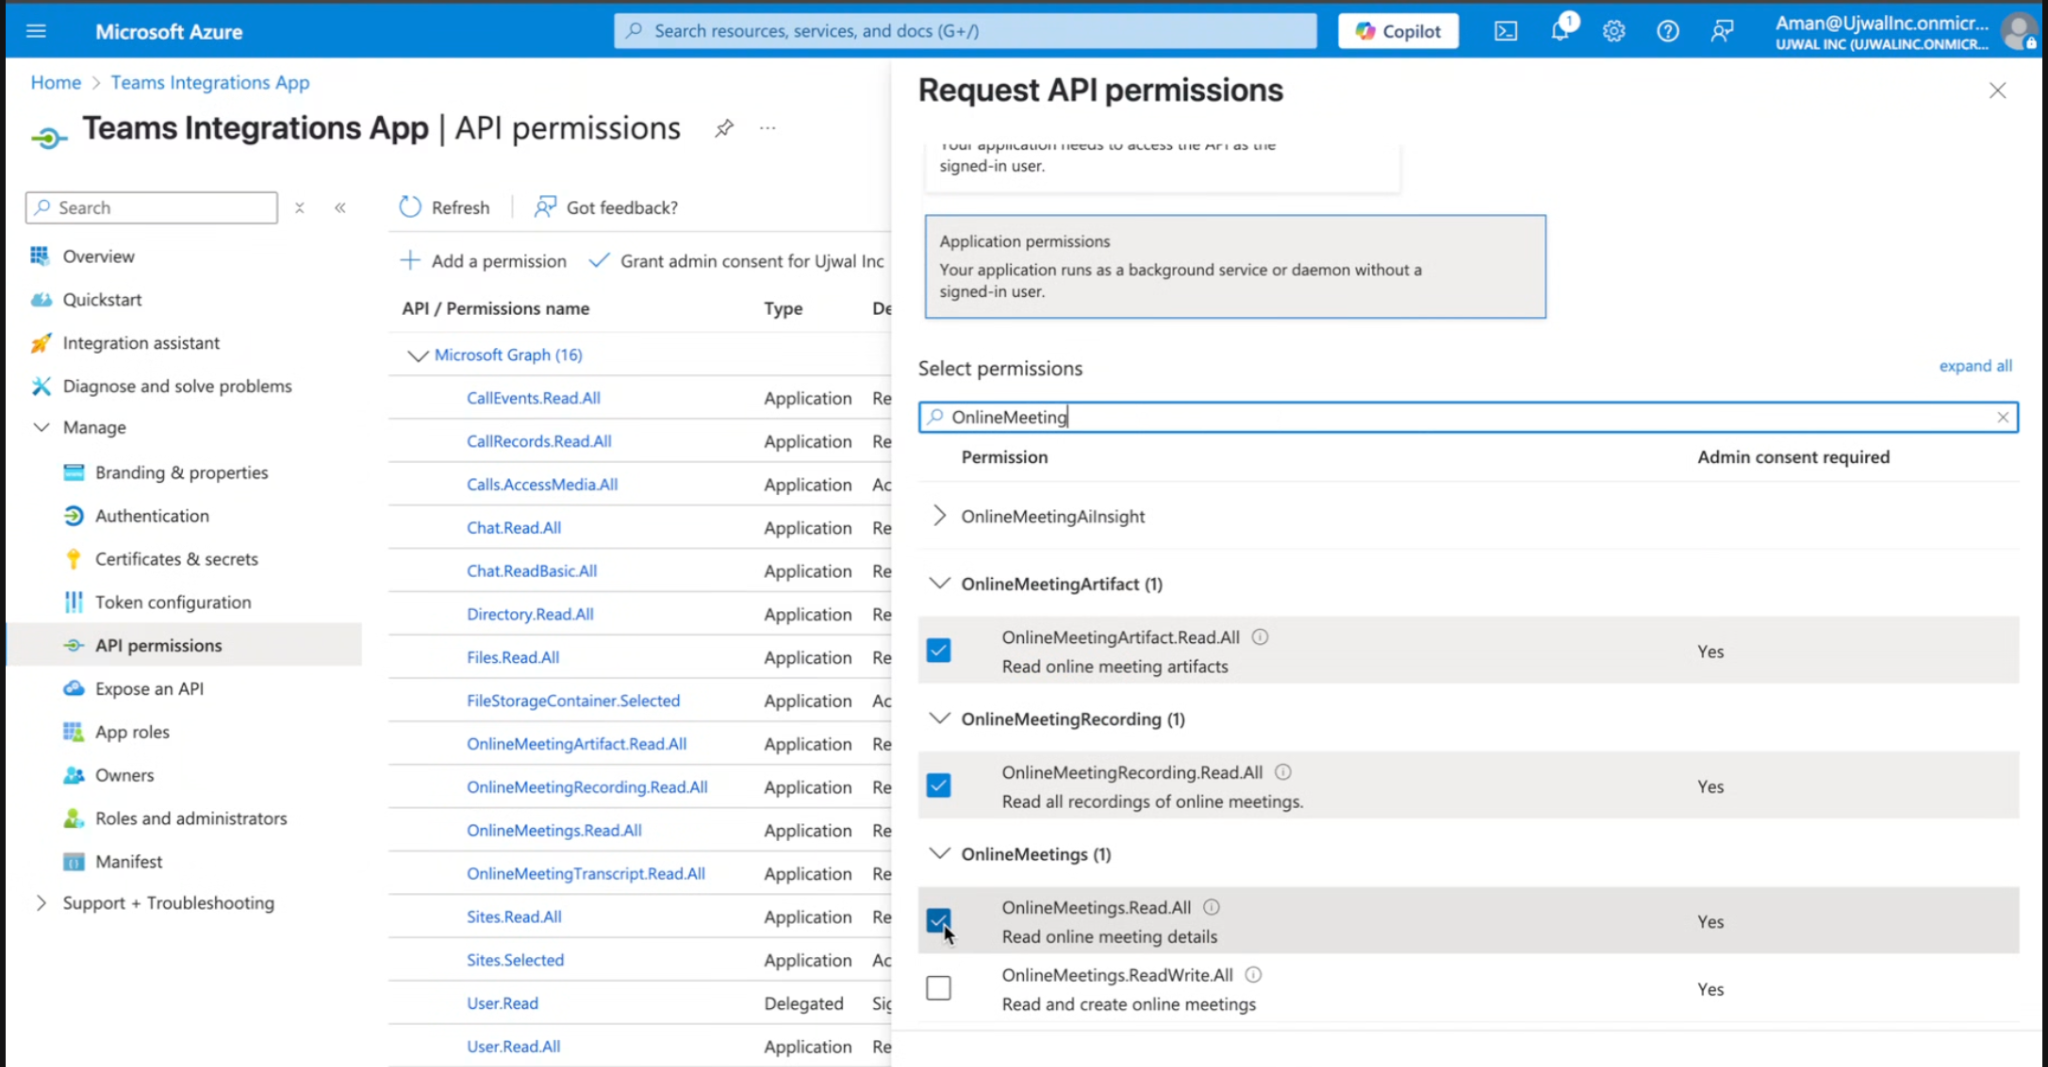
Selecting OnlineMeeting permissions
Once all are selected, click "Add permissions" at the bottom.
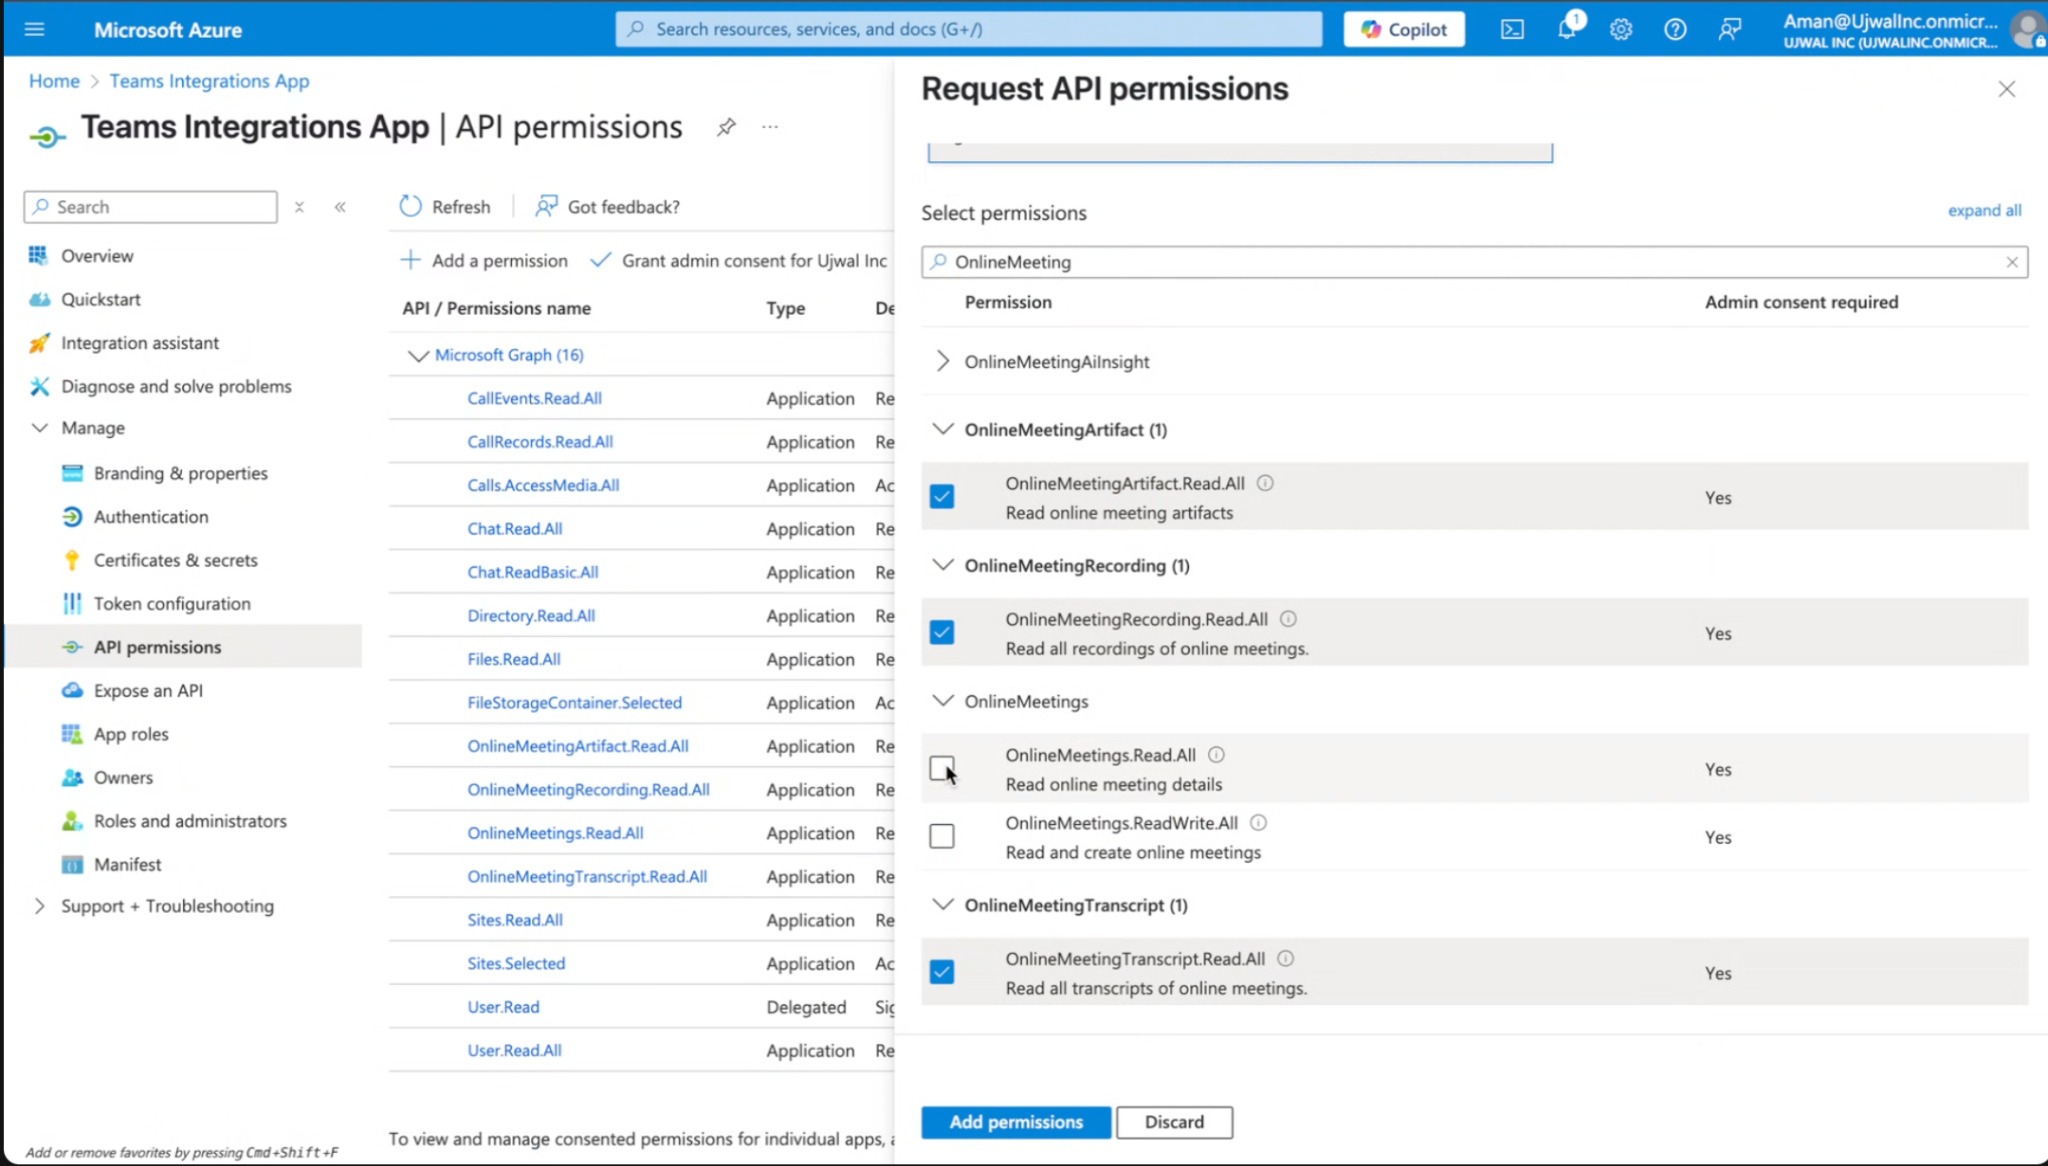
Permissions ready to be added
6. Grant Admin Consent
Click "Grant admin consent for [Your Organization]" at the top of the API permissions page. Confirm when prompted.
All permissions should show a green checkmark with "Granted" status.
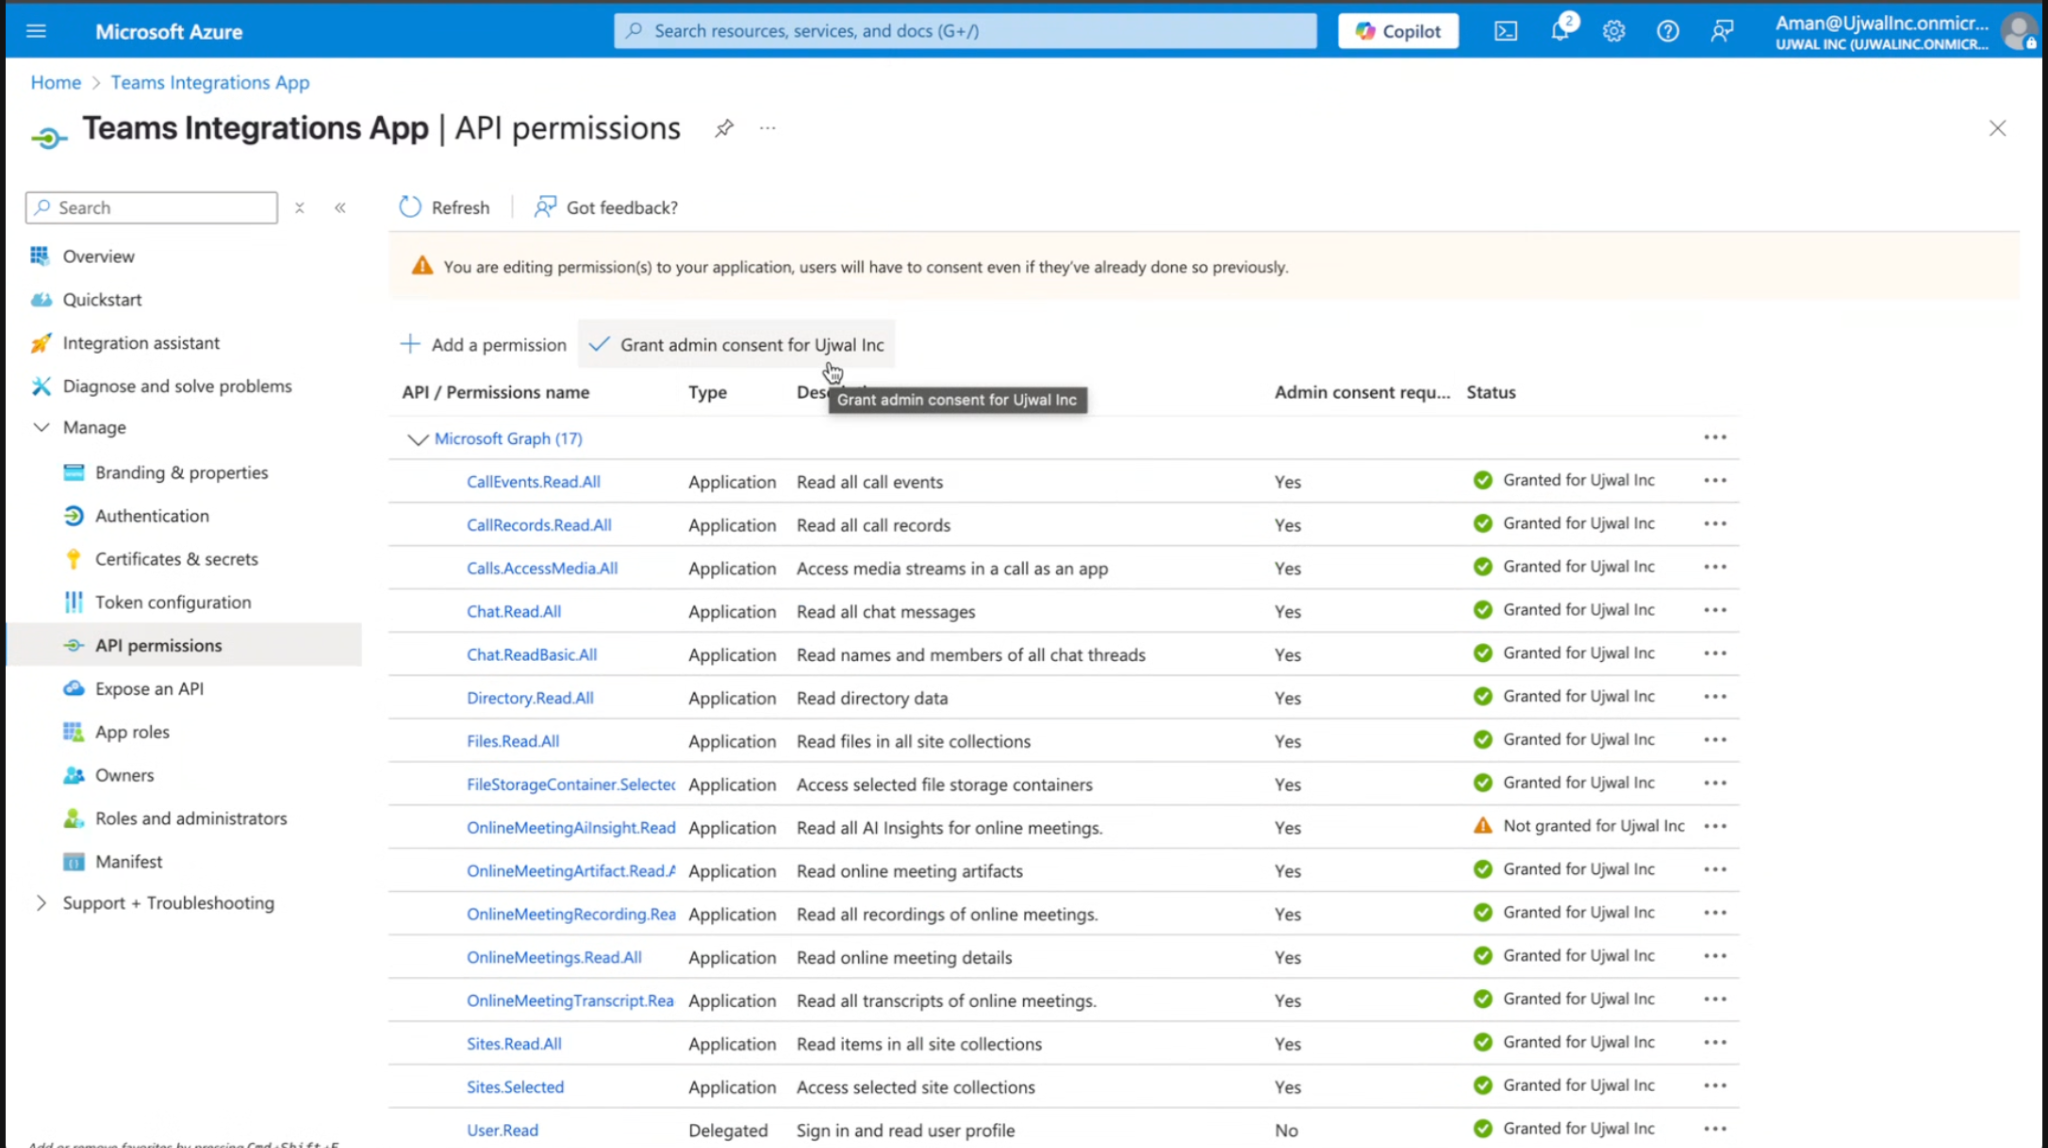
Admin consent granted -- all green
7. Find Tenant ID and Client ID
Go to the "Overview" tab of your app registration. Under Essentials you will find:
- Application (client) ID -- this is the Client ID
- Directory (tenant) ID -- this is the Tenant ID
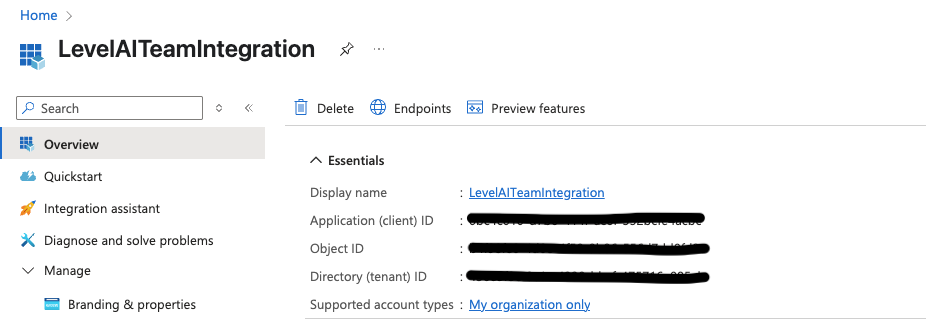
Tenant ID and Client ID in the Overview tab
8. Share Credentials with Level AI
Share these three values securely with your Level AI Technical Account Manager:
1. Client Secret Value (from Step 4)
2. Client ID / Application ID (from Step 7)
3. Tenant ID / Directory ID (from Step 7)
9. Module Installation (Azure CLI)
First, check if you have access to Azure Cloud Shell at https://shell.azure.com/. If yes, skip to Step 10.
If not, install Azure CLI locally:
Windows:
https://learn.microsoft.com/en-us/cli/azure/install-azure-cli-windows
Linux:
https://learn.microsoft.com/en-us/cli/azure/install-azure-cli-linux
macOS:
brew update && brew install azure-cli
az version
az login --allow-no-subscription
az account get-access-token
brew install --cask powershell
pwsh
10. Module Setup (PowerShell)
Run each command one by one in PowerShell:
Install-Module -Name Az -AllowClobber -Scope CurrentUser
Install-Module -Name MicrosoftTeams -Scope CurrentUser -Force
Connect-AzAccount
Connect-MicrosoftTeams
New-CsApplicationAccessPolicy -Identity MSTeams-Access-policy -AppIds "325b76d6-778d-4ce9-99a5-f5269e0d3a10" -Description "Access Policy App MS Teams"
Note: Verify the output matches the following. Do NOT enter these -- this is verification only.
Expected output:
Identity : Tag:MSTeams-Access-policy
AppIds : {325b76d6-778d-4ce9-99a5-f5269e0d3a10}
Description : Access Policy App Teams
Once verified, run:
Grant-CsApplicationAccessPolicy -PolicyName MSTeams-Access-policy -Global
Get-AzSubscription
Note: Once all commands succeed, inform your Level AI Technical Account Manager to enable the integration.
For questions, contact your Level AI Technical Account Manager.