Azure SCIM Client Setup Guide for Level AI
Last updated: June 18, 2026
Overview
SCIM provisioning in Level AI automates the entire account lifecycle, from creation to deactivation, and keeps your organizational structure perfectly in sync. This means less manual work for you, more consistent data across all your systems, and stronger security thanks to precise access control. Additionally, the automation helps reduce manual errors.
The entire process is divided into the following parts:
A) Accessing Azure Enterprise Applications
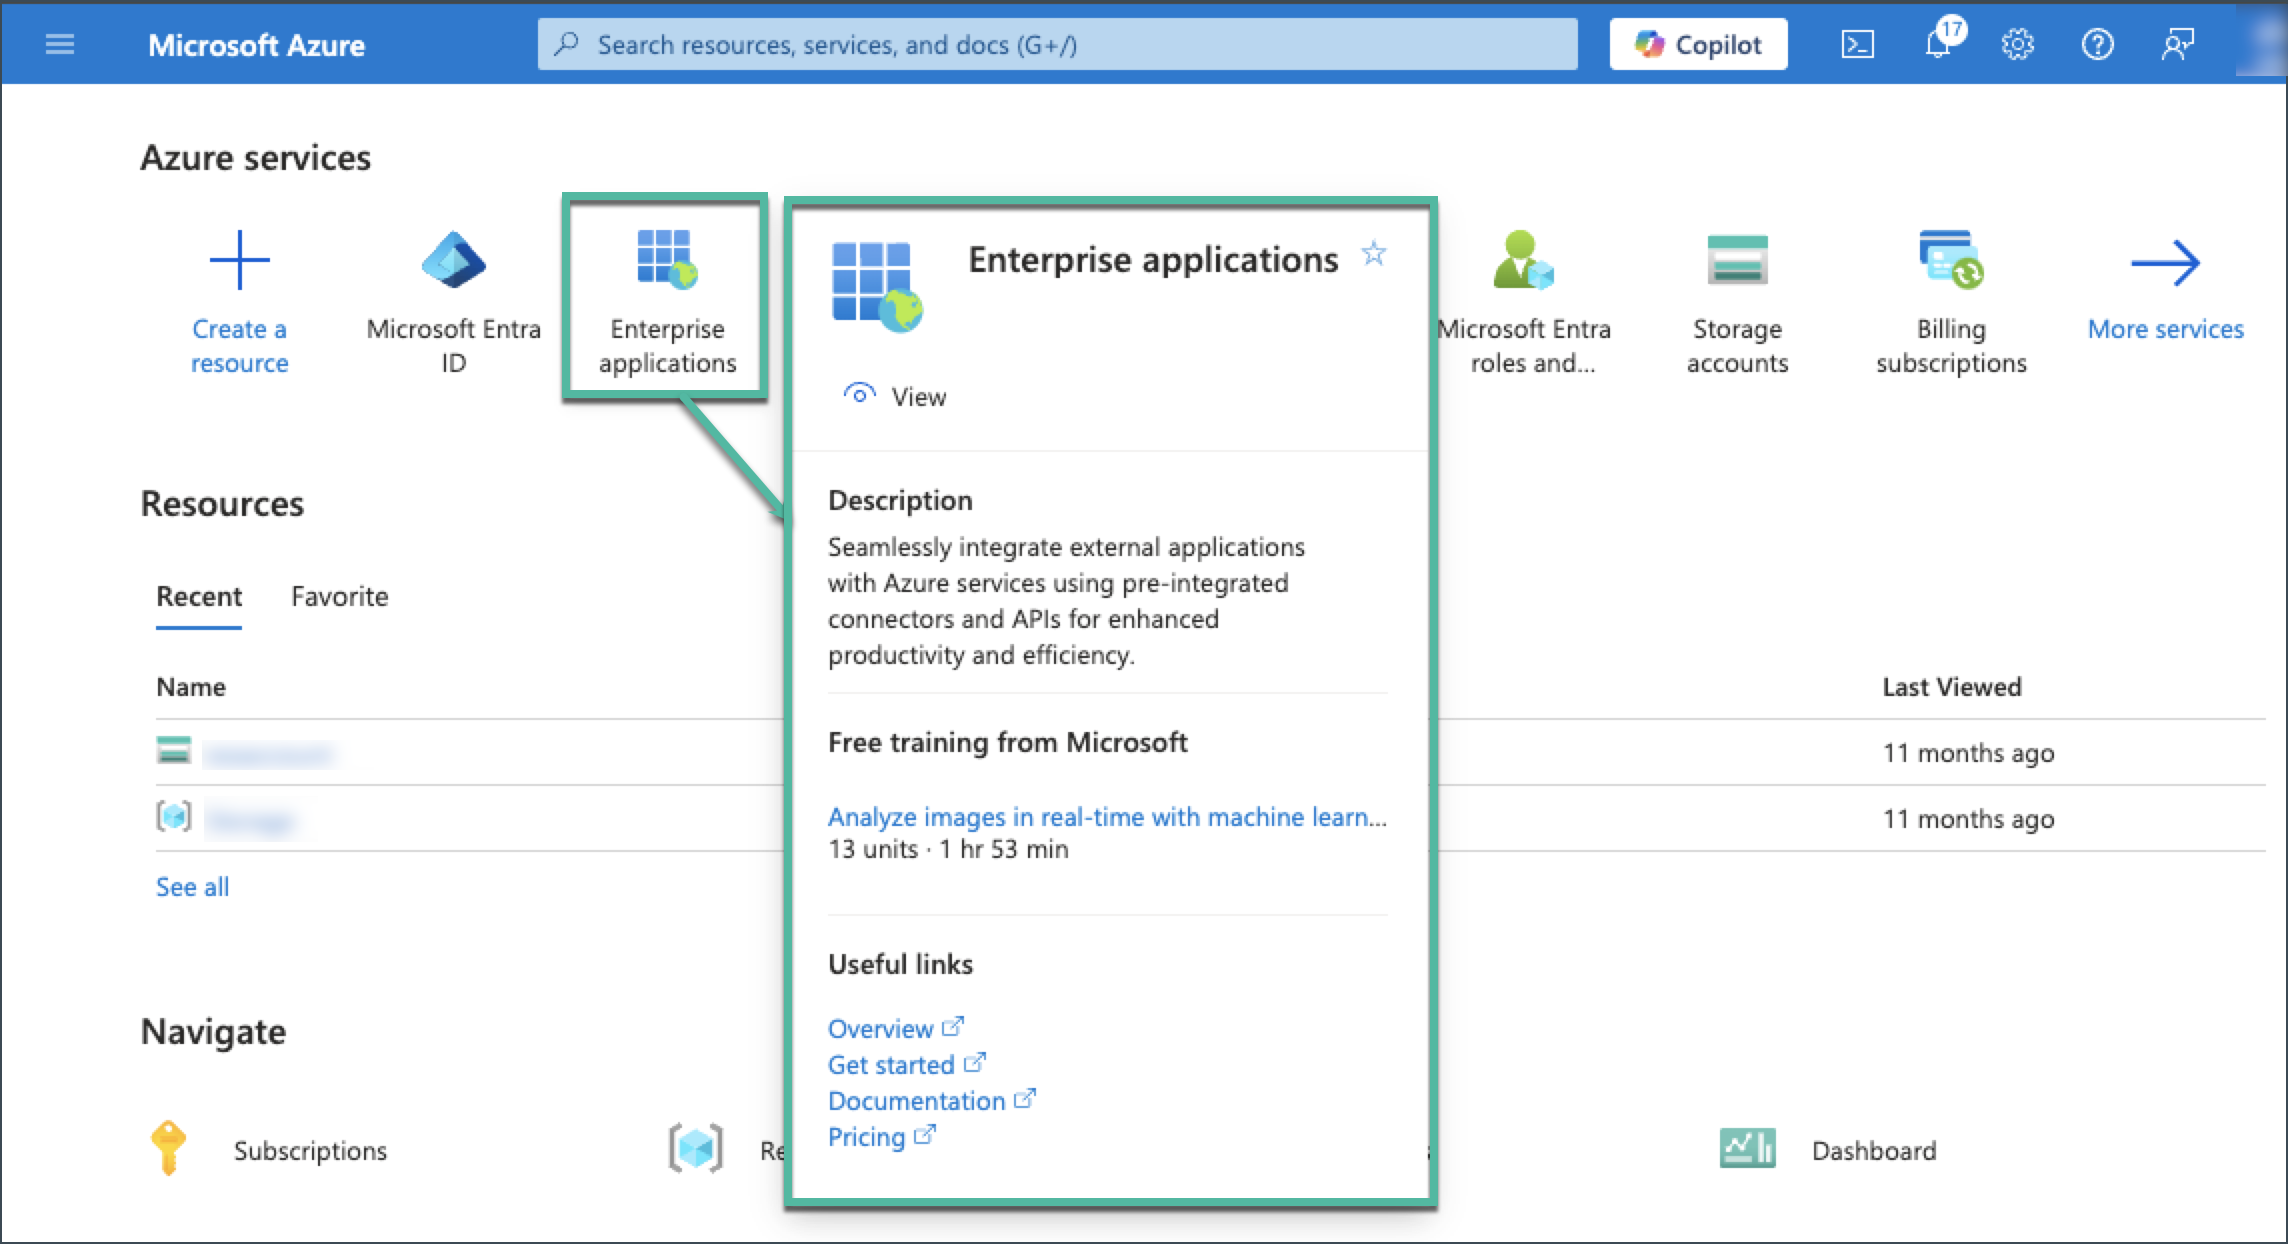
Log in to your Azure Dashboard
Navigate to Enterprise Applications.
B) Creating a New Application
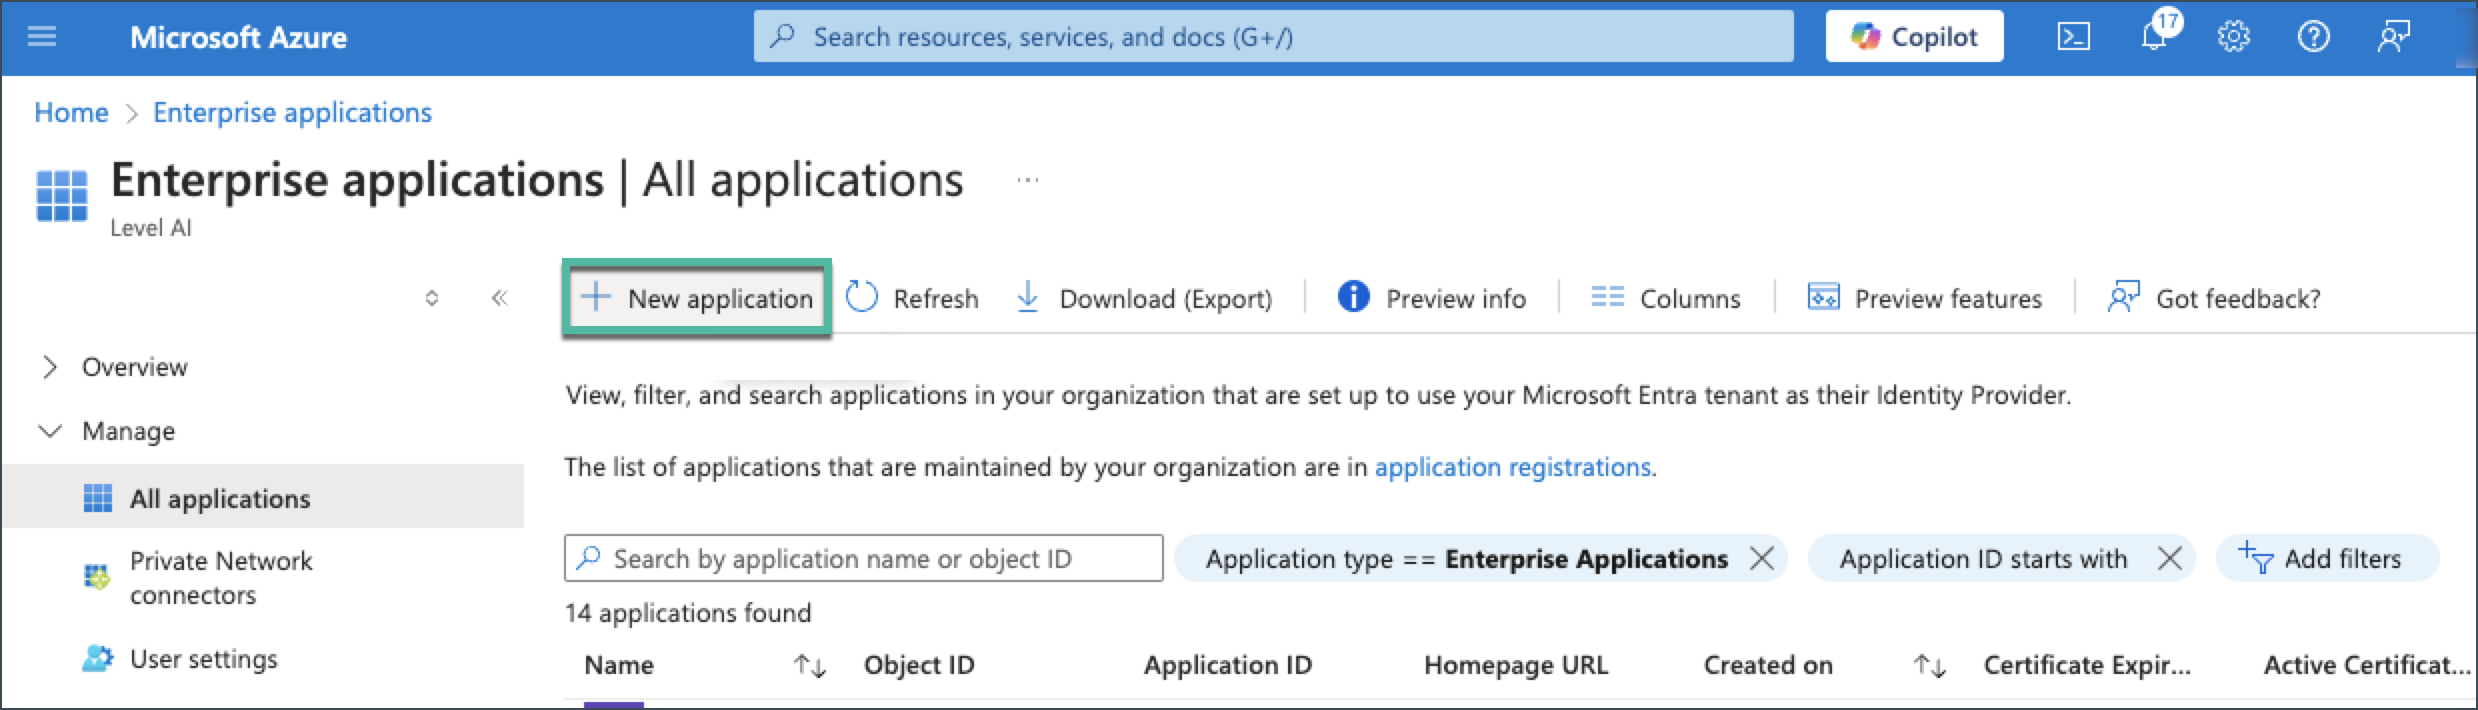
Click New Application.
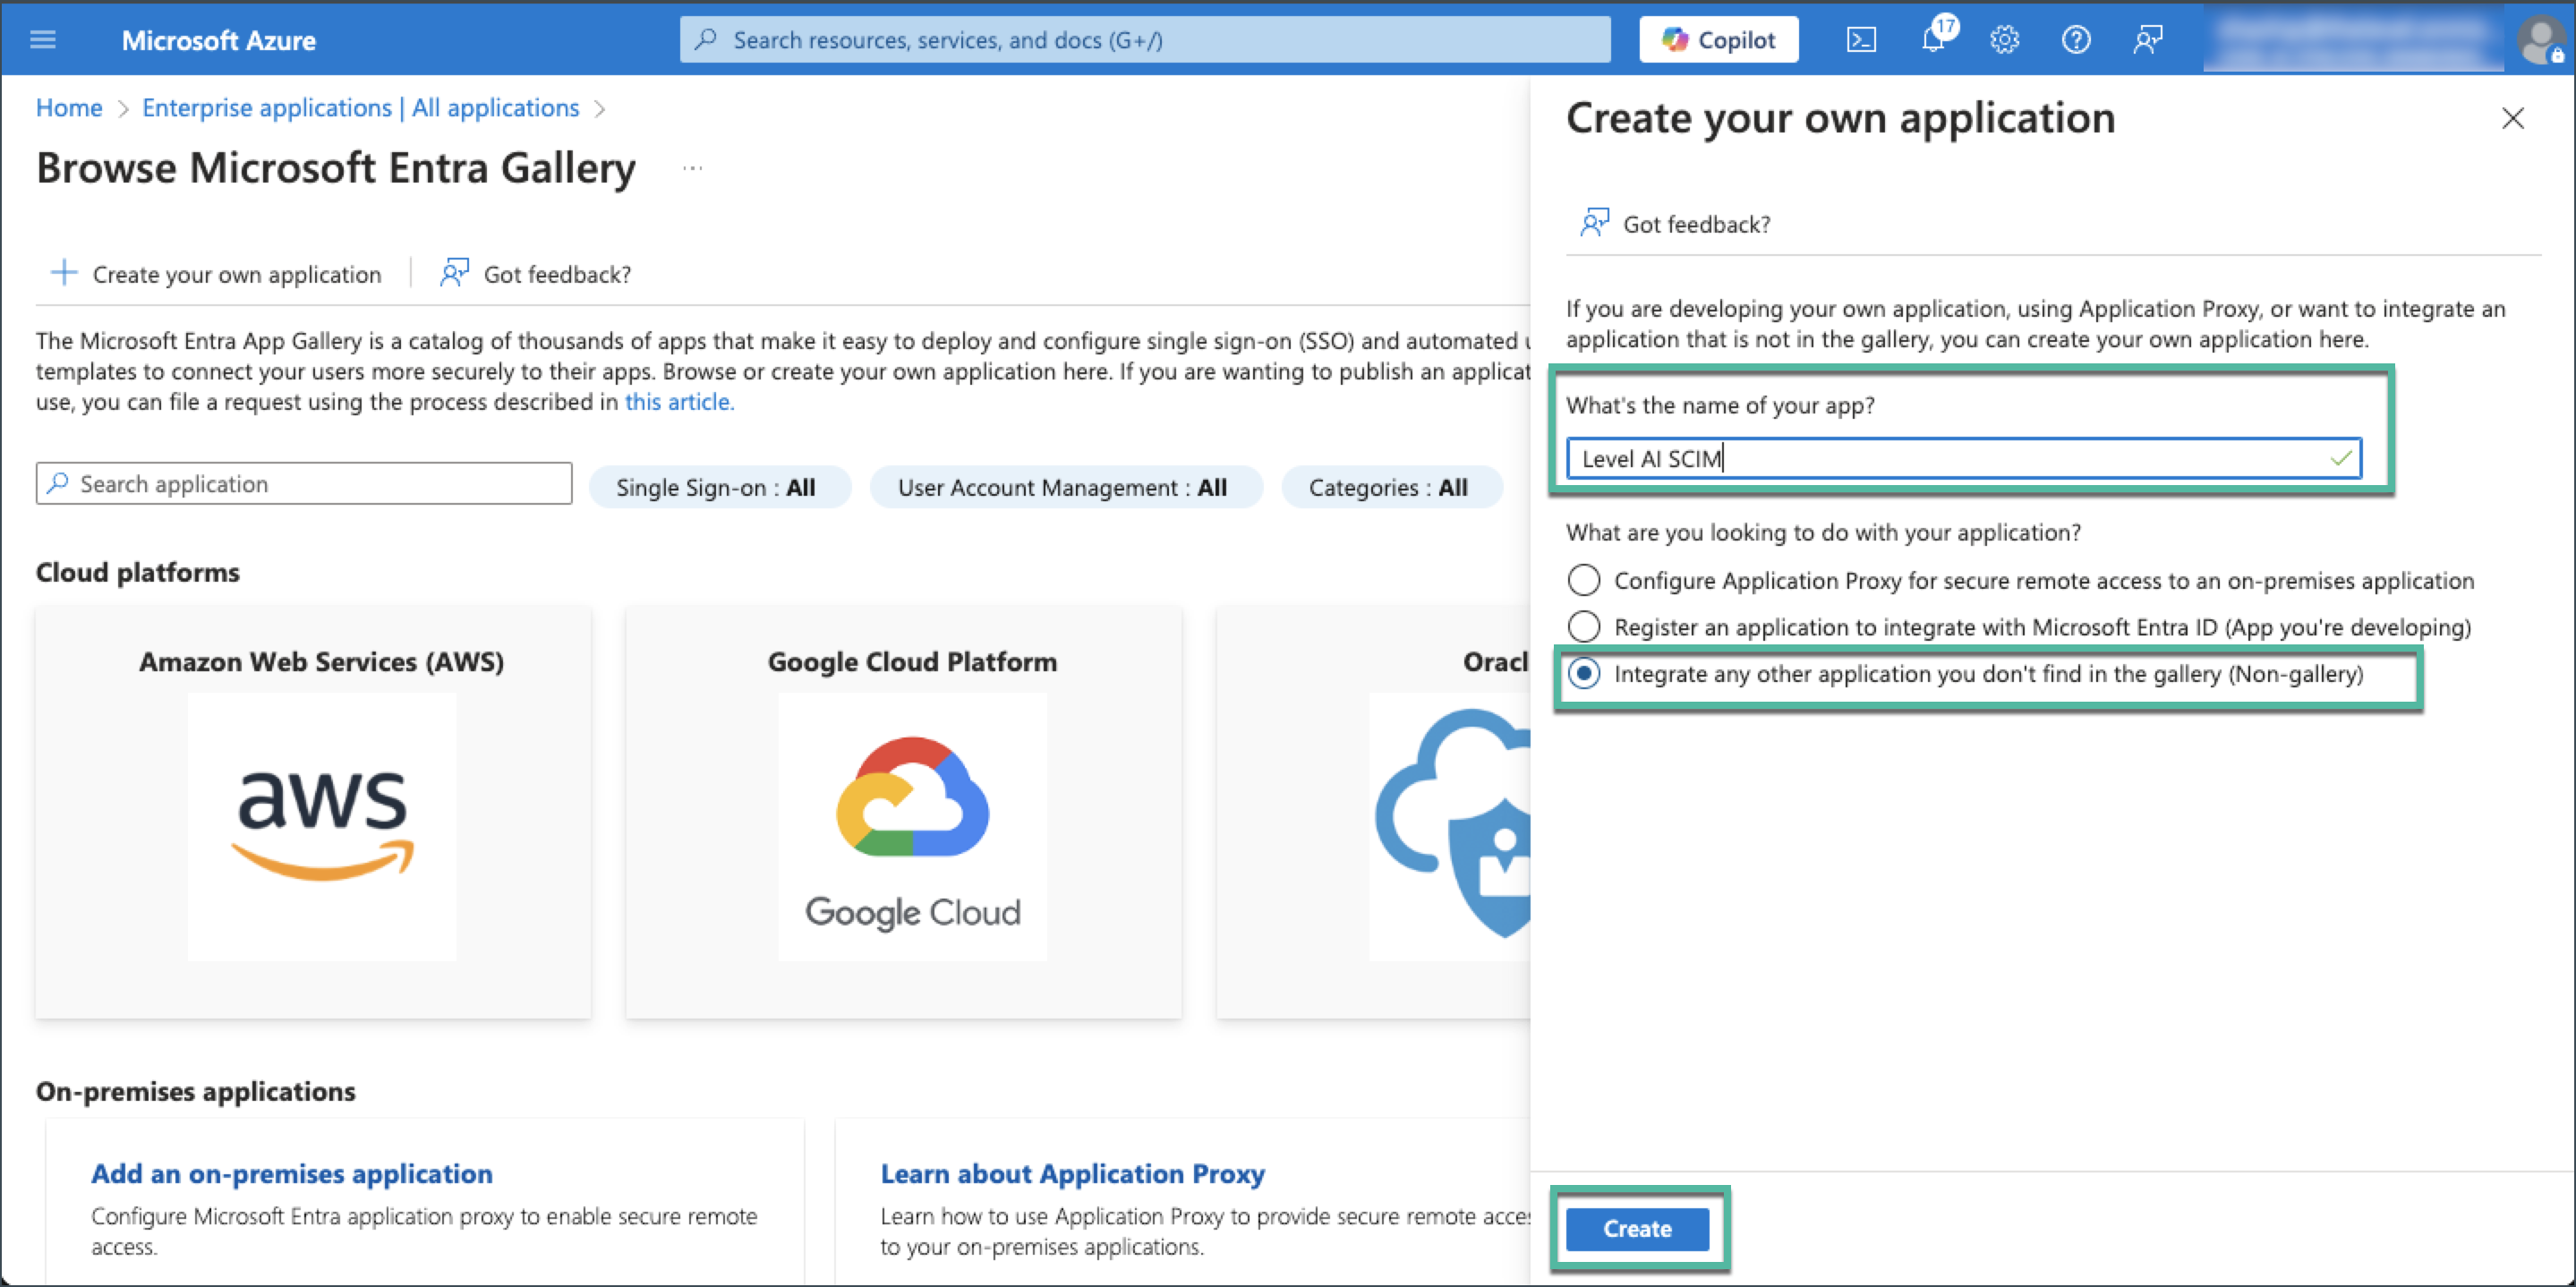
Enter the application name as Level AI SCIM.
Select Integrate any other application you don't find in the gallery (Non-gallery).
Click Create to add the application.
C) Configuring the SCIM Server URL
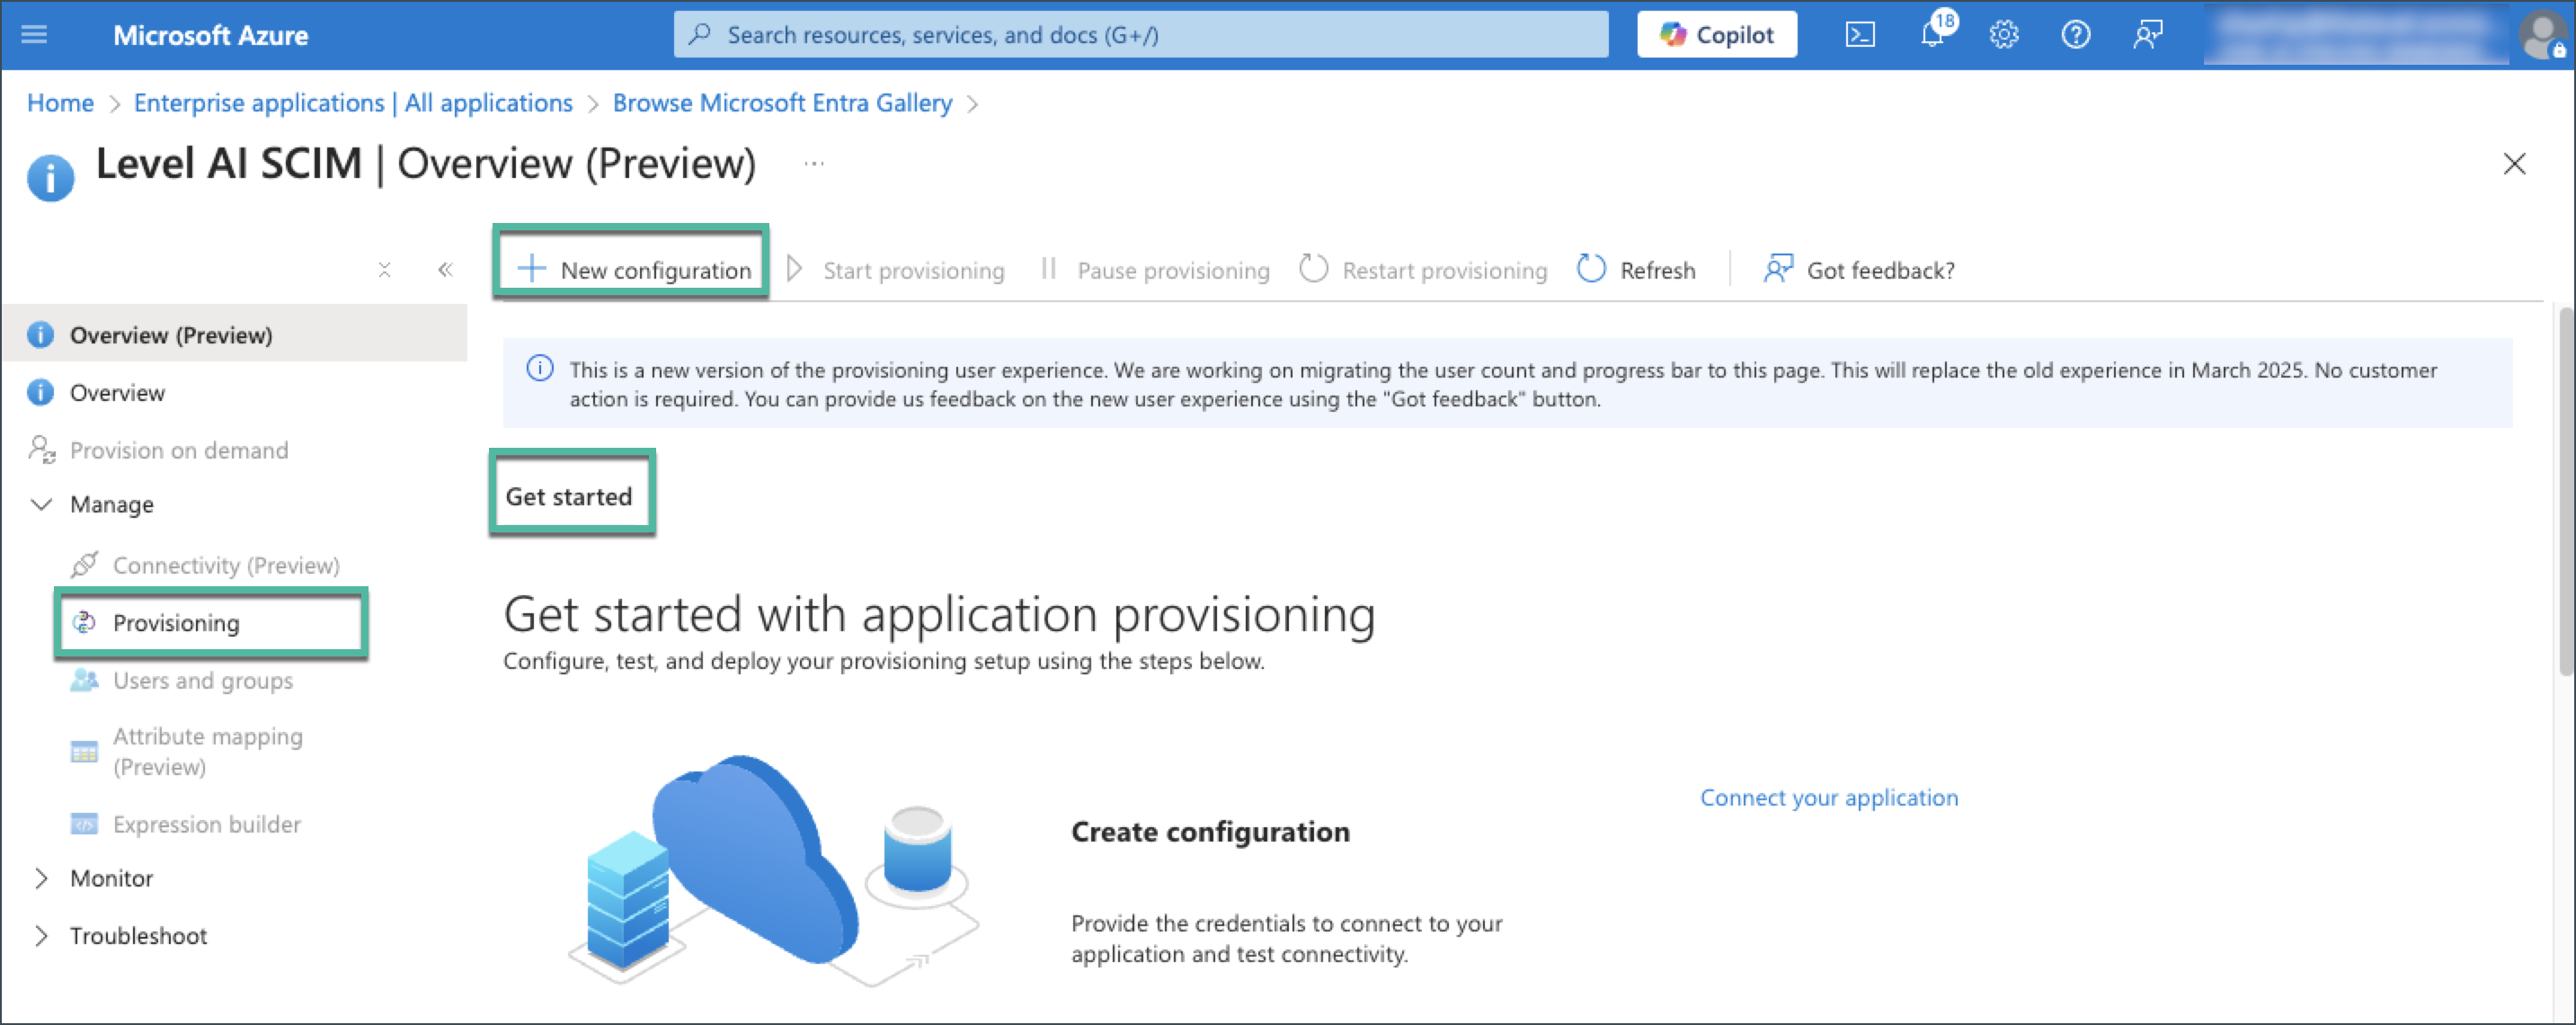
Once the application is added, navigate to the Provisioning section.
Click Get started.
Under Provisioning mode, select Automatic.
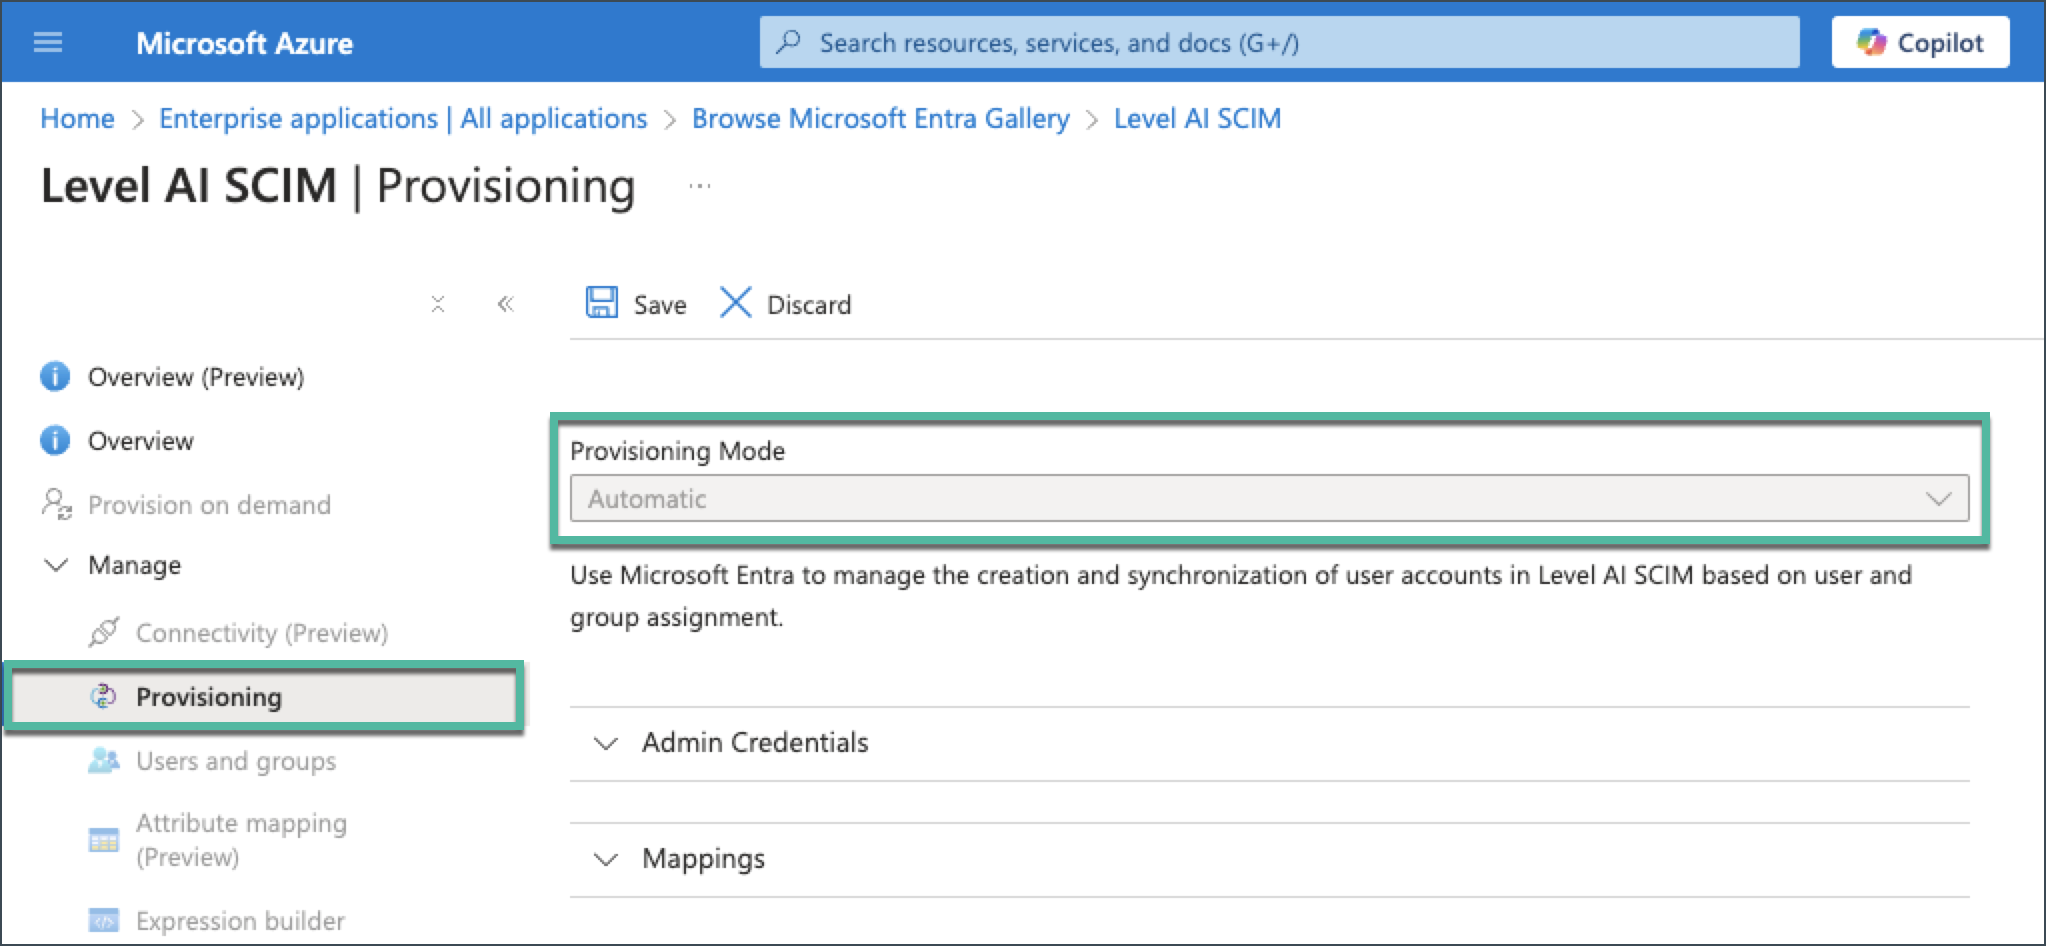
Under Admin Credentials, configure the following:
- Enter the SCIM Server URL: https://prod-api.thelevel.ai/scim/v2
- Enter the Secret Token provided by the Level AI team.Click Test Connection to verify the configuration.

Save the credentials once the connection is successful.

D) Configuring the Provisioning Settings
Under Mappings, expand Provision Azure Active Directory Users.
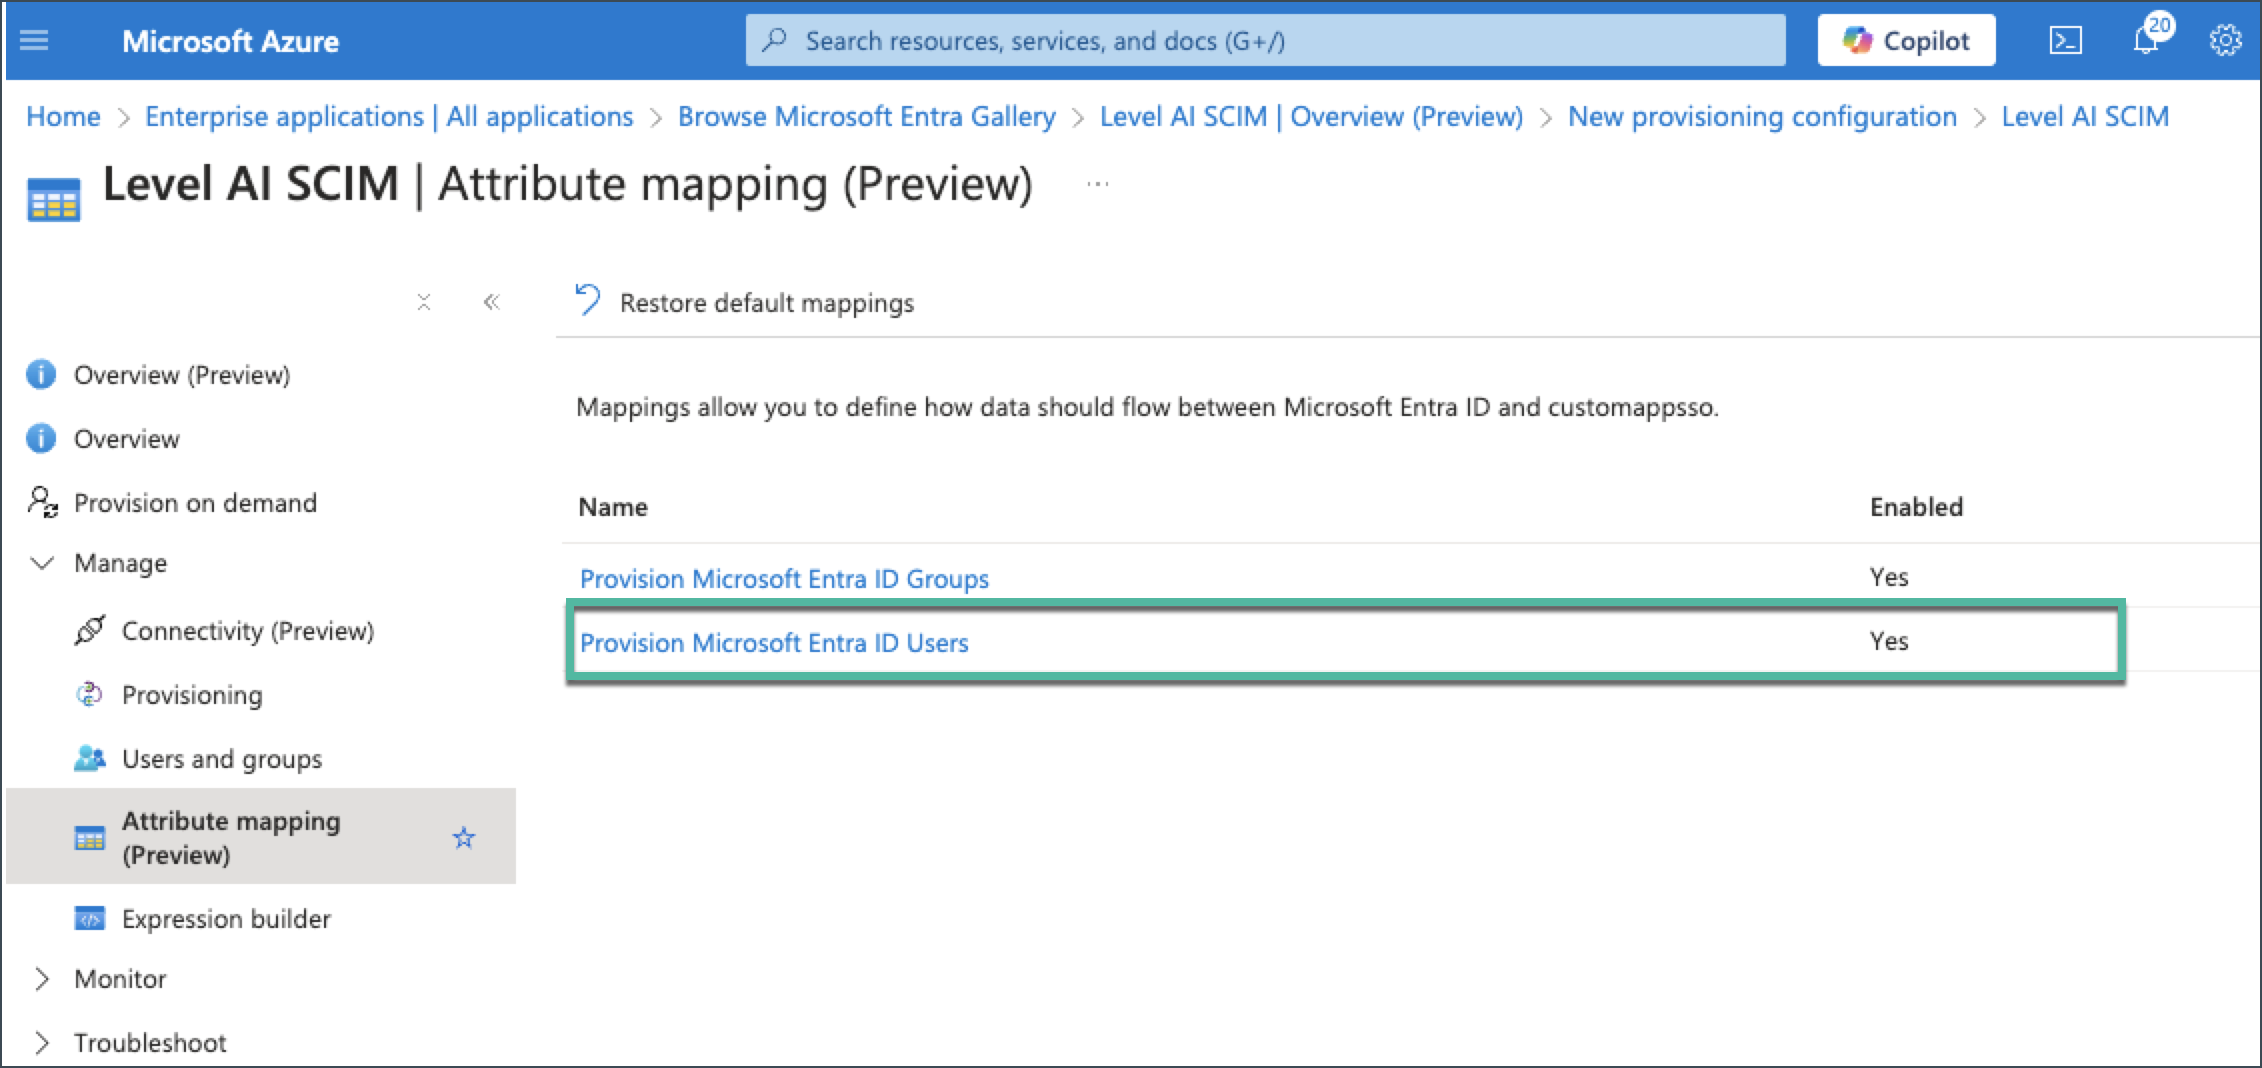
Configure the following settings:
- Enable user creation
- Enable user updation
- Enable user deactivation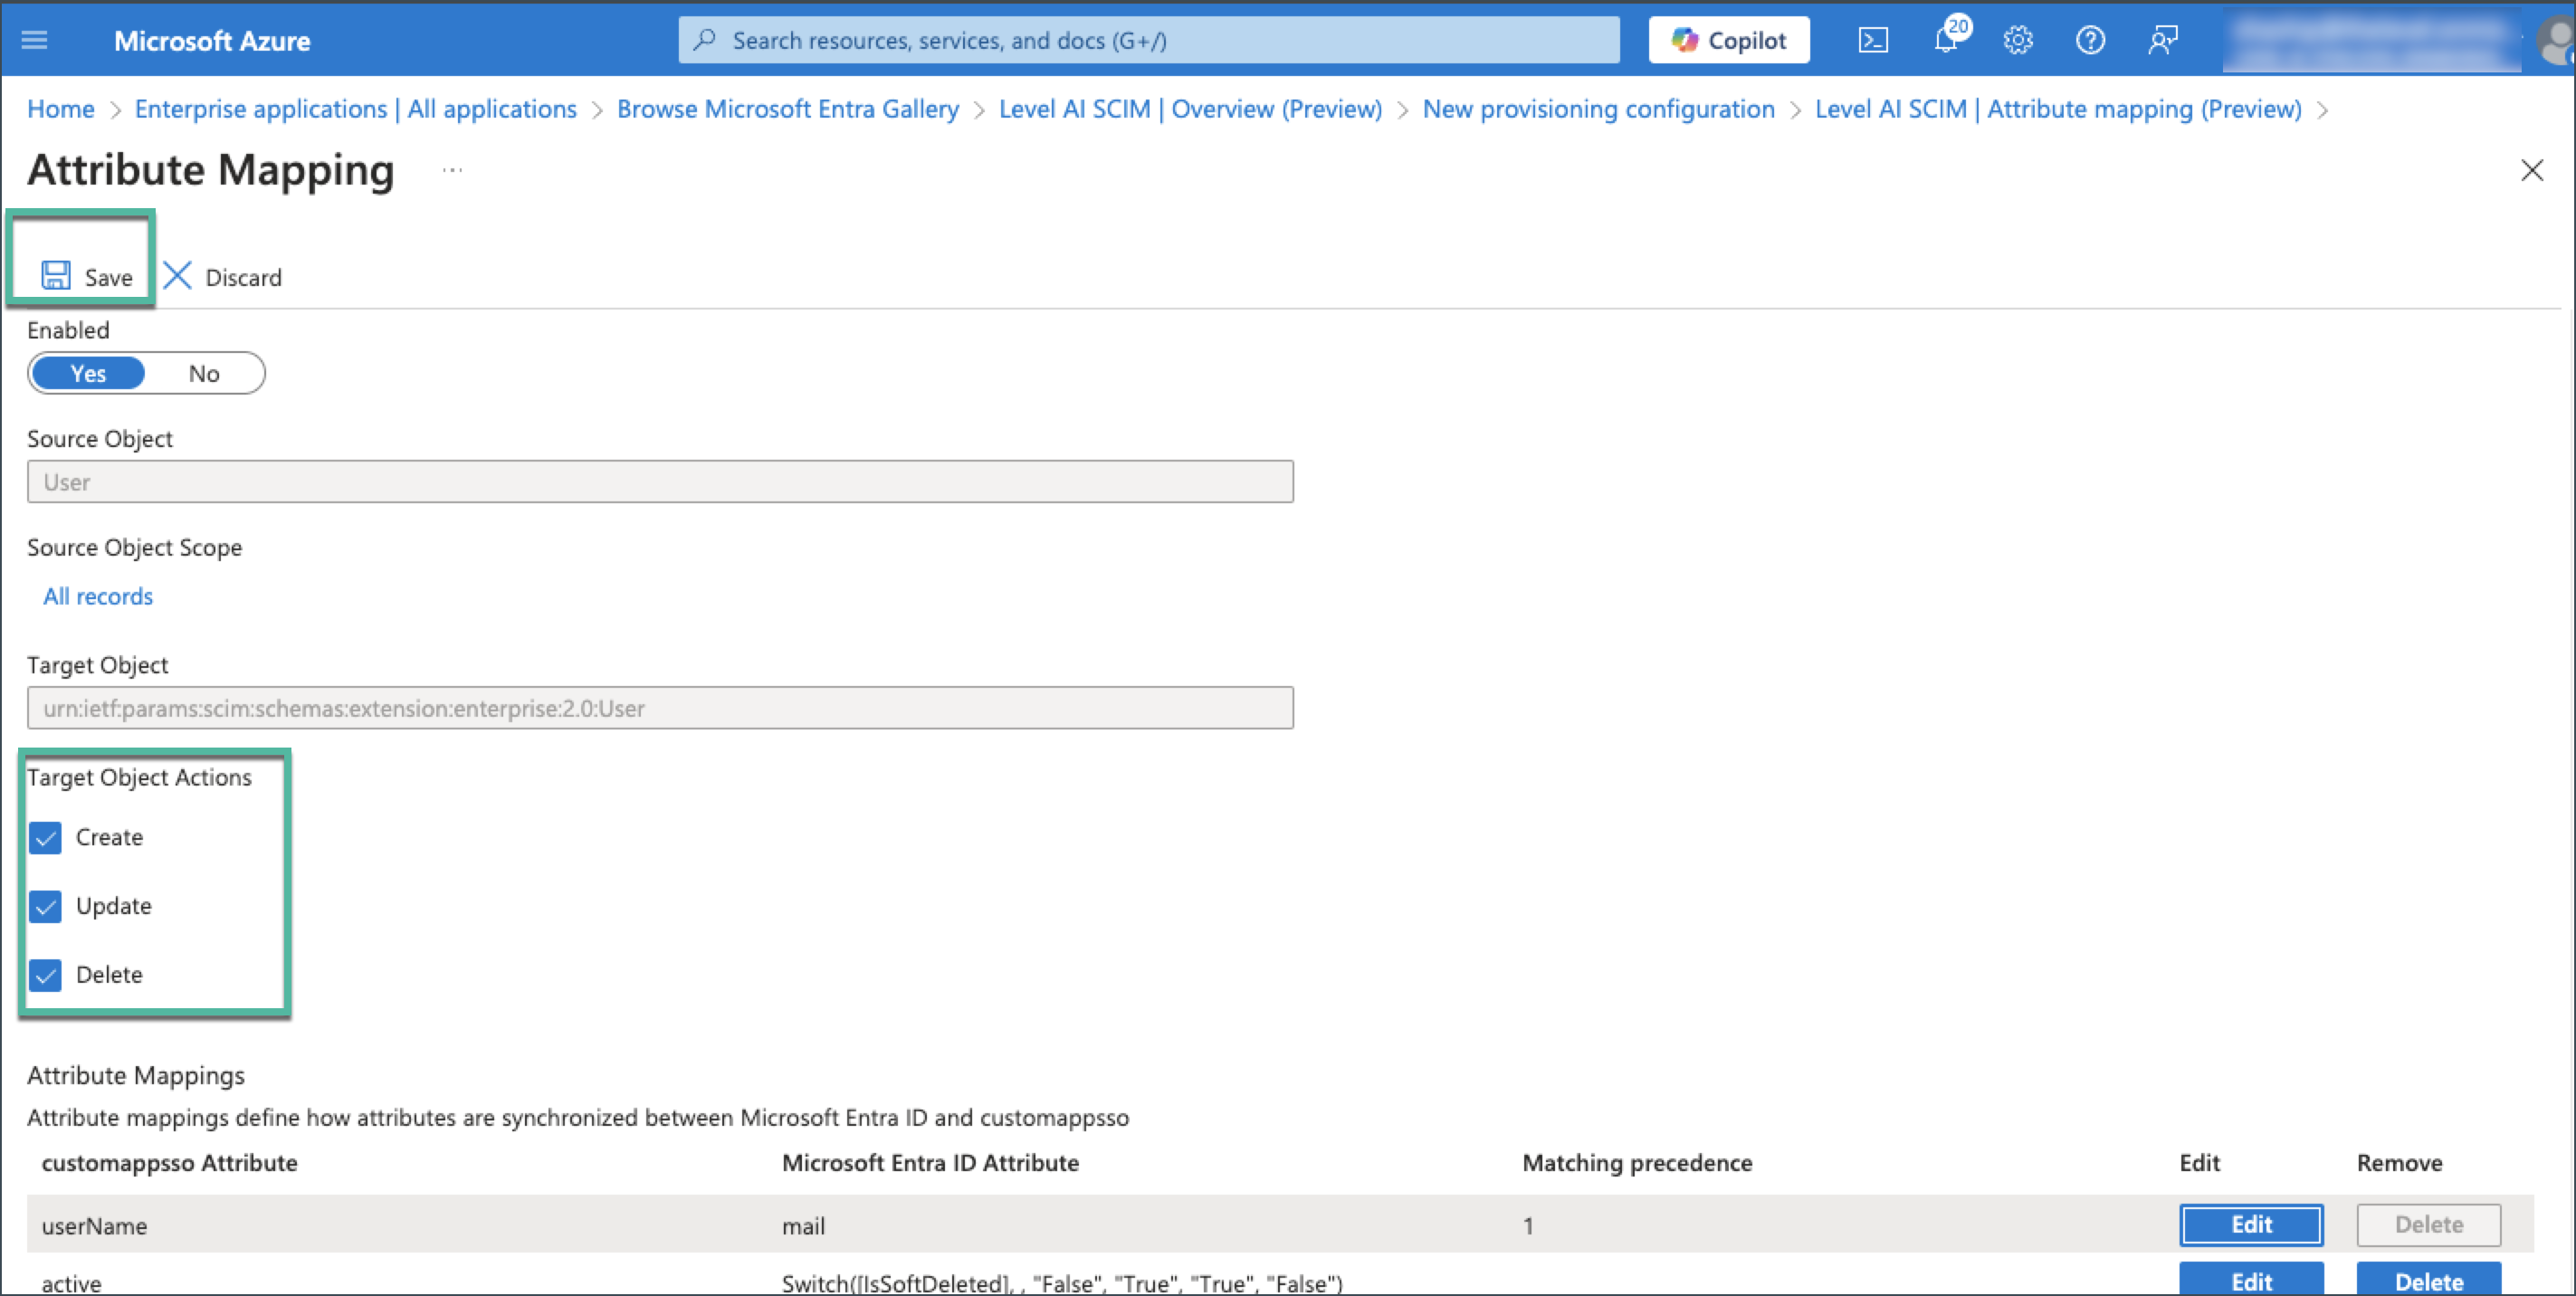
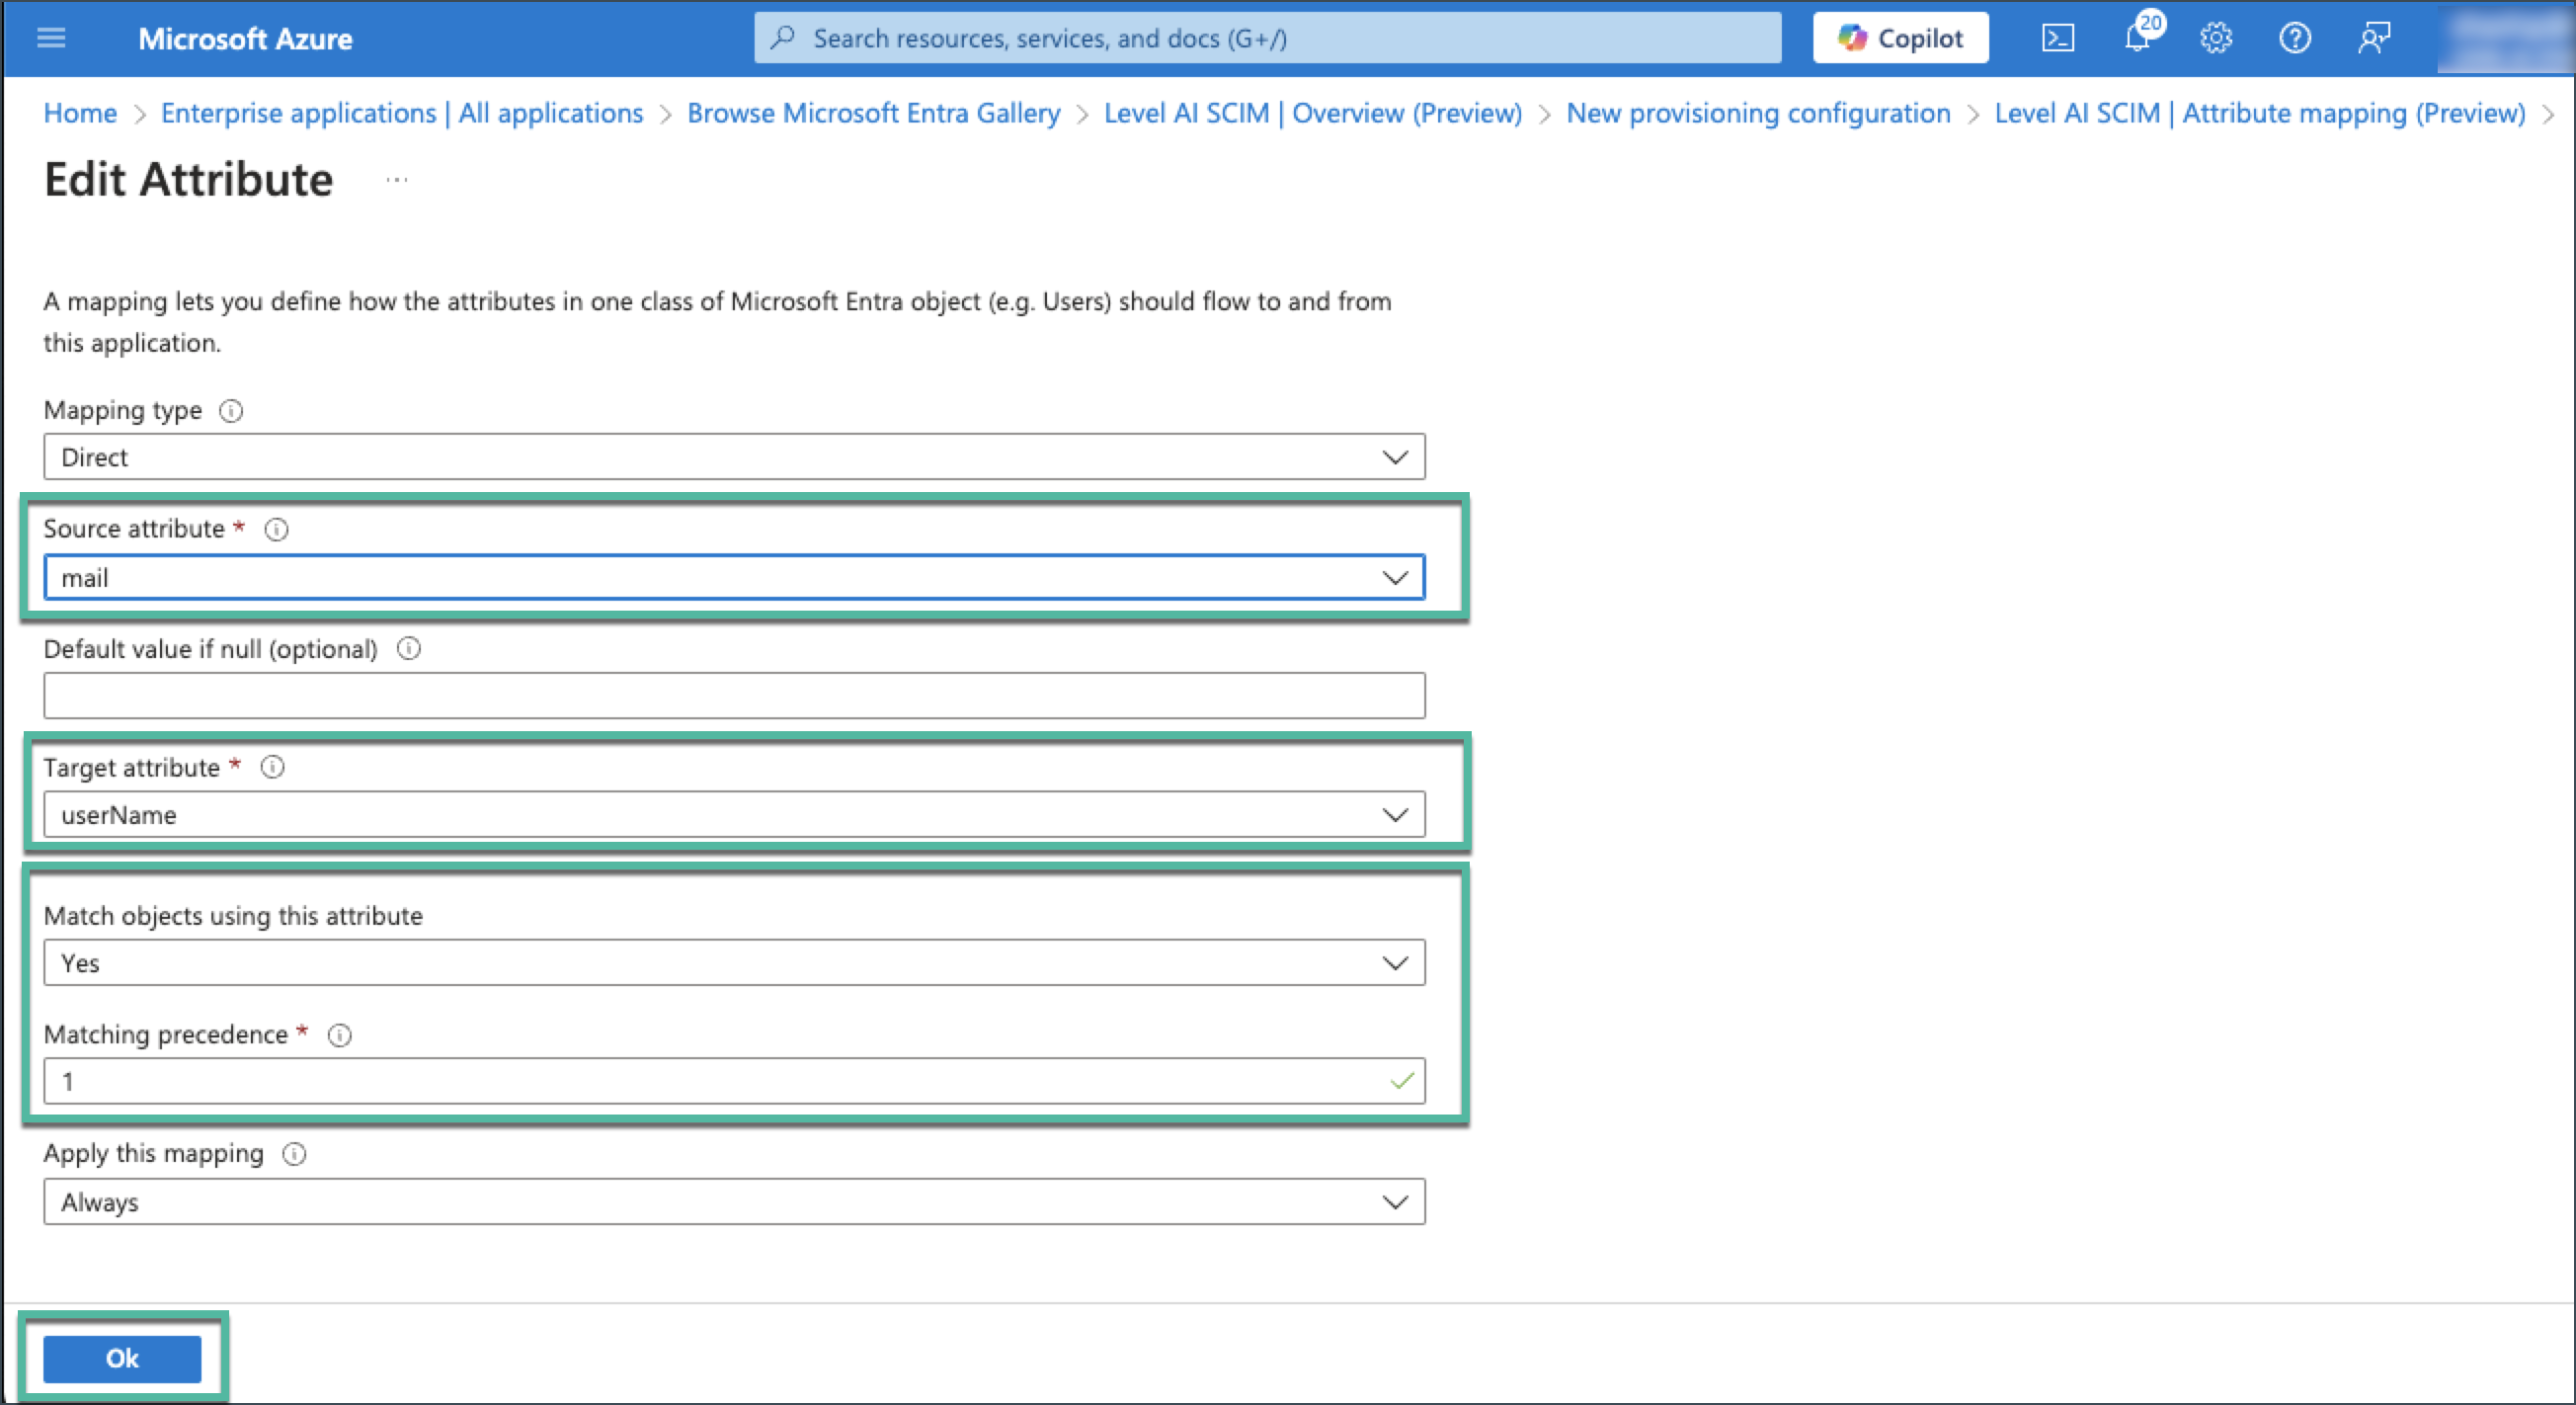
Review and customize the attribute mappings if needed.
- Mail attribute must be mapped to userName with matching precedence 1Click OK to save your changes.
E) Initiating Provisioning
Return to the Provisioning Overview page.
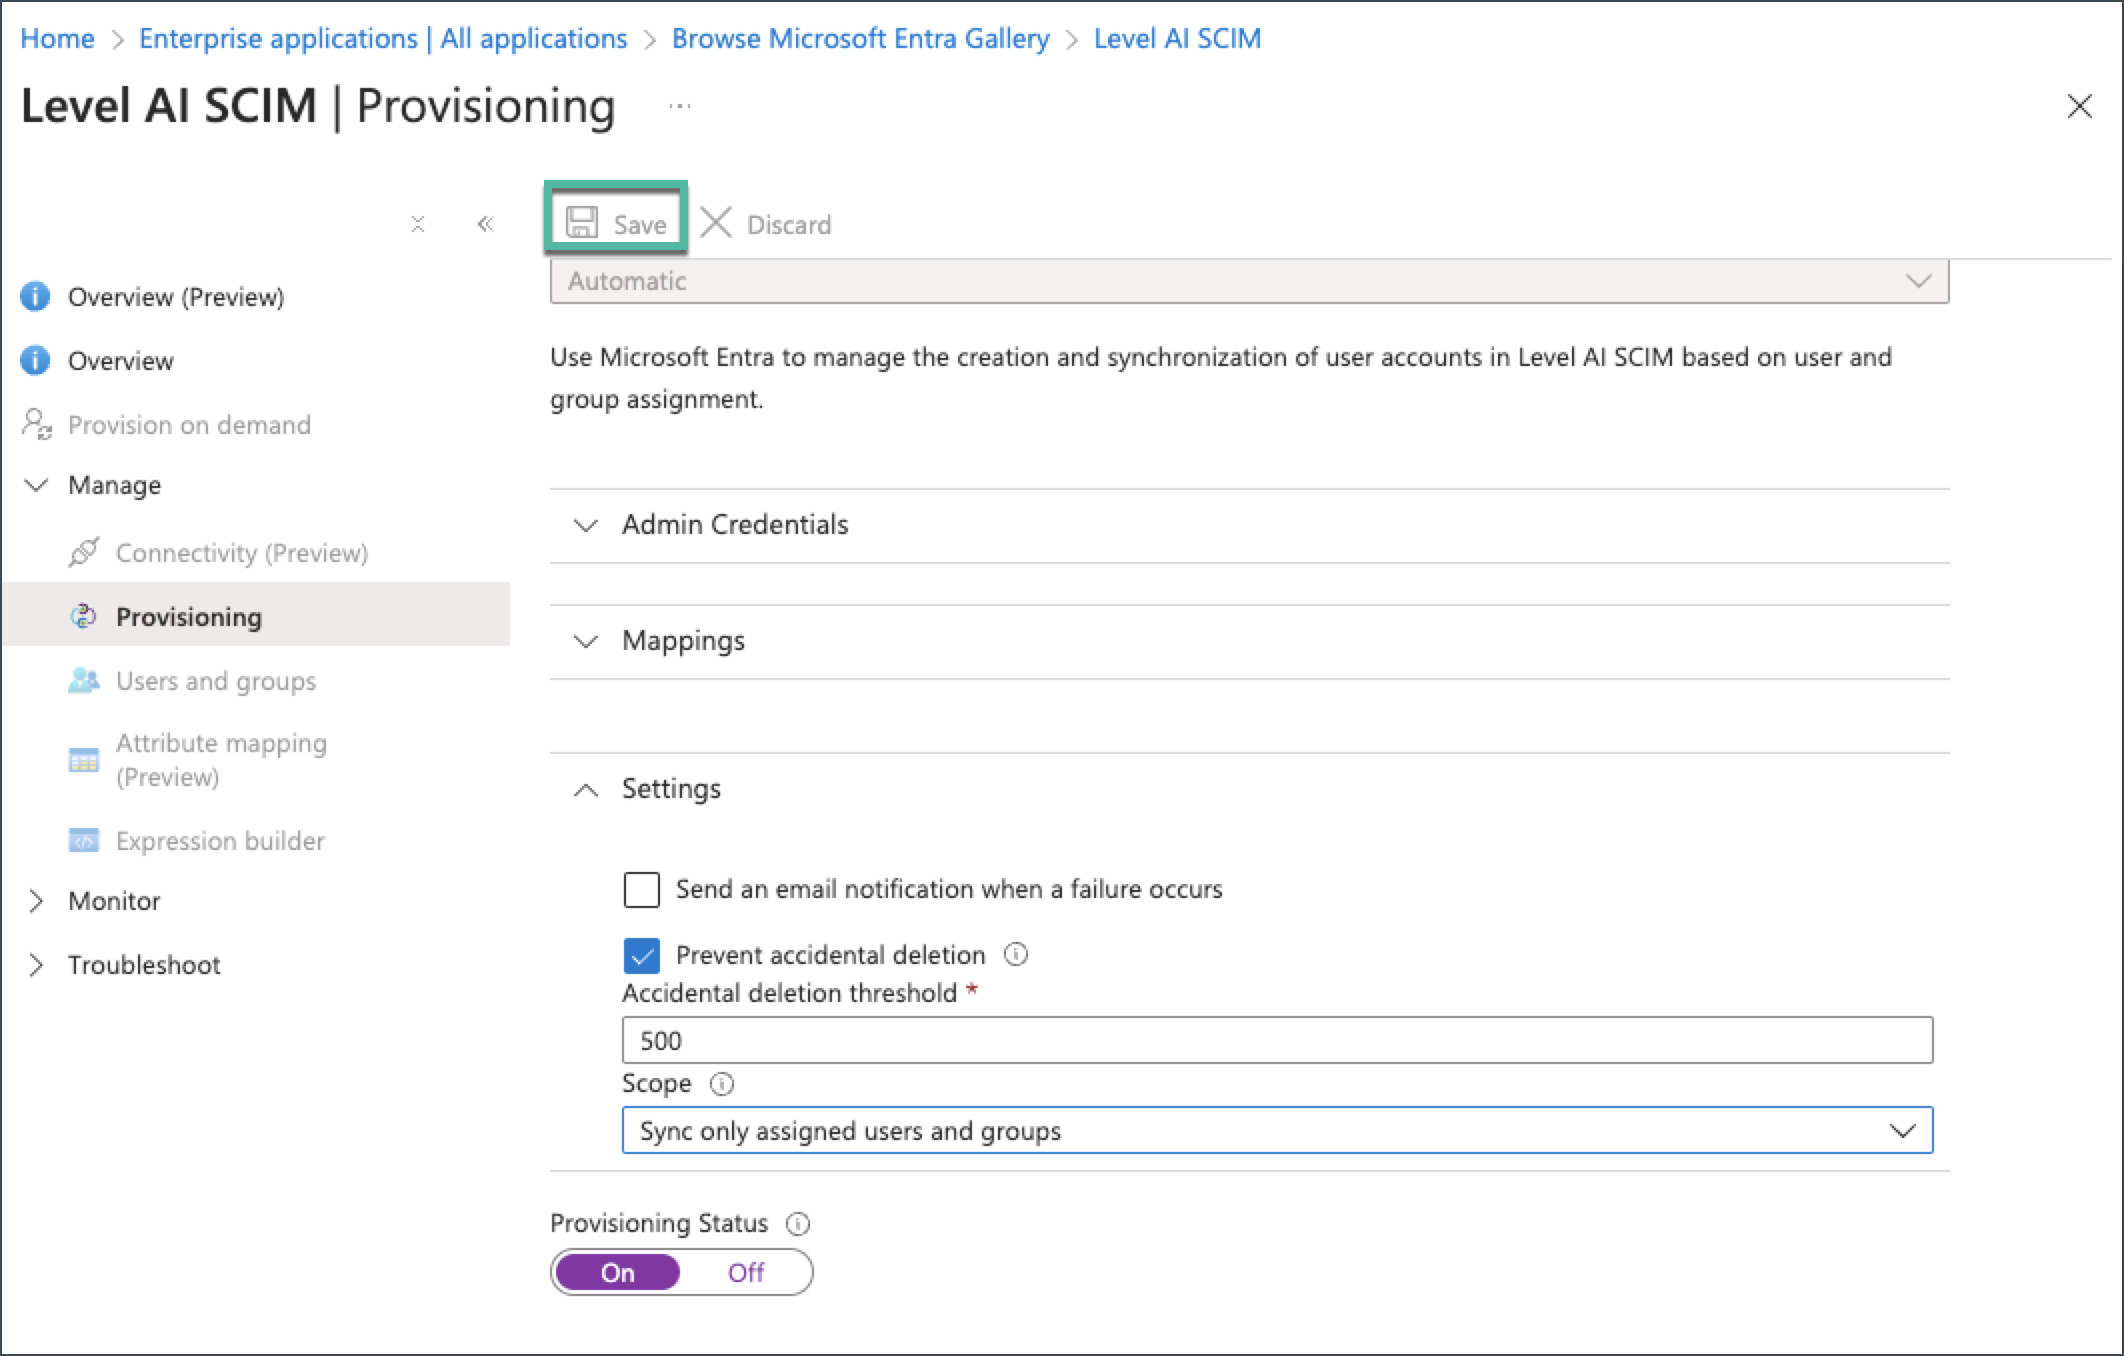
Toggle the Provisioning Status to On.
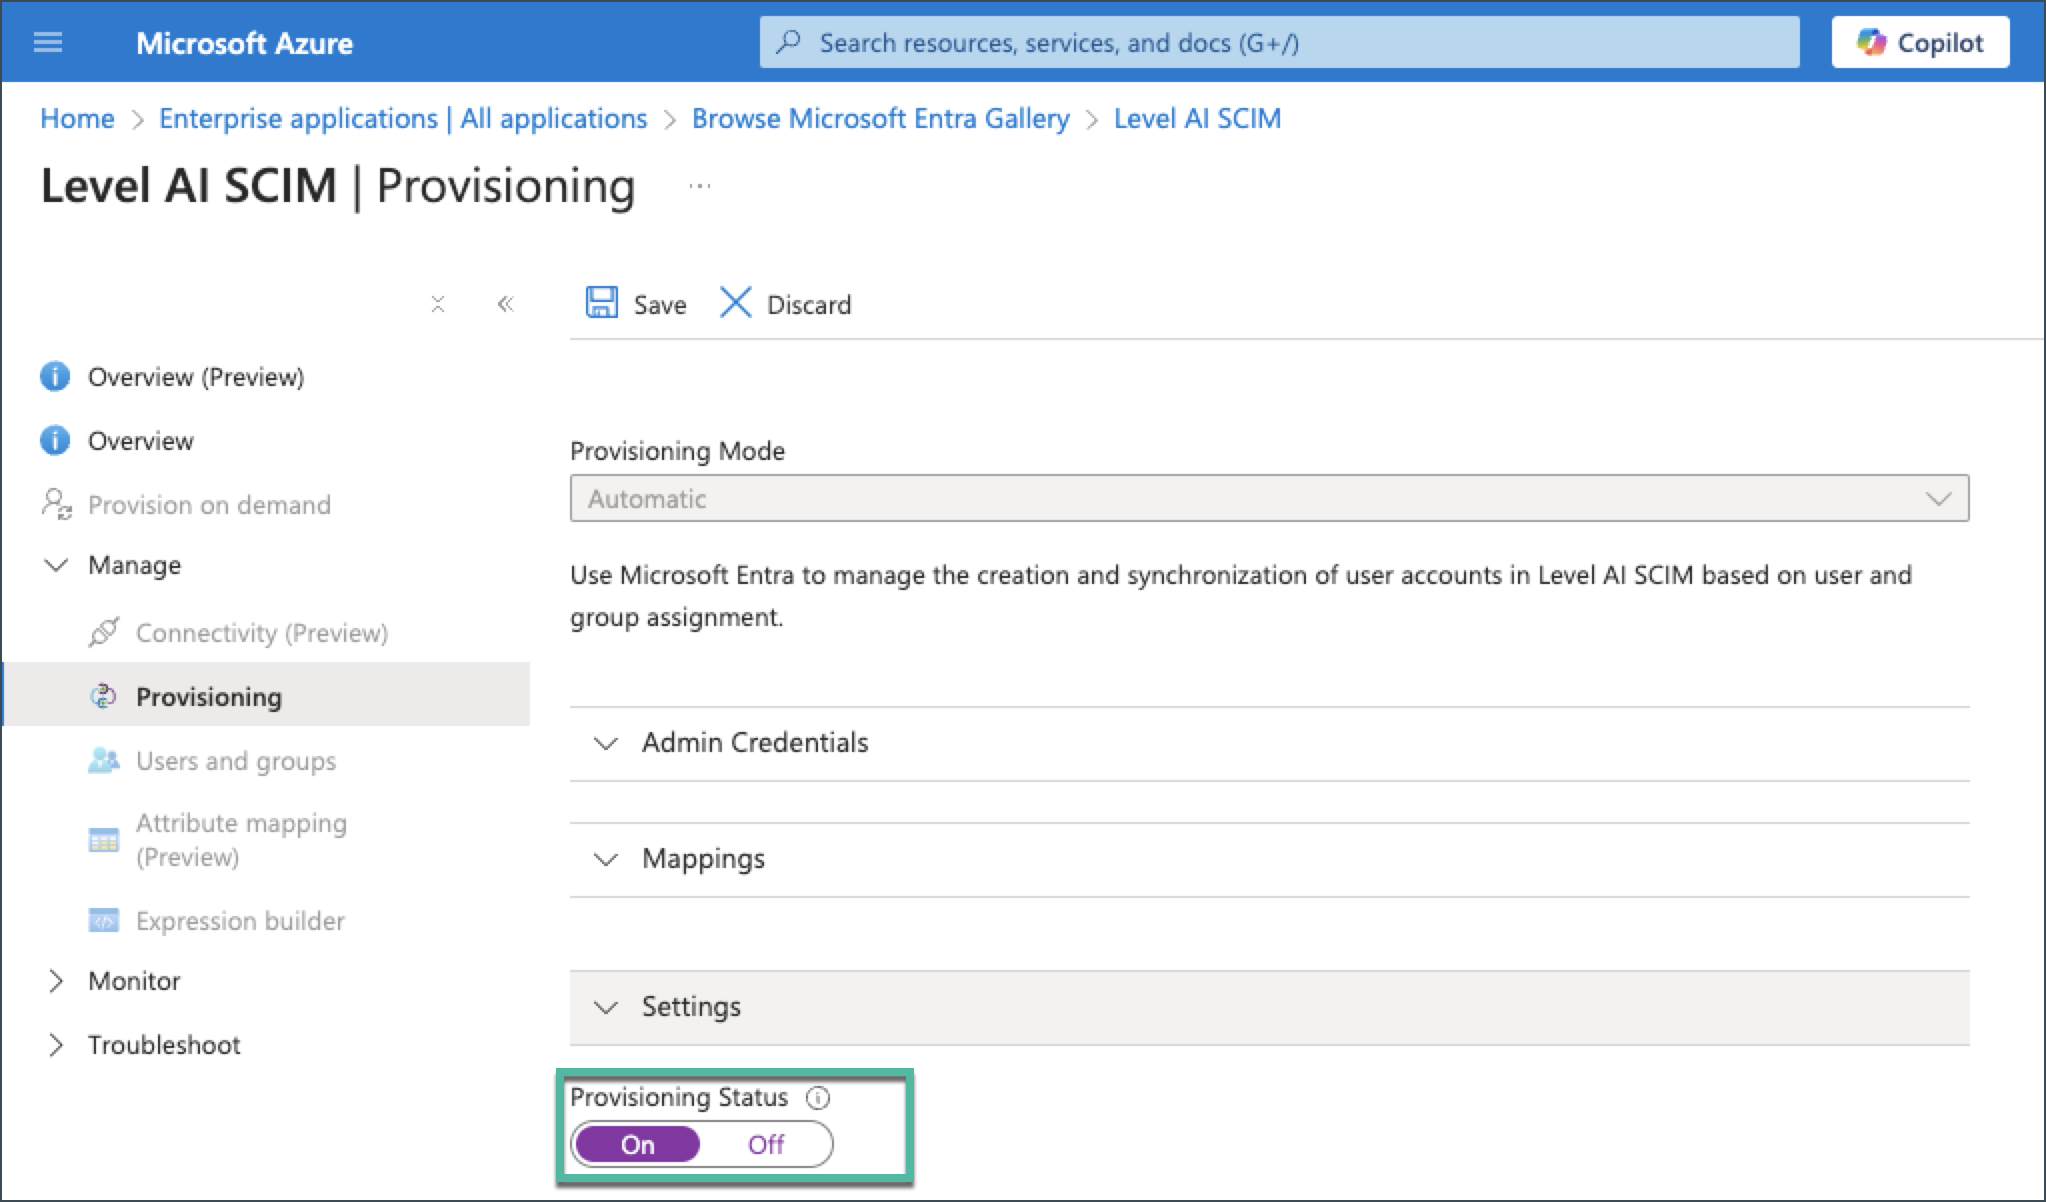
Click Save to initiate the provisioning service.
F) Testing the Integration
Create a new user or group in Azure AD.
Assign the user/group to the Level AI SCIM application.
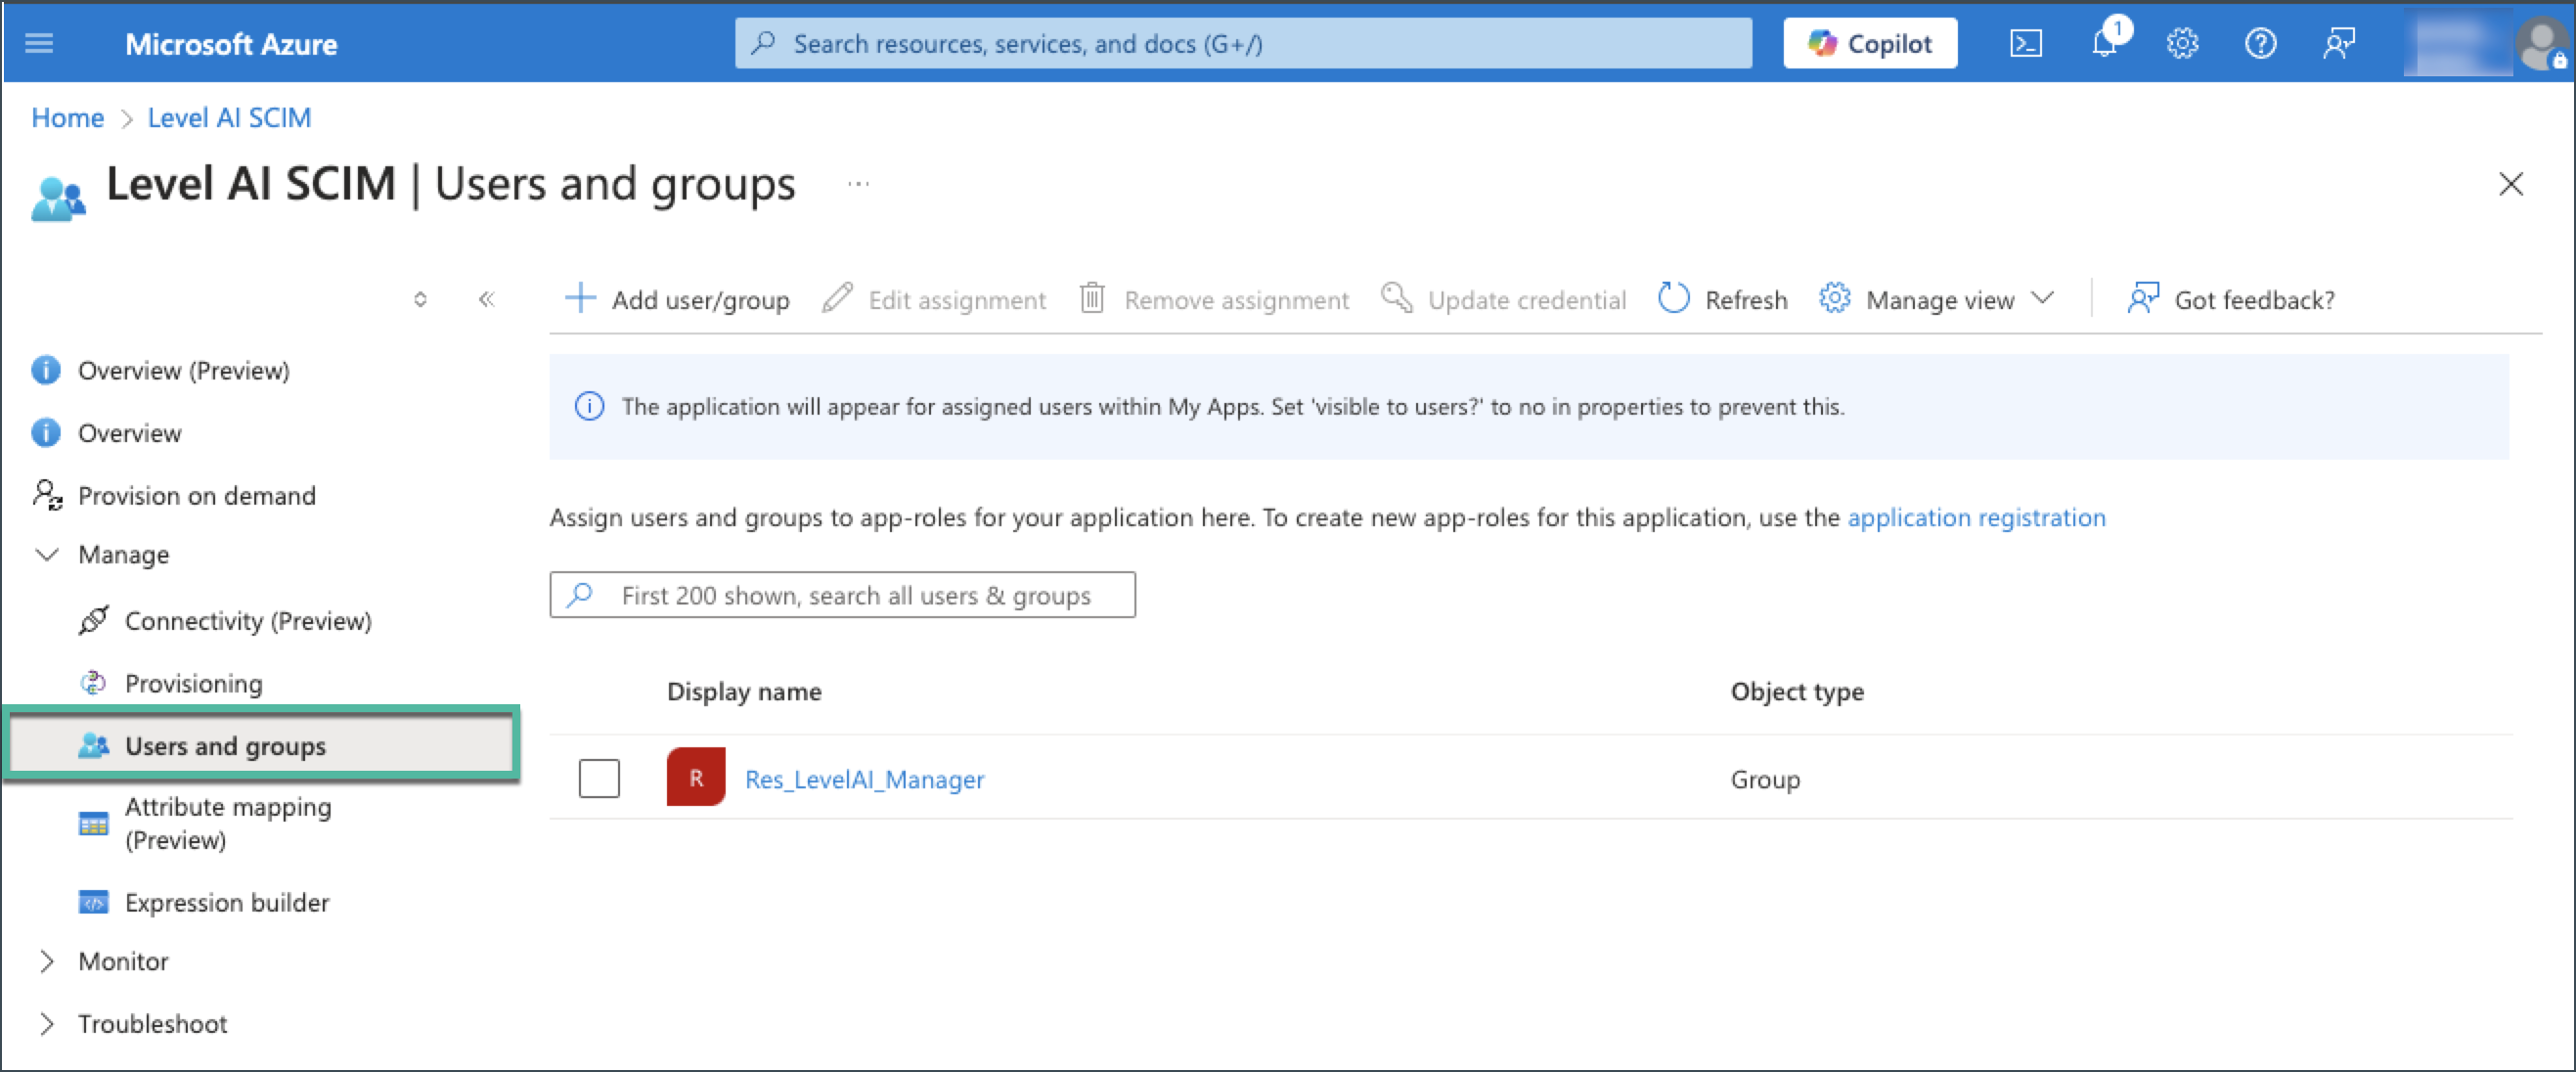
Verify that:
- The user appears in the Level AI dashboard.
- User attributes are correctly synchronized.
- Group memberships are properly reflected.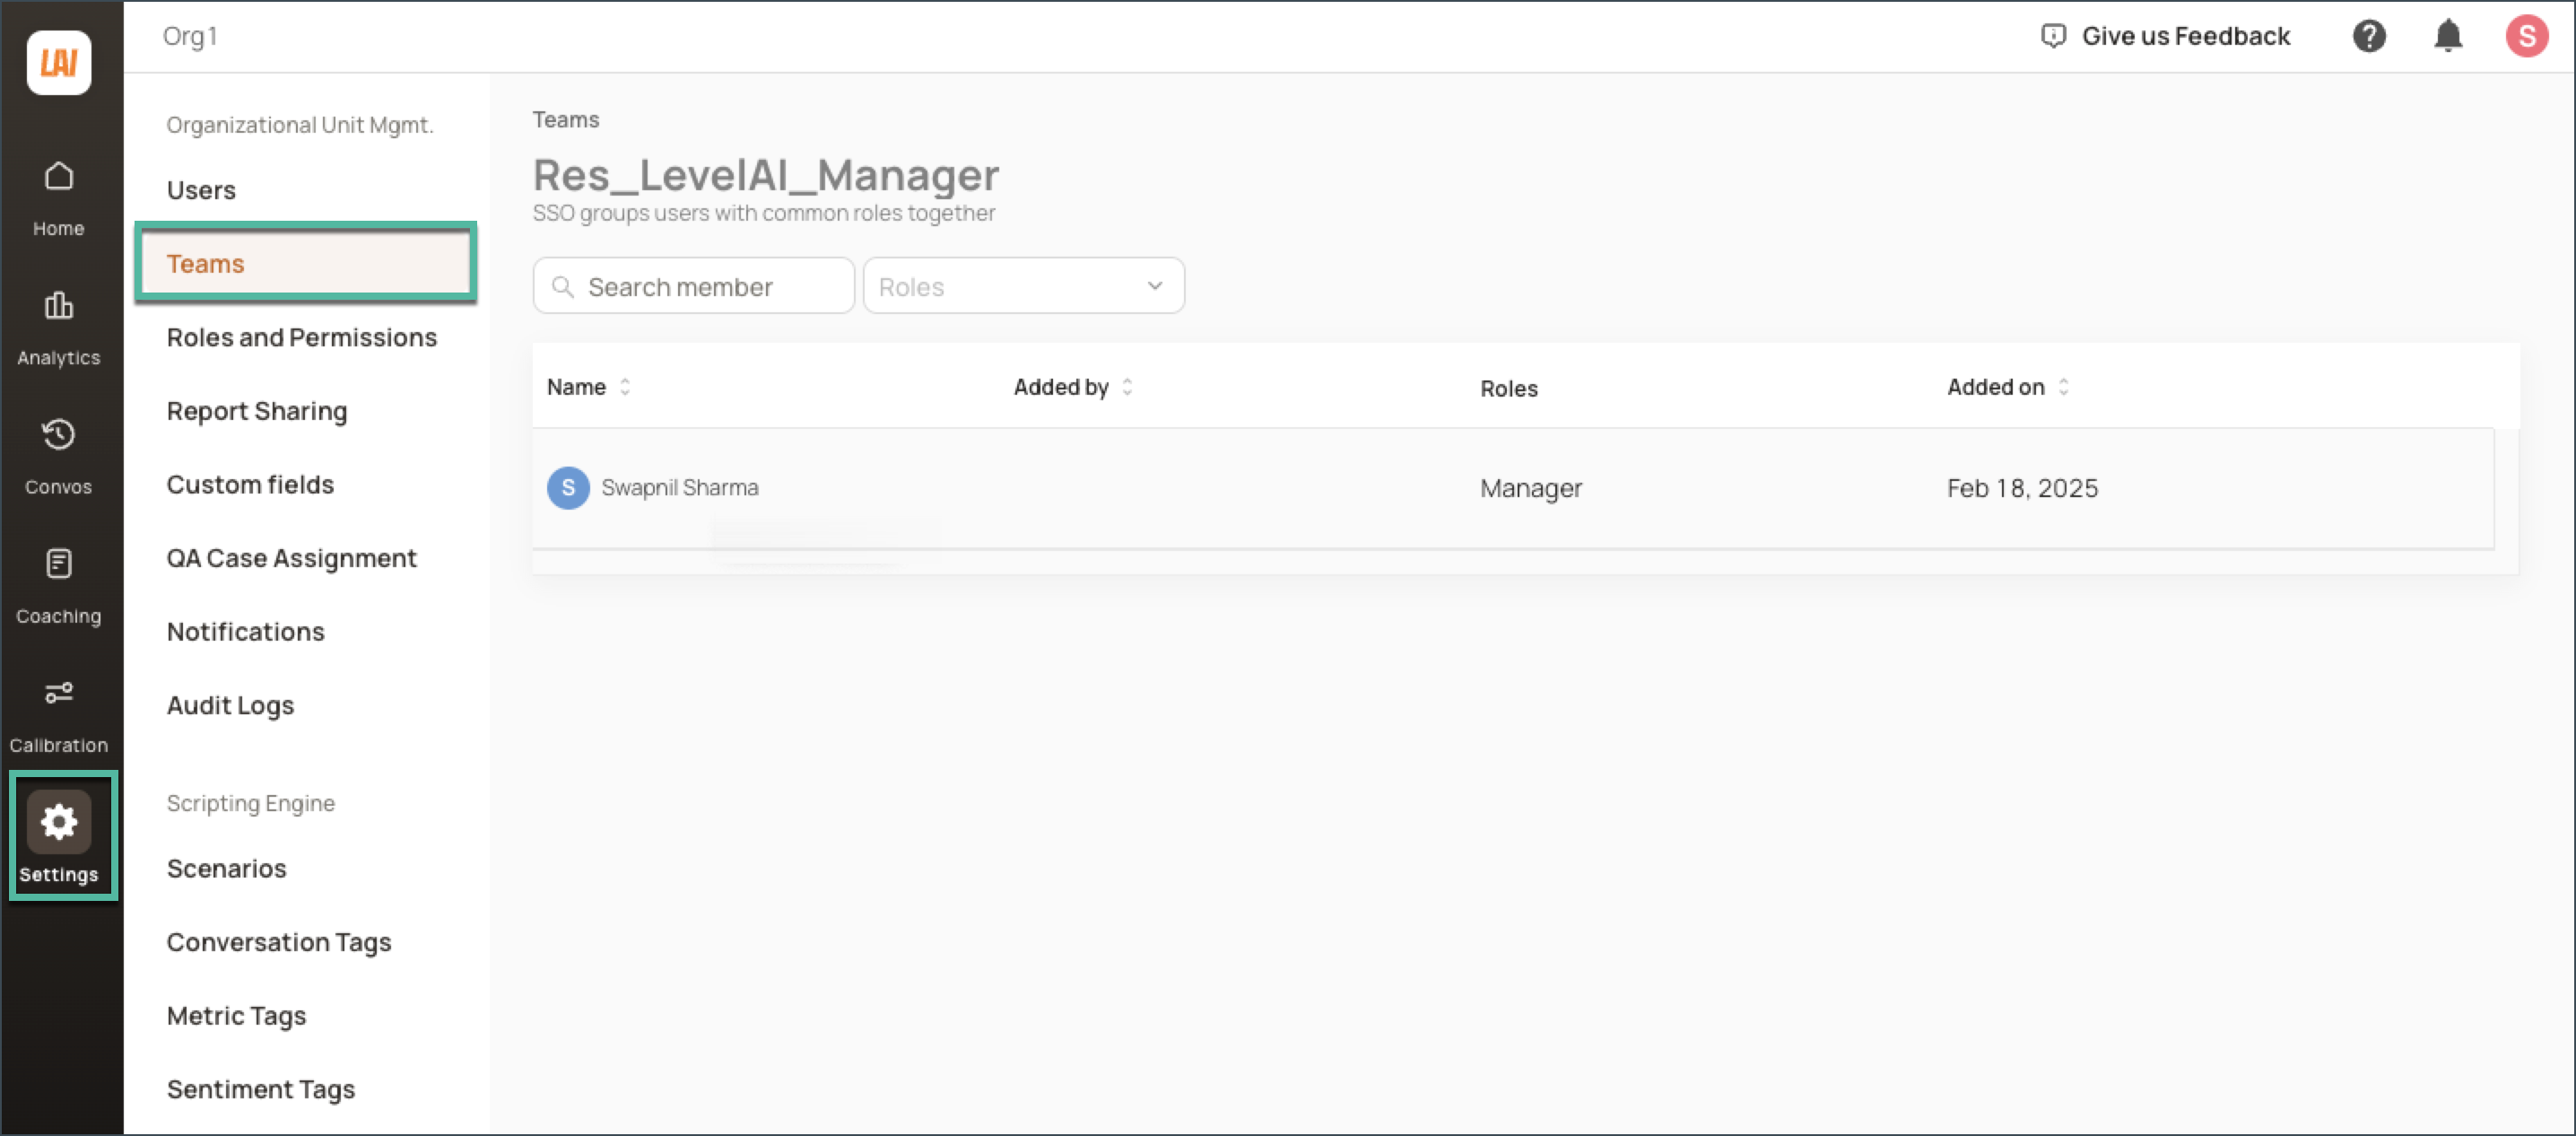
Test user updates and deactivation to ensure everything is functioning as expected.
NOTE
- Ensure you have the necessary permissions in both Azure AD and Level AI.
- Keep the secret token secure and do not share it.
- Monitor the provisioning logs for any synchronization issues.
INFO
Contact Level AI support if you encounter any integration problems.