Okta SCIM Client Setup guide
Last updated: June 18, 2026
A) Search and add the SCIM 2.0 App to your Okta Integration Network
Log in to your Okta Administrator Dashboard.
Navigate to the Applications section and select Browse App Catalog.
In the search bar, type SCIM 2.0 Oauth Bearer Token and hit enter. This will filter and display applications that support SCIM 2.0 for provisioning.
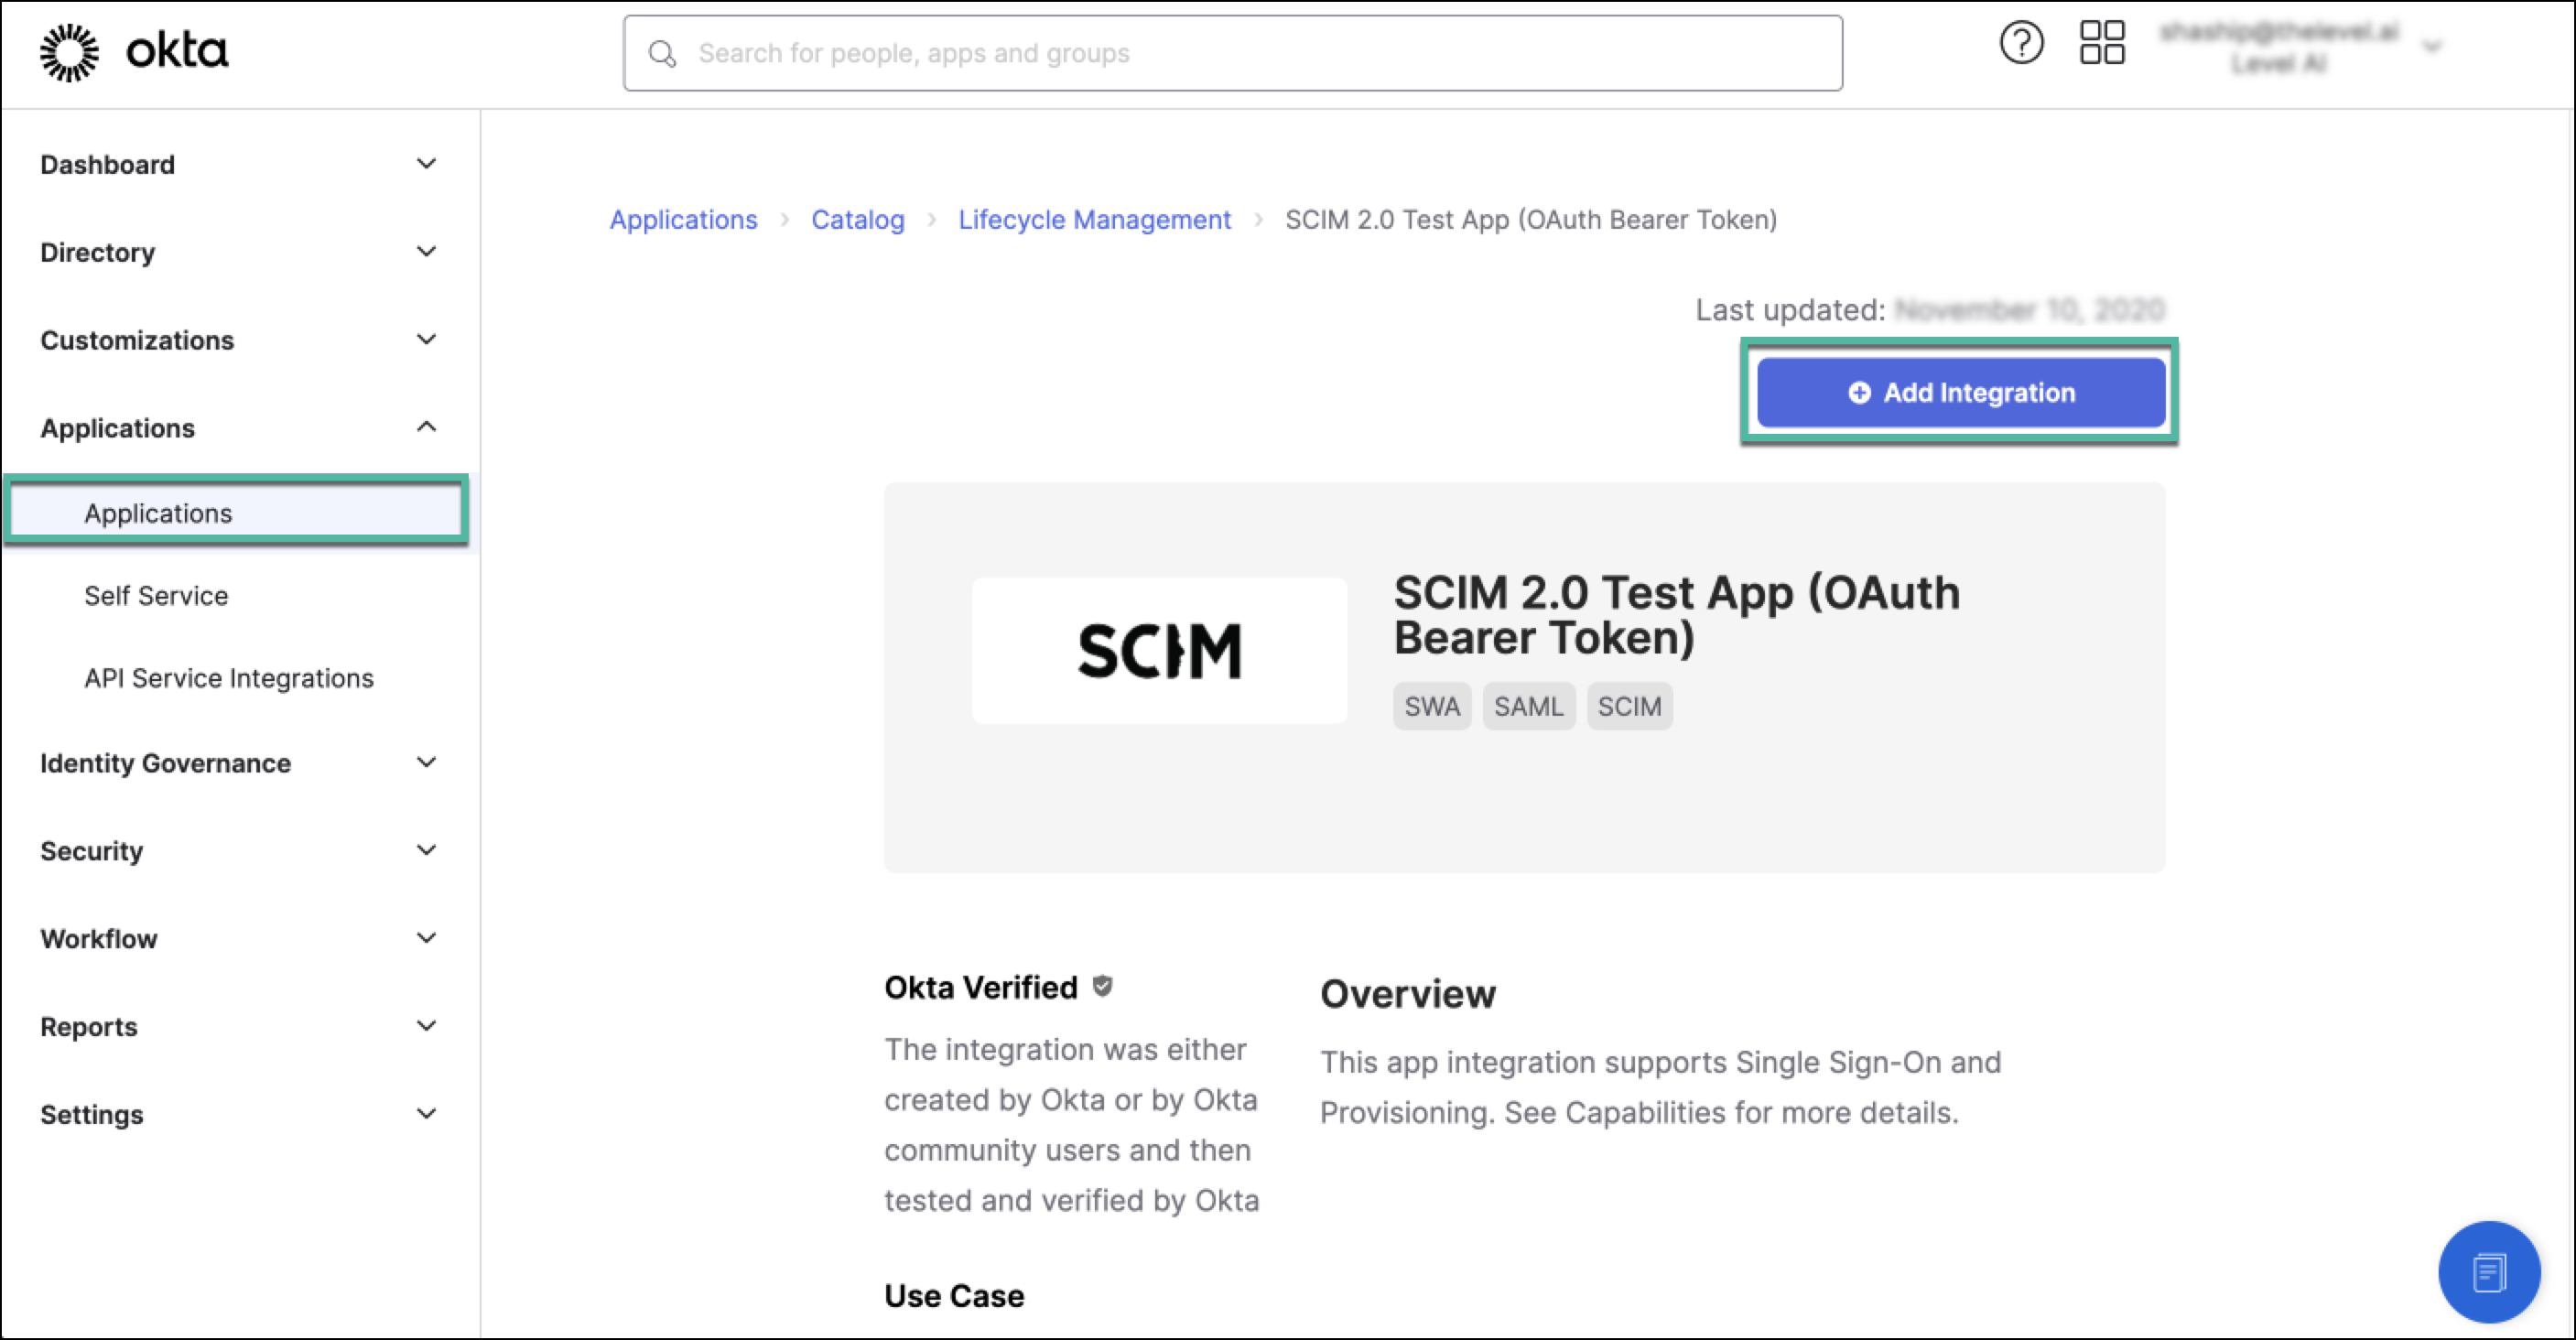
Click Add Integration to start the installation process.
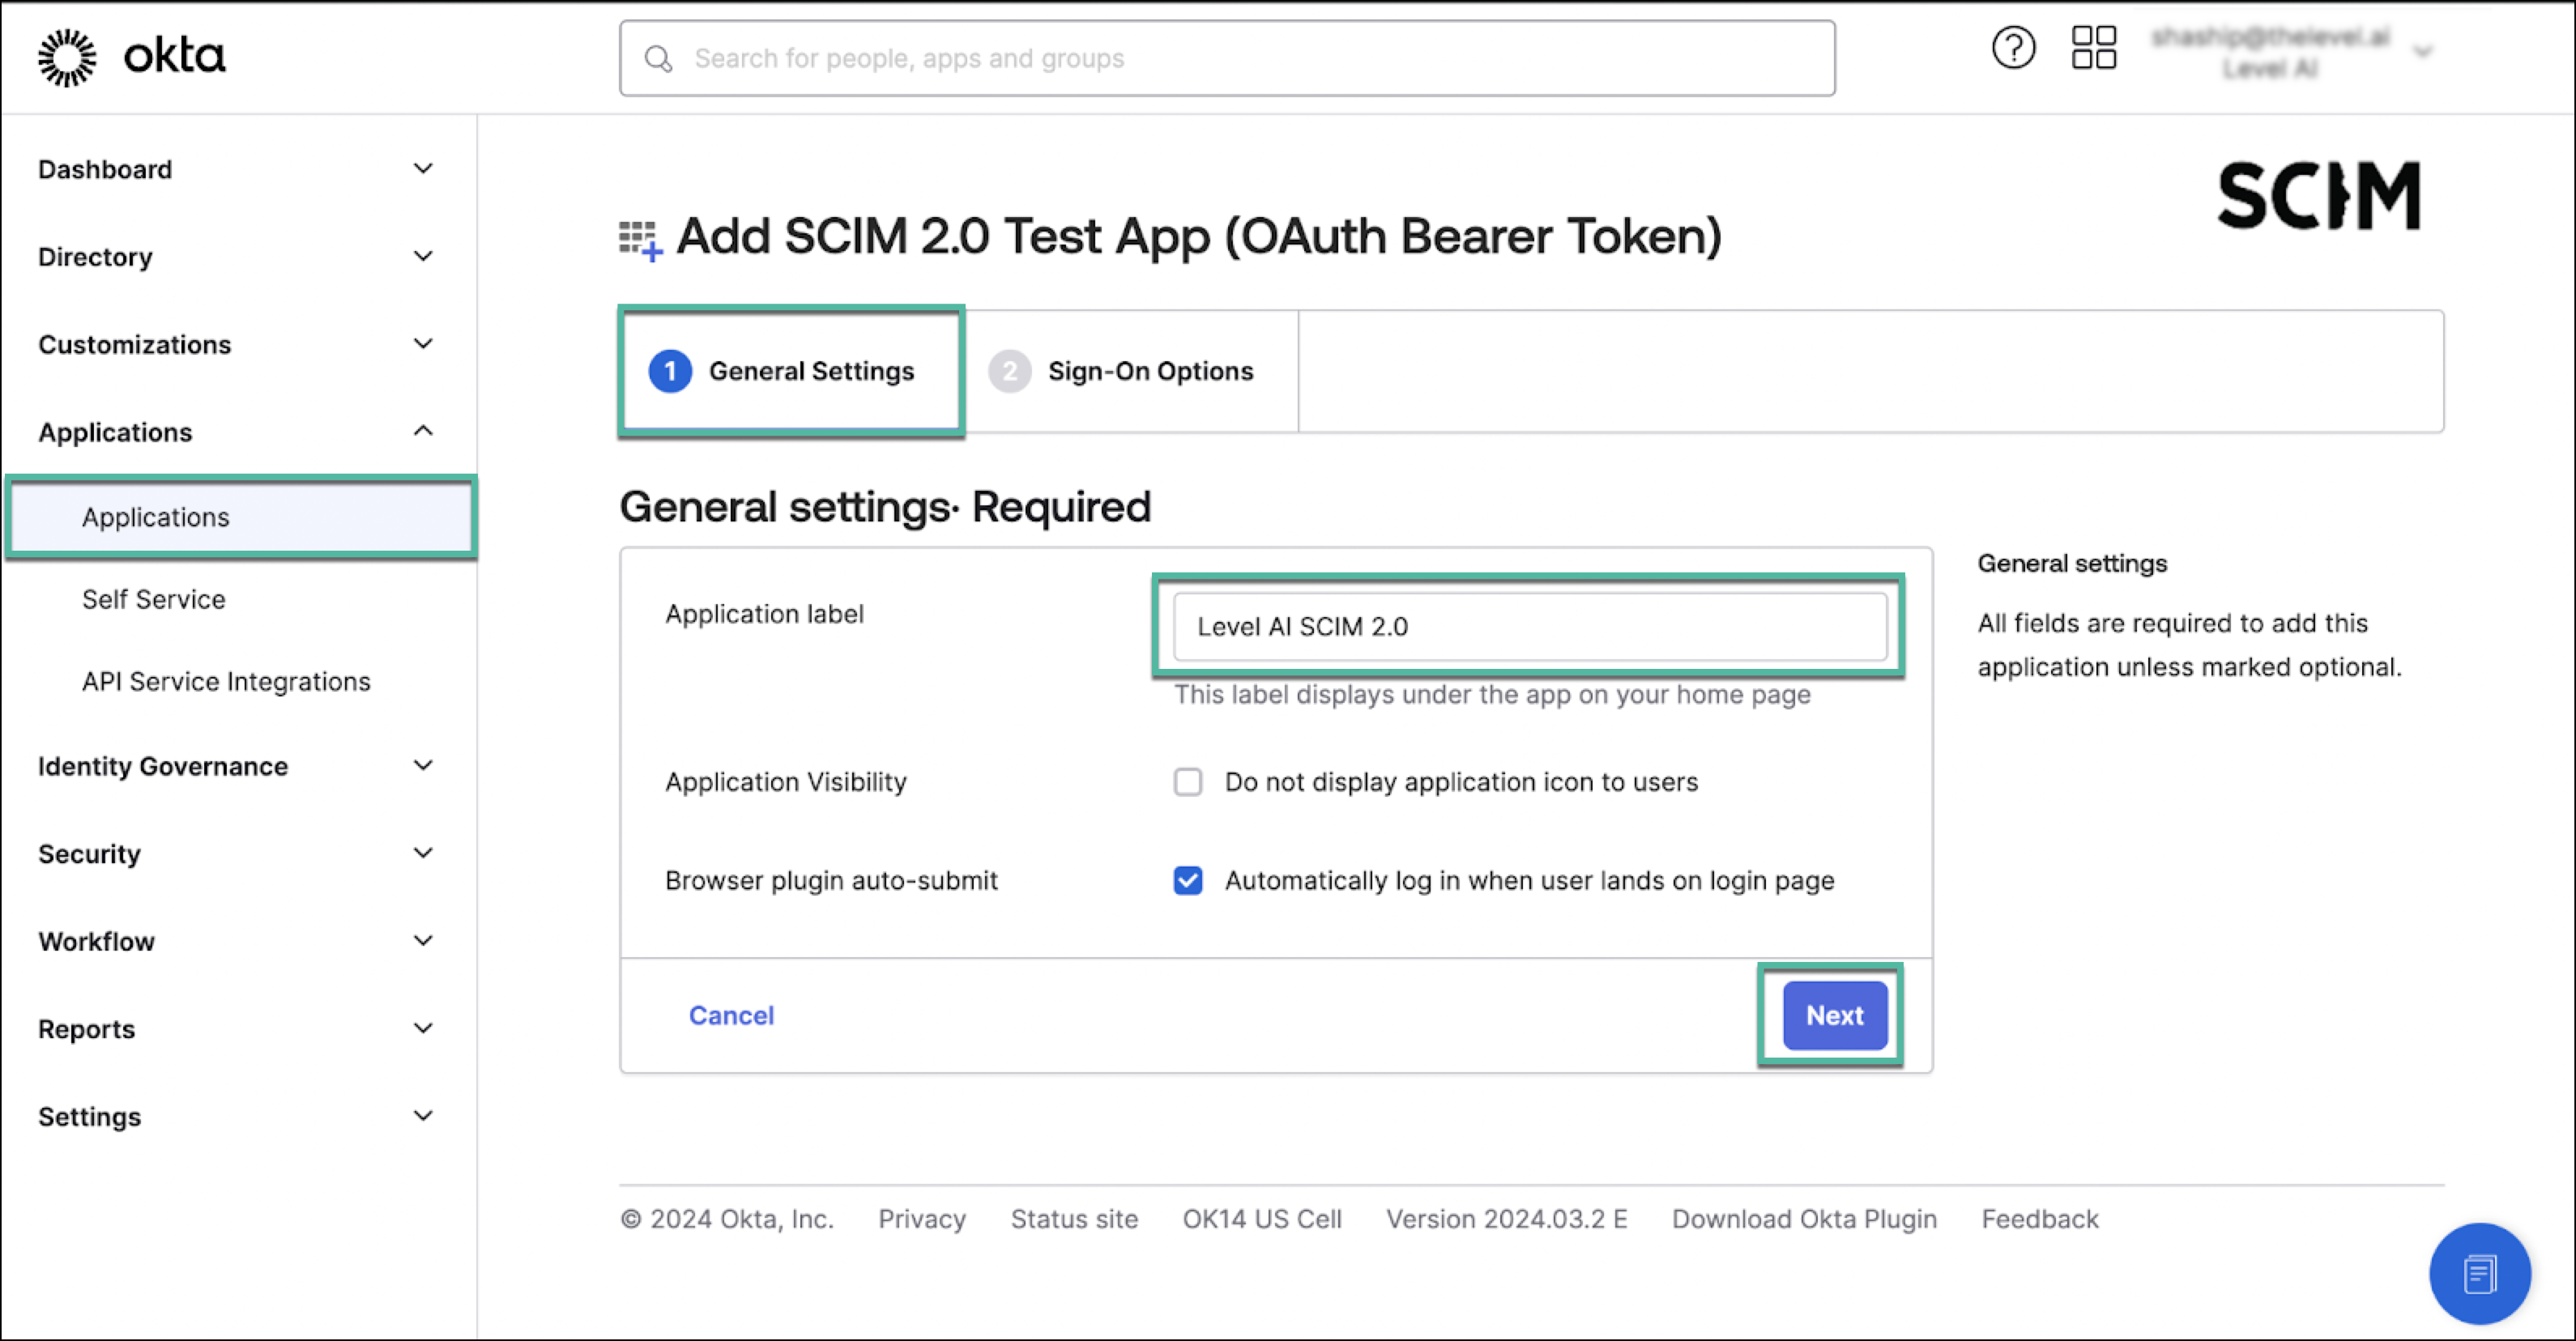
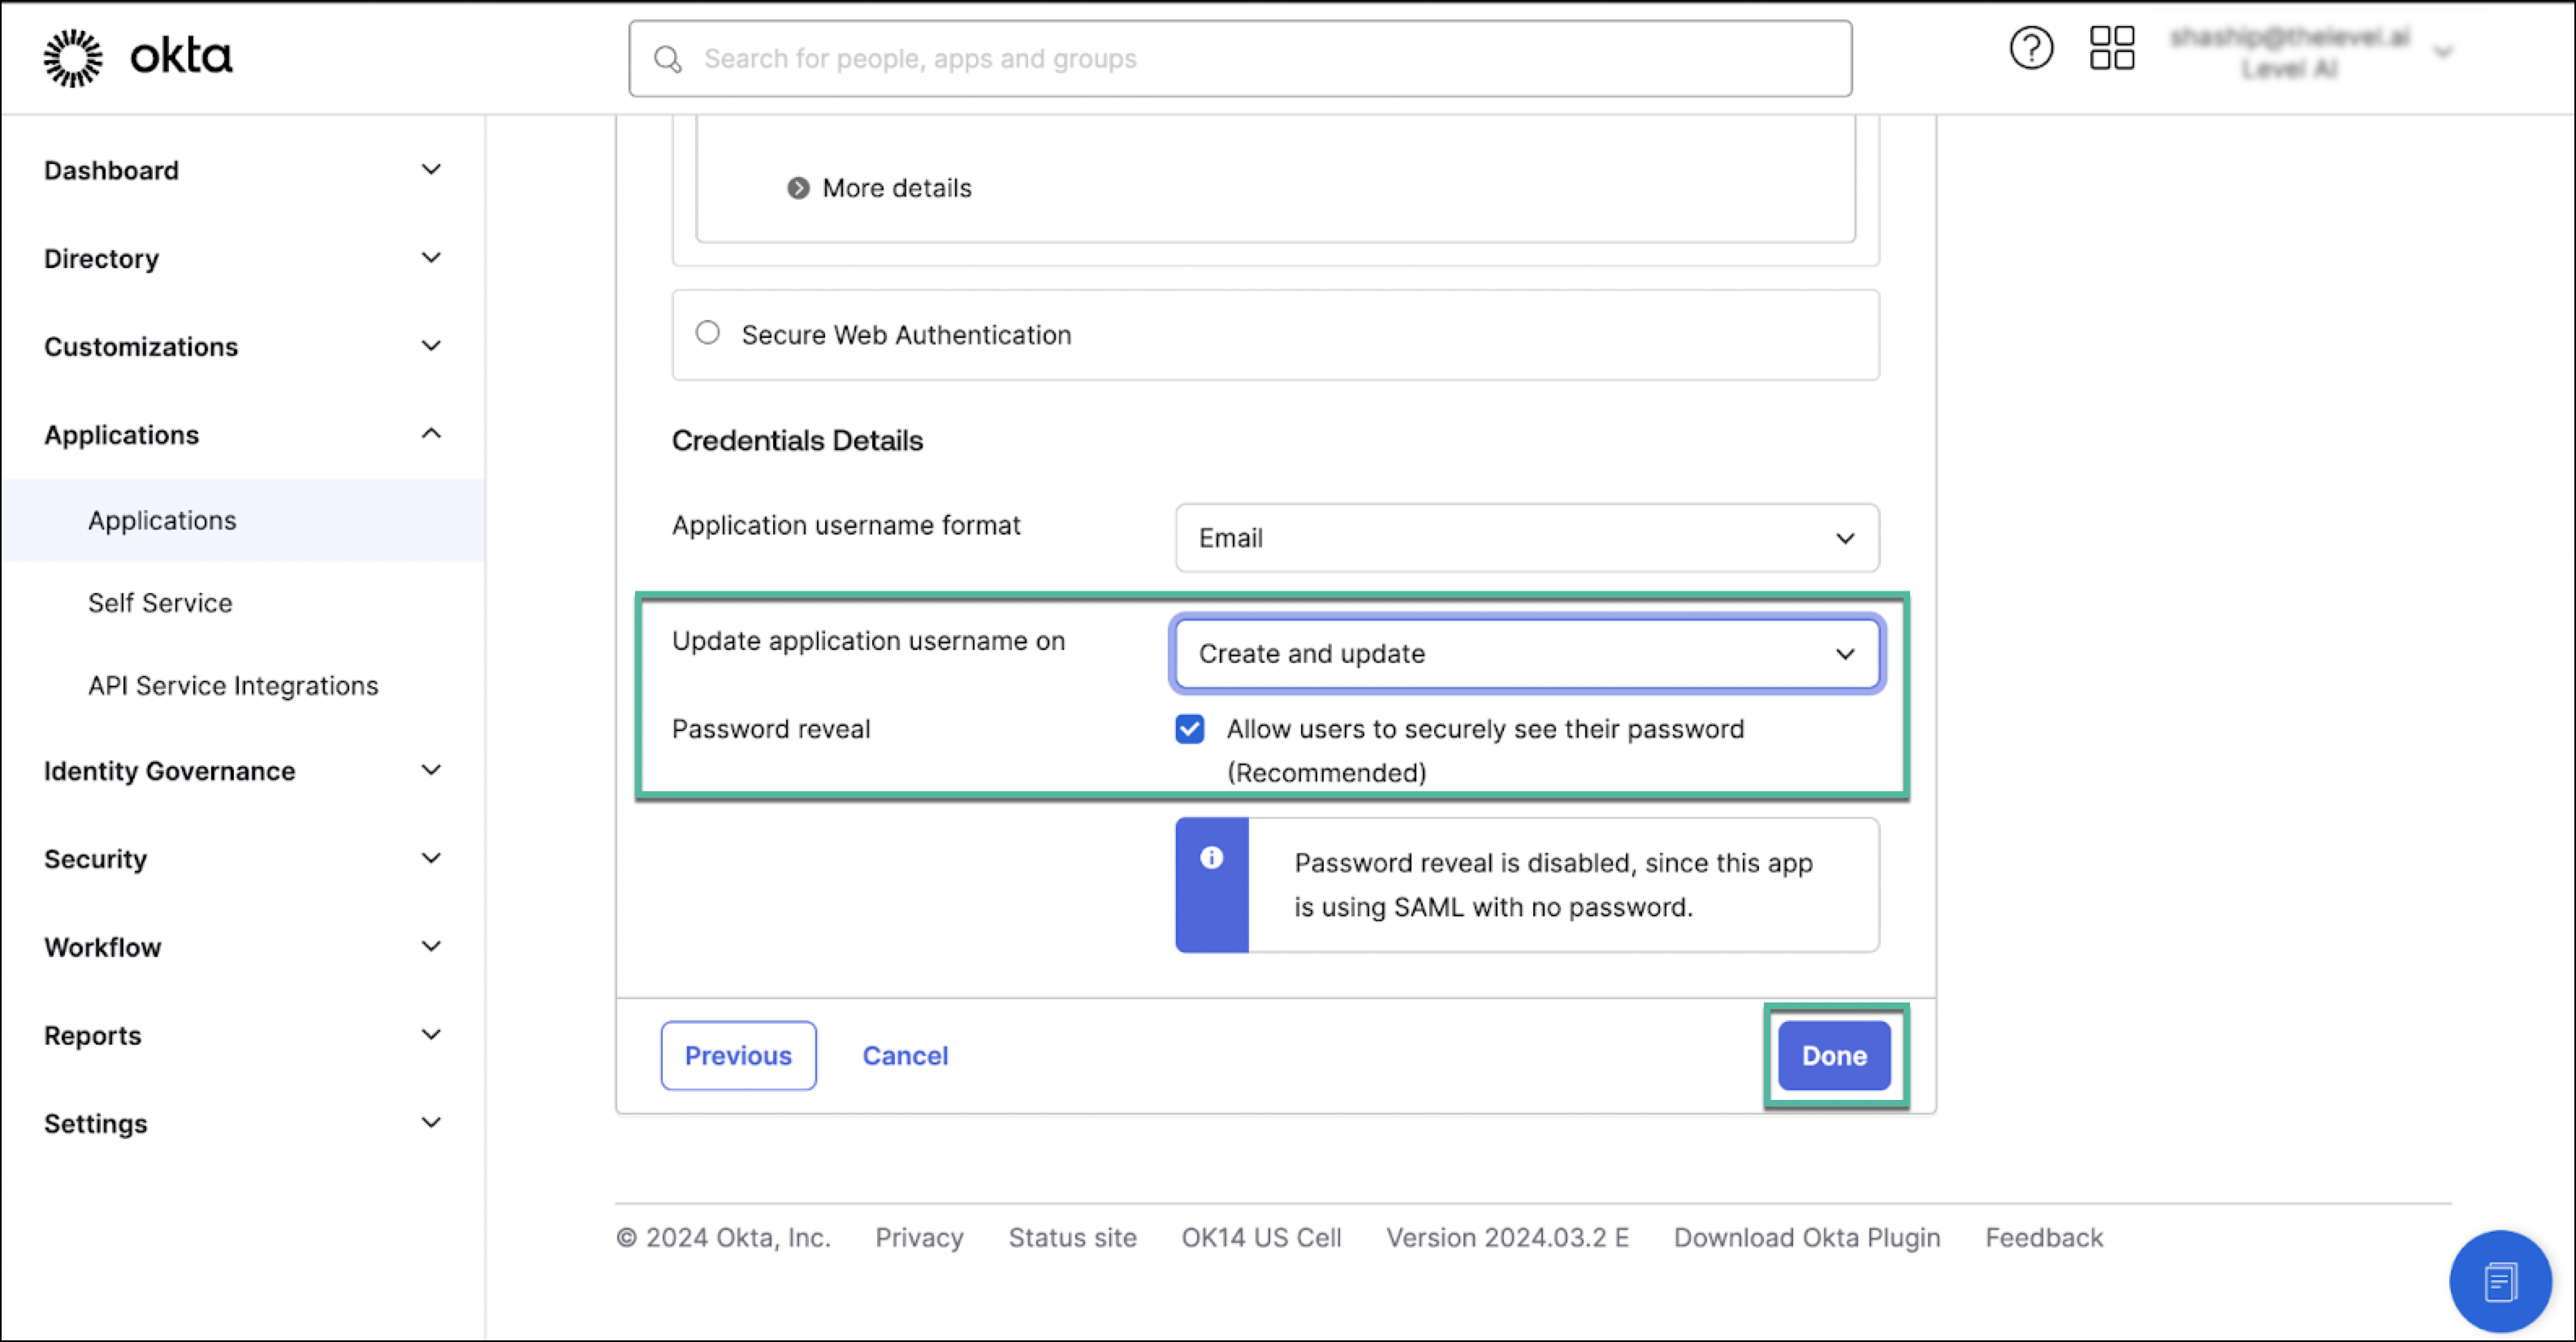
You will be prompted to enter general information about the application. Fill in the required fields and click Done.
B) Configure the SCIM Server URL
After adding the application, you will need to configure it to connect to your SCIM server.
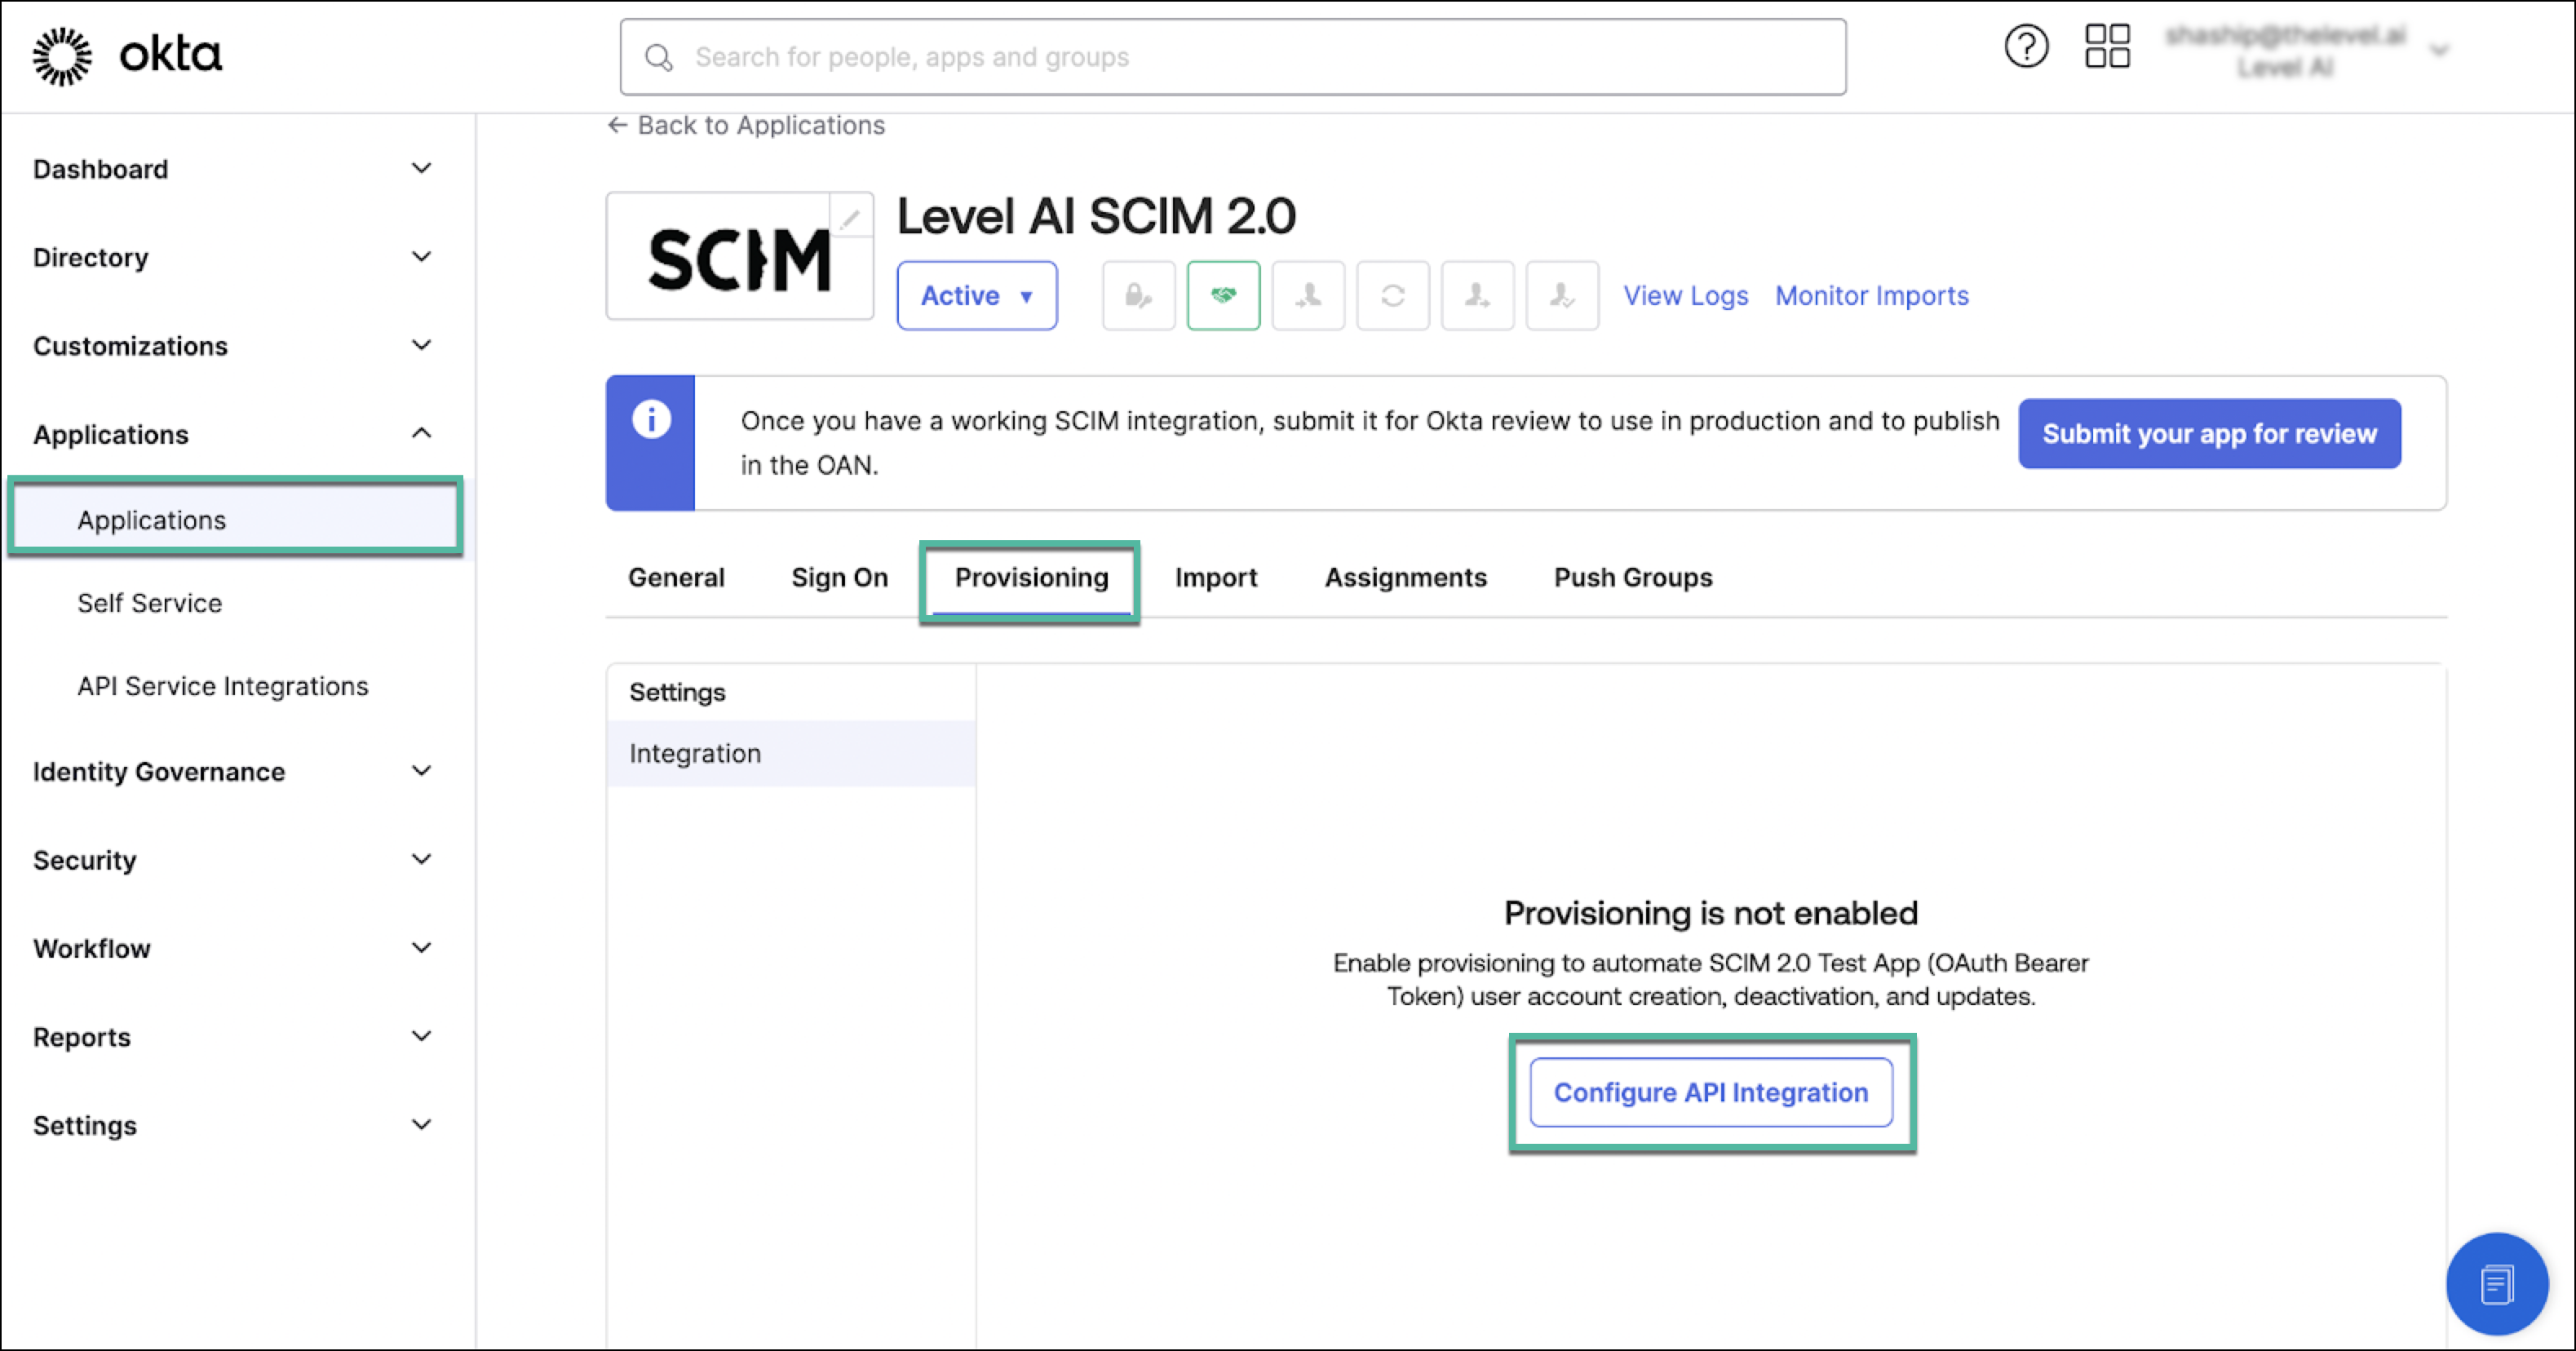
Navigate to Setup > Provisioning tab of your application
Click Configure API Integration.
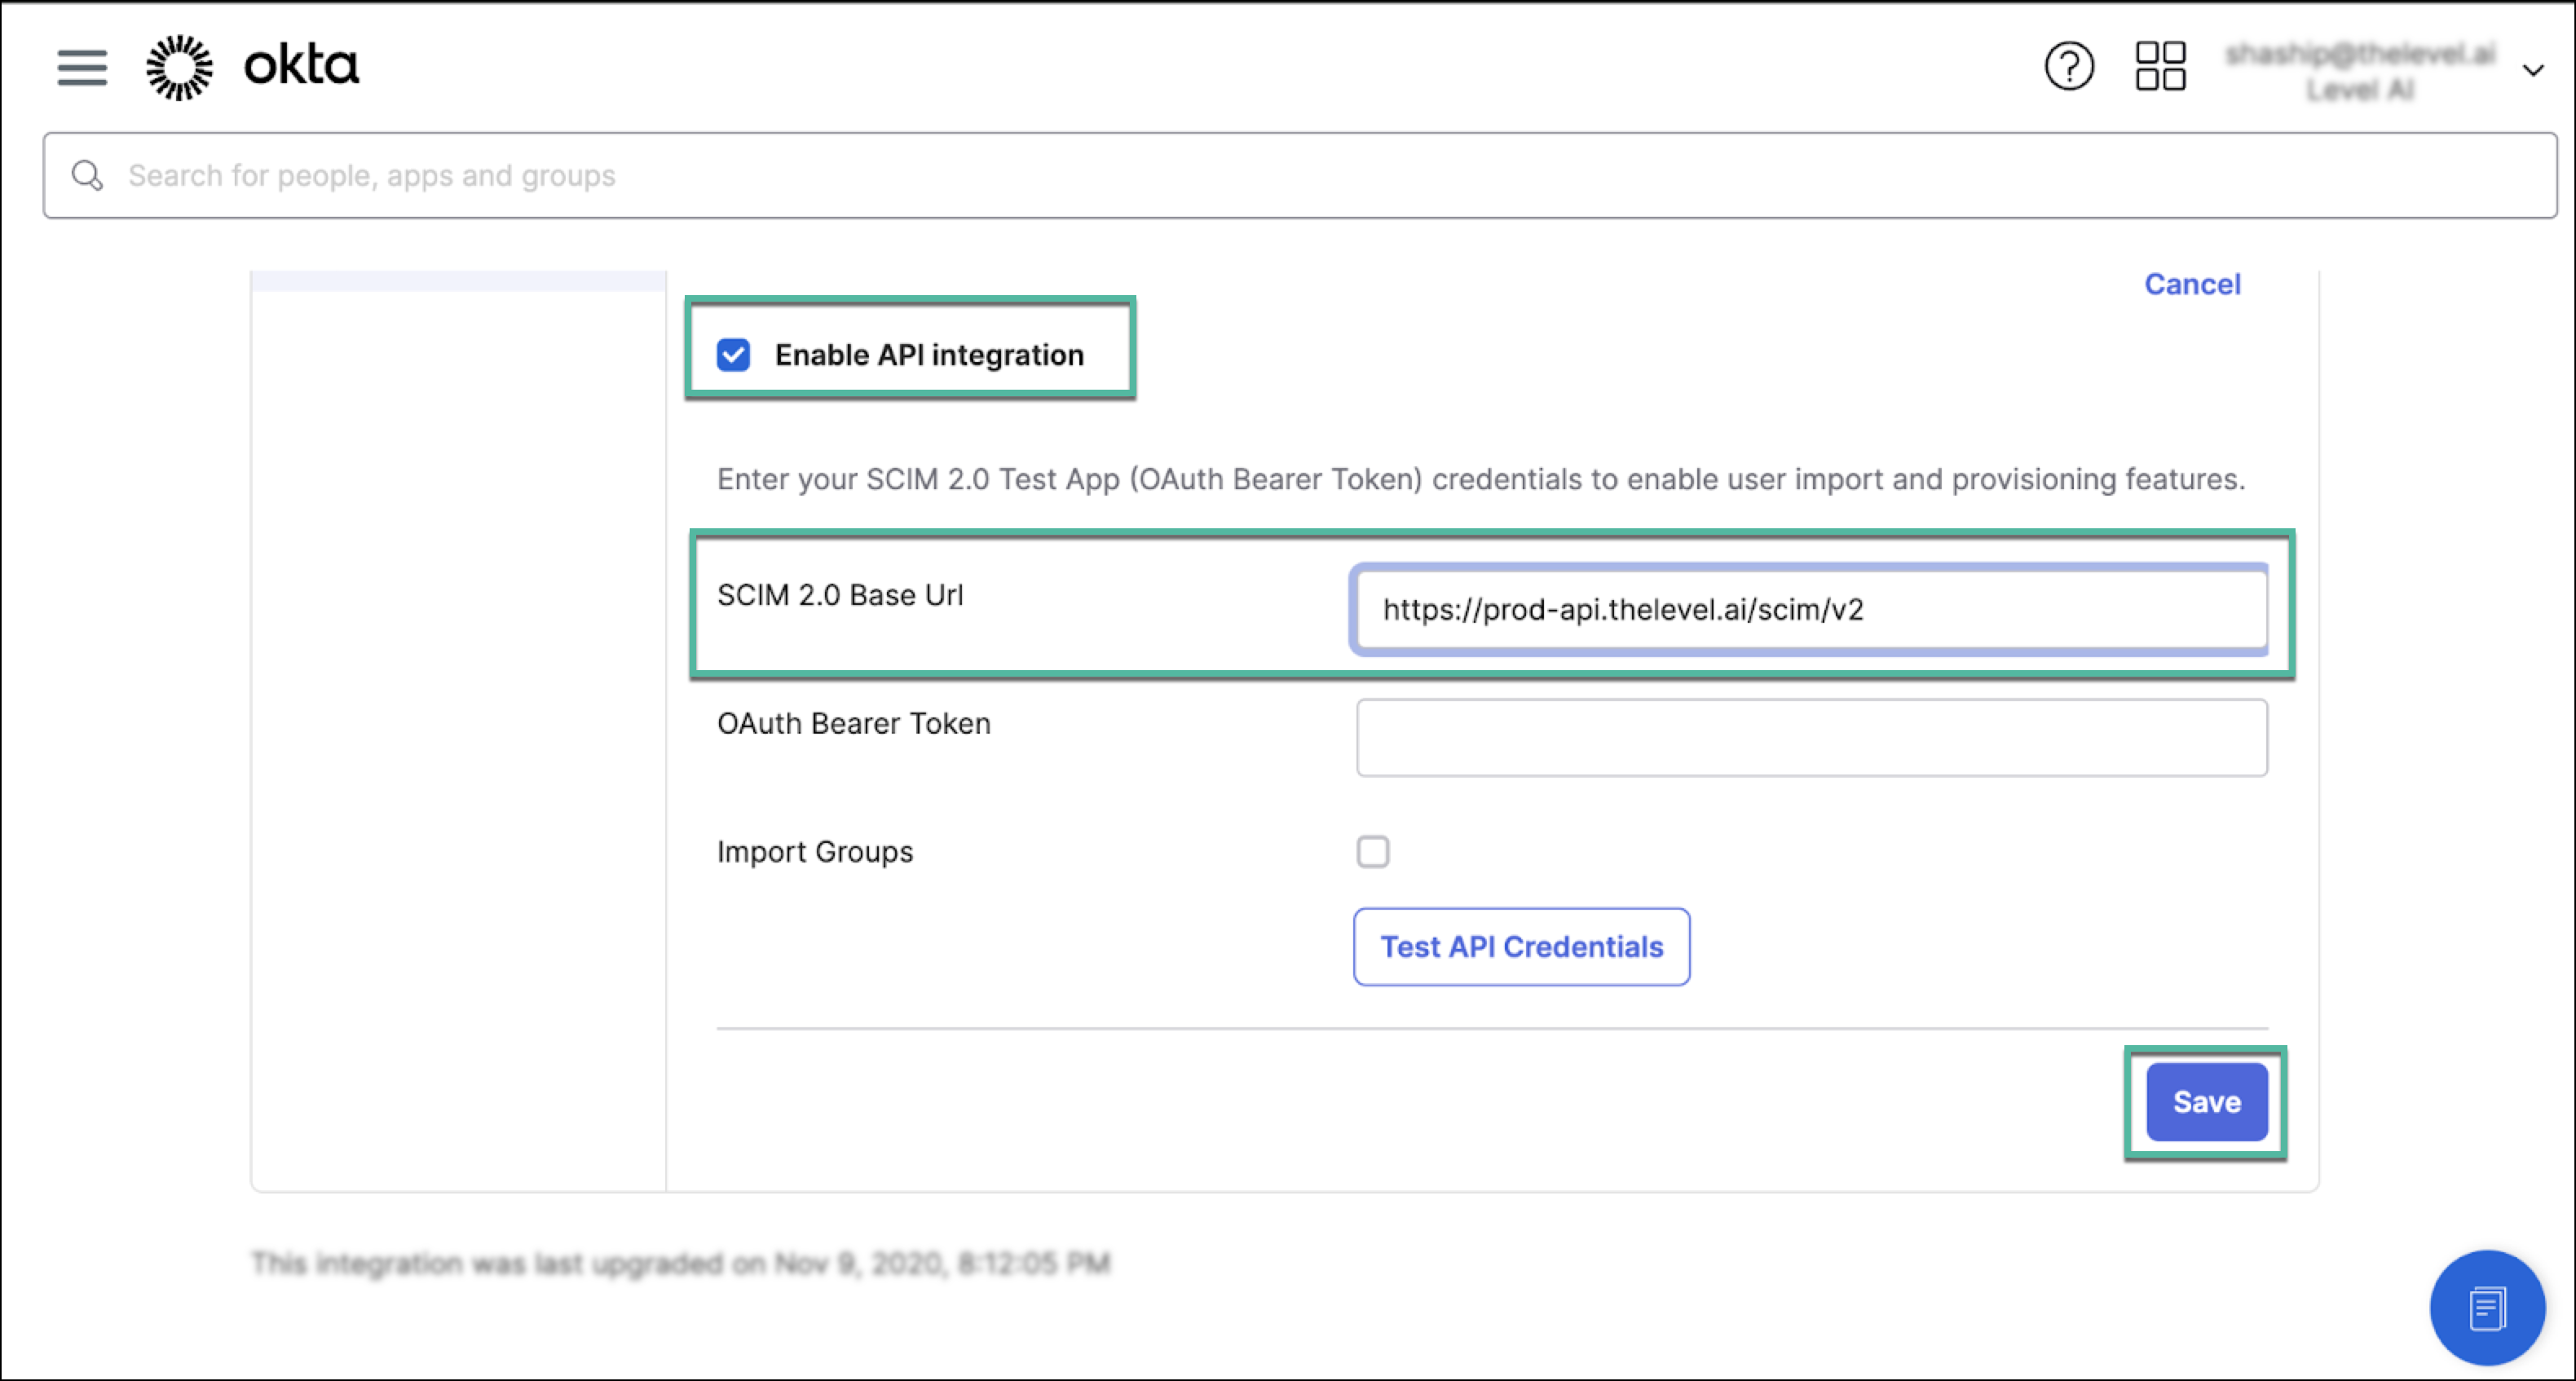
Check the Enable API integration box. Here, you will need to enter the following Level SCIM Server URL: https://prod-api.thelevel.ai/scim/v2
Save your changes.
C) Authenticate with OAuth Bearer Token
Continue to remain in the API integration settings under the Provisioning tab to complete these next steps:
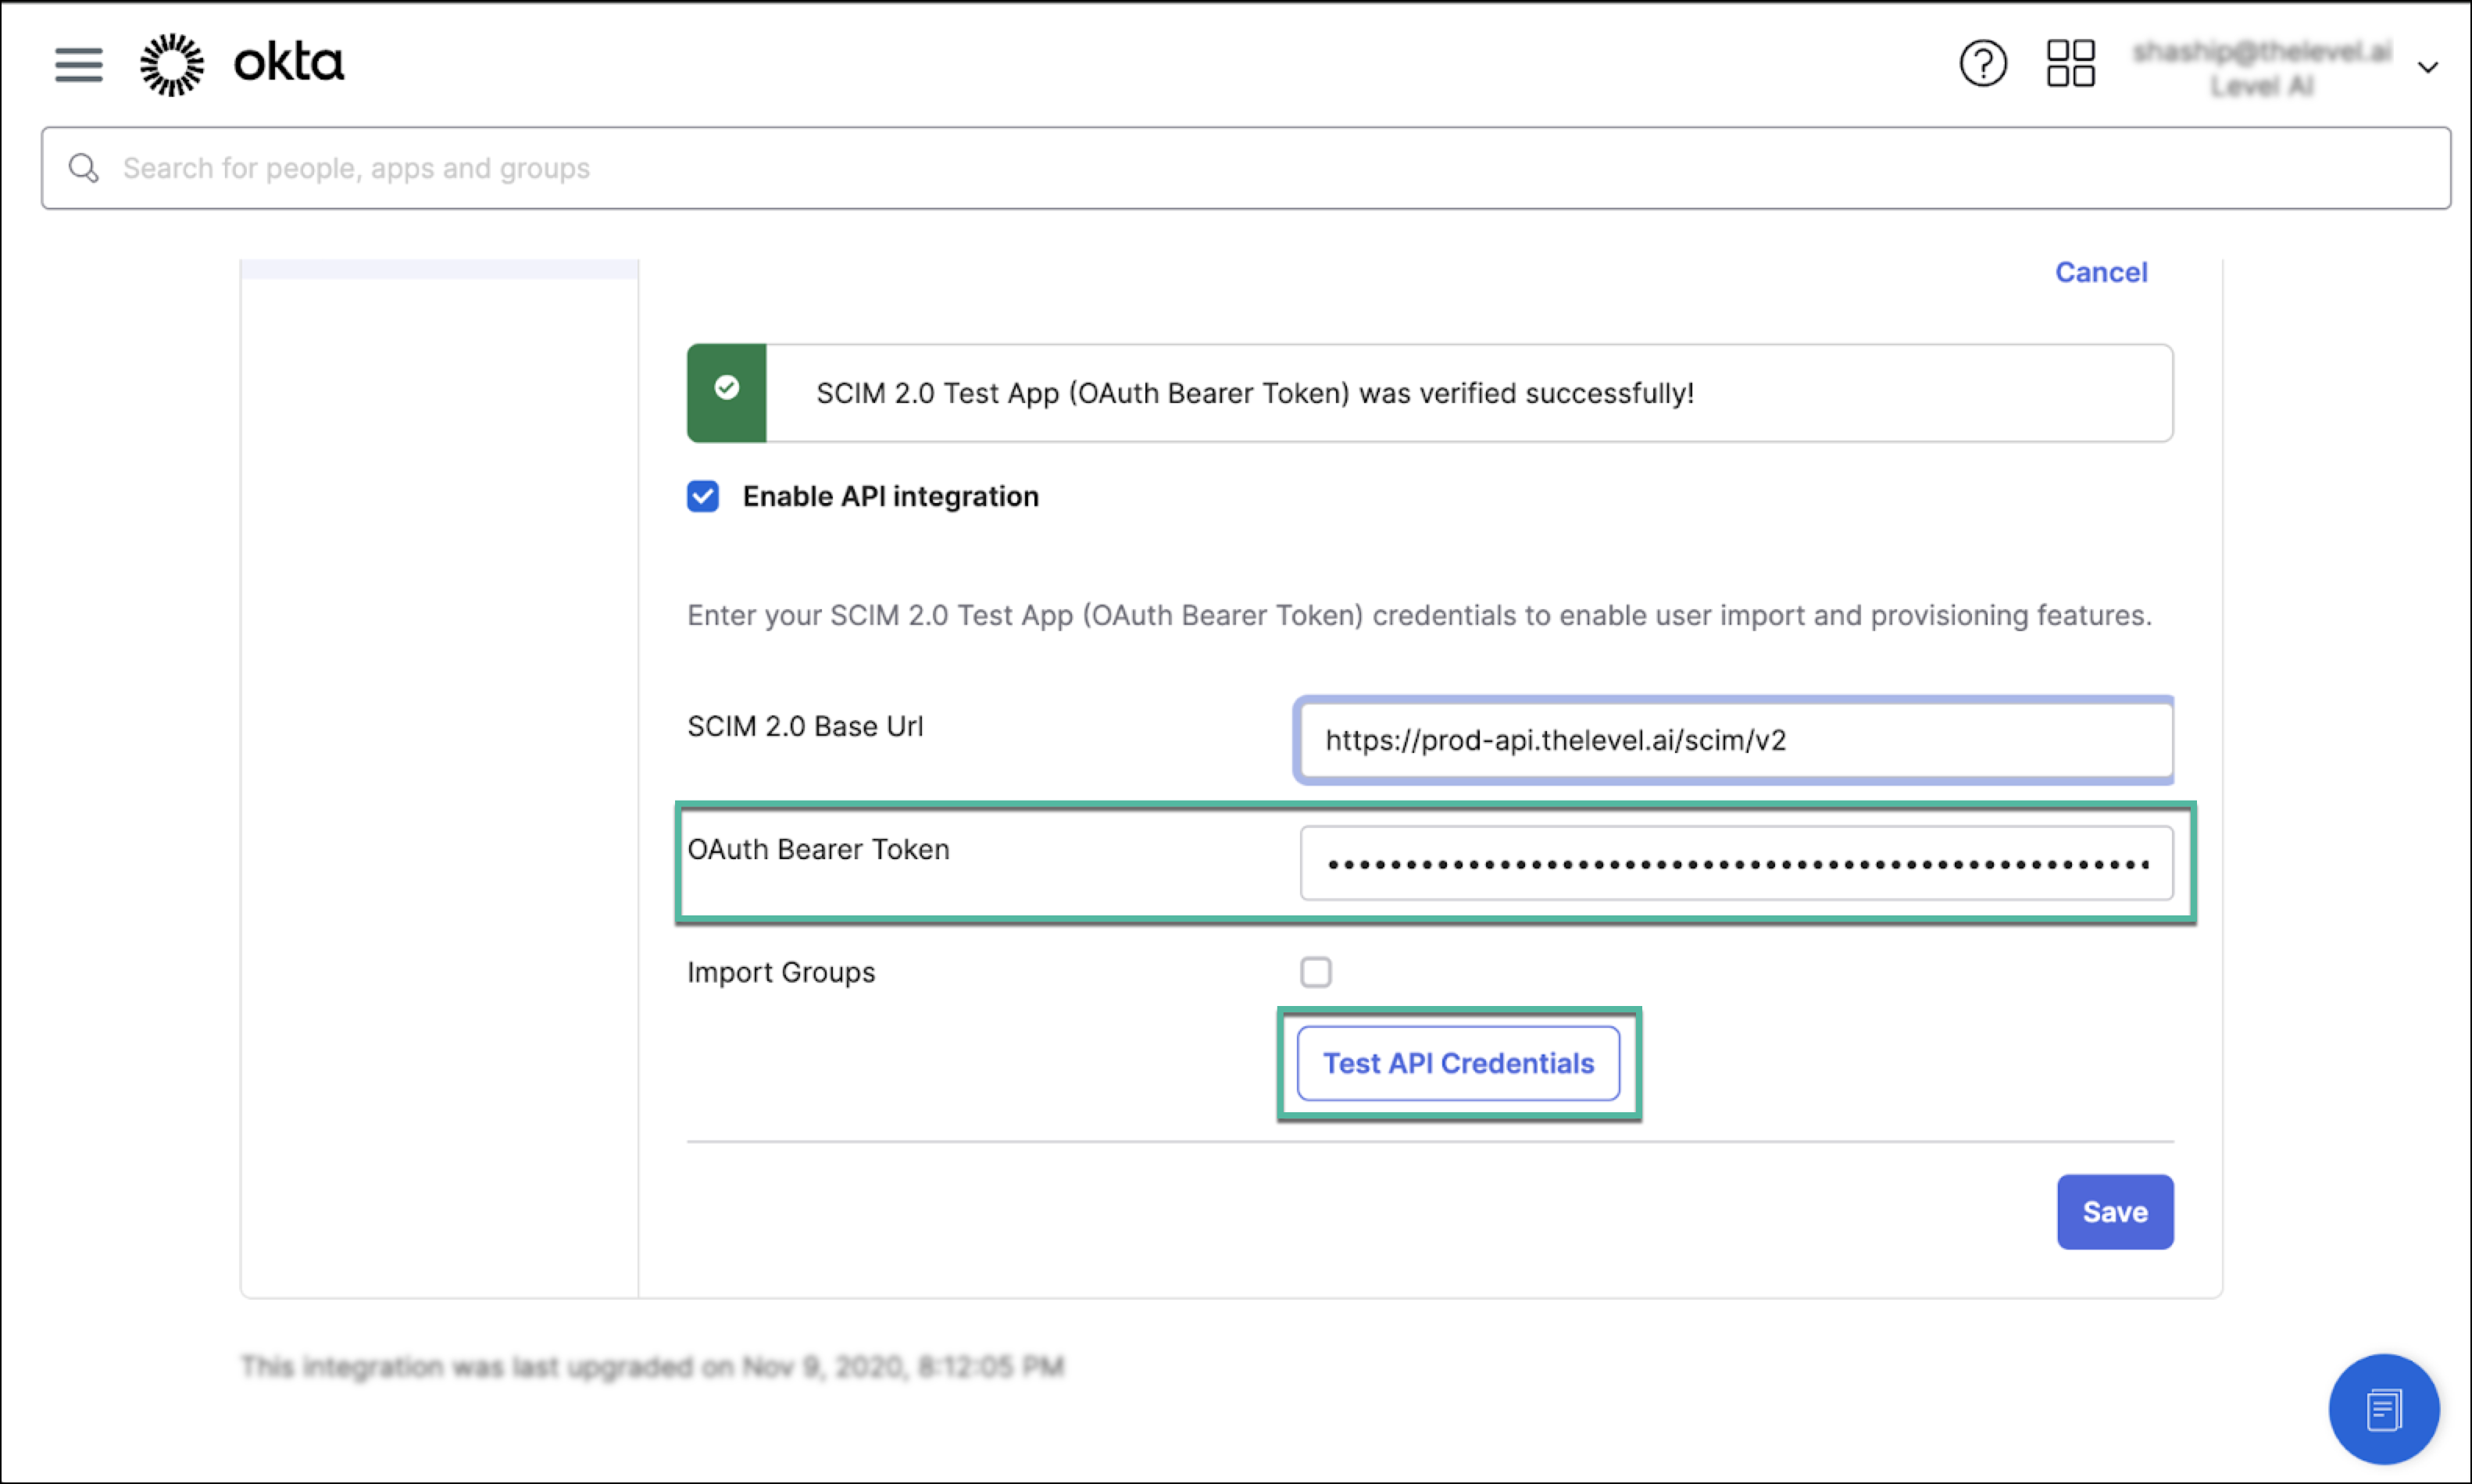
In the Oauth Bearer Token field, enter the token provided by Level AI.
INFO
The bearer token is an authentication token that your SCIM server uses to authenticate requests from Okta.
Ensure the token is entered correctly by clicking the Test API credentials button.
D) Enable Provisioning Features
With the SCIM server URL and bearer token configured, you can now enable specific provisioning features according to your needs:
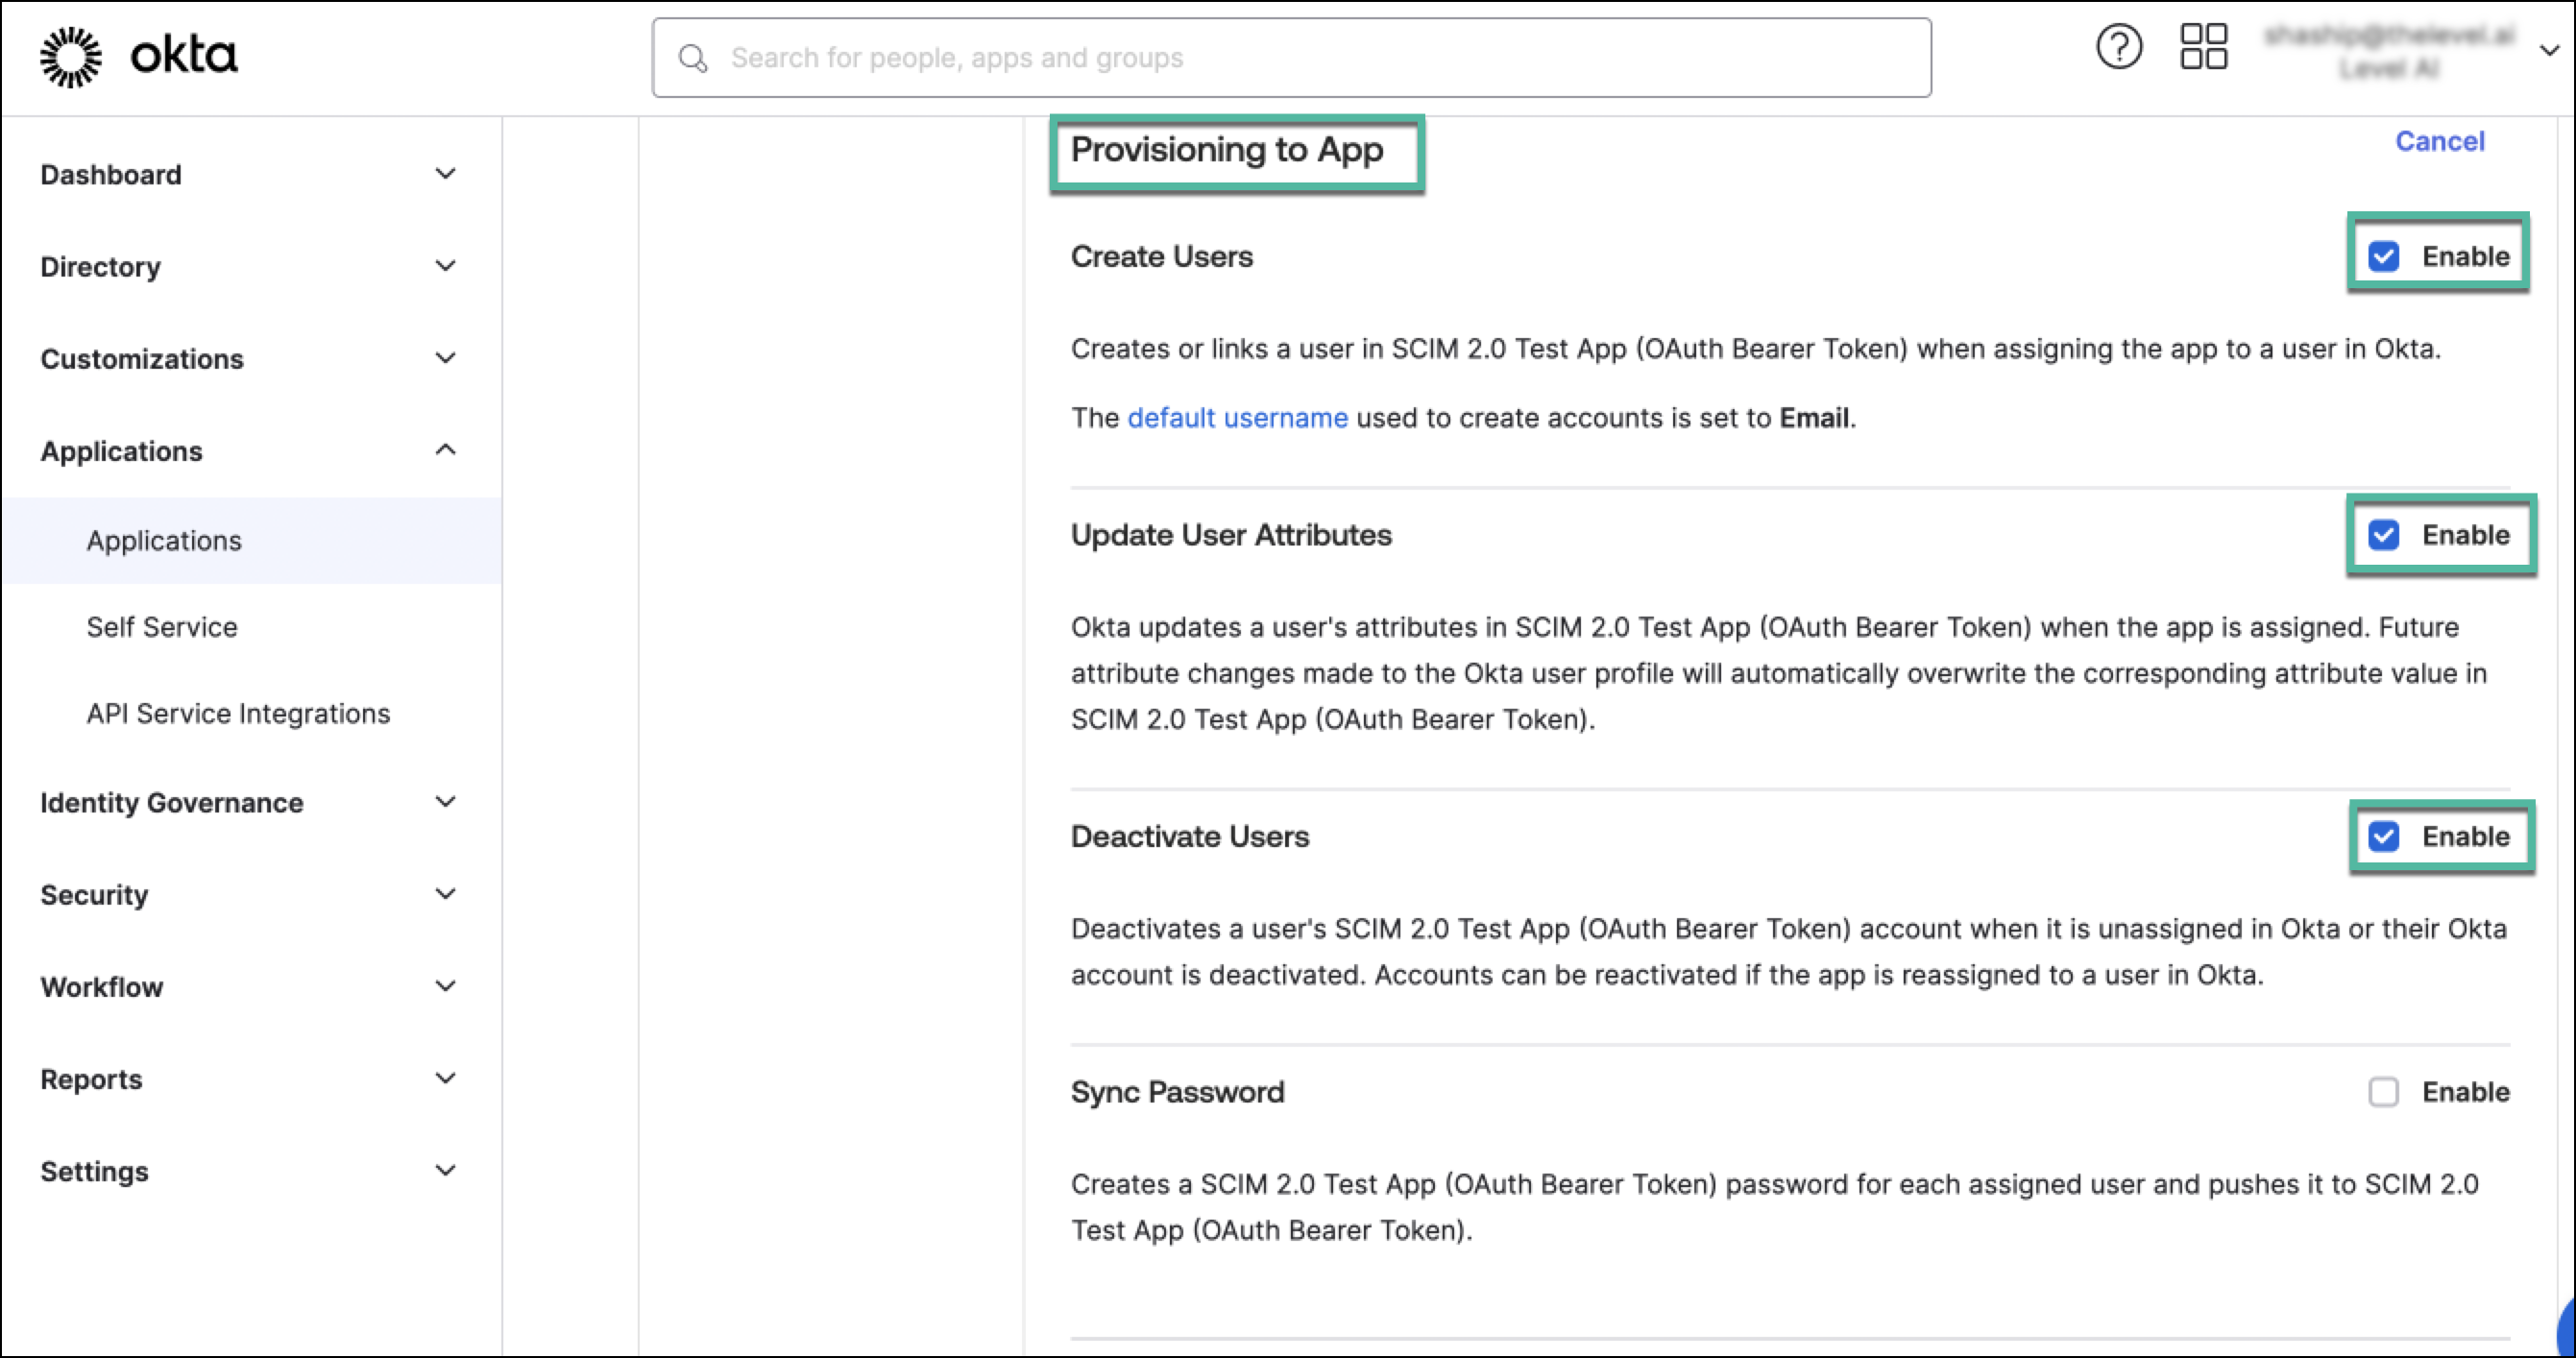
In the Provisioning tab, navigate to To App settings. Here, you can enable various provisioning actions such as Create Users, Update User Attributes, and Deactivate Users.
Select the check boxes corresponding to the actions you want to enable. Configure any additional settings as required.
Save your changes.
E) Test the Integration
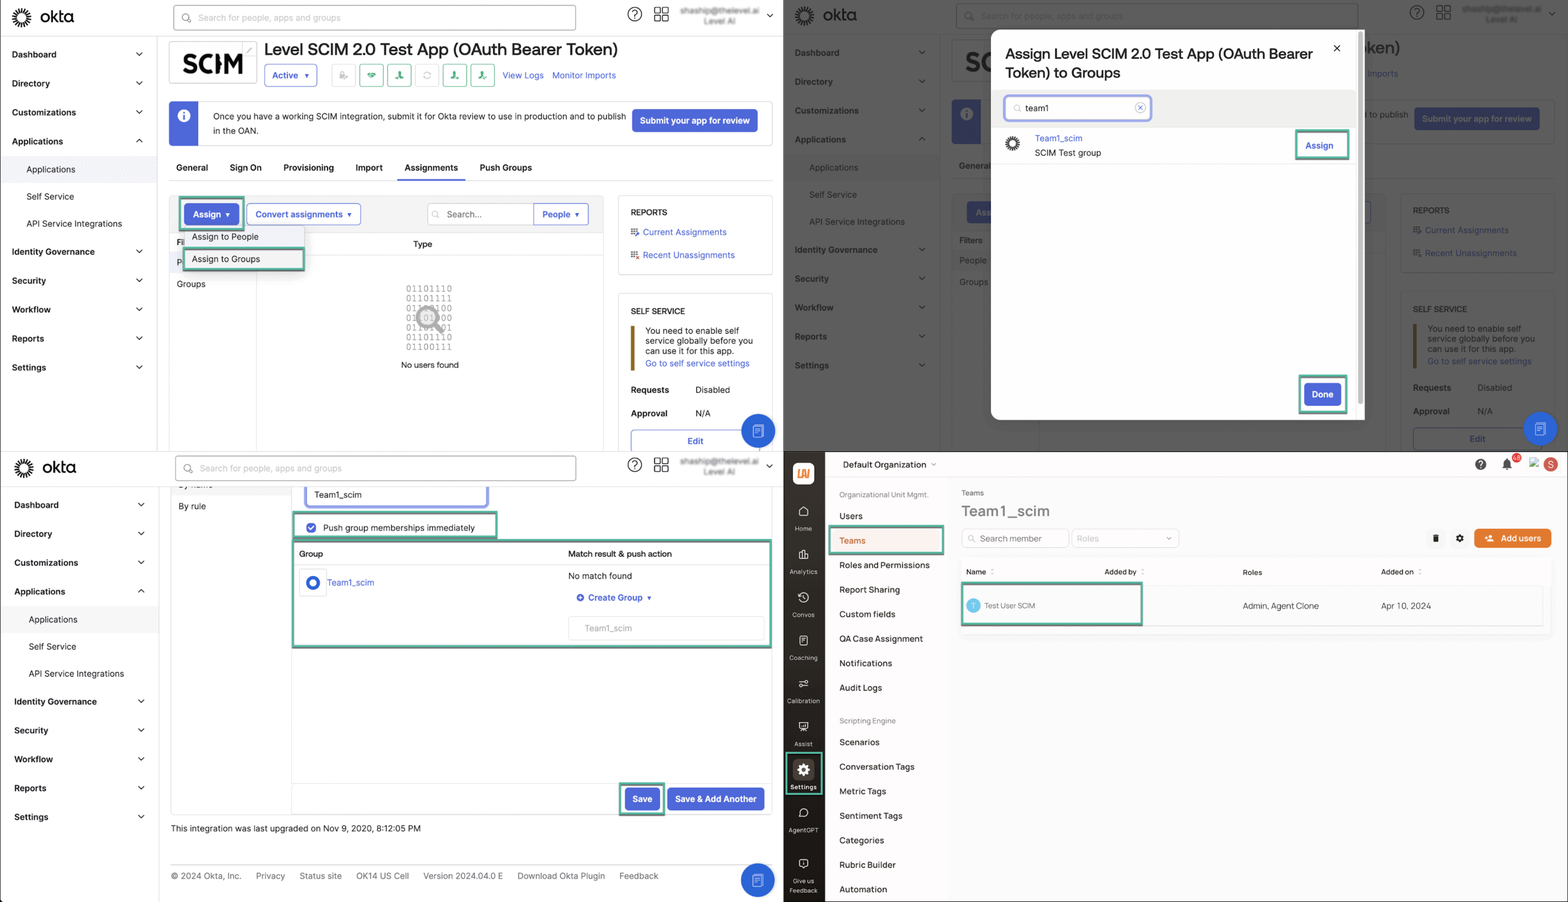
Assign a user to a group in Okta, assign this group to the Level SCIM application, and add the group to the push groups.
Verify that the user has been created successfully and the team appears in the Level Dashboard. Try updating user attributes and deactivating the user to test other provisioning actions.