How do I configure an API in Virtual Agent?
Last updated: July 31, 2026
Overview
API actions permit a Virtual Agent to call an external system during a live interaction, for example, verifying a reservation, fetching order status, or updating a record.
Integrate your desired APIs once under Tools & Settings, test it in isolation, and then use them as an action in your Skill or Node in your Workflows, so the agent can call it at the right moment.
Integrate the following types of API actions:
Action type | What it does | API method type |
|---|---|---|
Read | Retrieves data without changing database (e.g., verify a booking, search for options) | • Note: Some API actions might perform reads via the |
Write | Modify/update data in the external system (e.g., update a reservation, log a transaction, redeem miles) | • |
This article covers configuring the API action. To use a configured API action in a skill or flow, see How do I add API actions to a Virtual Agent flow?
Key concepts
Term | What it means | Example |
|---|---|---|
Params | Key-value pairs appended to the endpoint URL after the | Adding |
Input variables | Runtime values injected into the URI path, headers, or body at execution time to pass dynamic context. | Inserting a customer's specific account number {{ |
Headers | Metadata fields passed in the request header block for authentication, content negotiation, and protocol instructions. | Sending |
Body | The data payload transmitted in the HTTP message body containing the resource state to be created or modified. | Sending a text package containing a new user's name, email, and password to sign them up. |
Before you begin
Make sure you have:
URLs of API endpoints for each operation you want the agent to perform (for example, for data stored in Airtable: the base ID and table ID(s) in the URL).
Credentials to setup the API authorization.
A clear list of which input parameters will be used in the API action.
Configure an API Action
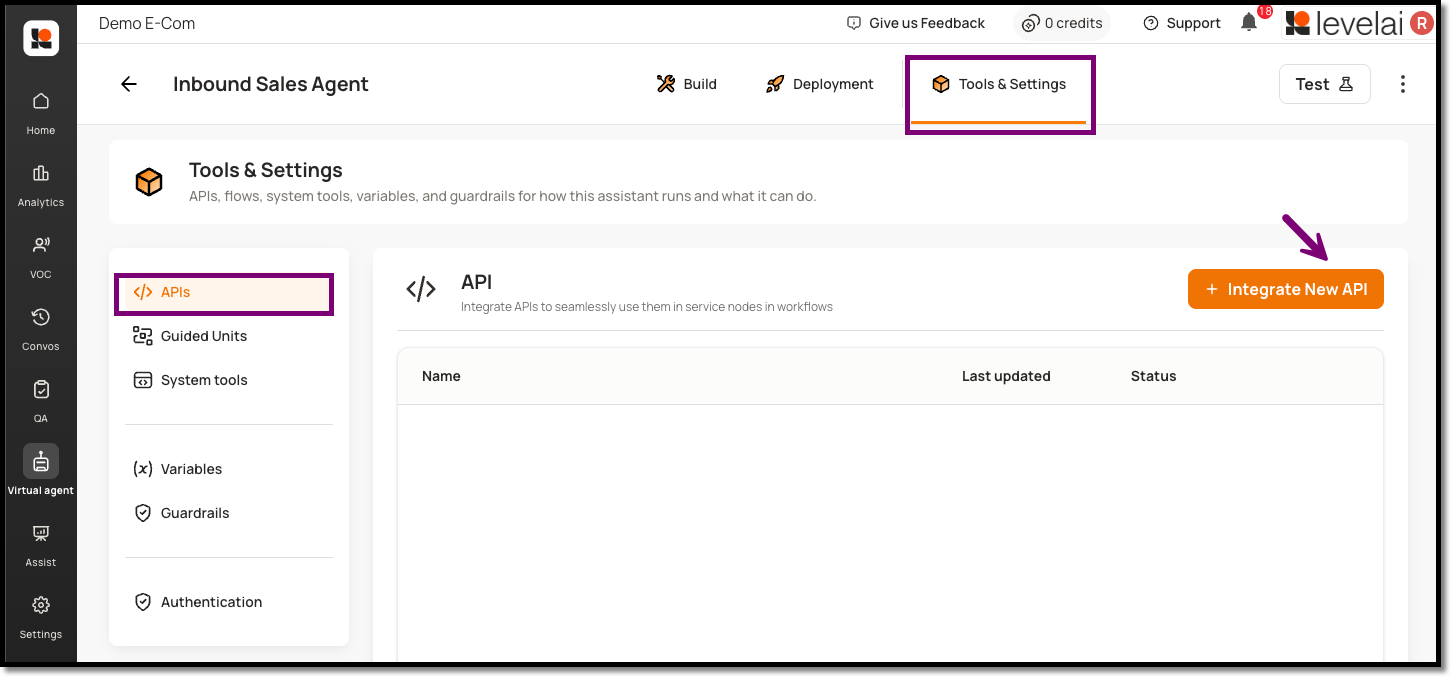
From the left navigation bar, click Virtual Agent > open your virtual agent > click the Tools & Settings tab.
In the left panel, select APIs.
Click + Integrate New API.
Enter the following details:
API Name — A clear, specific name for your API action. The agent uses this name to call the action.
Sample API names:
Verify_Reservation,Search_Flight_Options,Update_Reservation.
Description (optional) — Briefly describe what this endpoint is intended to perform, for future reference.
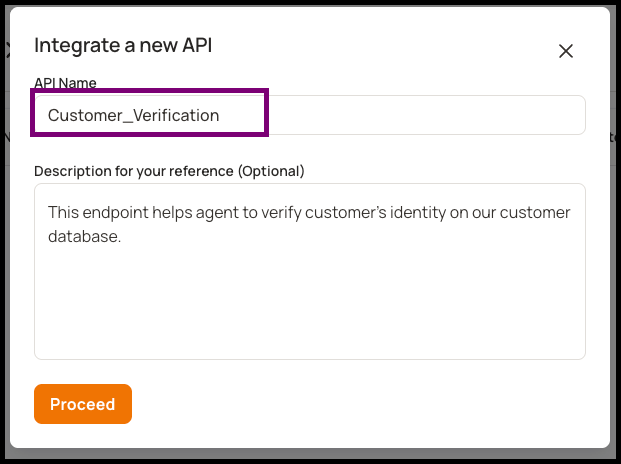
Click Proceed. The API configuration screen opens.
Set the Method and HTTPS URL:
Enter your API endpoint URL in the HTTPS URL field.
Select an appropriate method (GET, POST, PUT, PATCH, and DELETE) from the dropdown. Ensure you select the correct method to avoid errors.
For record-specific writes, include the record reference directly in the URL path (for example,
.../tableId/{{recordId}}).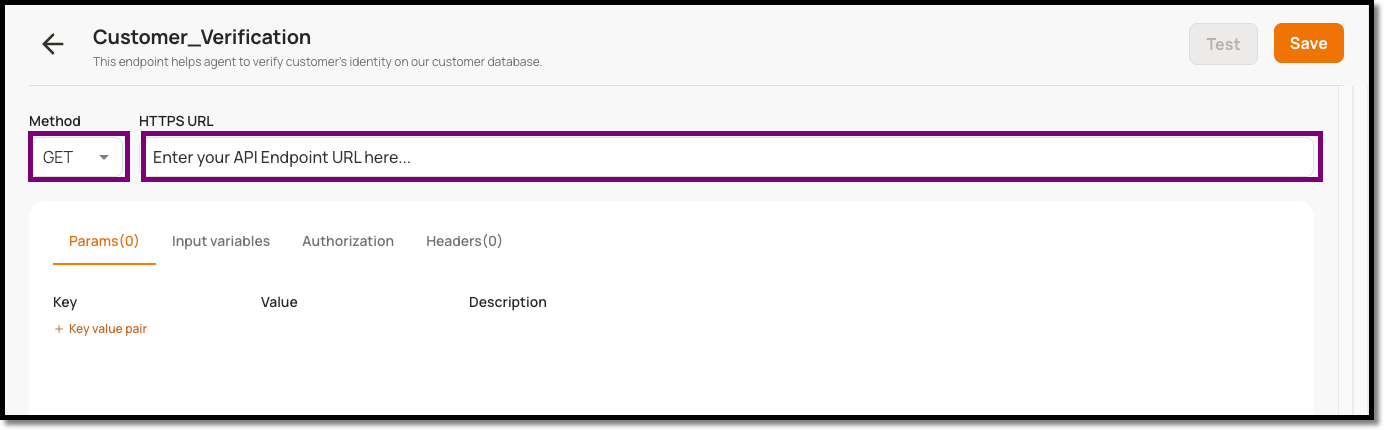
The configuration screen organizes the rest of setup into the following tabs. Configure each as needed:
Configure Input Variables
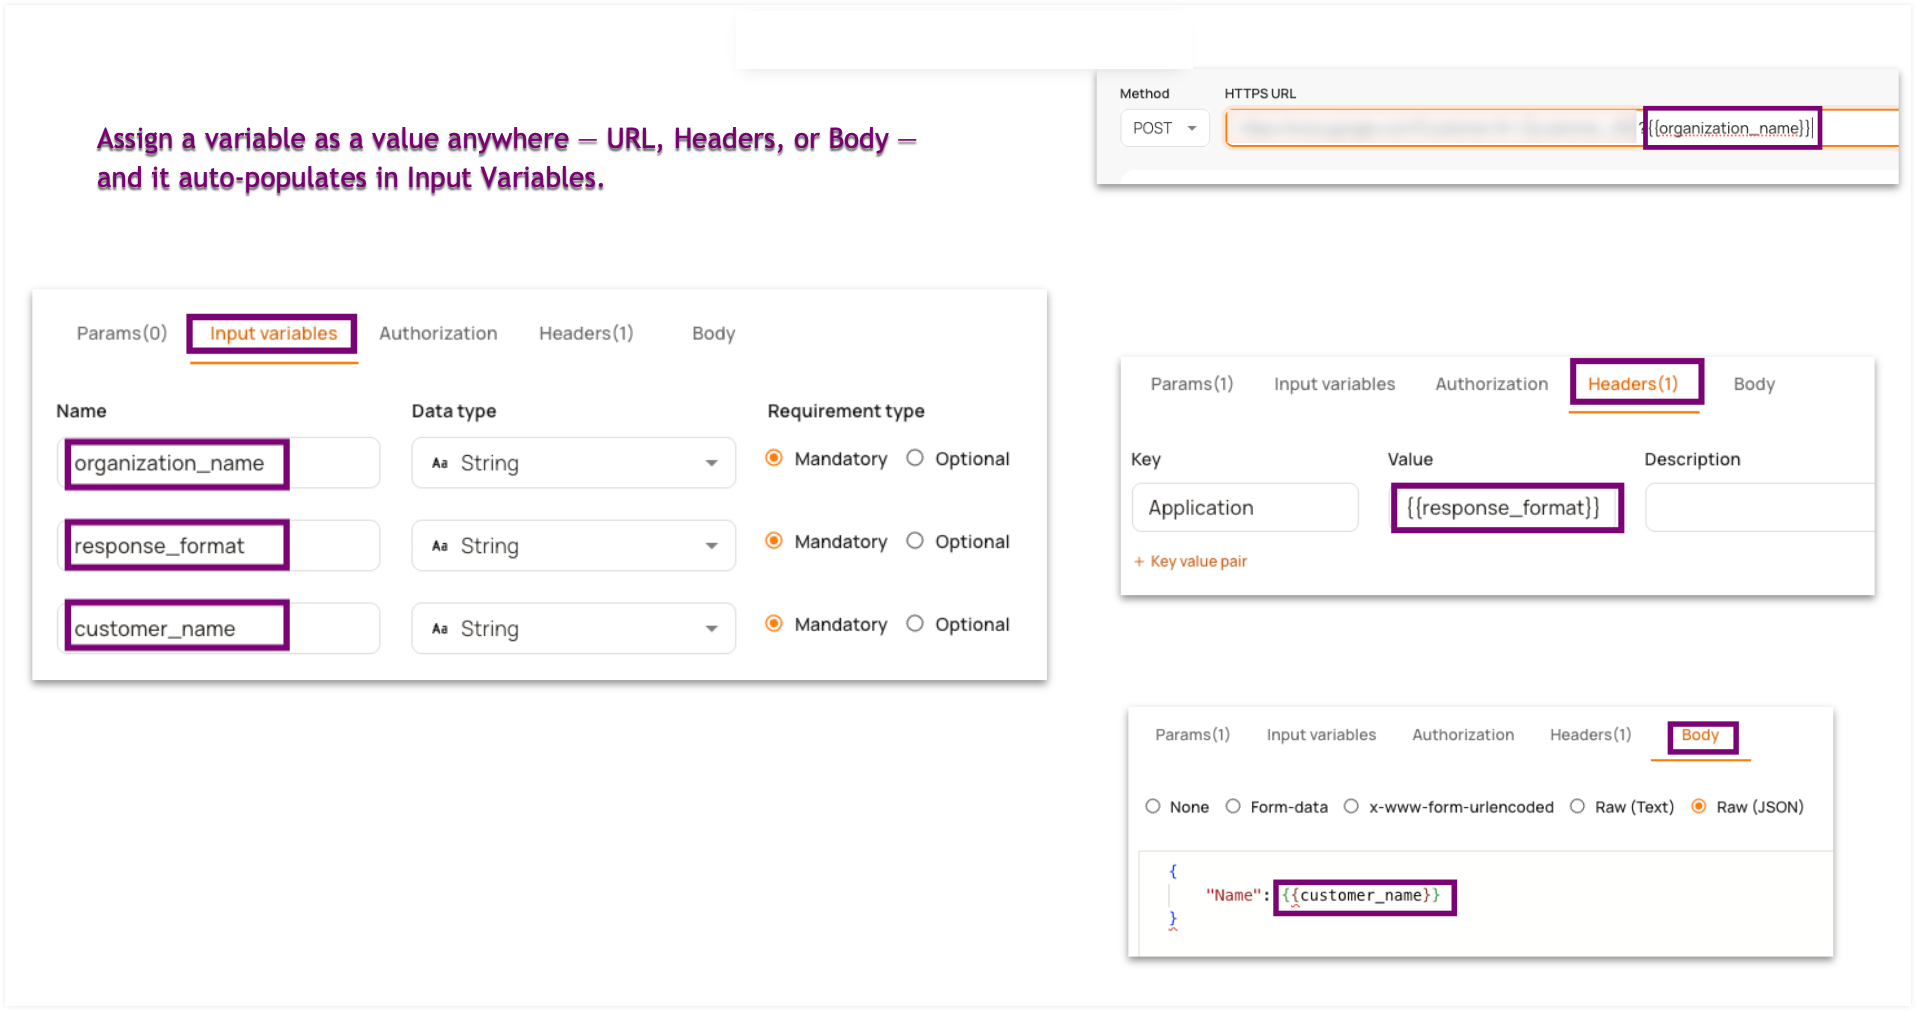
The Input Variables tab automatically populates any variables you’ve entered in the URL, Header or Body tabs. These values are captured at runtime during the API call against the configured variables.
To directly configure a variable in the API query URL use double curly brackets: {{variable}}.
You can also mark these variables as Mandatory or Optional depending on the query requirements.
Configure Query Parameters (Params)
Info: Any parameter added to the query string URL is automatically reflected in the Params section.
From the Params tab, click + Key value pair and enter a Key, a Value, and an optional Description.
To pass a value in Params at runtime, use double curly braces
{{param}}, for example{{reservation_id}}.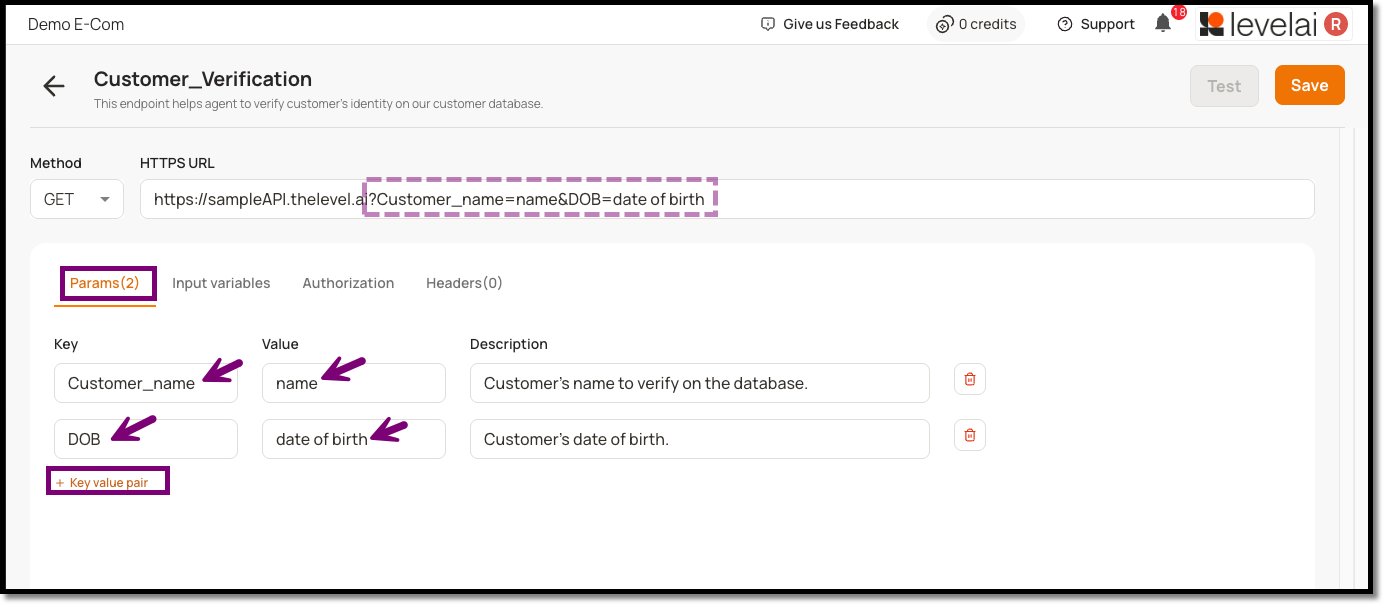
Configure Authorization
Open the Authorization tab.
Configure the supported authorization method as per your endpoint. Supported methods are:
Basic Auth
Bearer Token
OAuth 2.0
Cookie Session
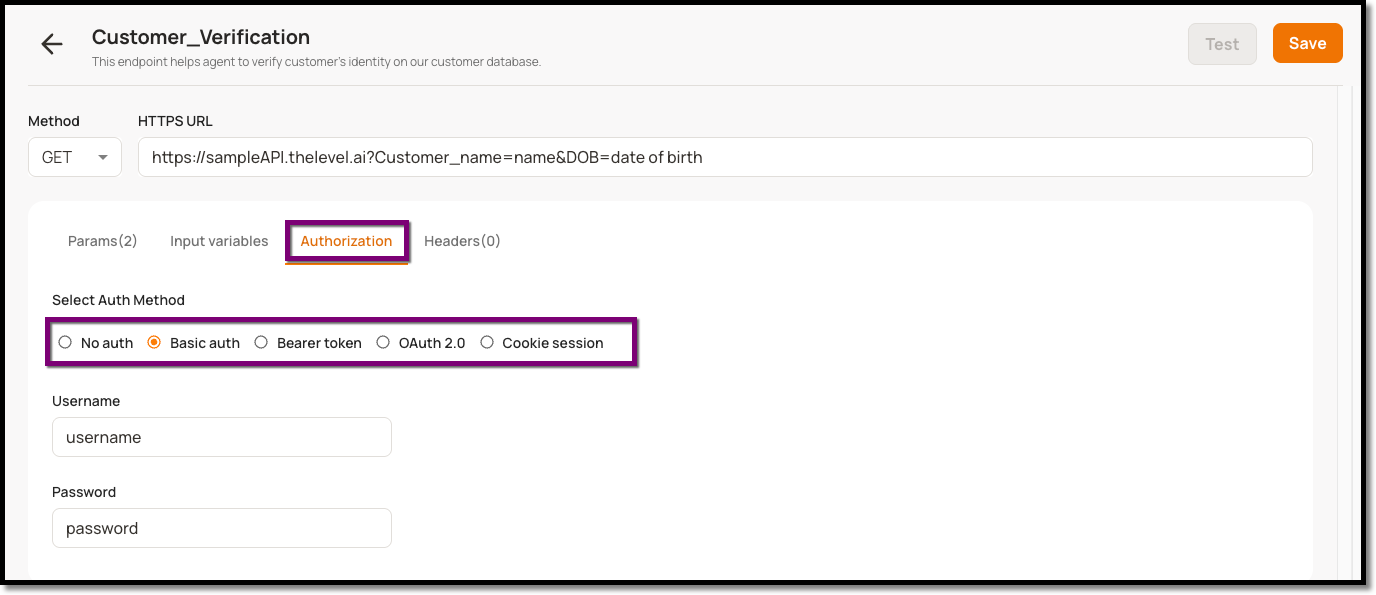
Configure Header
Open the Headers tab.
Click + Key value pair and add any headers the endpoint needs — for example,
Content-Type→application/json.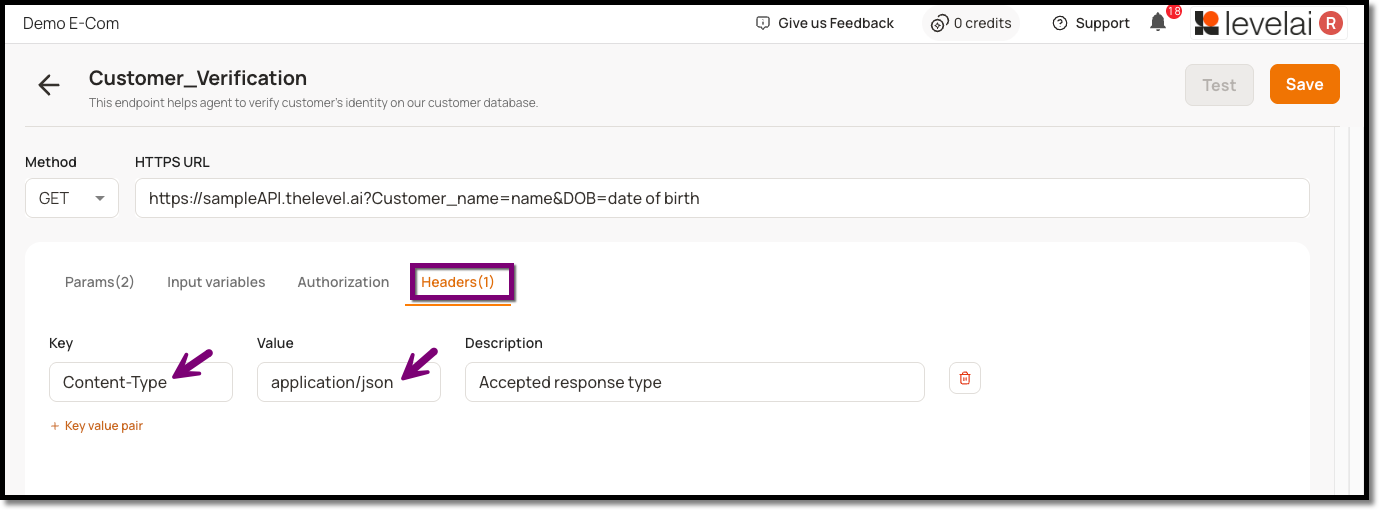
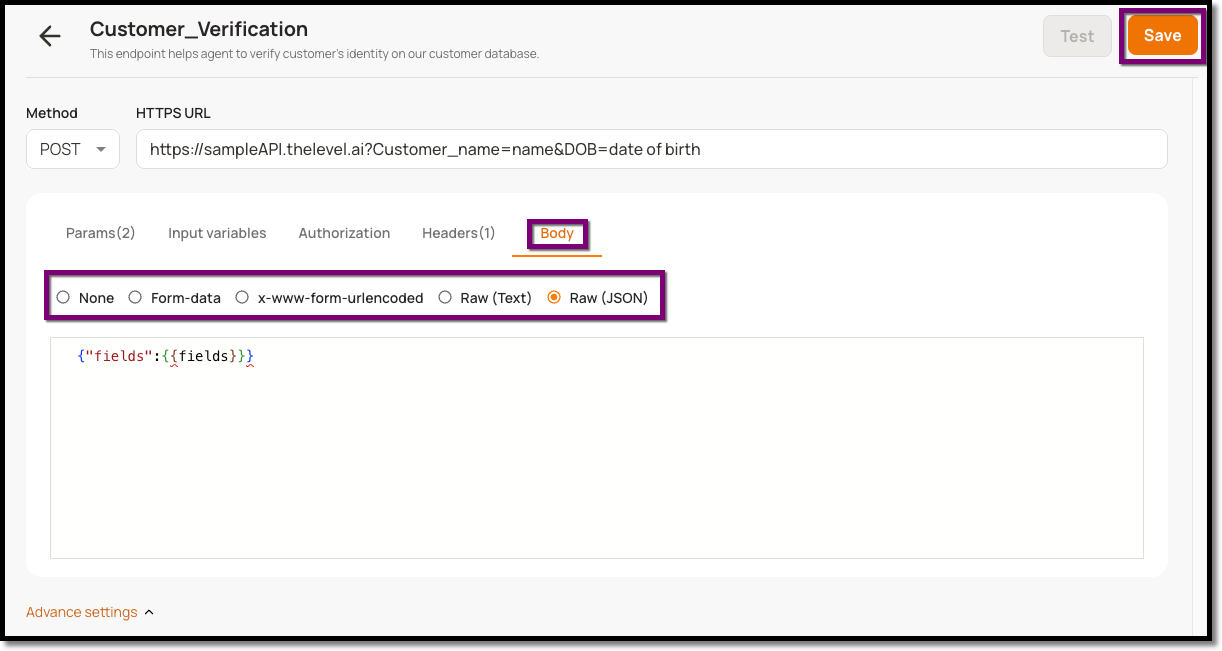
Configure Body
Note: The Body tab is visible only for PUT, PATCH, and POST methods.
Open the Body tab and select the format:
Form-data
x-www-form-urlencoded
Raw (Text)
Raw (JSON)
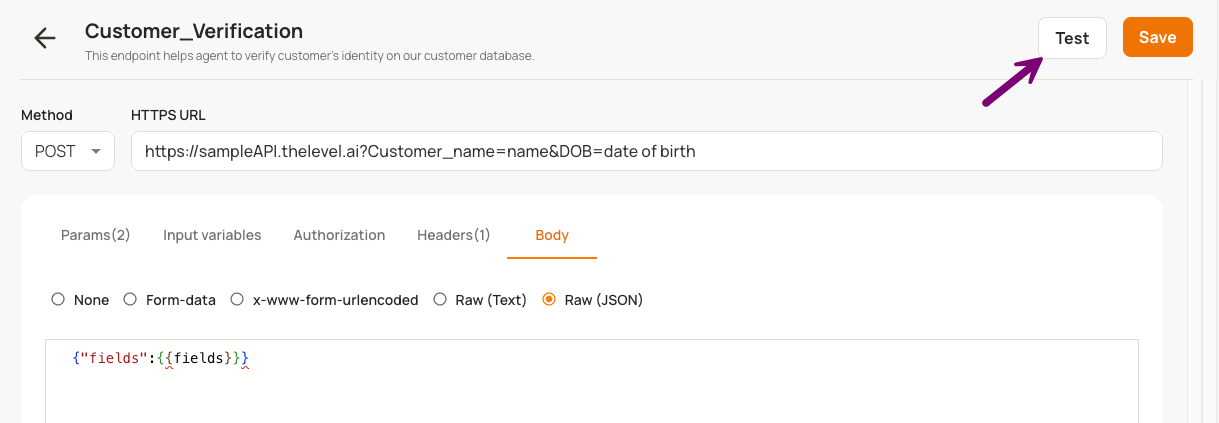
The body must be a fixed JSON object with tokens for the values. The agent supplies only the values, never the structure.
Once you're done, click Save from the top-right corner to Save the configuration.
Advanced Settings
Important: Advanced Settings applies to Voice Virtual Agents only.
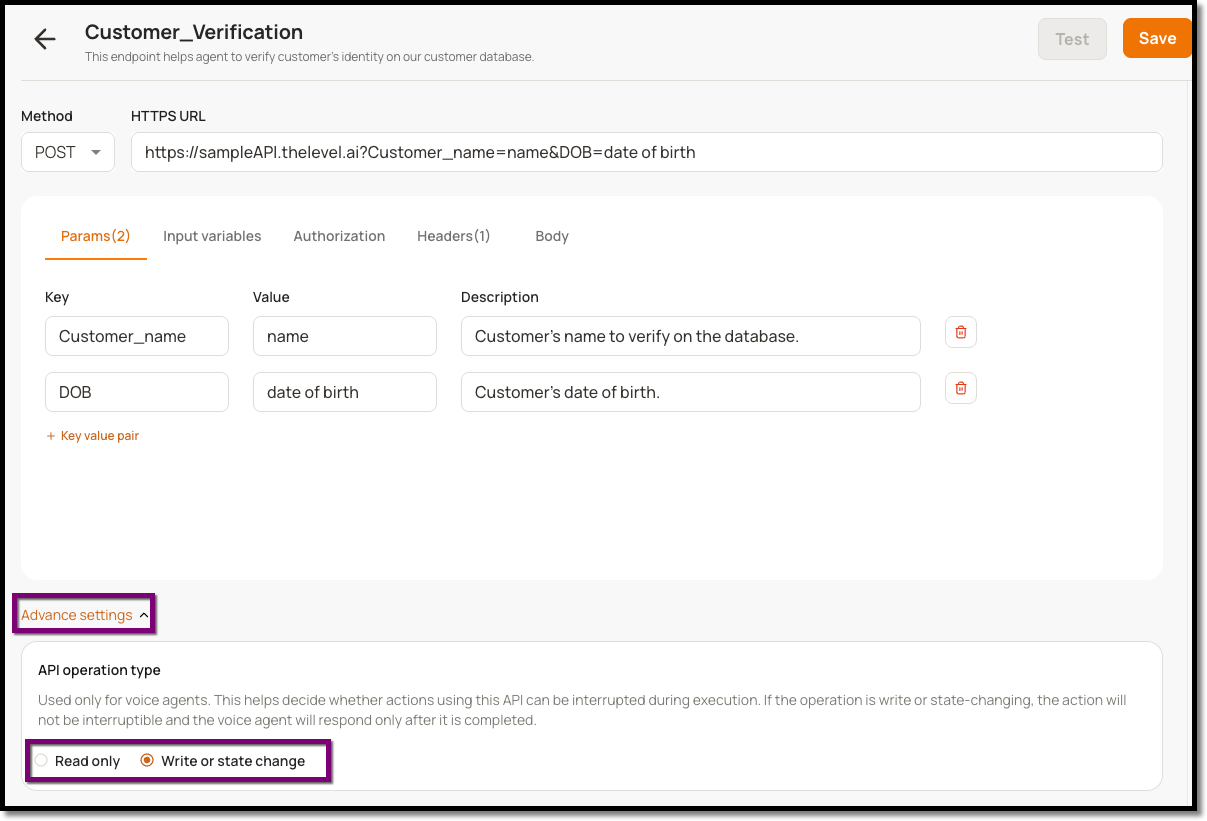
Defines the action's interruptibility for the voice agent. When the action type is set to Write or state change, the action cannot be interrupted during execution, and the agent will only respond after the action completes.
Expand the Advanced Settings menu at the bottom of the API configuration menu.
Select an action type: Read only or Write or state change.
Testing Configured API
Click Test to run the configured API
Note: If Test button is disabled, click Save first. If Save is also disabled, the configuration is likely incomplete — verify all tabs, then try again.
Enter values for any variables, if applicable.
Click Run.
Review the response. If you get an error, adjust the configuration and re-test until you get a successful response.
Best Practices
Name each API action precisely — the name is part of how the agent decides when to call it.
Build the read actions first, confirm verification and search work, then add writes.
Use fixed JSON bodies with tokens. Never let the agent compose the body structure.
Apply authentication to every action, not just reads.
Mark writes as a write/state change before testing on voice. This ensures that user interruption is avoided during execution.
Test every API action standalone and confirm a successful response (200) before using it in a skill.
To use APIs reliably with a voice agent, configure a tool preamble to reduce perceived latency for the end user.
If an API action should not be interrupted during execution, mark the tool as non-interruptible.
Always test an API action before using it. Avoid using the production database during API action testing.